Efficient VMware Snapshot Management – Best Techniques

Efficient VMware Snapshot Management – Best Techniques

VMWare Snapshot Overview.

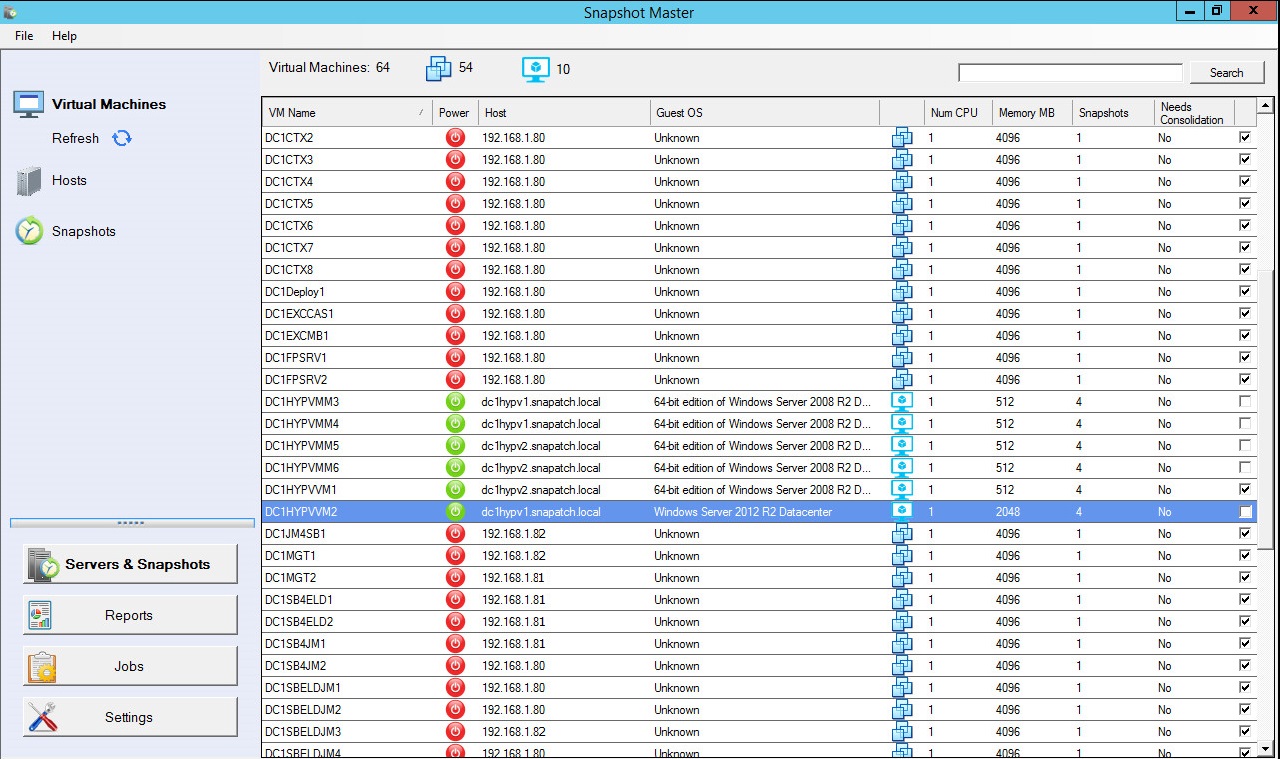
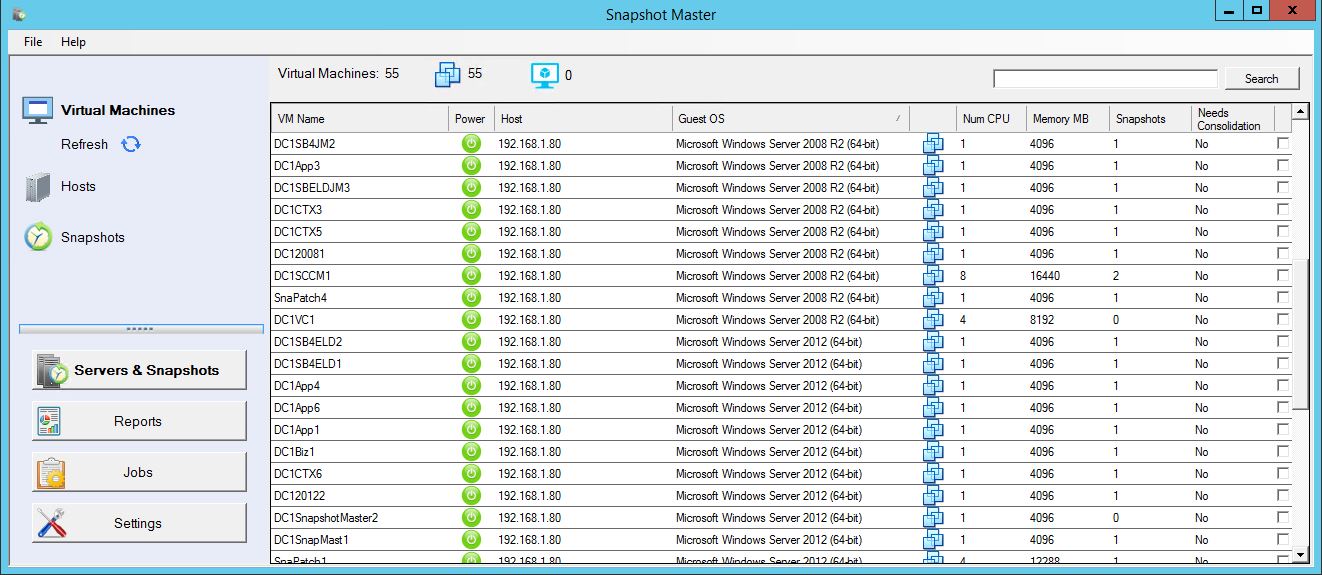
Snapshots are an essential part of virtual machine management, as they provide a convenient way to preserve the state of virtual machines and revert to an earlier version if necessary. However, without proper management, snapshots can quickly become a problem, consuming storage space and impacting performance. This is where SnapShot Master comes in.

SnapShot Master is a comprehensive solution for managing snapshots in your VMware environment. The tool offers a wide range of features to help you optimize your virtual environment, such as:

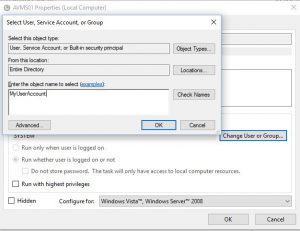
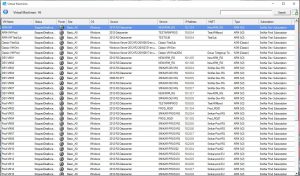
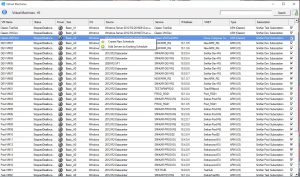
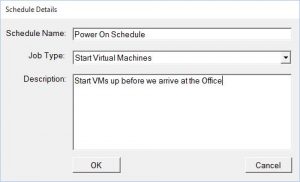
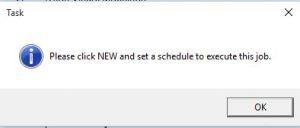
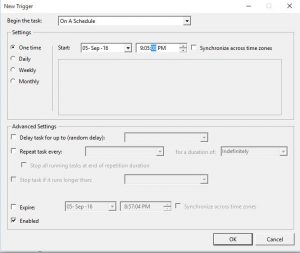
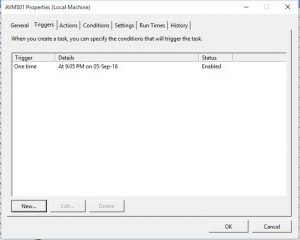
  • Efficient Snapshot Management: With SnapShot Master, you can easily create, schedule, manage, and delete snapshots, and you can automate the process to run at specific intervals.
  • Backup and Disaster Recovery: SnapShot Master provides reliable backup and disaster recovery solutions, ensuring that you can quickly restore your virtual environment in case of a failure.
  • Storage Optimization: SnapShot Master helps you optimize your storage space by identifying and allowing you to remove stale snapshots, freeing up valuable disk space.
  • Performance Optimization: The tool helps you improve the performance of your virtual environment by reducing the impact of snapshots on system performance.
  • Simple and User-Friendly: SnapShot Master is designed to be user-friendly and intuitive, making it easy for you to manage snapshots and optimize your VMware environment.


SnapShot Master Power On

Why Efficient Snapshot Management is Crucial for Your VMware Environment?

Snapshots are a critical aspect of virtual machine management, and efficient snapshot management is crucial to the success of your virtual environment. Here are some of the reasons why efficient snapshot management is important:

  • Conserve Storage Space: Over time, snapshots can consume a significant amount of storage space, reducing the amount of space available for other important data.
  • Improve Performance: Snapshots can have a significant impact on system performance, particularly if they are not properly managed.
  • Ensure Data Protection: Snapshots are used to protect virtual machines and their data, and without proper management, they can actually create data loss or corruption.

The Benefits of Using SnapShot Master for Snapshot Management

SnapShot Master offers a range of benefits to help you maximize your VMware environment with efficient snapshot management. Here are some of the key benefits:

  • Efficient and Automated Snapshot Management: SnapShot Master makes it easy to create, manage, and delete snapshots, and you can automate the process to run at specific intervals.
  • Reliable Backup and Disaster Recovery: With SnapShot Master, you can be confident that your virtual environment is protected in case of a failure.
  • Optimize Storage Space: The tool helps you optimize your storage space by automatically identifying and removing stale snapshots.
  • Improve Performance: SnapShot Master helps you improve the performance of your virtual environment by reducing the impact of snapshots on system performance.
  • Simple and User-Friendly: The tool is designed to be user-friendly and intuitive, making it easy for you to manage snapshots and optimize your VMware environment.

VMWare Snapshot FAQs

What is SnapShot Master?

SnapShot Master is a comprehensive solution for scheduling, and managing snapshots, backups, and disaster recovery in your VMware environment.

What are snapshots?

Snapshots are a feature of virtual machine management that allows you to preserve the state of a virtual machine at a particular point in time.

Why is efficient snapshot management important for my VMware environment?

Efficient snapshot management helps conserve storage space, improve performance, and ensure data protection in your virtual environment.

How does SnapShot Master help with snapshot management?

SnapShot Master offers a range of features to help you efficiently manage snapshots, including automated snapshot management, reliable backup and disaster recovery, storage optimization, and performance optimization.

Is SnapShot Master user-friendly?

Yes, SnapShot Master is designed to be simple and user-friendly, making it easy for you to manage snapshots and optimize your VMware environment.


SnapShot Master Home Screen

VMWare Snapshot Final Thoughts

Maximizing your VMware environment with efficient snapshot management is crucial to the success of your virtual environment. SnapShot Master offers the best solution for managing snapshots, backups, and disaster recovery in your VMware environment. The tool offers a wide range of features to help you optimize your virtual environment, including efficient snapshot management, reliable backup and disaster recovery, storage optimization, performance optimization, and a user-friendly interface. If you’re looking for a solution to maximize your VMware environment with efficient snapshot management, look no further than SnapShot Master.

Download a fully functioning trial today and test it for yourself.

How to Schedule Azure VM Deployment – Step-by-Step Guide

How to Schedule Azure VM Deployment – Step-by-Step Guide

How to schedule the deployment of Azure VMs

Automate Azure VM Deployment

If you need to schedule the regular deployment of your Azure VMs, you can do this easily with one of our Azure tools, AVMD (Azure VM Deployer). With the Azure VM deployer you can deploy single and multiple Virtual Machines quickly, easily and repeatably.

AVMD is completely FREE, you can download it from here and start using it right away.

Hopefully you have AVMD all setup and an azure admin account with the appropriate permissions to your Azure tenant to start the scheduled deployment of your Azure VMs.

Azure VM Deployment Use Cases

Use Case Description

Dev/Test Environments

Scheduling Azure VM deployment for development and testing environments allows for efficient use of resources by creating and deleting VMs as needed. For example, a development team might schedule VM deployment during business hours and delete them at the end of the day to avoid wasting resources.

Batch Processing

Scheduling Azure VM deployment for batch processing can help optimize resource utilization by only creating VMs when needed. This can be particularly useful for applications that require large amounts of compute resources for short periods of time, such as data analysis or video encoding.

Disaster Recovery

Scheduling Azure VM deployment for disaster recovery can help ensure that backup VMs are always available and up-to-date. This can be critical in the event of a system failure or other outage.

Scheduled Maintenance

Scheduling Azure VM deployment for scheduled maintenance can help minimize the impact of maintenance on users by automatically redirecting traffic to other VMs while maintenance is performed.

High Availability

Scheduling Azure VM deployment for high availability can help ensure that VMs are always available to users. This can be achieved by automatically creating new VMs when existing ones fail or become unavailable.

Cost Optimization

Scheduling Azure VM deployment can help optimize costs by only creating VMs when they are needed, and deleting them when they are no longer needed. This can be particularly useful for organizations that have variable workloads or need to closely manage their cloud spend.

Launch the Azure VM Deployer

To start automating and scheduling deployment of your Azure VMS, simply open up Azure VM Deployer and let is synchronise with your Azure environment.

Schedule Azure VM Deployment


Scan your Azure Tenancy First

First, ensure that you have the AVMD tool downloaded and set up on your machine. You’ll also need an Azure admin account with the necessary permissions to your Azure tenant to deploy VMs. Once you’re ready to begin, launch the Azure VM Deployer and allow it to synchronize with your Azure environment.

Azure VM Deployment Settings

  • You can now start filling out all the settings to deploy your VMs to your Azure subscription.
    Provide a Name for your Virtual Server
    Choose the Servers Operating System
    Azure Subscription
    Azure Availability Zone Location
    Azure Resource Group
    Choose the Azure Virtual Machine size
    Provide a local Administrator account and password
    Join the VM automatically a domain (You will need an account with Domain Join Permissions)
    Which Azure Storage account you wish to deploy the VM to
    Any additional disks you want to add to the VM during deployment
    The Azure vNet and Subnet
    Further additional options if you want VM diagnostics, Azure Log Analytics, a Basic NSG, Public IP, Azure Resource Tags and finally if you want to shutdown the VM post deployment.Click Add to queue when you have filled out all the Azure VM details and it will populate these settings to the Deployment Queue.

Schedule Azure VM Deployment Selection

Provide a name for your Azure VM

For any additional VMs, keep filling out the details and add them to the queue too. If the servers are all the same type and settings you just need to update the server name before adding them to the deployment queue.

Schedule Azure VM Deployment Server

Azure VM Details

Now when you have added all the Virtual Machines you wish to deploy to Azure you are now ready to start deployment, but you may want to just confirm that your VM settings are correct. Simply right click the blue icon next to each Virtual Machine in the Deployment Queue and choose Show Details

Schedule Azure VM Deployment Server Overview 2

Azure VM Deployment Schedule Creation

Now lets start the deployment of your Azure Virtual Machines. Click the DEPLOY button in the bottom left hand corner and you are now presented with the options to deploy right now or schedule the VM deployment of your Azure VMs.

  1. Schedule Azure VM Deployment Now

Azure VM New Deployment Schedule

In this example we will schedule the deployment of the Azure VMs, so click on schedule, then on OK to start the schedule creation.

Schedule Azure VM Deployment 3

Azure VM New Deployment Schedule

We are now prompted to create the schedule to deploy your Azure Virtual Machines, click on New.

Schedule Azure VM Deployment New

Scheduled Deployment Execution

In this example we will schedule the deployment of the Azure VMs, so click on schedule, then on OK to start the schedule creation.

Schedule Azure VM Deployment 3

Schedule Creation

We are now prompted to create the schedule to deploy your Azure Virtual Machines, click on New.

Schedule Azure VM Deployment New

Schedule Settings

Simply put in the date and time you wish for your Azure VMs to deploy at then click OK. (You can set to schedule this once off, or a reoccurring daily, weekly or monthly schedule.)

Schedule Azure VM Deployment Trigger

Schedule Date and Time Settings

Confirm that the date and time you want to schedule the VMs for deployment to your Azure subscription is correct.

Schedule Azure VM Deployment Trigger 2

Confirm the Schedule is Correct

Click on OK in the scheduler window and the deployment task is now confirmed.

Schedule Azure VM Deployment confirmed

Scheduled Deployment is underway

My scheduled deployment has now kicked off and we can see in my Azure Portal that the machines are now deploying.

Schedule Azure VM Deployment Creation

Scheduled Deployment Alerting

If you had set up your email alerts, you will receive an email letting you know that your VMs have now deployed to Azure.

Schedule Azure VM Deployment Finished Email


  1. After some time your Azure Virtual Machines should have now deployed. As seen in the Azure Portal I can see that our Azure VMs are up and running, in the correct resource group, Azure Subscription and Azure Location.Schedule Azure VM Deployment Complete


Dont forget that the Azure VM Deployer is completely free and one of our Azure Management Tools.

Azure VMs are now deployed

After some time your Azure Virtual Machines should have now deployed. As seen in the Azure Portal I can see that our Azure VMs are up and running, in the correct resource group, Azure Subscription and Azure Location.

Schedule Azure VM Deployment Complete

Dont forget that the Azure VM Deployer is completely free and one of our Azure Management Tools.

Azure FAQs

Question Answer

What is Azure VM deployment?

Azure VM deployment is the process of creating and managing virtual machines in the Microsoft Azure cloud platform.

What are the benefits of using Azure VMs?

Azure VMs offer a wide range of benefits, including scalability, flexibility, security, and cost-effectiveness.

How do I create a new Azure VM?

You can create a new Azure VM through the Azure portal, Azure CLI, or Azure PowerShell.

What operating systems are supported on Azure VMs?

Azure VMs support a wide range of operating systems, including Windows Server, Linux, and various distributions of Unix.

What are the different VM sizes available in Azure?

Azure offers a variety of VM sizes, ranging from small, low-cost instances to large, high-performance instances.

How can I manage and monitor my Azure VMs?

You can manage and monitor your Azure VMs through the Azure portal, Azure CLI, or Azure PowerShell, as well as third-party tools such as Azure Monitor and Azure Log Analytics.

What are availability sets in Azure VM deployment?

Availability sets are used to ensure high availability for VMs by distributing them across multiple physical servers in a data center.

How can I secure my Azure VMs?

You can secure your Azure VMs through a variety of measures, including network security groups, firewall rules, and encryption.

What is Azure Site Recovery and how does it work with VMs?

Azure Site Recovery is a disaster recovery solution that can be used to replicate and recover VMs in the event of a site outage or other disaster.

How can I optimize the performance of my Azure VMs?

You can optimize the performance of your Azure VMs through various means, such as selecting the appropriate VM size, optimizing disk performance, and using caching.
Azure VM Scheduler tasks not running

Azure VM Scheduler tasks not running

Azure VM Scheduler tasks not running

If you are having any issues with the Azure VM Scheduling tool not running a scheduled task, it could be one of the following issues

First thing to check is your log file which is located in the following location:

C:Program Files (x86) – SMIKAR Software – AVMS – avms.log

Error 1:

Scour through the log file and look for something similar to below:

01/11/2016 11:23:46 AM Attempting to ADD-azureaccount using account XXXX@XXXX.onmicrosoft.com
01/11/2016 11:23:46 AM Failed to ADD-azureaccount using account XXXX@XXXX.onmicrosoft.com – error user_realm_discovery_failed: User realm discovery failed: The remote server returned an error: (407) Proxy Authentication Required.

So the issue in the above example is that your onsite proxy server requires authentication to allow AVMS to talk to Azure.

The reason why the AVMS console can connect to Azure is because it is running under your own Domain Account and has the appropriate permissions to use the proxy server. The scheduled task however runs under your computers system account and more than likely does not have this permission.

So how do you fix this you ask?

Well go in to your control panel, then in to scheduled tasks. Highlight the AVMS task, right click it and choose properties.

Azure VM Scheduler Tasks

Next you need to change the user account from System to a domain and proxy appropriate account with the highest privileges you can.

Azure VM Scheduler tasks 2

AVMS will now run its scheduled tasks.

Error 2:

Again through the log another possible error to look out for is;

01/11/2016 12:45:23 PM Attempting to ADD-azureaccount using account XXXX@XXXX.onmicrosoft.com
01/11/2016 12:45:23 PM Connected to ADD-azureaccount using account XXXX@XXXX.onmicrosoft.com
01/11/2016 12:46:56 PM Attempting to ADD-AzureRmAccount using account XXXX@XXXX.onmicrosoft.com
01/11/2016 12:46:56 PM Connected to ADD-AzureRmAccount using account XXXX@XXXX.onmicrosoft.com
01/11/2016 12:46:56 PM Started code block to Stop VMs
01/11/2016 12:46:56 PM Adding servers to array for email
01/11/2016 12:46:56 PM email form created notifying task has started

If your log file stops as shown in the above, it is your email settings that are causing AVMS to not progress any further. Please check and confirm your email settings are correct, alternatively turn off notifications. Please be warned, turning this off will result in you not receiving any emails from the AVMS software.

Azure Tools

Azure Tools

Azure tools

Azure Cloud

Cloud Computing

As cloud computing continues to transform the IT landscape, businesses are turning to cloud providers to meet their infrastructure and service needs. Microsoft’s Azure is one of the top cloud providers on the market, offering an array of cloud services and solutions for businesses of all sizes. In this article, we’ll explore the suite of Azure tools and how they can help you optimize your cloud infrastructure.

Azure Cloud Computing: The Game Changer

Cloud computing has revolutionized the way businesses approach IT. With Azure, you have access to a range of cloud-based services, including Platform as a Service (PAAS), Software as a Service (SAAS), Disaster Recovery as a Service (DRAAS), and Infrastructure as a Service (IAAS). With these tools, you can create, manage, and deploy your applications and services with ease, allowing you to scale your business and increase your bottom line.

Azure Management Tools

SmiKar Software has developed a suite of Azure management tools that allow you to recover costs and time. Here are some of the key tools you should know about:

Azure Virtual Machine Scheduler – AVMS

If you’re using virtual machines within Azure, you know that they’re billed every minute they’re running. If you don’t shut them down and deallocate them properly, you’ll end up incurring unnecessary costs. The Azure Virtual Machine Scheduler (AVMS) is a tool that automates and schedules the shutdown, deallocation, and powering up of your virtual machines. This can save you significant time and money. Imagine having your development and test servers shut down and deallocate every night at 7 pm, then power back up at 7 am, ready for your developers and application owners to use. By doing this alone, you can save thousands of dollars a year. Try the Azure Virtual Machine Scheduler now for free with a 30-day trial key.

Azure Virtual Machine Cloner – AVMC

Whether you need to migrate your VMs within Azure from Azure Service Manager to Azure Resource Manager, or simply want to clone one of your VMs quickly and easily, the Azure VM Cloner (AVMC) is the tool for you. With AVMC, you can create a clone of your VM (like a snapshot) while you patch or upgrade components of your server, avoiding the risk of upgrades. Try the Azure Virtual Machine Cloner now for free with a trial key.

Azure Virtual Machine Deployer – AVMD

Deploying virtual machines to Microsoft Azure cloud can be challenging and may require you to learn PowerShell. However, SmiKar Software has developed a completely free tool to help make the process easier: the Azure Virtual Machine Deployer. With this tool, you can deploy virtual machines to Azure cloud without needing to learn PowerShell. Download the Azure Virtual Machine Deployer for free today.

Final Thoughts

By leveraging the power of Azure’s cloud services and SmiKar Software’s management tools, you can optimize your cloud infrastructure, save time, and reduce costs. Whether you need to automate the shutdown and deallocation of virtual machines or deploy virtual machines without learning PowerShell, Azure and SmiKar Software have you covered. Download and try these tools for yourself to see how they can benefit your business.

Automate Azure Shutdown

Automate Azure Shutdown

Automate the Shutdown and Startup of your Azure VMs

If you’re using Microsoft Azure, you know that time is money when it comes to running virtual machines. Fortunately, you can automate the shutdown and startup of your Azure VMs to save both. In this article, we’ll explore the benefits of automating your virtual machine schedules and provide a step-by-step guide to getting started..

Azure Overview

As one of the leading providers of IAAS, SAAS, PAAS, and DRAAS, Microsoft’s Azure cloud is flexible and supports a huge selection of operating systems and programming languages. You can run Windows or Linux servers, as well as Windows and Linux containers with Docker integration. Azure also allows you to build applications on a solid, highly scalable infrastructure built by Microsoft.

Benefits of Microsoft Azure Cloud Offering

Some of the benefits of Microsoft’s Azure cloud offering include:

  • No upfront costs
  • No termination fees
  • Pay only for what you use
  • Per minute billing
  • Quick to build, deploy, and scale (up or down)

Automating Azure VM Shutdown and Startup

To save time and money, especially with virtual machines that aren’t required to operate outside regular business hours (for example, development and test VMs), having the ability to automate a scheduled shutdown and power back on of your virtual machines is crucial. Here’s how to get started:

Download and Install Azure Virtual Machine Scheduler (AVMS)

First, download and install the Azure Virtual Machine Scheduler (AVMS) that we’ve developed. You can run this application within your on-premise network as long as it has internet access, or alternatively, as a Virtual Machine running within Azure itself. However, if you’re running it in Azure, be mindful not to select this machine to be one of those you choose to power down.

Configure Azure Virtual Machine Scheduler (AVMS)

Once installed, configure the Azure Virtual Machine Scheduler by following the instructions provided in the link.

Automate Azure VM Shutdown and Startup

Now that you’ve installed and configured the Azure Virtual Machine Scheduler, it’s time to automate the shutdown and startup of your VMs. Follow the link to see how to automate Azure shutdown and power on of your virtual machines.

Automating the shutdown and startup of your Azure VMs is a simple but effective way to save time and money. With Microsoft’s Azure cloud, you have the flexibility and scalability to meet all your business needs. Follow the step-by-step guide we’ve provided to start automating your virtual machine schedules today.

How to Automate a scheduled power down and on of Azure VMs

How to Automate a scheduled power down and on of Azure VMs

How to Automate a scheduled power down and on of Azure VMs

Automate the Shutdown

If you need to create an automated process that shuts down or powers on your Azure VMs to save you from paying fees to Microsoft for services while they are not being utilised, you can do this with the Azure Virtual Machine Scheduler tool that we have created. AVMS as it is known can automate a schedules that you specify to do all this for you and to send you email alerts during the process. You could use AVMS for your Development and Test systems housed within Azure, saving you money while they are not being used.

It is quite a simple process to create a new schedule. Open up the Azure Virtual Machine Scheduling tool and first let it sync with your Microsoft Azure Subscriptions so that it can populate all your VMs.

Start your Azure VM Automation Schedule

Click the Virtual Machines Icon to show your Azure virtual machines.

Schedule Azure VM shutdown

List all your Azure VMs

The Azure VM Scheduler / Orchestrator will scan your total Azure Environment and list all your Azure VMs.

Shutdown Azure VM

Select your Azure VMs

Select the Azure VMs you want to either power down or power on and make sure that you tick the according checkbox for each machine. Once you have selected all the machines you wish, right click in the console as below and choose create new schedule.

Azure Create new schedule

Azure VM Schedule Details

Next, give the schedule a name, use the drop down box to choose whether to automate a power on or shutdown schedule for your Azure Virtual Machines and then a description if you wish to do so. Click OK  to continue. In the example below, we can see we are creating a Power on Schedule. Keep in mind, if you wish to power machines on and then off, you will need to go through these steps twice, choosing the appropriate Job type.

Azure VM Schedule Creation

Schedule the Power on of your Azure VMs

Click NEW to create a new schedule

AVMS Power On Schedule execute

Choose your Azure VM Power On date and time

Now choose a date and time you wish your Azure virtual machines to Power On. Click OK when ready.

Azure VM Power On Schedule

Confirm the Azure VM Power On schedule

Confirm the Date and Time are what you created and then click OK.

Azure VM Power On Schedule Complete

Thats all there is to it. You have now automated a scheduled power down or power on of your virtual machines within Azure.

The Azure Virtual Machine Scheduling tool will now start up your virtual machines with Microsoft’s Azure cloud at the time you specified. If you have setup email alerts, you will be notified when the job starts and completes.

Azure VM Shutdown Schedule

If you now need to complete a Power Off schedule, go through these same steps again, but choose Shutdown Virtual Machines (Deallocate) as show in the window below.

Azure VMS Power On Schedule 6

Click this link to learn more about the Azure Virtual Machine Scheduler. Feel free to Download a fully functioning 30 day trial and test it for yourself.

Also, see the other products that SmiKar Software have developed. From SnaPatch our patch management addon for SCCM, SnapShot Master that automates your Vmware or Hyper-V snapshots and even AVMD our free tool that helps deploy Virtual Machines to Microsoft’s Azure cloud.

The Azure Virtual Machine Scheduler tool is an excellent way to automate the power down and on of your Azure VMs, saving you money while they are not being used. It is a straightforward process that can be completed within a matter of minutes. Try it out for yourself and see how it can benefit you. For more information on the Azure Virtual Machine Scheduler and other tools developed by SmiKar Software, click the link provided in this article.