Why Migrate Azure VMs to VMware: The Benefits

Why Migrate Azure VMs to VMware: The Benefits

Azure to VMware migration?

As organizations transition to the cloud, they are faced with the question of which platform is best suited to their needs. While Microsoft Azure has been a popular choice for cloud computing, many organizations are finding that VMware is a better fit for their virtualized infrastructure needs. This article will explore the reasons why you should consider migrating your Azure VMs to VMware and the benefits that come with making this transition.

Microsoft Azure has been a popular choice for cloud computing due to its scalability and ease of use. However, as organizations grow, they may find that they need more control over their virtualized infrastructure, which is where VMware comes in. With VMware, organizations have complete control over their virtualized environment, which can provide them with more flexibility, reliability, and security.

The Benefits of Migrating Azure VMs to VMware

There are several benefits to migrating Azure VMs to VMware, including increased control, improved performance, and enhanced security.

Increased Control

With VMware, organizations have complete control over their virtualized environment, which means they can manage their VMs in a way that best meets their business needs. They can also easily configure their virtual infrastructure to meet specific requirements, such as resource allocation and network configurations. This level of control is not possible with Azure, where organizations are limited to the resources and configurations provided by the platform.

Improved Performance


VMware also provides improved performance compared to Azure. This is because VMware provides dedicated hardware resources, which can result in faster and more reliable performance. Additionally, VMware’s virtual infrastructure is designed to support high-availability configurations, which can help ensure that VMs remain available even if there are hardware failures.

Enhanced Security

One of the biggest benefits of migrating Azure VMs to VMware is enhanced security. With VMware, organizations have complete control over their virtualized environment, which means they can implement robust security measures to protect their data and applications. This is not possible with Azure, where organizations are limited to the security measures provided by the platform.


Azure VM to VMware Migration FAQs

What is the process for migrating Azure VMs to VMware? 

The process for migrating Azure VMs to VMware will depend on the specific needs of your organization. However, the process typically involves configuring a virtual infrastructure, migrating your VMs to the new infrastructure, and testing to ensure that everything is working as expected.

Can I still use Microsoft Azure after migrating my VMs to VMware?

Yes, you can still use Microsoft Azure after migrating your VMs to VMware. However, your VMs will no longer be hosted on the Azure platform, and you will have more control over your virtualized environment.

What are the costs associated with migrating Azure VMs to VMware?

The costs associated with migrating Azure VMs to VMware will depend on the specific needs of your organization. However, the costs can include hardware, software, and support costs.

How best to migrate your Azure VMs to VMware.

In conclusion, migrating Azure VMs to VMware can provide organizations with increased control, improved performance, and enhanced security. With complete control over their virtualized environment, organizations can better manage their VMs and implement robust security measures to protect their data and applications. If you are considering migrating your Azure VMs to VMware, it is important to consider the specific needs of your organization and to work with a professional who can help you make the transition.

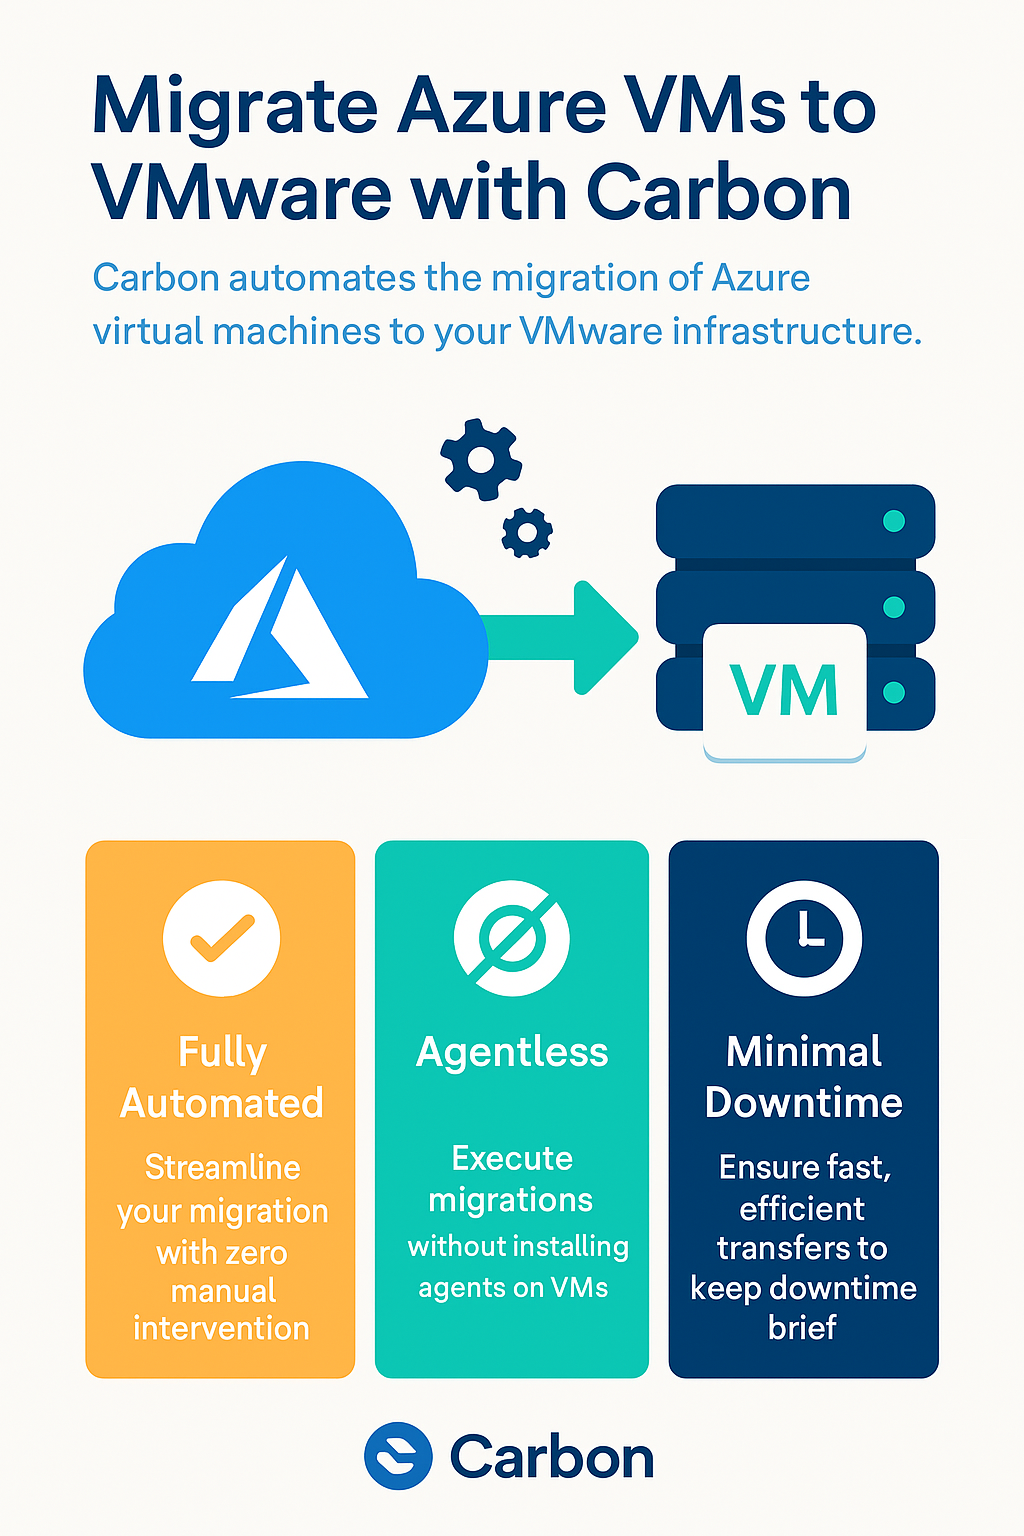
Moreover, with the help of software such as Carbon, the administrator can quickly and easily migrate their Azure VMs to either VMWare or Hyper-V. Carbon connects directly to your Azure Subscription, displays your Azure Virtual Machines, and integrates with either your VMware or Hyper-V environments. The software replicates and converts your Azure VMs to your on-premise hypervisor of choice, automatically sets up your replicated Azure VMs on either VMware or Hyper-V with the same configurations, and provides email alerts once the process is completed. By using Carbon, the migration process becomes efficient and straightforward, giving administrators more time to focus on other important tasks.

Efficient Snapshot Management

Efficient Snapshot Management

VMWare Snapshot Overview.

Snapshots are an essential part of virtual machine management, as they provide a convenient way to preserve the state of virtual machines and revert to an earlier version if necessary. However, without proper management, snapshots can quickly become a problem, consuming storage space and impacting performance. This is where SnapShot Master comes in.

SnapShot Master is a comprehensive solution for managing snapshots in your VMware environment. The tool offers a wide range of features to help you optimize your virtual environment, such as:

  • Efficient Snapshot Management: With SnapShot Master, you can easily create, schedule, manage, and delete snapshots, and you can automate the process to run at specific intervals.
  • Backup and Disaster Recovery: SnapShot Master provides reliable backup and disaster recovery solutions, ensuring that you can quickly restore your virtual environment in case of a failure.
  • Storage Optimization: SnapShot Master helps you optimize your storage space by identifying and allowing you to remove stale snapshots, freeing up valuable disk space.
  • Performance Optimization: The tool helps you improve the performance of your virtual environment by reducing the impact of snapshots on system performance.
  • Simple and User-Friendly: SnapShot Master is designed to be user-friendly and intuitive, making it easy for you to manage snapshots and optimize your VMware environment.


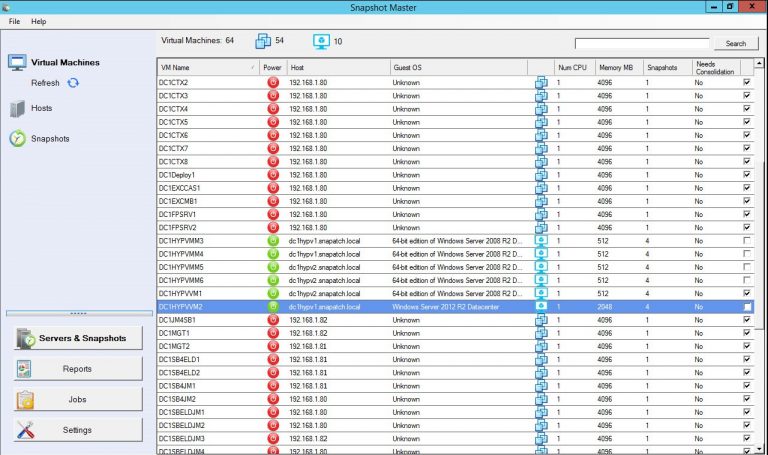
SnapShot Master Power On

Why Efficient Snapshot Management is Crucial for Your VMware Environment?

Snapshots are a critical aspect of virtual machine management, and efficient snapshot management is crucial to the success of your virtual environment. Here are some of the reasons why efficient snapshot management is important:

  • Conserve Storage Space: Over time, snapshots can consume a significant amount of storage space, reducing the amount of space available for other important data.
  • Improve Performance: Snapshots can have a significant impact on system performance, particularly if they are not properly managed.
  • Ensure Data Protection: Snapshots are used to protect virtual machines and their data, and without proper management, they can actually create data loss or corruption.

The Benefits of Using SnapShot Master for Snapshot Management

SnapShot Master offers a range of benefits to help you maximize your VMware environment with efficient snapshot management. Here are some of the key benefits:

  • Efficient and Automated Snapshot Management: SnapShot Master makes it easy to create, manage, and delete snapshots, and you can automate the process to run at specific intervals.
  • Reliable Backup and Disaster Recovery: With SnapShot Master, you can be confident that your virtual environment is protected in case of a failure.
  • Optimize Storage Space: The tool helps you optimize your storage space by automatically identifying and removing stale snapshots.
  • Improve Performance: SnapShot Master helps you improve the performance of your virtual environment by reducing the impact of snapshots on system performance.
  • Simple and User-Friendly: The tool is designed to be user-friendly and intuitive, making it easy for you to manage snapshots and optimize your VMware environment.

VMWare Snapshot FAQs

What is SnapShot Master?

SnapShot Master is a comprehensive solution for scheduling, and managing snapshots, backups, and disaster recovery in your VMware environment.

What are snapshots?

Snapshots are a feature of virtual machine management that allows you to preserve the state of a virtual machine at a particular point in time.

Why is efficient snapshot management important for my VMware environment?

Efficient snapshot management helps conserve storage space, improve performance, and ensure data protection in your virtual environment.

How does SnapShot Master help with snapshot management?

SnapShot Master offers a range of features to help you efficiently manage snapshots, including automated snapshot management, reliable backup and disaster recovery, storage optimization, and performance optimization.

Is SnapShot Master user-friendly?

Yes, SnapShot Master is designed to be simple and user-friendly, making it easy for you to manage snapshots and optimize your VMware environment.


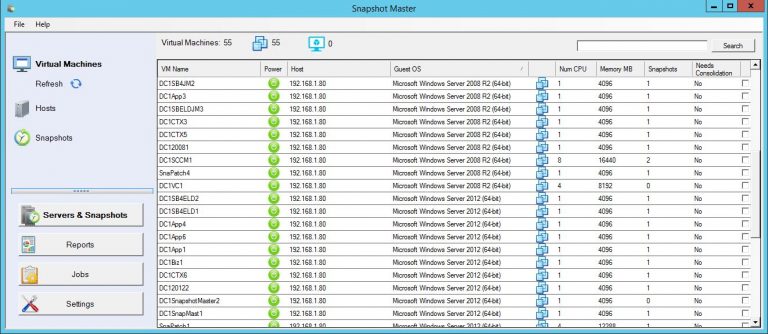
SnapShot Master Home Screen

VMWare Snapshot Final Thoughts

Maximizing your VMware environment with efficient snapshot management is crucial to the success of your virtual environment. SnapShot Master offers the best solution for managing snapshots, backups, and disaster recovery in your VMware environment. The tool offers a wide range of features to help you optimize your virtual environment, including efficient snapshot management, reliable backup and disaster recovery, storage optimization, performance optimization, and a user-friendly interface. If you’re looking for a solution to maximize your VMware environment with efficient snapshot management, look no further than SnapShot Master.

Download a fully functioning trial today and test it for yourself.

How to download an Azure VM

How to download an Azure VM

Migrate an Azure VM to VMware or Hyper-V

If you’re looking to download an Azure Virtual Machine to either VMware or Hyper-V for cost savings or compliance reasons, our software Carbon automates the process with just a few clicks. With Carbon, you won’t need to use PowerShell or download the VHD from the Azure portal.

To download your Azure VM to your preferred hypervisor, simply follow the steps outlined below for VMware.

First, download and install Carbon. Then, select your Azure VM and specify your VMware environment as the target. Carbon will handle the rest, downloading and converting your Azure VM to VMware.

In addition to VMware, Carbon also supports Hyper-V as a target environment. So whether you need to export your Azure VM to VMware or Hyper-V, Carbon can help.

To get started, download a free trial of Carbon and try it out for yourself. Don’t waste time with manual downloads or complicated PowerShell scripts – let Carbon simplify the process for you.

The Easiest way to convert your Azure VM to VMWare or Hyper-V

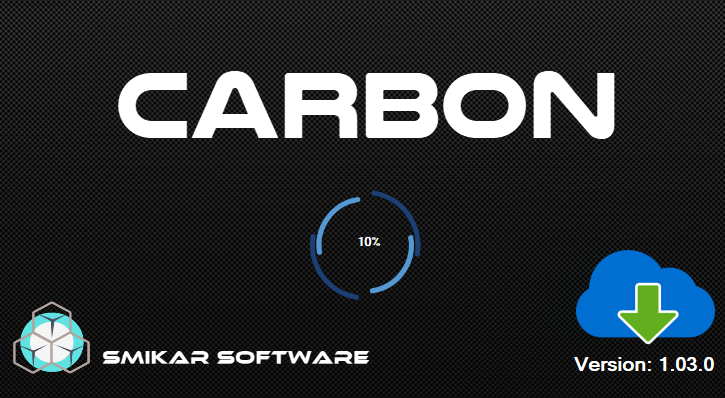
Launch Carbon

Once you have Carbon installed, the first task is to launch Carbon.

Carbon Azure Migration Tool Loading Screen

Sign in to the Azure Portal

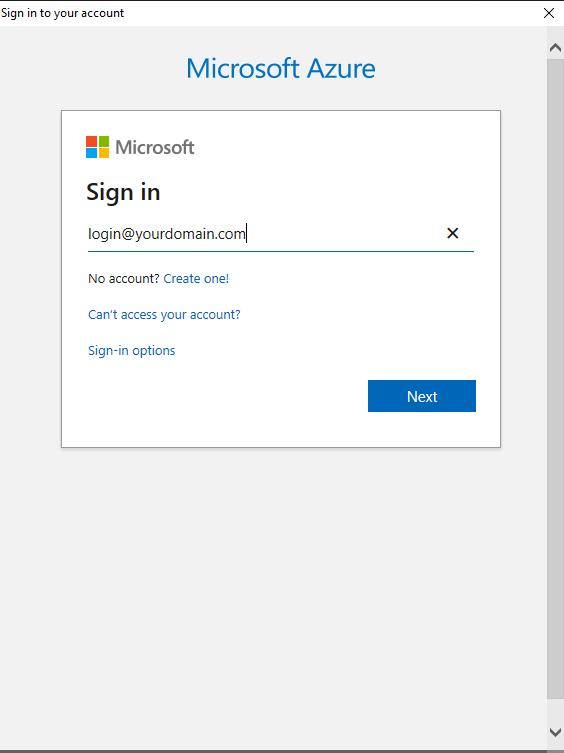
You will now be prompted to login to Azure, so enter your credentials with access to your Azure Portal.

Carbon Azure VM Download Login

Scan your Azure Portal for all of your Azure Virtual Machines

Find all your Azure VMs

Once you have authenticated against your Azure Tenant, Carbon will now start scanning your Azure environment for all your Azure Virtual Machines.

This could obviously take some time if you have a large Azure Environment.

Once the scan of your Azure VMs has completed, you will see the list of all the Azure VMs in your Azure Tenancy.

Carbon Azure VM Download Scanning

List all your Azure VMs

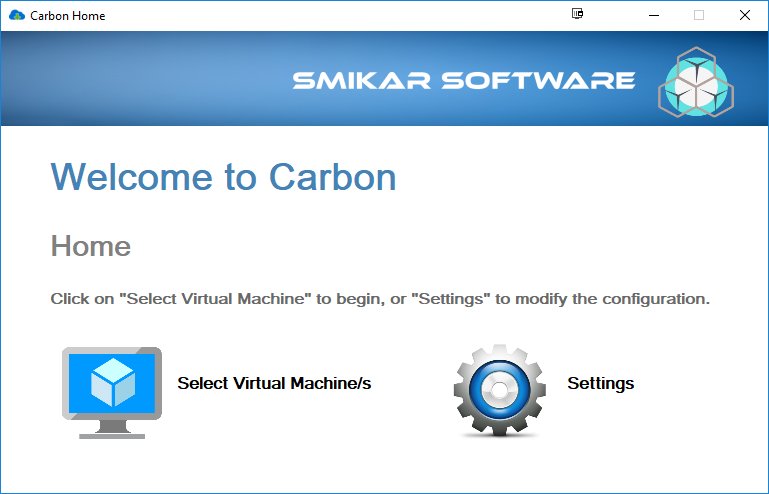
Now that your scan of all your Azure VMs is complete, choose Select Virtual Machine/s to list all your Azure VMs in your Tenancy and start the migration process.

Carbon Home Screen

Select your Azure VM for Migration

Which Azure VMs do you want to migrate back to your Hypervisor

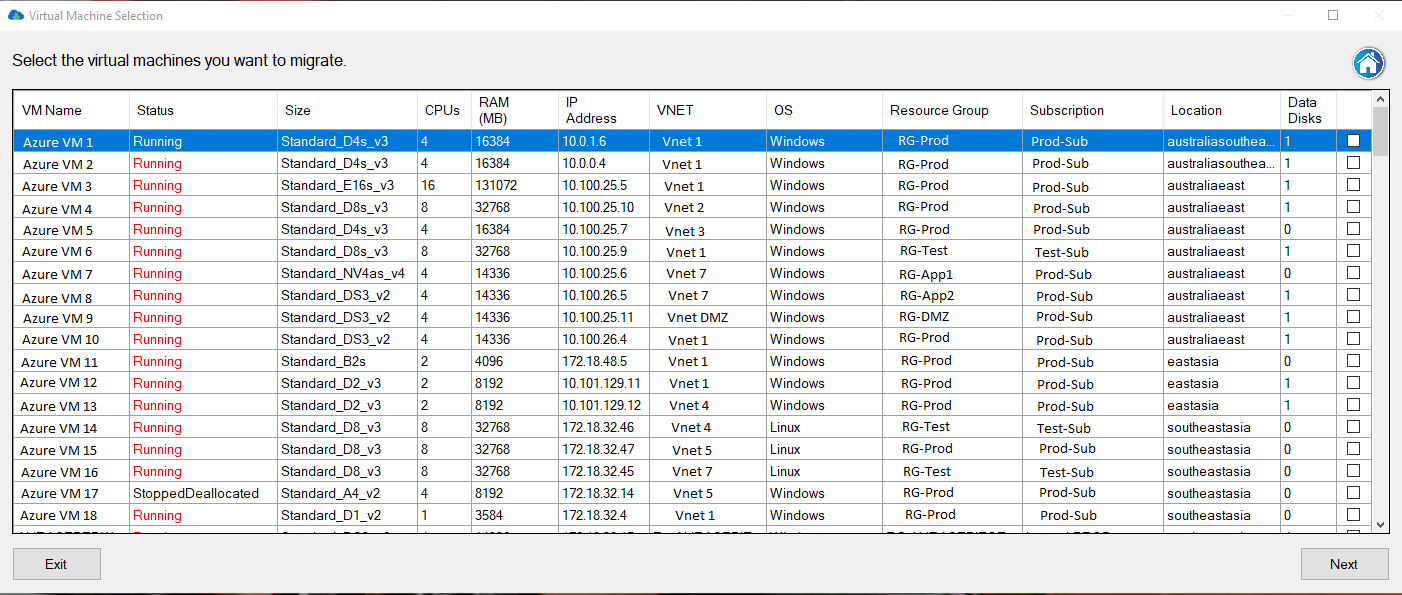
Now you should see a list of all your virtual machines in your Azure Environment.

Details displayed include:

  • The Azure VM Name
  • The status of the Azure VM
  • The Azure VM size
  • The number of CPUs your Azure VM has
  • The amount of Ram
  • The Azure VM’s IP Address
  • The Azure vNet it resides in
  • The Operating System of your Azure Virtual Machine
  • The Azure Resource Group
  • The Azure Subscription
  • The Azure location
  • and finally, the number of disks attached to your virtual machine

You simply select (by using the checkbox on the very right of the screen) the Azure VMs you want to download to VMware, then click Next.
The VMs you want to migrate will need to be powered off, so make sure you do this prior to attempting the migration.


Carbon Azure VM Details

Managed or Unmanaged Disks

Azure VM Disk Configuration

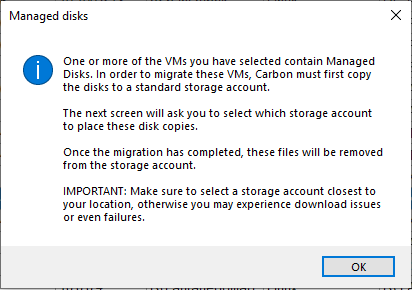
Now if the Azure VMs you are going to convert to VMware are using Azure Managed Disks, you will get this prompt.

Click OK to proceed.

What Carbon will do next is copy this Azure VM disks to a storage account that you specify in the next screen.

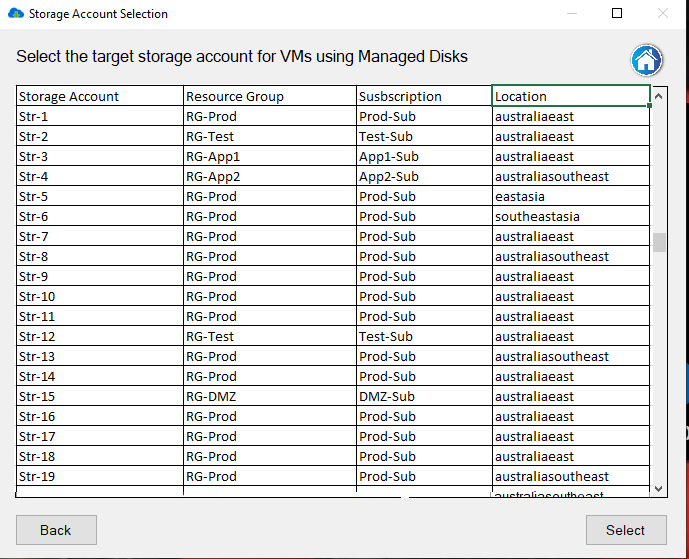
Please take note of the location of your Azure VM, as you want to use an Azure Storage Account in the same region.

Azure Managed Disk Prompt

Azure Storage Account for Conversion

Choose a destination Azure Storage Account

Next we select the appropriate Azure Storage Account that the Azure VM will be copied and converted to.

Choose the storage account you want and then choose Select.

Carbon will now read your Azure VM disk configuration. This can take a few minutes.

Azure Storage Account Details

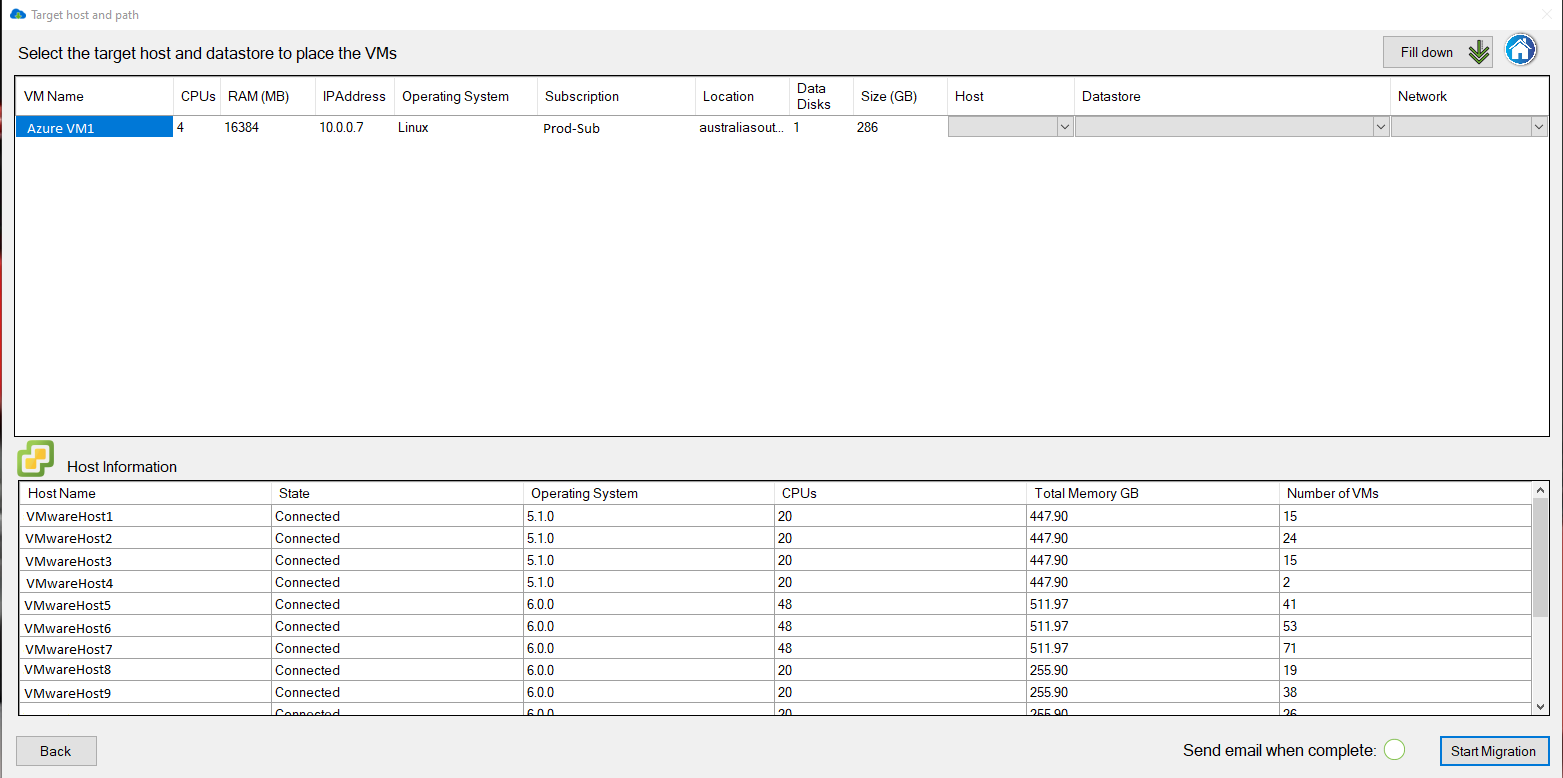
Choose your VMWare or Hyper-V Environment for Azure VM Migration

Connect to you Hypervisor

Now we are presented with your virtual environment (in this case our VMware vCentre environment)

Choose from the dropdown lists the VMware Host, the datastore and virtual network you want your Azure VM to download to.

You have the option here to send you an email once the migration has completed.

Click Start Migration to proceed to the final step


Azure VM Download VMware

Ready to start the Migration of your Azure VM

Start the Migration Process

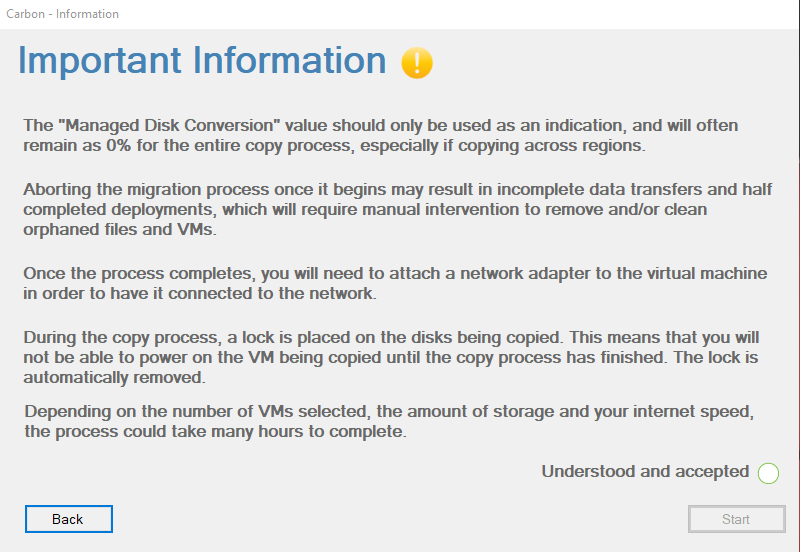
Finally we are prepared to start the conversion of your Azure VM to VMware.

Review the information here, when you are ready, click the circle next to Understood and Accepted, then click Start.  

Azure VM Migration to VMware

Azure VM Migration Process

Converting your Azure VM

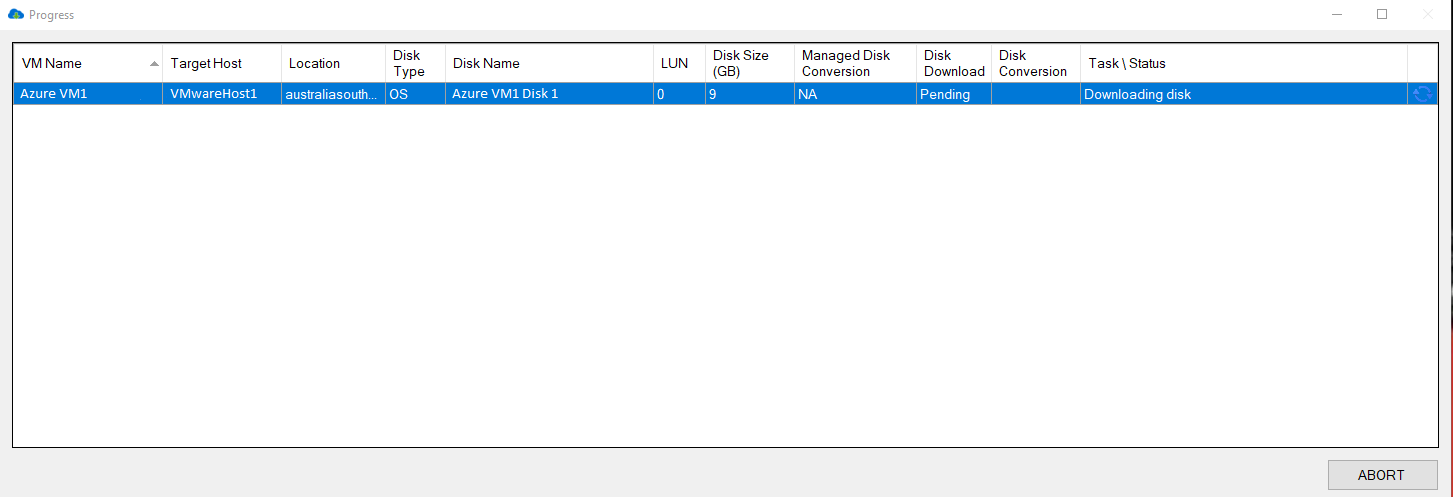
Now, the conversion process is underway. Your Azure VM will be downloaded and converted to the appropriate format for either VMware or Hyper-V before finally being deployed to your on-premise virtual infrastructure.

Please Note: This may take some time, dependent on the size of your Azure VM disks, so please be patient. 

If you have email alerting setup and turned on, you will receive an email once the process has completed.

Azure VM Conversion Process

Azure VM Conversion Progress

Converting your Azure VM for your selected Hypervisor

Watching the Progress window you can see the status of your download and conversion of your Azure VM.

In this picture you can see that the disk download has completed as well as the conversion and its currently being uploaded to our VMware environment.

Azure VM Conversion Status

Azure VM Converted

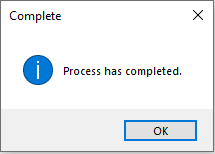
Azure VM Conversion is now Complete

After some time your Azure VM should now have downloaded, converted to VMware and be available within your vCentre server.

Azure VM download to VMware Complete

Azure VM Migration Alerts

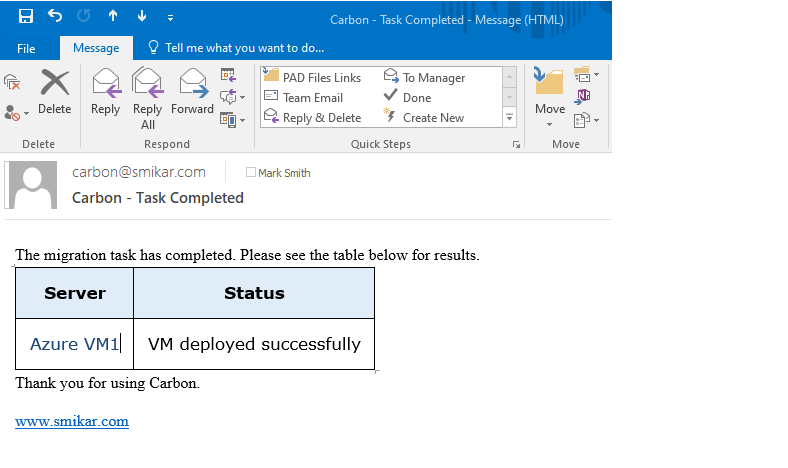
If you requested an email alert, you should have received one in your inbox stating that the Azure VM has now deployed to your VMware environment.

Azure VM Download Email

Azure VM Conversion Completed

View the migrated VM in your Hypervisor

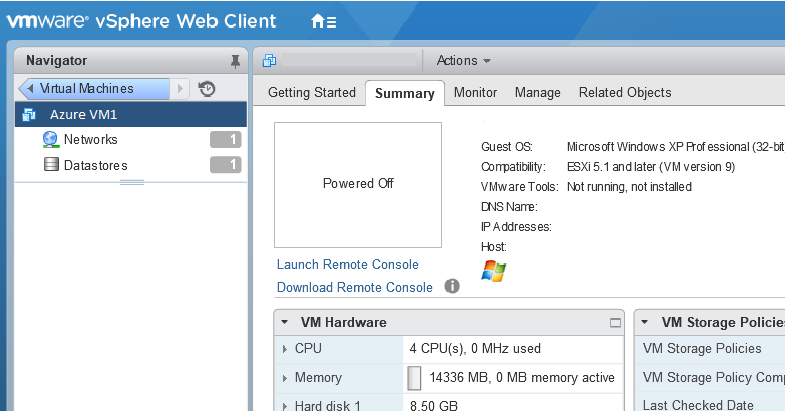
If you go to your vCentre now you should be able to find the Azure VM you had migrated to your VMware environment.

All left for you to do now, is power it on then log on to the VM and update the IP address if needed.


Azure VM on VMware

Azure VM Conversion Completed

Find the migrated VM in your Hypervisor

If you go to your vCentre now you should be able to find the Azure VM you had migrated to your VMware environment.

All left for you to do now, is power it on then log on to the VM and update the IP address if needed.


Azure VM on VMware

Your Azure VM has been converted and then migrated to your Hyper-v or VMware environment.

And that’s all there is to it. You have downloaded an Azure VM and converted it to VMware or Hyper-V. (Obviously in this example we converted the Azure VM to VMWare. For HyperV the last few steps are replaced with VCentre with SCVMM)

You can download a fully functioning trial of Carbon here to test it for yourself.

Carbon: Moving You Forward by Bringing You Back.

How to clone a Azure VM

How to clone a Azure VM

How to clone a Azure VM

If you ever need to duplicate or clone your Azure VMs or perhaps even migrate your Azure VMs from Azure Service Manager (ASM) to Azure Resource Manager (ARM) you can use one of our Azure Management Tools, Azure VM Cloner (AVMC) to quickly and easily do this for you. (You can download a fully functioning trial here)

In the last blog post I showed you how you could schedule the deployment of Azure VMs. Using those same VMs and Azure Subscription I will now show you how we can clone your Azure VMs.

Why clone your Azure VM?

Use Case Description

Disaster Recovery

In case of a disaster or outage, having a cloned VM in a different Azure region or datacenter can provide a quick failover option and ensure business continuity.

Testing and Development

Cloning a VM can provide a safe and isolated environment for testing and development purposes without affecting the production environment.

Scaling Out

Cloning a VM can help quickly and easily scale out an application or service by creating multiple copies of the same VM to distribute the workload.

Migrating to a New Subscription

When migrating to a new Azure subscription, cloning a VM can help ensure that all the necessary configurations and settings are preserved.

Creating a Backup

Cloning a VM can also serve as a backup option in case the original VM experiences any issues or failures.

Cloning an Azure Virtual Machine

Start cloning your Azure VM

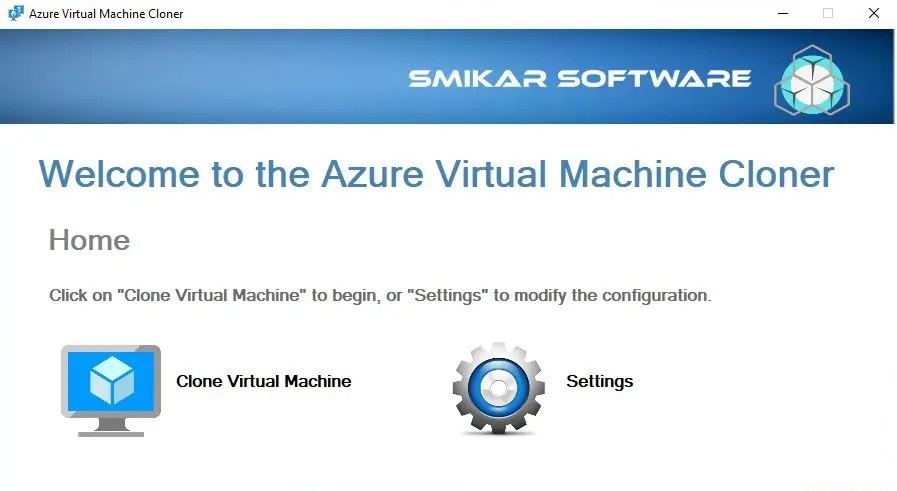
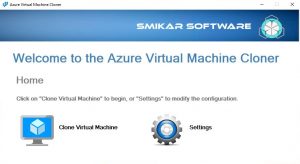
Start up the Azure VM Cloner tool then click on Clone Virtual Machine in the home window


Clone Azure VM

Select the Azure VM to Clone

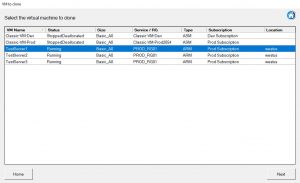
Next we are presented with a list of the Azure VMs you have in your subscription. Highlight one of the Virtual Machines and then click on Next.


Shutdown your Azure VM to be Cloned

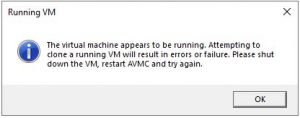
Note if the VM is running you will get the following error. Best to shutdown any virtual machines within Azure that you need to clone.


Clone Azure VM running VM

Choose the Destination for your cloned Azure VM

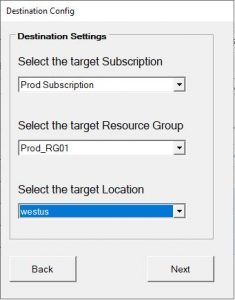
We are next presented on some destination settings we need to migrate the cloned Azure VM to. Choose your Azure Target Subscription (you can clone your Azure VMs across subscriptions only if you have access)
Select a target Azure Resource Group and then finally the Azure Location for the VM to reside in.
Click on NEXT to continue with the cloning process.

Clone Azure VM Destination

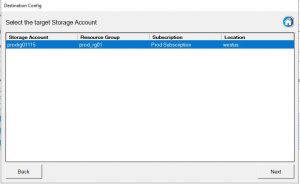
Cloned Azure VM Destination Storage Account

Now we need to choose which Azure storage account to place the cloned Azure VM in.

Highlight the correct storage account then click on NEXT.


Clone Azure VM Storage Account

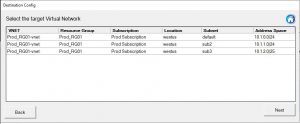
Cloned Azure VM Destination vNet

The next selection window we are presented with is the Azure Virtual Network that you would like the cloned virtual machine in.

Highlight the correct Azure vNet and again click on NEXT.  The Azure VM Cloner will read the vnet configuration before continuing.


Clone Azure VM vNet

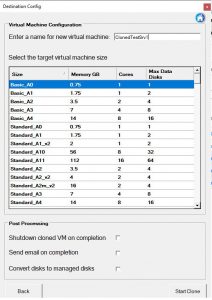
Choose the VM Size for your cloned VM

The last configuration window before the cloning of the Azure VM kicks off is the VM sizing window. Choose an Azure VM size and give the server a name.

You can also select whether to shutdown the cloned VM on completion, Send an email to let you know once done and even convert the disks to Azure Managed Disks if they were in an Azure Storage Account before.
Click on START CLONE to continue.


Clone Azure VM Sizing

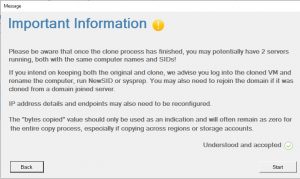
Ready to start the cloning of your Azure VM

You are now ready to proceed with the cloning process. The Cloning Warning screen informs you that may have two servers with the same SIDs and computers names after the server has been cloned, this is of course not something you want to have happen in a Production environment.

Read the warning and when you are ready to do so, check the Understood and Accepted then click on START.


Clone Azure VM Warning

Cloning process for your Azure VM

In the Console Output you can see the tasks and status of your Azure VM cloning and as seen in the Azure Portal you can see that the VM has now cloned successfully.

Now the last things you will need to do if it is a Microsoft Windows virtual machine that you cloned, is to login with its local Administrator account and password and possibly run a Sysprep to change the server name and SSID before you rejoin it to the domain.


Clone Azure VM Azure Portal

Download a Trial of Azure VM Cloner today.

To trial our Azure VM Cloner, fill in the form below to get access to download the trial software.


The cost of our Azure VM Cloner is $500 USD.


FREE DOWNLOAD

Send download link to:

I confirm that I have read and agree to the End User License Agreement.

Download a trial of the Azure VM Cloner and see all of our Azure Management Tools.

Cloning an Azure VM is an important process that can save you a lot of time and effort. With Azure VM Cloner (AVMC), you can easily and quickly clone your Azure VMs, ensuring that you have an exact replica of the original virtual machine. By following the steps outlined in this guide, you can clone your Azure VMs with ease, without any errors or issues.