SnapShot Master - How To
See how to create a schedule for the creation and deletion of VMware and Hyper-V snapshots.
How to use SnapShot Master
Schedule Snapshot creation and Deletion.
Are you looking for an efficient way to manage your virtual machine snapshots? Look no further than SnapShot Master. In this article, we’ll explore how to use SnapShot Master to schedule snapshot creation and deletion, perform virtual machine functions and tasks, and manage snapshots for single or multiple VMs.

Virtual Machines Functions
SnapShot MasterVirtual Machines Tasks
Under the Virtual Machines menu, you can perform tasks to single or multiple VMs.
Are you looking for an efficient way to manage your virtual machine snapshots? Look no further than SnapShot Master. In this article, we’ll explore how to use SnapShot Master to schedule snapshot creation and deletion, perform virtual machine functions and tasks, and manage snapshots for single or multiple VMs.
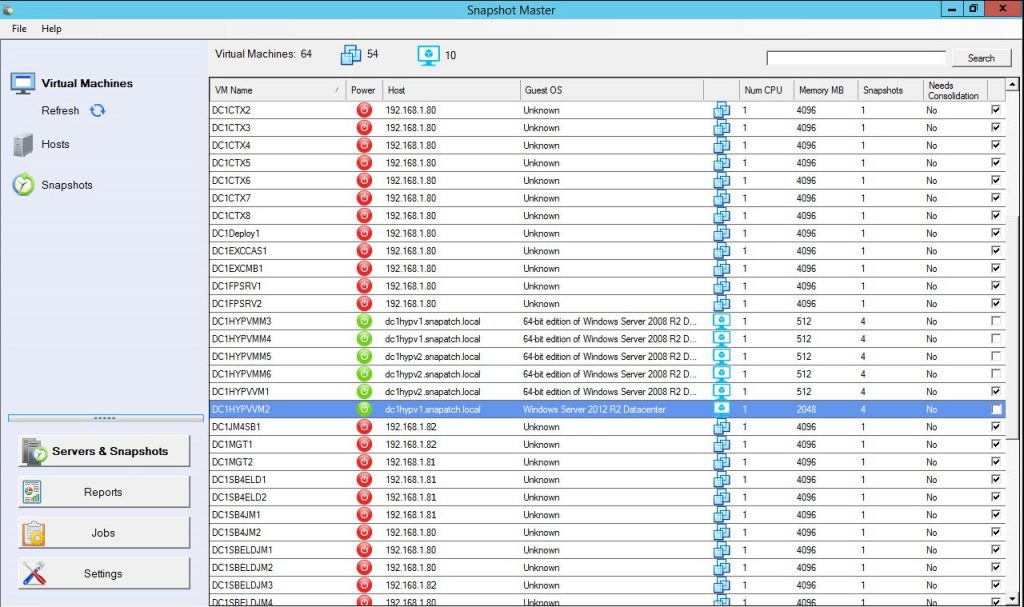
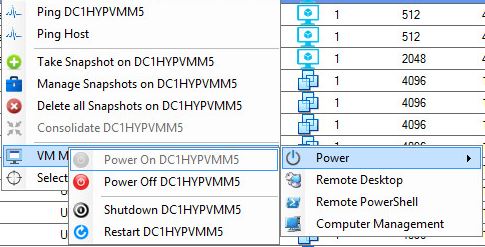
Virtual Machines Right Click
Right click on any of the virtual machines and you are presented with the Right Click Menu.
For a single VM, the various functions available to you within the Right Click Menu are;
- Ping Virtual Machine
- Ping Virtualisation Host
- Take a Snapshot of the Virtual Machine
- Manage that Virtual Machine’s Snapshots
- Delete all the Virtual Machine’s Snapshots
- Power on Virtual Machine
- Power off Virtual Machine
- Shutdown
- Restart
- Remote Desktop
- Remote Powershell
- Computer Management
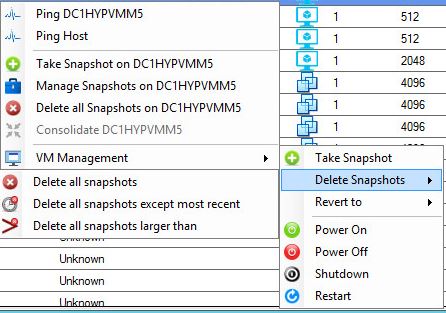
Virtual Machines Select Multiple VMs
For multiple VMs, you use the checkboxes on the right hand side of the SnapShot Master console and select the VMs you wish to perform a function to.
For multiple VMs, the various functions available to you within the Right Click Menu are;
- Take a Snapshot of all the Selected Virtual Machines
- Delete all Selected Virtual Machine’s Snapshots
- Delete all Selected Virtual Machine’s Snapshots except most recent
- Delete all Selected Virtual Machine’s Snapshots larger than
- Power on all Selected Virtual Machines
- Power off all Selected Virtual Machines
- Shutdown all Selected Virtual Machines
- Restart all Selected Virtual Machines
- Revert all Selected Virtual Machines to Most Recent Snapshot
- Revert all Selected Virtual Machines to the Oldest Snapshot
Delete Snapshots
Use the menu to delete the snapshots for the Virtual Machines you have selected.
Revert Snapshots
And you can use this menu item to revert the snapshots for any VMs you have selected.
Creating a Virtual Machine Scheduled Snapshot
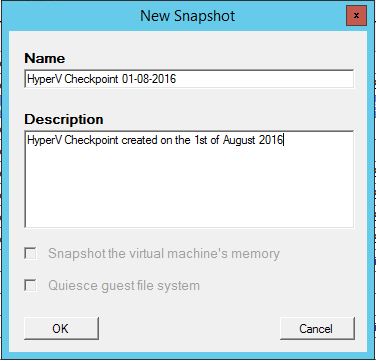
Select the Virtual Machines to be Snapshotted
You can select either a single or multiple VMs for the Snapshot function. give the Snapshot a Name and Description to make it easily identifiable when and what this snapshot was for. You have the options of taking a snapshot of the Virtual Machine’s memory and taking a Quiesce of the Guest File System as well. Click OK when ready.
Give the Snapshot Schedule a Name
You can select either a single or multiple VMs for the Snapshot function. give the Snapshot a Name and Description to make it easily identifiable when and what this snapshot was for. You have the options of taking a snapshot of the Virtual Machine’s memory and taking a Quiesce of the Guest File System as well. Click OK when ready.
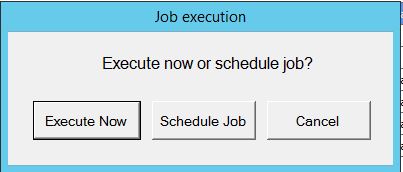
Scheduled VM Snapshot Execution
Now choose whether you wish the run this snapshot job now (Execute Now), or schedule it for a later time (Schedule Job). In this example, I will schedule the snapshots so I selected Schedule Job.
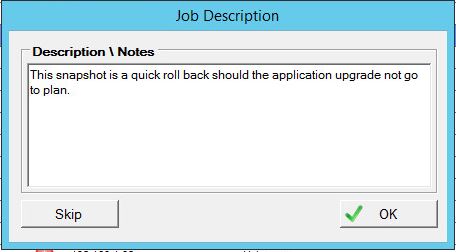
Scheduled VM Snapshot Notes
You can enter in a Note should you so wish. Skip if you dont need any notes, or type in a note then click OK.
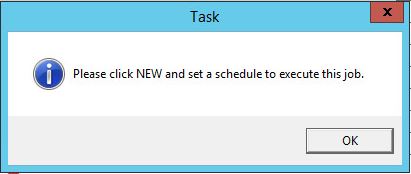
Scheduled VM Snapshot Prompt
Now we need to create a schedule for this job. Click on New in the scheduling window.
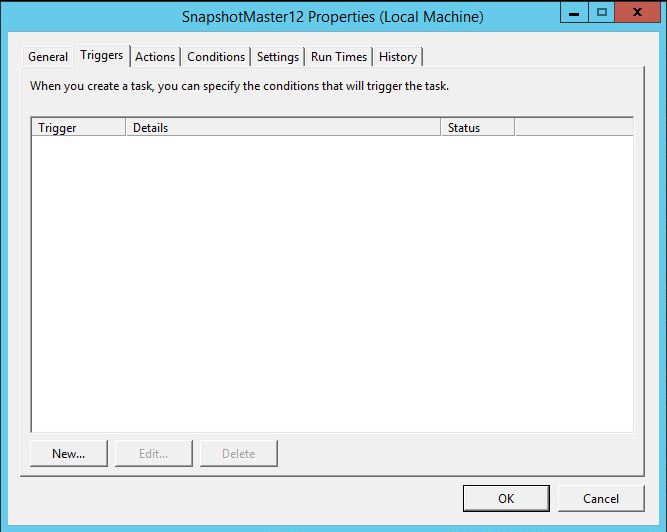
VM Snapshot Trigger
Now we need to create a schedule for this job. Click on New in the scheduling window.
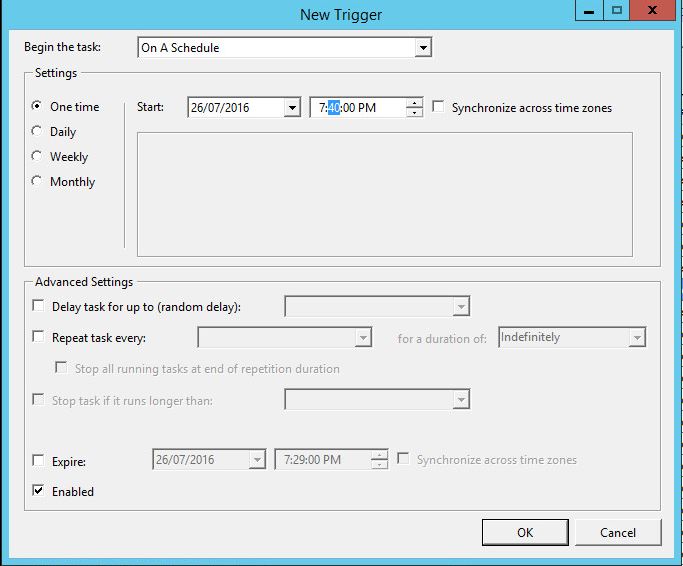
VM Snapshot Date and Time Creation
Select a Date and Time that you wish the function to perform then click on OK.
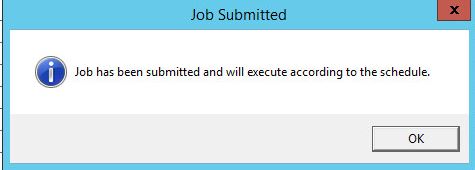
VM running schedule
Now the scheduled job is completed and will run according to the schedule you have set.
Interested in trying out SnapShot Master? Download the trial software by filling out the form below In conclusion, SnapShot Master is a powerful tool for managing virtual machine snapshots. By following the steps outlined in this guide, you’ll be able to schedule snapshots, perform virtual machine functions and tasks, and manage snapshots for single or multiple VMs with ease. Try it out today and see the difference it can make in your virtualization workflow.
SnapShot Master: Control Your VM Universe!
Effortlessly schedule and manage your virtual machine snapshots with SnapShot Master.
