SharePoint Storage Explorer
Setup and Installation Guide
Easily manage your SharePoint Online storage with SharePoint Storage Explorer. This guide provides step-by-step instructions on how to set up and install SharePoint Storage Explorer, enabling you to optimise your SharePoint environment by gaining valuable insights into your storage usage. Whether you’re an admin or an end-user, this tool helps streamline storage management effortlessly.
Step 1: Request and Download SharePoint Storage Explorer
- Visit the SharePoint Storage Explorer page and fill in the request form.
- Upon approval, you will receive an email containing a download link for the application.
- Once the download is complete, locate the file (e.g., SharePointStorageExplorer.exe) in your designated download folder. In this example, it is saved in the C:\Temp directory.
- You are now ready to begin the installation process by double-clicking the downloaded file.

Step 2: Launch the Prerequisites Setup Wizard
- Double-click the SharePointStorageExplorer.exe file to begin the installation.
- The Prerequisites Setup Wizard will launch, checking for any missing components required by SharePoint Storage Explorer.
- If prerequisites are missing, the wizard will assist in downloading and installing them.
- Click Next to proceed with the setup.

Step 3: Select Prerequisites to be Installed
The setup wizard will display a list of prerequisites required to run SharePoint Storage Explorer. These may include:
- .NET Framework 4.7.2
- Microsoft Visual C++ 2010 x86 Redistributable
- Microsoft Azure PowerShell (latest version)
The wizard will automatically detect which prerequisites are already installed and mark them accordingly:
- If a component is already installed, the action will be marked as Skip.
- Missing components will be marked as Must Install.
Ensure the required components are selected, then click Next to proceed with their installation.

Step 4: Accept the Microsoft Azure PowerShell License Agreement
- The Microsoft Azure PowerShell Setup will launch, prompting you to review the license terms.
- Carefully read through the license agreement.
- Tick the checkbox “I accept the terms in the License Agreement” to proceed.
- Click Install to begin installing Microsoft Azure PowerShell.
Once the installation completes, the setup wizard will continue with the next steps.

Step 5: Welcome to the SharePoint Storage Explorer Setup Wizard
- Once all prerequisites have been successfully installed, the SharePoint Storage Explorer Setup Wizard will launch.
- The wizard welcomes you and provides an overview of the installation process.
- Click Next to proceed with installing SharePoint Storage Explorer on your computer.

Step 6: Accept the SmiKar Software License Agreement
- The setup wizard will display the SmiKar Software License Terms. Please read the terms carefully.
- To proceed, tick the checkbox “I accept the terms of this agreement”.
- Click Next to continue with the installation.
Once accepted, the installation will proceed to the next stage.

Step 7: Choose Installation Folder Location
- The setup wizard will prompt you to select the installation folder for SharePoint Storage Explorer.
- By default, the software will be installed in the following location: C:\Program Files\SmiKar Software\SharePoint Storage Explorer\
- If you wish to change the installation folder, click the folder icon and select a different directory.
- Ensure there is enough free disk space available (the required space is displayed in the window).
- Click Next to proceed.

Step 8: Begin Installation
- The setup wizard will display a confirmation screen titled “Begin installation of SharePoint Storage Explorer”.
- Review the selected settings. If you need to make any changes, click Back to modify your previous selections.
- Once ready, click Install to start the installation process.
The installation will now begin, and progress will be displayed on the screen.

Step 9: Installation Complete
- Once the installation process is finished, a confirmation screen will appear stating that SharePoint Storage Explorer has been successfully installed.
- It is recommended to reboot your system to ensure all modules and environment variables are correctly applied.
- Click Close to exit the setup wizard.
Your installation is now complete, and SharePoint Storage Explorer is ready to use.

Step 10: Launch the Configuration Wizard
- After installation, the SharePoint Storage Explorer Configuration Wizard will launch automatically.
- This wizard will guide you through the configuration process to connect SharePoint Storage Explorer to your SharePoint Online environment.
- It is recommended to close any other running applications before proceeding to avoid potential conflicts.
- Click Next to begin the configuration.

Troubleshooting: IE Enhanced Security Configuration Warning
If you encounter the “IE Enhanced Security Configuration is enabled!” warning during the configuration process, it means that the Internet Explorer Enhanced Security Configuration (IE ESC) is preventing the application from running login prompts correctly.
How to Disable IE Enhanced Security Configuration (IE ESC):
Open Server Manager:
Click the Start menu and open Server Manager. Access Local Server Settings:
- In Server Manager, click on Local Server from the left-hand navigation pane. Locate IE Enhanced Security Configuration:
- In the Properties section, find IE Enhanced Security Configuration (usually on the right-hand side).
- Click the current setting (e.g., On) to open the configuration dialog. Turn Off IE ESC:
- In the dialog box, set both Administrators and Users to Off.
- Click OK to apply the changes. Retry the Configuration:
- After disabling IE ESC, relaunch the SharePoint Storage Explorer Configuration Wizard and proceed with the configuration.
Disabling IE ESC temporarily allows the application to function properly during the initial setup. Once configuration is complete, you can re-enable IE ESC if required for security purposes.

Step 11: Important Information and Permissions
- The setup wizard will display an Important Information screen with key details about the configuration process. Carefully read the instructions and requirements before proceeding.
Key Points to Note:
- An Application will be registered and granted SharePoint FullControl permissions at the tenant level. You will need to log in and accept the permissions.
- You must have one of the following Azure roles to complete the setup:
- Global Administrator
- Cloud Applications Administrator
- Application Administrator
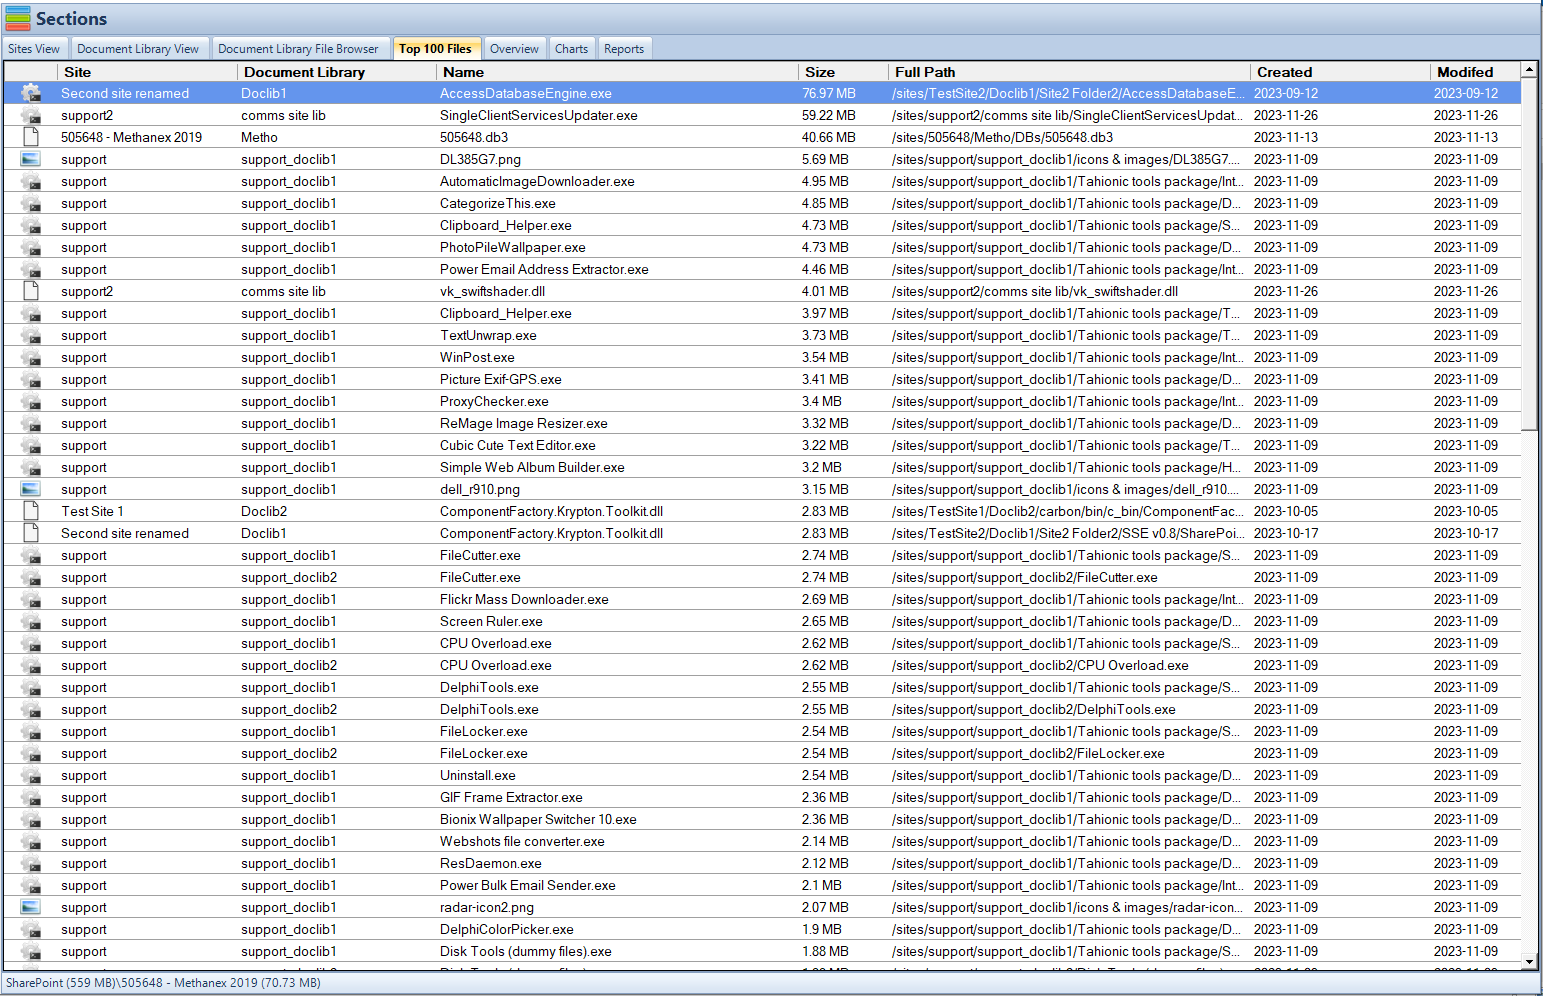
- The initial scan will perform a high-level inventory of all SharePoint sites, focusing on the 100 largest sites.
- After the initial scan, you can opt for a deeper scan that gathers detailed storage data, including:
- Site and document library sizes
- File creation and last modified dates
- This deep scan may be resource-intensive and time-consuming, especially for environments with large sites or extensive libraries.
- It is recommended to use a machine with at least 32 GB of RAM for scanning large sites or sites with millions of items.
- For best results, install the application on a new virtual machine (VM) to prevent potential conflicts with existing modules.
- The storage consumed by file versions is an estimated value.
- Once you have read and understood the information, click “Understood and accepted”, then click Next to proceed. If you do not agree with the terms, click Decline & Exit to cancel the setup.

Step 12: Register Application ID
- The setup wizard will now prompt you to register a new Application ID. This is necessary for SharePoint Storage Explorer to securely access your SharePoint environment.
- Click “Register Application ID” to begin the registration process.
What Happens Next:
- You will be redirected to the Microsoft login page to authenticate with an account that has one of the required roles (Global Administrator, Cloud Applications Administrator, or Application Administrator).
- Once authenticated, the wizard will register the application and assign the required permissions automatically.
Ensure you use an account with the necessary permissions before proceeding.

Step 13: Enter the Tenant Name
- The setup wizard will prompt you to enter the domain name of your SharePoint tenant.
- The domain should be the part of your SharePoint admin URL before
-admin.sharepoint.com. - For example, if your SharePoint admin URL is https://mycompany-admin.sharepoint.com, enter mycompany in the text field.
- The domain should be the part of your SharePoint admin URL before
- Once you have entered the correct tenant name, click OK to proceed.
Note:
- Ensure that the domain name is entered correctly; otherwise, the connection to your SharePoint environment may fail.
- If unsure, you can check the correct admin URL by logging into your SharePoint Admin Centre.

Step 14: Sign in to Microsoft Azure
The setup wizard will open a Microsoft Azure login prompt.
Enter the credentials of an account that has one of the required roles:
- Global Administrator
- Cloud Applications Administrator
- Application Administrator
- Click Next and follow the authentication process, including any multi-factor authentication (MFA) steps if required.
Note:
- Ensure that you are using an account with sufficient permissions to register and grant access to the application.
- Once authenticated, the setup wizard will proceed to register the application and complete the configuration.

Step 15: Application ID Successfully Registered
- Once the login and authentication process is complete, a confirmation message will appear stating “Application ID successfully registered”.
- Click OK to proceed.
What This Means:
- The application has now been registered in your Azure tenant with the necessary permissions to access your SharePoint environment.
- You are now ready to begin using SharePoint Storage Explorer to scan and manage your SharePoint storage.

Step 16: Scan for File-Level Versions
The setup wizard will ask whether you would like to include file-level version scanning in your SharePoint Storage Explorer scan.
- Including File-Level Version Scanning:
- This option will provide a detailed count and size of all versions for each file in your SharePoint environment.
- Keep in mind that enabling this option can significantly increase the scan time. Depending on the size of your environment, it may take several days or weeks to complete.
- Recommended only if detailed version data is critical for your analysis.
- Skipping File-Level Version Scanning:
- This option will only calculate the total storage consumed by versions at the site level, without individual file version details.
- Much faster and suitable for larger environments or when version-level details are not required.
Note:
- For large environments, ensure that the system running the scan has sufficient memory and processing power to handle the operation efficiently.
- It also must be able to remain on, and not reboot to complete a scan. This can take minutes, hours, weeks or longer depending on the size of your environment,

Step 17: Enter Contact Details
- The setup wizard will prompt you to enter your contact details to activate SharePoint Storage Explorer.
- Name: Enter your full name. (Required)
- Email: Enter a valid email address. (Required)
- Company: Enter your company name. (Optional)
- Once you have filled in the required fields, click OK to proceed.
Note:
- This information is only used for activation and support purposes.
- Your contact details will never be shared with third parties.

Step 18: Installation Process Complete
- Once the setup and configuration are complete, a confirmation screen will appear with the message “Installation Process Complete”.
- Click Finish to close the setup wizard.
Congratulations! SharePoint Storage Explorer is now fully installed and ready to use. You can begin managing your SharePoint Online environment, gaining insights into storage usage, and optimising your resources.

SharePoint Storage Explorer: Your Free Solution for SharePoint Storage Management
Take control of your SharePoint Online storage-for free! SharePoint Storage Explorer provides you with in-depth insights into your SharePoint environment, helping you identify large files, manage unused content, and optimise storage usage. With its intuitive interface and zero cost, it’s the ultimate tool for organisations looking to streamline SharePoint storage without breaking the bank.
