Cloud Reverse Migration: A Comprehensive Guide

Cloud Reverse Migration: A Comprehensive Guide

The rapid technological advancements in the last decade led to a massive migration of data and applications from on-premise environments to the cloud. While this cloud migration trend dominated the IT world, a recent paradigm shift has emerged that’s moving in the opposite direction – ‘Cloud Reverse Migration’ or ‘Cloud Repatriation’. This burgeoning movement towards cloud repatriation has piqued the interest of many, prompting a need for a comprehensive exploration of this concept, its driving factors, and the tools that facilitate it.

Understanding Cloud Reverse Migration

Cloud Reverse Migration, also known as Cloud Repatriation, is the strategic move of transferring digital data, operations, applications, or services from a cloud environment back to its original on-premise location or to an alternate private data center. Contrary to some misconceptions, this migration process does not denote the failure of cloud computing; instead, it is a strategic response to the evolving needs of businesses and a reflection of the realization that not all workloads are suited for the cloud.


Carbon Azure VM Details

The Rising Trend of Cloud Repatriation

While the benefits of cloud computing – flexibility, scalability, and cost savings, to name a few – remain valid and significant, an increasing number of businesses are reconsidering their digital strategies and migrating their operations back on-premises. This trend, known as Cloud Repatriation, is becoming increasingly prevalent across different sectors for a multitude of reasons.

Reasons for Cloud Reverse Migration

Financial Considerations

At first glance, cloud services may appear to be a more cost-efficient alternative due to the reduced upfront costs and the promise of predictable recurring expenses. However, the reality is often more complicated. The ongoing costs of cloud services, which include data transfer fees and charges for additional services, can accumulate rapidly, turning what initially seemed like a cost-saving move into a financial burden. For some businesses, investing in and maintaining in-house infrastructure can be more cost-effective over the long term.

Data Security and Control

With data breaches and cyberattacks becoming more sophisticated and commonplace, organizations are increasingly concerned about their data’s security. While cloud service providers have robust security measures in place, storing sensitive data off-premises often results in companies feeling they have less control over their data protection strategies. By migrating data back on-premise, organizations can regain control and implement security measures tailored to their unique requirements.

Performance and Latency Issues

Despite the cloud’s advantages, certain applications, particularly those requiring real-time data processing and low latency, can face performance issues in a cloud environment. Factors such as network congestion, physical distance from the data center, and shared resources can result in slower response times. As such, for applications where speed is paramount, on-premises solutions often prove superior.

Compliance and Regulatory Concerns

Certain industries, such as healthcare and finance, are subject to strict data management regulations. These industries often need to keep their data on-premises to comply with data sovereignty laws and privacy regulations. In such cases, cloud reverse migration becomes a necessary step towards ensuring compliance and avoiding hefty penalties.


Carbon Azure Migration Progress Screen

Carbon: Your Reliable Partner for Cloud Reverse Migration

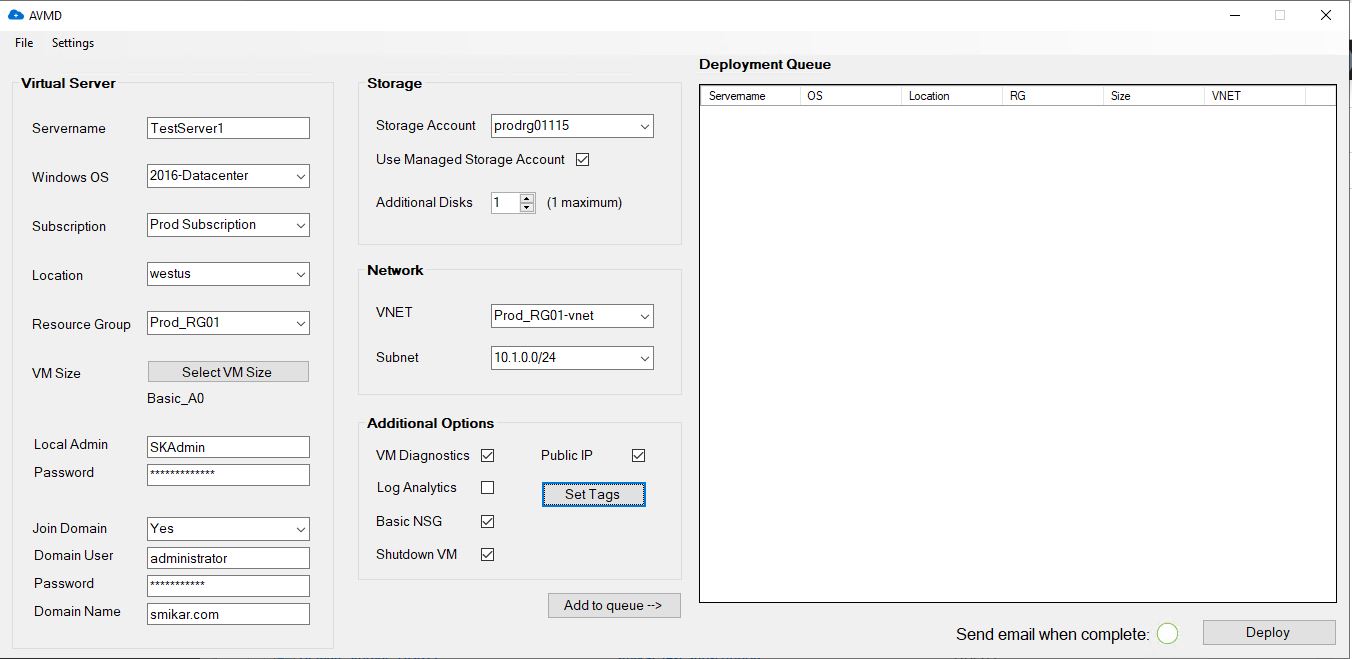
When it comes to facilitating the cloud repatriation process, the right tools can make a world of difference. Carbon, a software tool developed by SmiKar, is specifically designed to streamline the process of migrating Azure Virtual Machines (VMs) back to an on-premise environment, either on VMware or Hyper-V. With its user-friendly interface and impressive features, Carbon simplifies what could otherwise be a complex process.

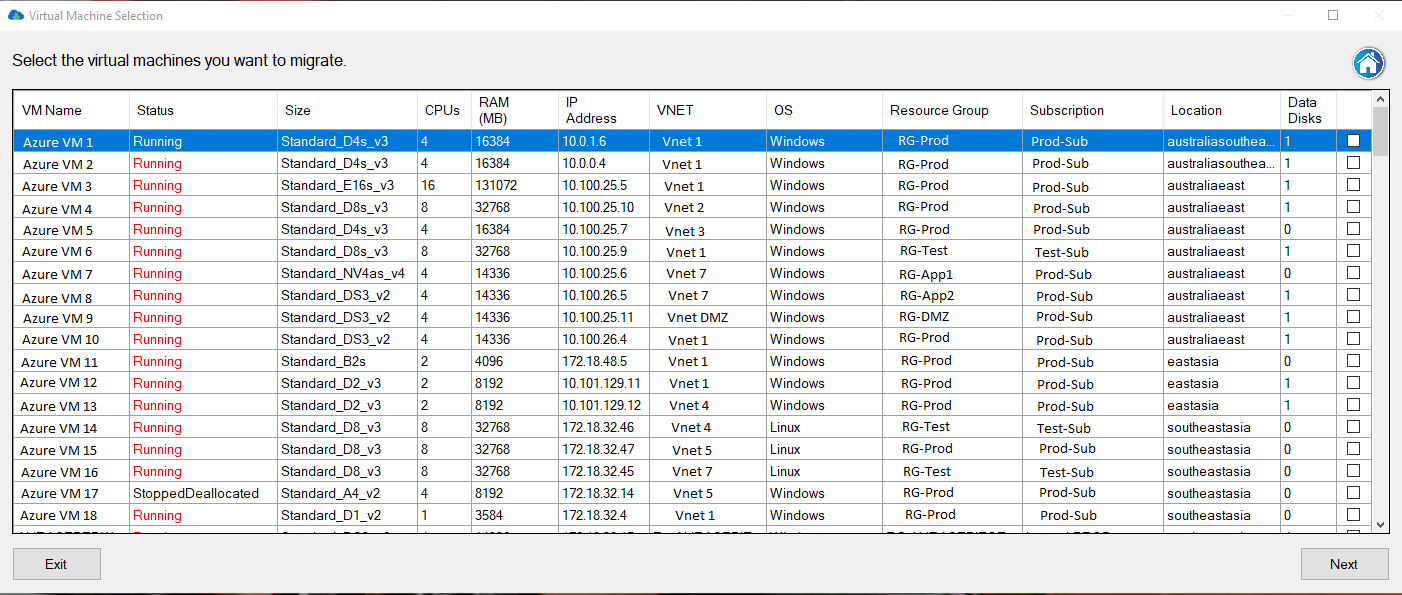
Comprehensive VM Management

Carbon’s comprehensive VM management is one of its key features. With Carbon, users gain a detailed understanding of their Azure VMs – including VM name, status, size, number of CPUs, memory allocation, IP address, VNET, operating system, resource group, subscription name, location, and more. This detailed information aids users in making informed decisions about which VMs to migrate and how best to configure them in their on-premise environment.

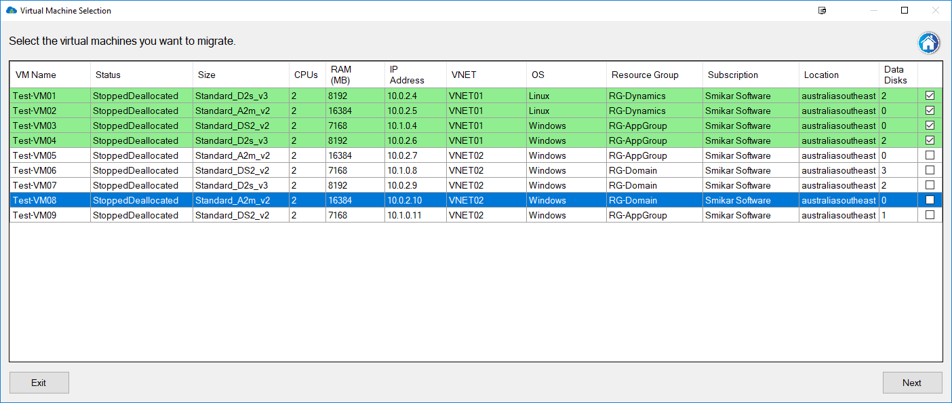
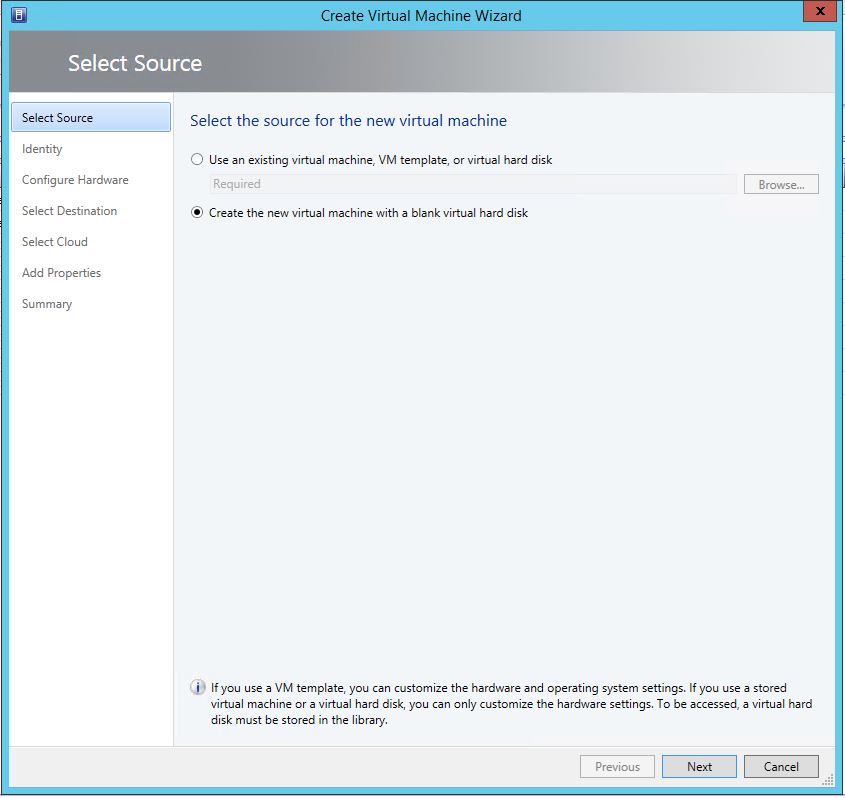
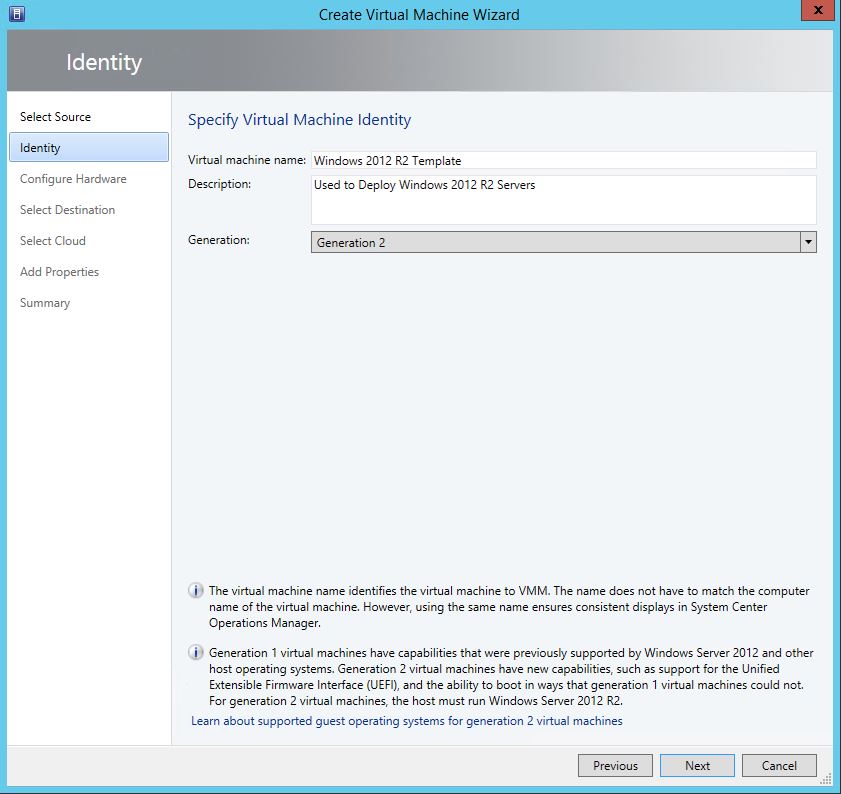
Easy Migration and Conversion Process

One of Carbon’s greatest strengths is its ability to simplify the migration and conversion process. By integrating seamlessly with VMware or Hyper-V environments, Carbon enables users to replicate and convert their Azure VMs to their chosen on-premise hypervisor with just a few clicks. The software sets up replicated Azure VMs with the same CPU, memory, and disk configurations, ensuring a smooth transition back to the on-premise environment.

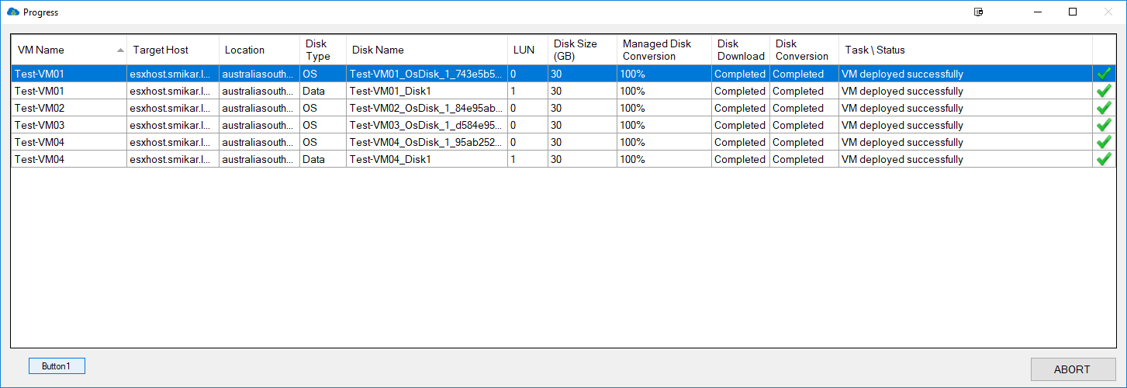
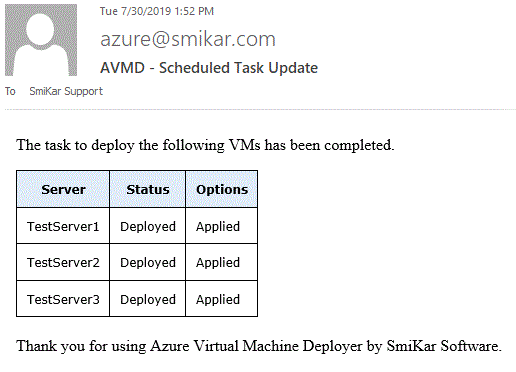
Automatic Configuration and Email Notifications

To help users stay informed about the progress of their migration, Carbon offers automatic configuration and email notifications. These notifications can alert users to any changes in their VMs’ status, allowing them to monitor the migration process more effectively.

Customizable User Interface

Recognizing that each user has unique preferences, Carbon provides a customizable interface that allows users to adjust settings to suit their needs. Whether users prefer a particular hypervisor, datastore, or Azure subscription, Carbon offers the flexibility to accommodate these preferences, making the migration process as straightforward and user-friendly as possible.


Carbon Azure VM Selection Screen

How Carbon Streamlines Cloud Reverse Migration

Carbon’s streamlined process for migrating Azure VMs back to on-premise infrastructure has brought ease and simplicity to a typically complex task. By providing detailed VM information, an easy-to-navigate migration process, automatic configuration, and email notifications, along with a customizable interface, Carbon enables businesses to execute a smooth and successful cloud reverse migration.

 Conclusion

Cloud reverse migration is a growing trend among businesses seeking to address cloud computing’s limitations. Whether driven by financial considerations, data security and control concerns, performance issues, or regulatory compliance, the move towards cloud repatriation has become an increasingly viable option for many organizations. With tools like SmiKar’s Carbon, this process is made significantly more manageable, providing businesses with a path to successfully navigate their journey back to on-premise infrastructure.

Reverse Cloud Migration FAQs

NumberQuestionAnswer
1What is Cloud Reverse Migration?Cloud Reverse Migration, also known as Cloud Repatriation, is the process of moving data, operations, applications, or services from a cloud environment back to its original on-premise location or to a private data center.
2Why are businesses opting for Cloud Repatriation?Businesses are opting for Cloud Repatriation for several reasons. These can include financial considerations, data security and control, performance and latency issues, and regulatory compliance concerns.
3What are some common issues businesses face with cloud-based solutions?Common issues include unexpected costs, lack of control over data security, performance issues especially with applications that require real-time data processing and low latency, and compliance issues in industries with strict data regulations.
4How can Cloud Reverse Migration address these issues?Cloud Reverse Migration allows businesses to regain control over their data, potentially reduce costs, improve application performance, and ensure compliance with industry regulations.
5What is Carbon and how does it support Cloud Reverse Migration?Carbon is a reverse cloud migration tool. It streamlines the process of migrating Azure Virtual Machines (VMs) back to an on-premise environment, either on VMware or Hyper-V. It offers comprehensive VM management, easy migration and conversion, automatic configuration and email notifications, and a customizable user interface.
6What are the key features of Carbon for cloud reverse migration?Key features of Carbon include comprehensive VM management, simplified migration and conversion process, automatic configuration and email notifications, and a customizable user interface to adjust settings to user preferences.
7How does Carbon ease the process of cloud reverse migration?Carbon eases the process of cloud reverse migration by offering a detailed view of Azure VMs, enabling seamless migration and conversion, providing automatic notifications about the migration process, and allowing users to customize the software to their preferences.
8What types of businesses can benefit from using Carbon for Cloud Reverse Migration?Businesses of all sizes and across various sectors can benefit from Carbon, especially those looking to move their Azure VMs back to on-premise environments due to financial, security, performance, or compliance reasons.
9How does Carbon ensure a seamless transition from the cloud to on-premise environments?Carbon ensures a seamless transition by integrating with your on-premise VMware or Hyper-V environments. It replicates and converts Azure VMs to the chosen on-premise hypervisor, maintaining the same CPU, memory, and disk configurations.
10Can Carbon assist in managing costs during Cloud Reverse Migration?By providing comprehensive details about Azure VMs and offering a simplified migration process, Carbon can help businesses make informed decisions, potentially helping to manage costs associated with Cloud Reverse Migration.
How to Schedule Azure VM Deployment – Step-by-Step Guide

How to Schedule Azure VM Deployment – Step-by-Step Guide

How to schedule the deployment of Azure VMs

Automate Azure VM Deployment

If you need to schedule the regular deployment of your Azure VMs, you can do this easily with one of our Azure tools, AVMD (Azure VM Deployer). With the Azure VM deployer you can deploy single and multiple Virtual Machines quickly, easily and repeatably.

AVMD is completely FREE, you can download it from here and start using it right away.

Hopefully you have AVMD all setup and an azure admin account with the appropriate permissions to your Azure tenant to start the scheduled deployment of your Azure VMs.

Azure VM Deployment Use Cases

Use CaseDescription

Dev/Test Environments

Scheduling Azure VM deployment for development and testing environments allows for efficient use of resources by creating and deleting VMs as needed. For example, a development team might schedule VM deployment during business hours and delete them at the end of the day to avoid wasting resources.

Batch Processing

Scheduling Azure VM deployment for batch processing can help optimize resource utilization by only creating VMs when needed. This can be particularly useful for applications that require large amounts of compute resources for short periods of time, such as data analysis or video encoding.

Disaster Recovery

Scheduling Azure VM deployment for disaster recovery can help ensure that backup VMs are always available and up-to-date. This can be critical in the event of a system failure or other outage.

Scheduled Maintenance

Scheduling Azure VM deployment for scheduled maintenance can help minimize the impact of maintenance on users by automatically redirecting traffic to other VMs while maintenance is performed.

High Availability

Scheduling Azure VM deployment for high availability can help ensure that VMs are always available to users. This can be achieved by automatically creating new VMs when existing ones fail or become unavailable.

Cost Optimization

Scheduling Azure VM deployment can help optimize costs by only creating VMs when they are needed, and deleting them when they are no longer needed. This can be particularly useful for organizations that have variable workloads or need to closely manage their cloud spend.

Launch the Azure VM Deployer

To start automating and scheduling deployment of your Azure VMS, simply open up Azure VM Deployer and let is synchronise with your Azure environment.

Schedule Azure VM Deployment


Scan your Azure Tenancy First

First, ensure that you have the AVMD tool downloaded and set up on your machine. You’ll also need an Azure admin account with the necessary permissions to your Azure tenant to deploy VMs. Once you’re ready to begin, launch the Azure VM Deployer and allow it to synchronize with your Azure environment.

Azure VM Deployment Settings

  • You can now start filling out all the settings to deploy your VMs to your Azure subscription.
    Provide a Name for your Virtual Server
    Choose the Servers Operating System
    Azure Subscription
    Azure Availability Zone Location
    Azure Resource Group
    Choose the Azure Virtual Machine size
    Provide a local Administrator account and password
    Join the VM automatically a domain (You will need an account with Domain Join Permissions)
    Which Azure Storage account you wish to deploy the VM to
    Any additional disks you want to add to the VM during deployment
    The Azure vNet and Subnet
    Further additional options if you want VM diagnostics, Azure Log Analytics, a Basic NSG, Public IP, Azure Resource Tags and finally if you want to shutdown the VM post deployment.Click Add to queue when you have filled out all the Azure VM details and it will populate these settings to the Deployment Queue.

Schedule Azure VM Deployment Selection

Provide a name for your Azure VM

For any additional VMs, keep filling out the details and add them to the queue too. If the servers are all the same type and settings you just need to update the server name before adding them to the deployment queue.

Schedule Azure VM Deployment Server

Azure VM Details

Now when you have added all the Virtual Machines you wish to deploy to Azure you are now ready to start deployment, but you may want to just confirm that your VM settings are correct. Simply right click the blue icon next to each Virtual Machine in the Deployment Queue and choose Show Details

Schedule Azure VM Deployment Server Overview 2

Azure VM Deployment Schedule Creation

Now lets start the deployment of your Azure Virtual Machines. Click the DEPLOY button in the bottom left hand corner and you are now presented with the options to deploy right now or schedule the VM deployment of your Azure VMs.

  1. Schedule Azure VM Deployment Now

Azure VM New Deployment Schedule

In this example we will schedule the deployment of the Azure VMs, so click on schedule, then on OK to start the schedule creation.

Schedule Azure VM Deployment 3

Azure VM New Deployment Schedule

We are now prompted to create the schedule to deploy your Azure Virtual Machines, click on New.

Schedule Azure VM Deployment New

Scheduled Deployment Execution

In this example we will schedule the deployment of the Azure VMs, so click on schedule, then on OK to start the schedule creation.

Schedule Azure VM Deployment 3

Schedule Creation

We are now prompted to create the schedule to deploy your Azure Virtual Machines, click on New.

Schedule Azure VM Deployment New

Schedule Settings

Simply put in the date and time you wish for your Azure VMs to deploy at then click OK. (You can set to schedule this once off, or a reoccurring daily, weekly or monthly schedule.)

Schedule Azure VM Deployment Trigger

Schedule Date and Time Settings

Confirm that the date and time you want to schedule the VMs for deployment to your Azure subscription is correct.

Schedule Azure VM Deployment Trigger 2

Confirm the Schedule is Correct

Click on OK in the scheduler window and the deployment task is now confirmed.

Schedule Azure VM Deployment confirmed

Scheduled Deployment is underway

My scheduled deployment has now kicked off and we can see in my Azure Portal that the machines are now deploying.

Schedule Azure VM Deployment Creation

Scheduled Deployment Alerting

If you had set up your email alerts, you will receive an email letting you know that your VMs have now deployed to Azure.

Schedule Azure VM Deployment Finished Email


  1. After some time your Azure Virtual Machines should have now deployed. As seen in the Azure Portal I can see that our Azure VMs are up and running, in the correct resource group, Azure Subscription and Azure Location.Schedule Azure VM Deployment Complete


Dont forget that the Azure VM Deployer is completely free and one of our Azure Management Tools.

Azure VMs are now deployed

After some time your Azure Virtual Machines should have now deployed. As seen in the Azure Portal I can see that our Azure VMs are up and running, in the correct resource group, Azure Subscription and Azure Location.

Schedule Azure VM Deployment Complete

Dont forget that the Azure VM Deployer is completely free and one of our Azure Management Tools.

Azure FAQs

QuestionAnswer

What is Azure VM deployment?

Azure VM deployment is the process of creating and managing virtual machines in the Microsoft Azure cloud platform.

What are the benefits of using Azure VMs?

Azure VMs offer a wide range of benefits, including scalability, flexibility, security, and cost-effectiveness.

How do I create a new Azure VM?

You can create a new Azure VM through the Azure portal, Azure CLI, or Azure PowerShell.

What operating systems are supported on Azure VMs?

Azure VMs support a wide range of operating systems, including Windows Server, Linux, and various distributions of Unix.

What are the different VM sizes available in Azure?

Azure offers a variety of VM sizes, ranging from small, low-cost instances to large, high-performance instances.

How can I manage and monitor my Azure VMs?

You can manage and monitor your Azure VMs through the Azure portal, Azure CLI, or Azure PowerShell, as well as third-party tools such as Azure Monitor and Azure Log Analytics.

What are availability sets in Azure VM deployment?

Availability sets are used to ensure high availability for VMs by distributing them across multiple physical servers in a data center.

How can I secure my Azure VMs?

You can secure your Azure VMs through a variety of measures, including network security groups, firewall rules, and encryption.

What is Azure Site Recovery and how does it work with VMs?

Azure Site Recovery is a disaster recovery solution that can be used to replicate and recover VMs in the event of a site outage or other disaster.

How can I optimize the performance of my Azure VMs?

You can optimize the performance of your Azure VMs through various means, such as selecting the appropriate VM size, optimizing disk performance, and using caching.

MICROSOFT’S December 2016 PATCH RELEASES

MICROSOFT’S December 2016 PATCH RELEASES

MICROSOFT’S December 2016 PATCH RELEASES

patch tuesday aliens

Microsoft have released 12 new Patch Tuesday releases for deployment this month of December.

See how you can remove the risk of patch deployment by adding SnaPatch to your SCCM patching infrastructure?

MS16-144 – Critical

Cumulative Security Update for Internet Explorer (3204059)
This security update resolves vulnerabilities in Internet Explorer. The most severe of the vulnerabilities could allow remote code execution if a user views a specially crafted webpage using Internet Explorer. An attacker who successfully exploited the vulnerabilities could gain the same user rights as the current user. If the current user is logged on with administrative user rights, an attacker could take control of an affected system. An attacker could then install programs; view, change, or delete data; or create new accounts with full user rights.

MS16-145 – Critical

Cumulative Security Update for Microsoft Edge (3204062)
This security update resolves vulnerabilities in Microsoft Edge. The most severe of the vulnerabilities could allow remote code execution if a user views a specially crafted webpage using Microsoft Edge. An attacker who successfully exploited the vulnerabilities could gain the same user rights as the current user. Customers whose accounts are configured to have fewer user rights on the system could be less impacted than users with administrative user rights.

MS16-146 – Critical

Security Update for Microsoft Graphics Component (3204066)
This security update resolves vulnerabilities in Microsoft Windows. The most severe of the vulnerabilities could allow remote code execution if a user either visits a specially crafted website or opens a specially crafted document. Users whose accounts are configured to have fewer user rights on the system could be less impacted than users who operate with administrative user rights.

MS16-147 – Critical

Security Update for Microsoft Uniscribe (3204063)
This security update resolves a vulnerability in Windows Uniscribe. The vulnerability could allow remote code execution if a user visits a specially crafted website or opens a specially crafted document. Users whose accounts are configured to have fewer user rights on the system could be less impacted than users who operate with administrative user rights.

MS16-148 – Critical

Security Update for Microsoft Office (3204068)
This security update resolves vulnerabilities in Microsoft Office. The most severe of the vulnerabilities could allow remote code execution if a user opens a specially crafted Microsoft Office file. An attacker who successfully exploited the vulnerabilities could run arbitrary code in the context of the current user. Customers whose accounts are configured to have fewer user rights on the system could be less impacted than those who operate with administrative user rights.

MS16-149 – Important

Security Update for Microsoft Windows (3205655)
This security update resolves vulnerabilities in Microsoft Windows. The more severe of the vulnerabilities could allow elevation of privilege if a locally authenticated attacker runs a specially crafted application.

MS16-150 – Important

Security Update for Secure Kernel Mode (3205642)
This security update resolves a vulnerability in Microsoft Windows. The vulnerability could allow elevation of privilege if a locally-authenticated attacker runs a specially crafted application on a targeted system. An attacker who successfully exploited the vulnerability could violate virtual trust levels (VTL).

MS16-151 – Important

Security Update for Windows Kernel-Mode Drivers (3205651)
This security update resolves vulnerabilities in Microsoft Windows. The vulnerabilities could allow elevation of privilege if an attacker logs on to an affected system and runs a specially crafted application that could exploit the vulnerabilities and take control of an affected system.

MS16-152 – Important

Security Update for Windows Kernel (3199709)
This security update resolves a vulnerability in Microsoft Windows. The vulnerability could allow information disclosure when the Windows kernel improperly handles objects in memory.

MS16-153 – Important

Security Update for Common Log File System Driver (3207328)
This security update resolves a vulnerability in Microsoft Windows. The vulnerability could allow information disclosure when the Windows Common Log File System (CLFS) driver improperly handles objects in memory. In a local attack scenario, an attacker could exploit this vulnerability by running a specially crafted application to bypass security measures on the affected system allowing further exploitation.

MS16-154 – Critical

Security Update for Adobe Flash Player (3209498)
This security update resolves vulnerabilities in Adobe Flash Player when installed on all supported editions of Windows 8.1, Windows Server 2012, Windows Server 2012 R2, Windows RT 8.1, Windows 10, and Windows Server 2016.

MS16-155 – Important

Security Update for .NET Framework (3205640)
This security update resolves a vulnerability in Microsoft .NET 4.6.2 Framework’s Data Provider for SQL Server. A security vulnerability exists in Microsoft .NET Framework 4.6.2 that could allow an attacker to access information that is defended by the Always Encrypted feature.


Now that you have made it this far, a quick shameless plug for our software portfolio. 🙂

SnaPatch – Patch Management Addon for Microsoft’s SCCM.

SnapShot Master – Take control of your virtual machine snapshots, works with both Hyper-V and Vmware.

Azure Virtual Machine Scheduler – Save money and schedule the shutdown and power on of your virtual machines within Microsoft’s Azure Cloud.

Azure Virtual Machine Deployer – Deploy VMs to Microsoft’s Azure cloud easily, without the need for powershell.

MICROSOFT’S November 2016 PATCH RELEASES

MICROSOFT’S November 2016 PATCH RELEASES

MICROSOFT’S November 2016 PATCH RELEASES

Make Patching Great Again

Microsoft have released 14 new Patch Tuesday releases for deployment this month of November.

See how you can remove the risk of patch deployment by adding SnaPatch to your SCCM patching infrastructure?

MS16-129 – Critical

Cumulative Security Update for Microsoft Edge (3199057)
This security update resolves vulnerabilities in Microsoft Edge. The most severe of the vulnerabilities could allow remote code execution if a user views a specially crafted webpage using Microsoft Edge. An attacker who successfully exploited the vulnerabilities could gain the same user rights as the current user. Customers whose accounts are configured to have fewer user rights on the system could be less impacted than users with administrative user rights.

MS16-130 – Critical

Security Update for Microsoft Windows (3199172)
This security update resolves vulnerabilities in Microsoft Windows. The most severe of the vulnerabilities could allow remote code execution if a locally authenticated attacker runs a specially crafted application.

MS16-131 – Critical

Security Update for Microsoft Video Control (3199151)
This security update resolves a vulnerability in Microsoft Windows. The vulnerability could allow remote code execution when Microsoft Video Control fails to properly handle objects in memory. An attacker who successfully exploited the vulnerability could run arbitrary code in the context of the current user. However, an attacker must first convince a user to open either a specially crafted file or a program from either a webpage or an email message.

MS16-132 – Critical

Security Update for Microsoft Graphics Component (3199120)
This security update resolves vulnerabilities in Microsoft Windows. The most severe being of the vulnerabilities could allow a remote code execution vulnerability exists when the Windows Animation Manager improperly handles objects in memory if a user visits a malicious webpage. An attacker who successfully exploited the vulnerability could install programs; view, change, or delete data; or create new accounts with full user rights.

MS16-133 – Important

Security Update for Microsoft Office (3199168)
This security update resolves vulnerabilities in Microsoft Office. The most severe of the vulnerabilities could allow remote code execution if a user opens a specially crafted Microsoft Office file. An attacker who successfully exploited the vulnerabilities could run arbitrary code in the context of the current user. Customers whose accounts are configured to have fewer user rights on the system could be less impacted than those who operate with administrative user rights.

MS16-134 – Important

Security Update for Common Log File System Driver (3193706)
This security update resolves vulnerabilities in Microsoft Windows. The vulnerability could allow elevation of privilege when the Windows Common Log File System (CLFS) driver improperly handles objects in memory. In a local attack scenario, an attacker could exploit these vulnerabilities by running a specially crafted application to take complete control over the affected system. An attacker who successfully exploits this vulnerability could run processes in an elevated context.

MS16-135 – Important

Security Update for Windows Kernel-Mode Drivers (3199135)
This security update resolves vulnerabilities in Microsoft Windows. The most severe of the vulnerabilities could allow elevation of privilege if an attacker logs on to an affected system and runs a specially crafted application that could exploit the vulnerabilities and take control of an affected system.

MS16-136 – Important

Security Update for SQL Server (3199641)
This security update resolves vulnerabilities in Microsoft SQL Server. The most severe vulnerabilities could allow an attacker could to gain elevated privileges that could be used to view, change, or delete data; or create new accounts. The security update addresses these most severe vulnerabilities by correcting how SQL Server handles pointer casting.

MS16-137 – Important

Security Update for Windows Authentication Methods (3199173)
This security update resolves vulnerabilities in Microsoft Windows. The more severe of the vulnerabilities could allow elevation of privilege. To exploit this vulnerability, the attacker would first need to authenticate to the target, domain-joined system using valid user credentials. An attacker who successfully exploited this vulnerability could elevate their permissions from unprivileged user account to administrator. The attacker could then install programs; view, change or delete data; or create new accounts. The attacker could subsequently attempt to elevate by locally executing a specially crafted application designed to manipulate NTLM password change requests.

MS16-138 – Important

Security Update to Microsoft Virtual Hard Disk Driver (3199647)
This security update resolves vulnerabilities in Microsoft Windows. The Windows Virtual Hard Disk Driver improperly handles user access to certain files. An attacker could manipulate files in locations not intended to be available to the user by exploiting this vulnerability.

MS16-139 – Important

Security Update for Windows Kernel (3199720)
This security update resolves a vulnerability in Microsoft Windows. The vulnerability could allow elevation of privilege if an attacker runs a specially crafted application to access sensitive information. A locally authenticated attacker could attempt to exploit this vulnerability by running a specially crafted application. An attacker can gain access to information not intended to be available to the user by using this method.

MS16-140 – Important

Security Update for Boot Manager (3193479)
This security update resolves a vulnerability in Microsoft Windows. The vulnerability could allow security feature bypass if a physically-present attacker installs an affected boot policy.

MS16-141 – Critical

Security Update for Adobe Flash Player (3202790)
This security update resolves vulnerabilities in Adobe Flash Player when installed on all supported editions of Windows 8.1, Windows Server 2012, Windows Server 2012 R2, Windows RT 8.1, Windows 10, and Windows Server 2016.

MS16-142 – Critical

Cumulative Security Update for Internet Explorer (3198467)
This security update resolves vulnerabilities in Internet Explorer. The most severe of the vulnerabilities could allow remote code execution if a user views a specially crafted webpage using Internet Explorer. An attacker who successfully exploited the vulnerabilities could gain the same user rights as the current user. If the current user is logged on with administrative user rights, an attacker could take control of an affected system. An attacker could then install programs; view, change, or delete data; or create new accounts with full user rights.


Now that you have made it this far, a quick shameless plug for our software portfolio. 🙂

SnaPatch – Patch Management Addon for Microsoft’s SCCM.

SnapShot Master – Take control of your virtual machine snapshots, works with both Hyper-V and Vmware.

Azure Virtual Machine Scheduler – Save money and schedule the shutdown and power on of your virtual machines within Microsoft’s Azure Cloud.

Azure Virtual Machine Deployer – Deploy VMs to Microsoft’s Azure cloud easily, without the need for powershell.

Microsoft patches KB3177725 & KB3176493 causing printing issues

Microsoft patches KB3177725 & KB3176493 causing printing issues

Microsoft August Patch Tuesday Release Causes Printing Issues: How to Fix it

Are you experiencing printing problems on your Windows PC after installing the latest security updates from Microsoft? If yes, then you are not alone. Two recent patches released by Microsoft, KB3177725 and KB3176493, seem to be causing printing issues on multiple Windows versions. In this article, we will discuss the details of this issue and how to fix it.

What are KB3177725 and KB3176493?

KB3177725 and KB3176493 are two security updates released by Microsoft in its August Patch Tuesday Release. These updates were designed to patch security vulnerabilities that could allow remote code execution on Windows 7, 8, 8.1, 10, and server editions of their software, including Windows server 2008, 2008 R2, 2012, and 2012 R2.

STOP SIGN


What is the issue caused by these updates?

The issue caused by these updates is the inability to print more than one page at a time. Some users have reported that it corrupts all print jobs with an error. Initially, Microsoft claimed that the problem was due to incompatibility issues between Windows and Printer Drivers. However, the company later acknowledged that the issue was caused by these two updates.

Update

What is the fix for this issue?

UPDATE:  Previously we mentioned the only work around is to uninstall either or both KB3177725 and KB3176493.

Well Microsoft have come through and have released another patch that will fix the issues caused by these two security updates. KB3187022 – Print functionality is broken after any of the MS16-098 security updates are installed

Patch is available to download from the Microsoft site https://support.microsoft.com/en-us/kb/3187022

There has been other issues this month, caused by the August Security Patches. Microsoft Patch KB3179575 causing authentication issues with Windows 2012 servers and KB3176934 breaks Windows 10 Powershell

If you are a SnaPatch customer, you are in luck. SnaPatch allows you to quickly and easily roll back your virtual machines to the prior security update deployment snapshot, thereby avoiding further issues. To learn more about what SnaPatch offers and how it can help you avoid similar issues, click the link provided.

In conclusion, if you are experiencing printing issues on your Windows PC after installing the latest security updates from Microsoft, then you are not alone. The patches causing these problems are KB3177725 and KB3176493. However, Microsoft has released a fix for this issue in the form of KB3187022. We recommend that you download and install this patch to resolve the issue.

SnaPatch Home Screen


How to Create a Hyper-V Template for Deployment

How to Create a Hyper-V Template for Deployment

Revolutionizing Document Archiving for SharePoint Online

How to Create a Hyper-V Template for Deployment

If you ever need to deploy Virtual Machines often a great time saving way is to create a VM Template for quick and easy deployment.

The main reason for creating a Hyper-V Template is to save time and effort when deploying Virtual Machines. By having a standardised and consistent configuration, deploying a new VM becomes a streamlined process that can be accomplished quickly and easily. This also reduces the chances of human error and helps ensure that all VMs deployed from the template have the same configuration, reducing the need for manual intervention and troubleshooting. Additionally, using a template helps enforce best practices and promotes standardisation across an organisation, improving the overall management and efficiency of the virtual infrastructure.

VM templates give you the advantage of a consistent configuration that is standardised format that is reusable.

To create a Hyper-V VM Template follow these steps;

What Are Hyper-V Templates?

A Hyper-V template is a pre-configured virtual machine (VM) that can be used to quickly create new VMs with identical configurations. Templates can include operating systems, applications, settings, and configurations. This means that you can deploy new VMs with just a few clicks, without having to manually install and configure each one.

Why Use Hyper-V Templates?

Using Hyper-V templates can save time and effort when deploying new VMs. Instead of creating each VM manually, you can simply select a pre-configured template that meets your needs. This can be especially useful for creating multiple VMs with identical configurations, such as in a test environment or for a specific application.

Templates also ensure consistency and standardization across your virtual infrastructure. By using the same template for each new VM, you can ensure that each VM has the same configuration and settings. This can make it easier to manage and troubleshoot your virtual infrastructure.

Hyper-V Template Benefits

There are several benefits to creating a Hyper-V template, including:

  1. Consistency and Standardization: By creating a Hyper-V template, administrators can ensure that all virtual machines (VMs) created from the template have a consistent configuration and operating system setup. This can help to reduce administrative overhead and minimize the risk of configuration errors.
  2. Faster Deployment: Creating a Hyper-V template allows administrators to deploy new VMs much faster compared to manually installing the operating system and configuring the necessary software on each individual VM.
  3. Reduced Storage Requirements: Hyper-V templates are stored as a single VHD (virtual hard disk) file, which can be much more efficient in terms of storage compared to storing multiple VMs each with their own VHD file.
  4. Increased Scalability: By using a Hyper-V template, administrators can quickly and easily create new VMs as needed to support business growth and changing requirements.
  5. Improved Disaster Recovery: With a Hyper-V template in place, administrators can quickly recreate VMs in the event of a disaster, reducing downtime and minimizing the impact on the business.
  6. Enhanced Security: By using a Hyper-V template, administrators can enforce security policies and configuration standards for all VMs created from the template, helping to maintain a secure computing environment.
  7. Improved Compliance: For organizations that must comply with industry or regulatory standards, using a Hyper-V template can help ensure that all VMs meet the necessary requirements.

Open System Centre Virtual Machine Manager

Open your SCVMM (Microsoft System Centre Virtual Machine Manager) console, click Hosts then Right Click and choose Create Virtual Machine.


Create HyperV Template

Create Virtual Machine Wizard

 Next, the Create Virtual Machine Wizard will start up. Choose Create the new virtual machine with a blank virtual hard disk and click Next.


Create HyperV Template 2

Create Virtual Machine Wizard

Now we need to give the VM a name and description. In this example I am using the Windows 2012 R2 operating system so the name and description are shown as such. As the Hyper-V host is Windows 2012 R2 as well, I can choose either Generation 1 or Generation 2 VM. Generation 2 VMs add the following new functionality;

  • PXE boot by using a standard network adapter
  • Boot from a SCSI virtual hard disk
  • Boot from a SCSI virtual DVD
  • Secure Boot (enabled by default)
  • UEFI firmware support

Create HyperV Template 14

Edit Virtual Machine Hardware Configuration

We can now edit the VMs hardware configuration. Choose the appropriate hardware settings you wish, make sure to have selected your installation media and then selected Hyper-V for compatibility and click on Next

Create HyperV Template 4

Choose where your Hyper-V VM Destination

Select the Destination where the VM will reside.

Create HyperV Template 5

Select your Hyper-V Host

Now Select the Host to deploy to and then click Next.


Create HyperV Template6

Select your Hyper-V Host

 On the Configure Settings tab, choose the location where the VM will keep its virtual hard disk and then click Next.

Create HyperV Template 7

Configure your Hyper-V Template Settings

 On the Configure Settings tab, choose the location where the VM will keep its virtual hard disk and then click Next.

Create HyperV Template 7

Choose your network adapter

Select the appropriate network, adapter and virtual switch then click Next.

Create HyperV Template 8

Template Hardware Options

You can now choose a few options including if you wish to Turn the machine on automatically and specify the operating system that you will install.

Create HyperV Template 9

Ready to create the Hyper-V Template

Check that the settings are correct, and when you are ready to, click Create.


Create HyperV Template 10

Power On the Hyper-V Template

Now power on the VM if you have done so already, and install the operating system of your choice

Create HyperV Template 11

Power On the Hyper-V Template

Now once you have installed the Windows Operating System, do not join the domain. Log on to the VM, open a command prompt and go to the Windows, System32, Sysprep folders then run sysprep.exe

Sysprep (System Preparation) is a Microsoft utility tool designed for system administrators to automate the deployment of Windows operating systems. It is used to prepare an operating system for disk cloning or for delivery to end-users.

Sysprep performs several key tasks, including:

  1. Generalizing the system: Sysprep removes specific information from the Windows installation that is unique to the system, such as the security identifier (SID), computer name, and drivers.
  2. Configuring the Windows Security settings: Sysprep can reset security settings to default settings, ensuring that all new installations of the operating system will have the same security settings.
  3. Removing the activation files: Sysprep can remove activation files, allowing the cloned operating system to be activated on a new computer.
  4. Shutting down the system: After preparing the operating system, Sysprep shuts down the computer, making it ready for disk imaging or delivery to an end-user.

Sysprep is a critical component in the deployment of Windows operating systems and is an essential tool for system administrators. It enables them to efficiently and easily deploy operating systems to multiple computers, ensuring that each installation is fully configured and ready to use.


Create HyperV Template 12

Power On the Hyper-V Template

You will now be presented with the System Preparation tool. Make sure to check the Generalize checkbox as well as Shutdown in the shutdown options dropdown then click OK.

Once the system has been prepared, the VM will power off.

Create HyperV Template 13

Power On the Hyper-V Template

 Now that the VM has powered off, we need to convert it to a template. Highlight the powered off VM, right click and then Create and Create VM template to start the wizard.

HyperV Create VM Template

Hyper-V Template Creation Warning

Next a warning is shown that you are about to convert this VM to a template. “Creating a template will destroy the source virtual machine “vm name”. The virtual hard disk of the virtual machine will be generalized to create the new template and any user data of the virtual machine may be lost. To prevent this, you can create a clone of “vm name”  before using it to create a template. 

Make sure you understand what you are committing this VM to and click Yes to continue.

Create HyperV Template 17

Create Hyper-V Template Wizard Starts

Now the Create VM Template Wizard starts. Give the template a name and description then click Next.

Create HyperV Template 18

Confirm Template Hardware Configuration

Check you are happy with the hardware configuration then click Next.

Create HyperV Template 19

Configure Operating System Settings

The Configure Operating System Tab we can change settings for the OS. Time Zones, whether you wish it to join a domain automatically or not, and any additional Operating System Roles or Features you wish can be configured here. Change what you need and then click Next.

Create HyperV Template 20

Choose a Server Library

On the Select Library Server tab, choose one of your library servers and choose Next.

HyperV Create VM Template 22

Choose a Server Library

Select the UNC Path location for the files to save to. Be mindful that other Hyper-V servers within your environment will require access to this folder.

Create HyperV Template 23

Choose a Server Library

Finally, on the Summary Tab, you can view the script details to see the settings you have chosen. Confirm you are happy with the settings then click on Create. 

Create HyperV Template 24

Thats all there is to it. Your SCVMM and Hyper-V environment should now be preparing the selected VM and converting it to a template for consistent deployment to your virtual environment.

Hyper-V templates can be a valuable tool for businesses looking to streamline their virtual infrastructure. By creating pre-configured templates, you can save time and effort when deploying new VMs, ensure consistency and standardization, and make it easier to manage your virtual infrastructure. By following best practices for managing templates, you can ensure that your virtual infrastructure is efficient, reliable, and scalable.

FAQ about Hyper-V templates

  1. What is a Hyper-V template?
    A Hyper-V template is a pre-configured virtual machine image used as a starting point for creating new virtual machines. It allows administrators to standardize virtual machine configurations, reducing the time and effort required to deploy new virtual machines.
  2. How do I create a Hyper-V template?
    To create a Hyper-V template, you need to create a new virtual machine and configure it as desired. Then, shut down the virtual machine and convert it to a template. This can be done through the Hyper-V Manager or through PowerShell.
  3. What are the benefits of using a Hyper-V template?
    The benefits of using a Hyper-V template include reduced deployment time, standardization of virtual machine configurations, and the ability to easily update virtual machines. Templates also allow administrators to quickly deploy new virtual machines, reducing the risk of human error.
  4. What should I include in my Hyper-V template?
    Your Hyper-V template should include all of the necessary software and configurations for your virtual machines. This might include operating systems, applications, security updates, and network configurations.
  5. Can I use a Hyper-V template for different types of virtual machines?
    Yes, Hyper-V templates can be used for different types of virtual machines, including domain controllers, file servers, and web servers.
  6. How do I update a Hyper-V template?
    To update a Hyper-V template, you need to update the virtual machine that the template is based on. After making the desired updates, shut down the virtual machine and then update the template.
  7. What are the limitations of using a Hyper-V template?
    The main limitation of using a Hyper-V template is that it only provides a starting point for virtual machines. Administrators still need to configure each virtual machine individually, as the template does not automatically configure unique settings such as IP addresses.
  8. What are some best practices for creating Hyper-V templates?
    Some best practices for creating Hyper-V templates include ensuring that all software and configurations are up-to-date, including only necessary software, and testing the template before deploying it to production. Additionally, it is important to regularly update templates to ensure that virtual machines are always running the latest software and configurations.