Configuration Manager 1606 Hotfix KB3180992
Configuration Manager 1606 Hotfix KB3180992
If you’re using System Center Configuration Manager (SCCM) and haven’t updated to build 5.00.8412.1204 yet, it’s time to do so. Microsoft has released a hotfix KB3180992 to fix various issues with SCCM. In this article, we’ll guide you through the installation process and explain how to fix the known issues that this hotfix addresses.
What’s New in SCCM 1606 Hotfix KB3180992
This hotfix addresses several known issues with SCCM, including:
- An exception error that occurs when selecting the “Update all clients in the hierarchy using production client” option on the Client Upgrade tab of Hierarchy Settings Properties.
- Software update installation freezing on SCCM clients.
- Inaccurate client counts on the Production and Preproduction Client Deployment dashboards.
- Incorrectly showing a state of Compliant on the Device Compliance section of the Software Center application.
- Incorrectly showing an error state that indicates the role is not available on the Service Connection Point after upgrading to version 1606.
- The SMS Agent Host process consuming excessive CPU resources on Pull Distribution Points after updating to version 1606.
- The ccmexec.exe process stopping responding when distributing a software update package containing many updates to a Pull Distribution Point.
SCCM 1606 Hotfix FAQ
| Question | Answer |
|---|---|
What is System Centre Configuration Manager? |
System Centre Configuration Manager (SCCM) is a software management tool that allows administrators to manage large numbers of computers and devices from a single location. |
What is Configuration Manager 1606 Hotfix KB3180992? |
Configuration Manager 1606 Hotfix KB3180992 is an update for SCCM that fixes various issues identified with SCCM, including a freeze during software update installation and inaccurate client counts. |
How do I install Configuration Manager 1606 Hotfix KB3180992? |
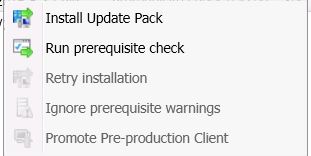
To install this update, go to Administration, then expand Cloud Services and highlight Updates and Servicing. In the main console window, you should see the SCCM 1606 Hotfix has downloaded and is available for deployment. Highlight the update (KB3180992), right-click, then run the prerequisite pack. This will now check that your SCCM meets the prerequisites for this update. Once the prerequisite check has completed, highlight the update once again, right-click, and choose Install Update Pack. |
What should I do if the Service Connection Point incorrectly shows an error state after upgrading to version 1606? |
If the Service Connection Point is already showing an error state after upgrading to version 1606, you need to change the Availability State registry value from 1 to 4 under HKEY_LOCAL_MACHINE-SOFTWARE-Microsoft-SMS-Operations Management-SMS Server Role-SMS Dmp Connector, then restart the SMS Executive service on the site server. |
How do I validate the client update on my preproduction SCCM members? |
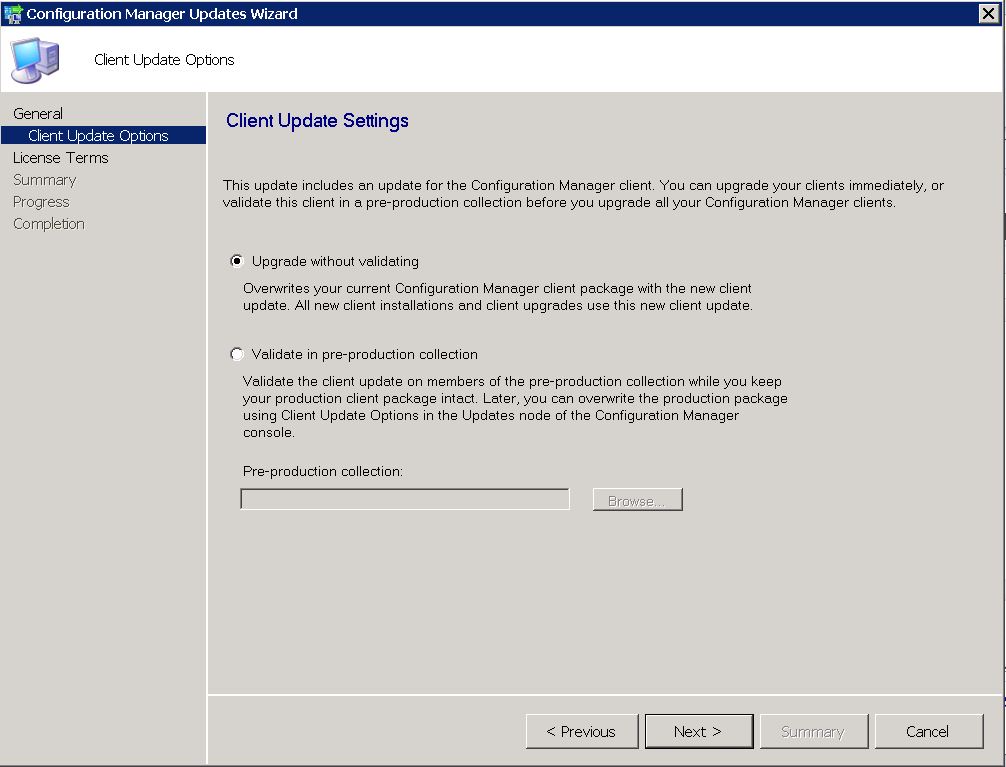
On the Client Update Options Tab of the Configuration Manager Updates Wizard, you have the chance to validate the client update on your preproduction SCCM members. Simply select the checkbox next to “Validate in pre-production collection” and choose the pre-production collection to use for validation. |
How long does it take to install SCCM 1606 Update 1? |
Installation of SCCM 1606 Update 1 may take some time, as it installs in the background. Keep refreshing the window to see when KB3180992 shows a status of installed. |
How to upgrade SCCM
To install this update, go to Administration, then expand Cloud Services and highlight Updates and Servicing.
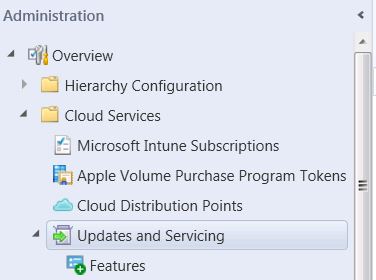
In the main console Window, you should now see the SCCM 1606 Hotfix has downloaded and is available for deployment.

Highlight the update (KB3180992), Right Click then Run Prerequisite Pack. This will now check that your SCCM meets the prerequisites for this update.

This may take some time, so be patient and be sure to refresh the console to make sure the prerequisite check has been successful.

Now that the prerequisite check has completed, highlight the update once again, right click and choose Install Update Pack
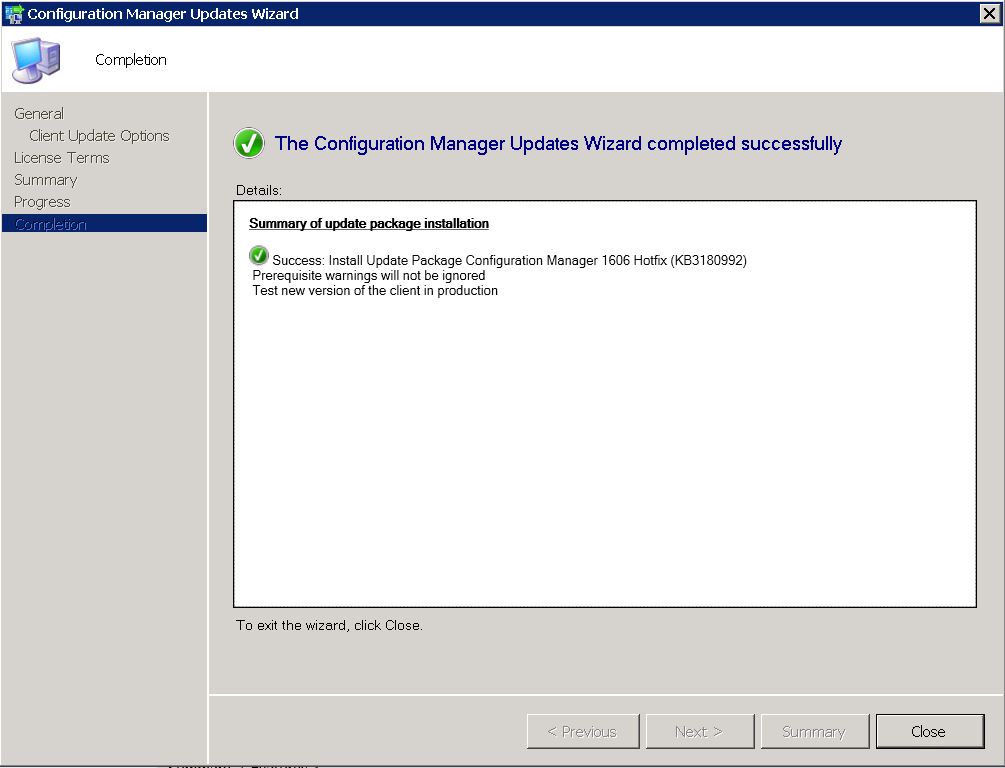
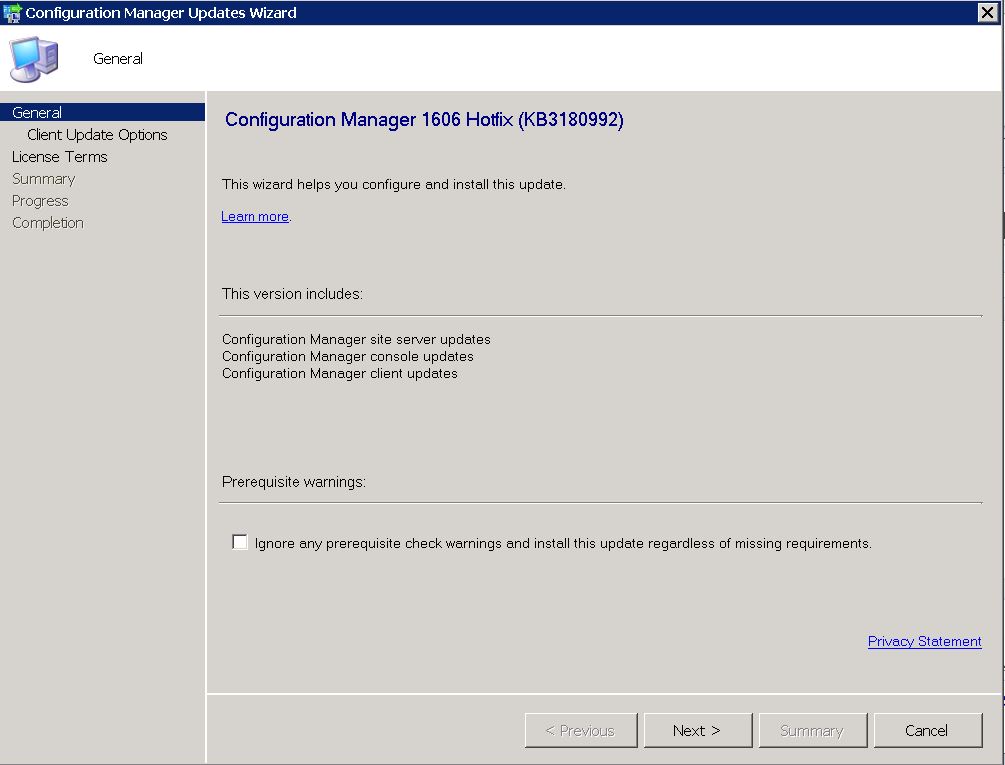
Next you are presented with the Configuration Manager Updates Wizard. Click on Next to start the installation.
On the Client Update Options Tab, you have the chance to validate the client update on your preproduction SCCM members. In this example, I am upgrading without validation.
Click Next to continue.
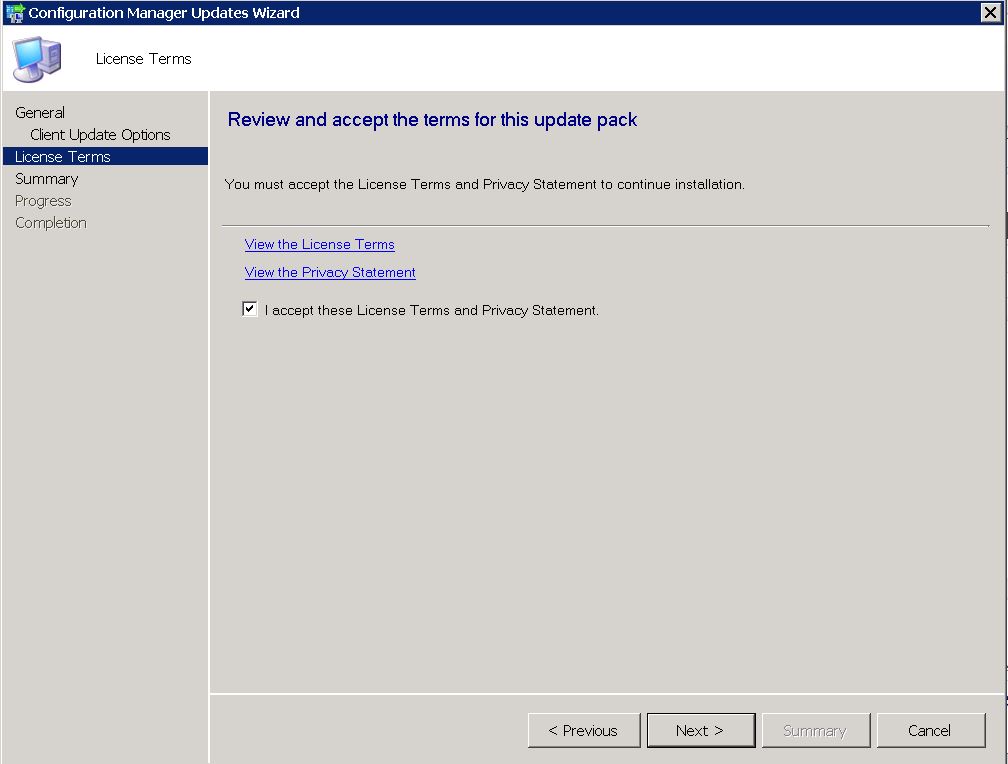
Accept the License Terms and click Next.
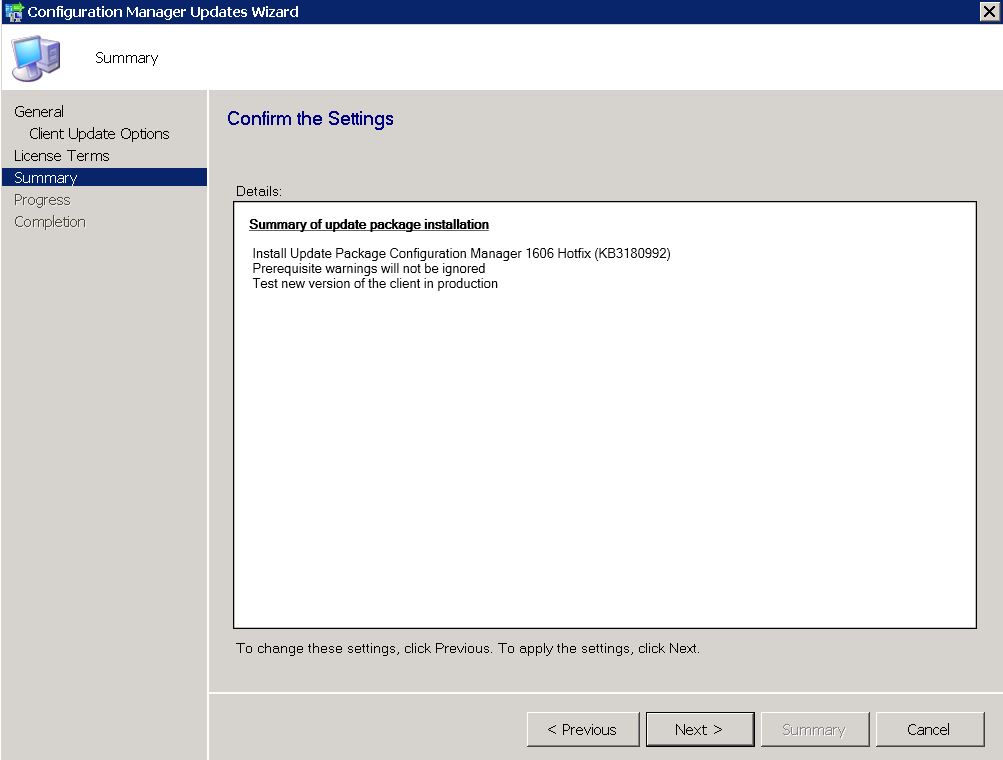
Review you are happy with the options you have selected on the Summary Tab, then click Next.
Installation of the SCCM 1606 Update 1 will now occur. If all goes well, you should see the Completion Window as below. SCCM will install this in the background, so it may take some time. Keep refreshing the Window, to see when KB3180992 shows a status of installed.