Snapshot before Patching

Snapshot before Patching

Automate Snapshot Creation Before Deployment

Reduce Patching Risks with SnaPatch

System administrators are responsible for ensuring the smooth functioning of their organization’s computer systems. They are the ones who deploy new software and updates, perform maintenance tasks, and troubleshoot any issues that arise. However, keeping these systems up-to-date can be a daunting task, especially when new updates and patches are released frequently. This is where taking a snapshot before patching comes into play.

A snapshot before patching is a crucial tool that system administrators can use to protect their systems from vulnerabilities. In this article, we will discuss why taking a snapshot before patching is essential and how it can help system administrators safeguard their systems.

What is a Snapshot Before Patching?

A snapshot before patching is a backup copy of your system’s current state. This copy can be used to restore your system to its previous state in case something goes wrong during the patching process. Taking a snapshot before patching ensures that you have a stable and reliable system to fall back on if the patching process fails.

Why is a Snapshot Before Patching Important?

Taking a snapshot before patching is essential for several reasons. Here are some of the main reasons why system administrators should make this a standard practice:

  1. Protects Against System Failure: Patching can sometimes cause system failures. Having a snapshot before patching ensures that you can quickly restore your system to its previous state in case of such failures.
  2. Provides a Safe Environment for Testing: Taking a snapshot before patching allows system administrators to test the patches in a safe environment. This ensures that any issues that arise during the testing process can be addressed before the patches are applied to the live system.
  3. Helps in Disaster Recovery: Snapshots can be used as part of a disaster recovery plan. In case of a disaster, snapshots can be used to restore your system to a previous state.

Best Practices for Using Snapshots Before Patching

Here are some best practices for using snapshots before patching:

Always Test Patches:

Test patches in a safe environment before applying them to the live system.

Schedule Regular Snapshots:

Schedule regular snapshots so that you always have an up-to-date backup of your system.

Name Your Snapshots:

Give your snapshots meaningful names so that you can easily identify them.

Store Snapshots Securely:

Store your snapshots in a secure location to prevent unauthorized access.

Snapshots Before Patching FAQs

What is the difference between a snapshot and a backup?

A snapshot is a point-in-time copy of your system, whereas a backup is a copy of your system’s data that is stored separately.

How often should I take a snapshot before patching?

It depends on your organization’s needs. However, it is a good practice to take a snapshot before each patching session.

Can I take a snapshot of a virtual machine?

Yes, you can take a snapshot of a virtual machine. In fact, taking snapshots of virtual machines is a common practice in virtualized environments.

What happens if I don’t take a snapshot before patching?

If you don’t take a snapshot before patching, you run the risk of losing important data or causing system failures.

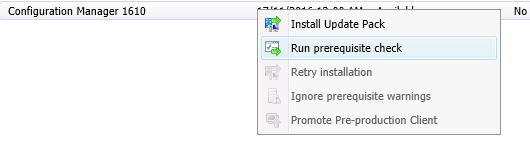
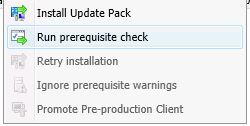
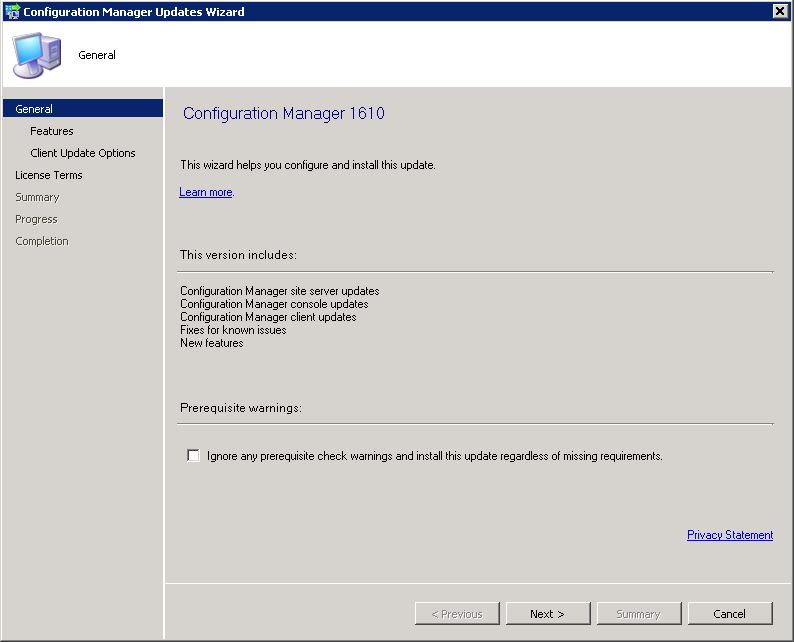
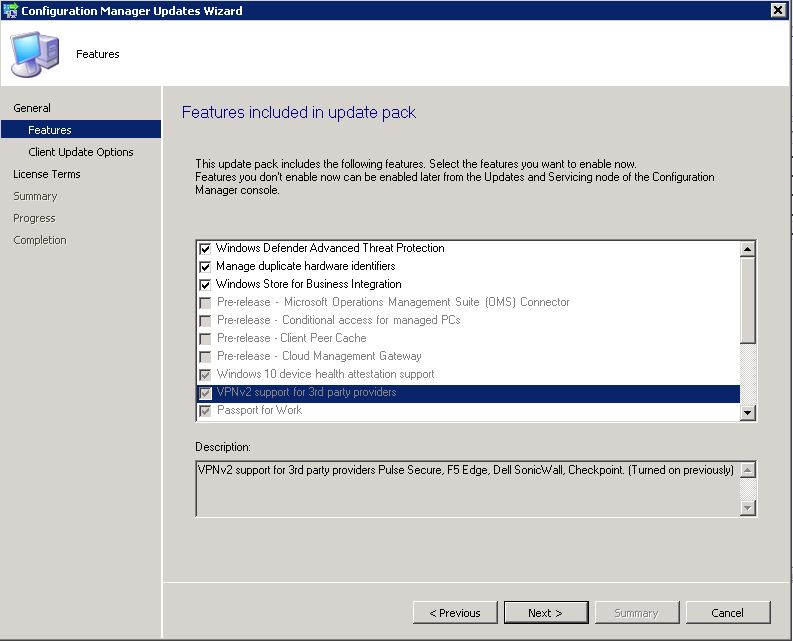
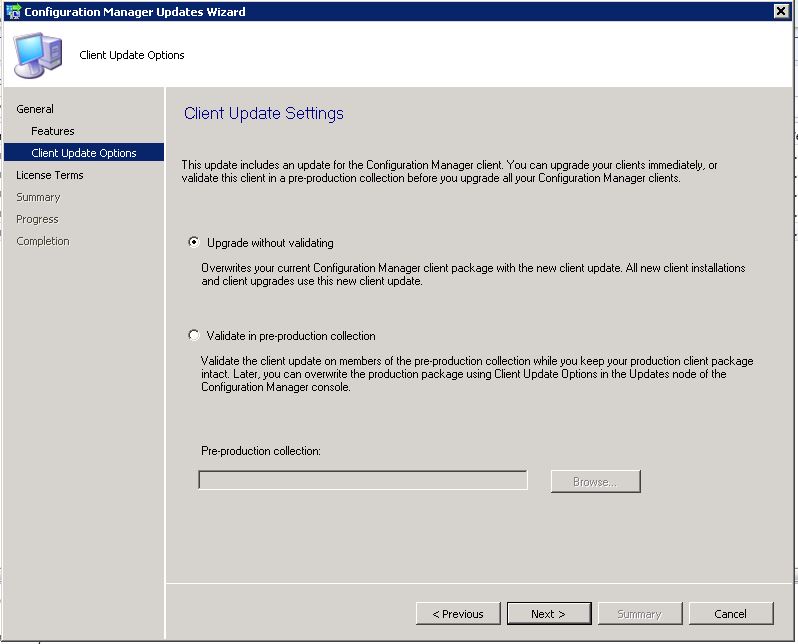
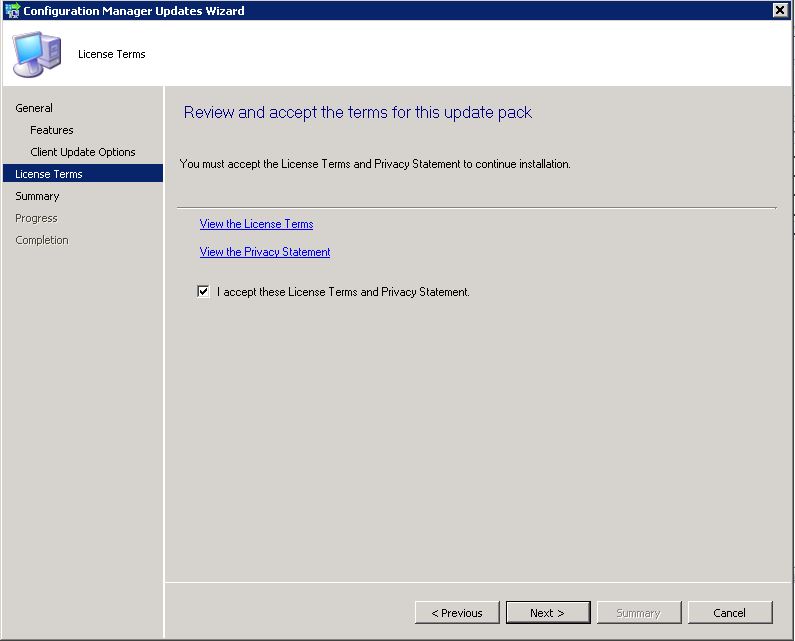
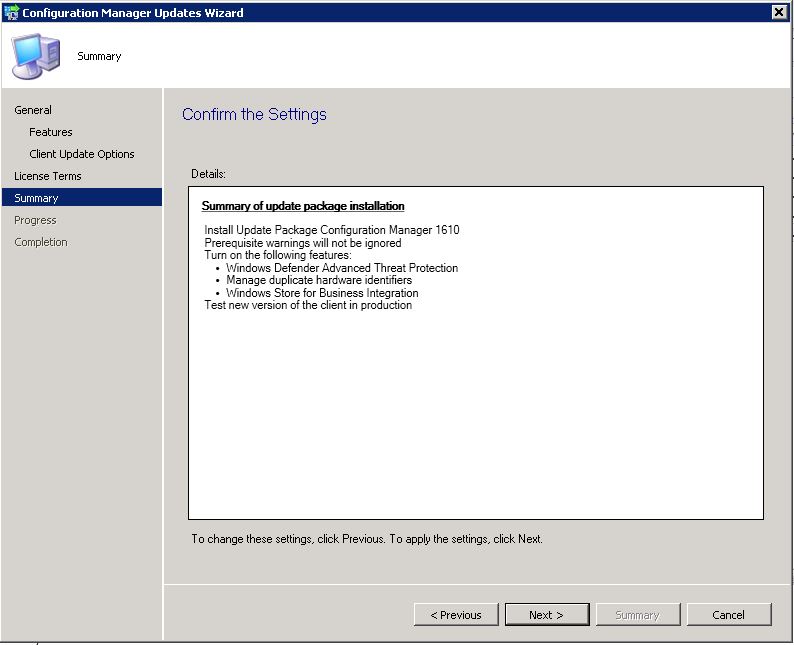
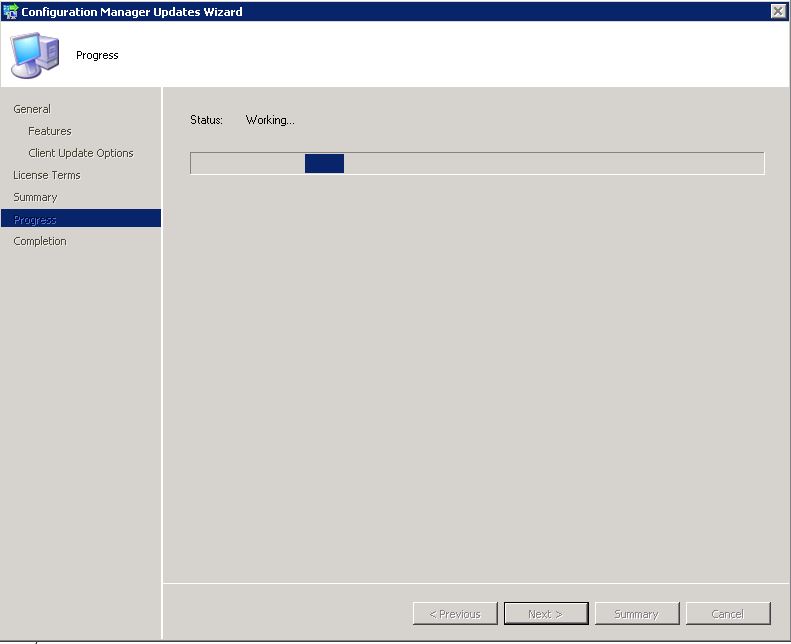
How to Snapshot before deploying Patches.

How SnaPatch Can Help You Take Snapshots Before Patching

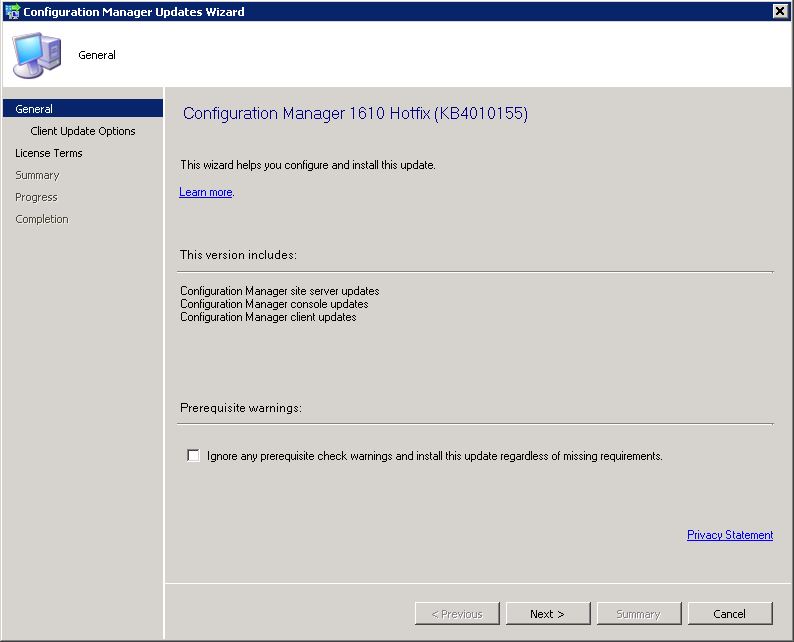
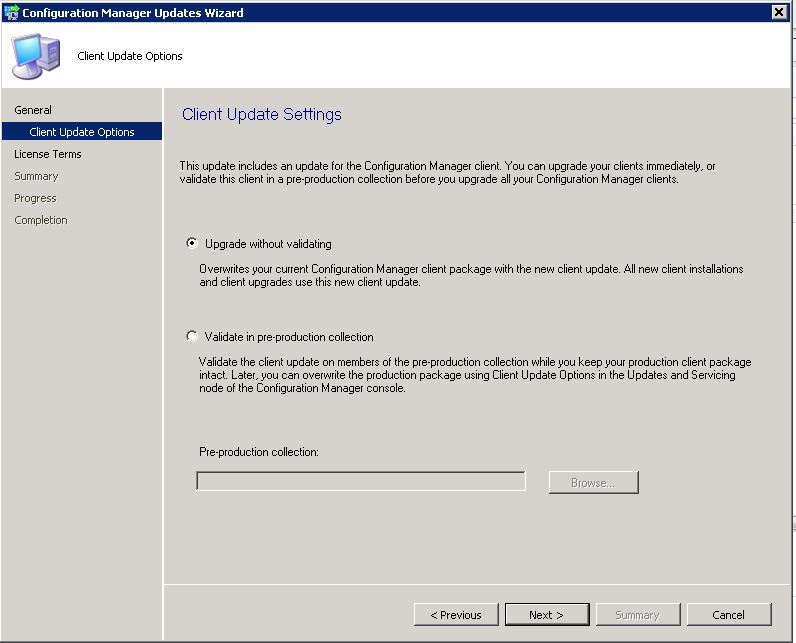
When it comes to taking snapshots before patching, it can be a time-consuming and manual process for system administrators. However, there is a tool that can simplify the process and make it more efficient: SnaPatch.

What is SnaPatch?

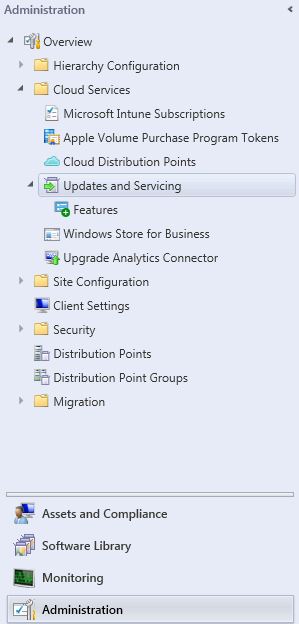
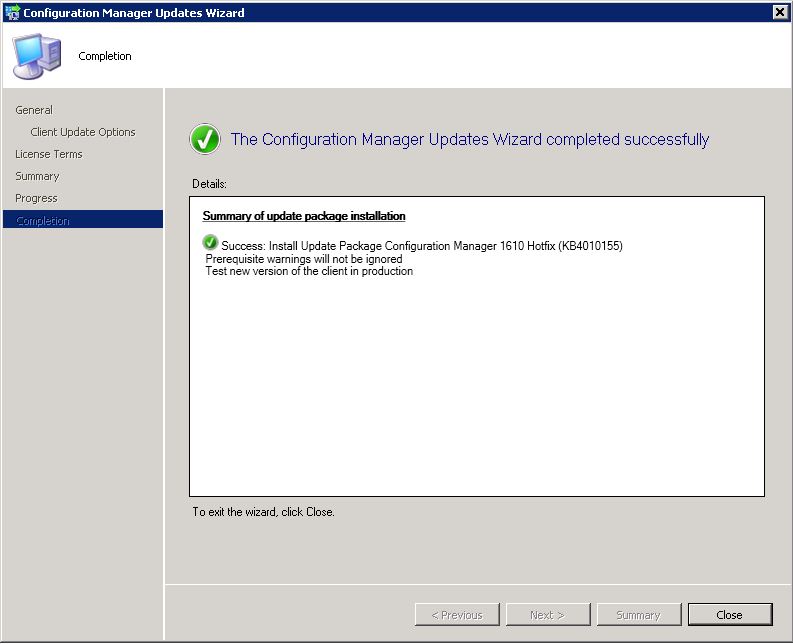
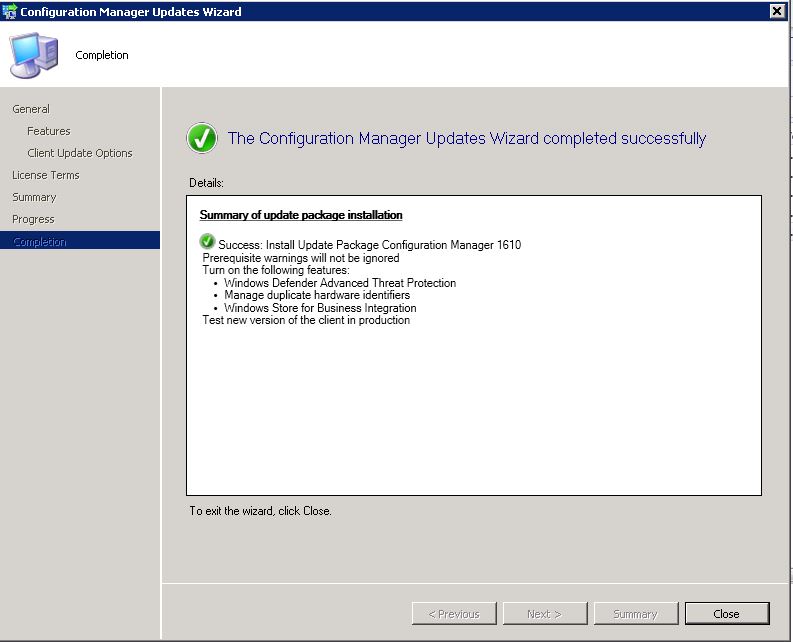
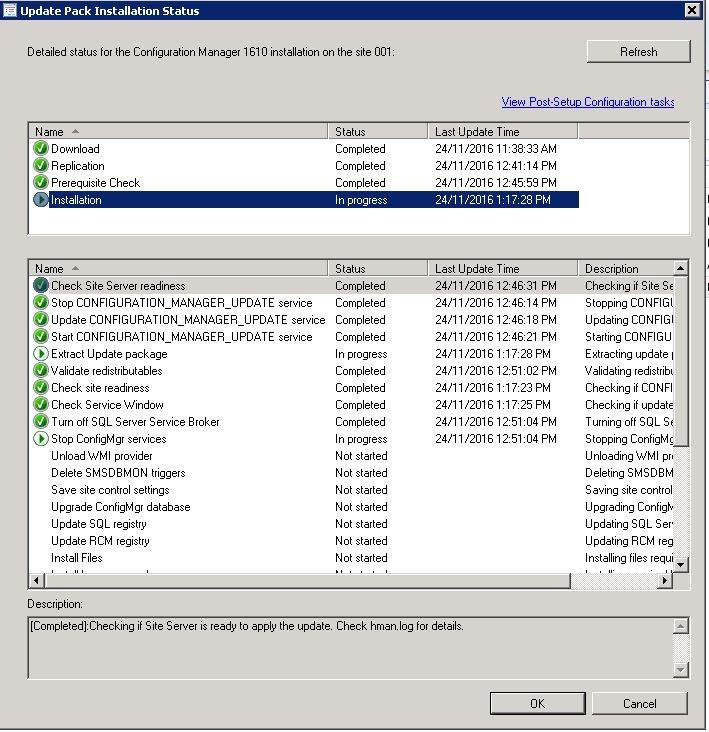
SnaPatch is a software application that interacts with your Microsoft System Centre Configuration Manager (SCCM) environment to pull in all your machine information. It uses SCCM as the source of truth for all your VM information.

Next, it interfaces with either your vCentre or System Centre Virtual Machine Manager (SCVMM), or both. It takes control of your VM environment, allowing it to create and delete snapshots of your VMs.

How does SnaPatch work?

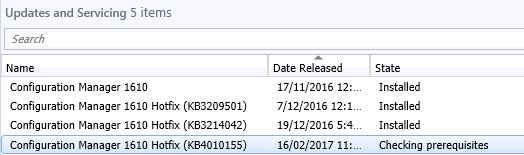
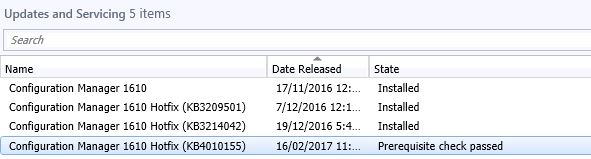
SnaPatch simplifies the snapshot process by automating it. It creates a snapshot of any virtual machine before allowing it to be patched. If the snapshot fails, the VM will not receive updates and will be removed from the patching schedule. SnaPatch streamlines the process and frees up your time by automating the snapshot and patching processes, while keeping you updated on progress via email notifications.

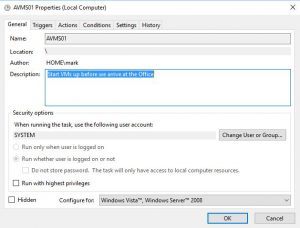
How do you deploy SnaPatch?

Deploying SnaPatch is easy and straightforward. After installation, the application discovers your SCCM environment and allows you to configure various settings such as email notifications, snapshot creation, and patch deployment.

Why use SnaPatch?

SnaPatch helps you take snapshots before patching in a more efficient and streamlined manner. It complies with SOX regulations and minimizes risk, and its automated snapshot creation feature ensures that you can easily roll back updates if necessary, giving you peace of mind and more time to focus on other critical tasks.

Conclusion

In conclusion, taking snapshots before patching is a critical step in ensuring the security and stability of your systems. SnaPatch can help simplify and automate this process, allowing you to deploy Microsoft updates in your VM environment safely and efficiently. Try SnaPatch today and streamline your patching process!

SCCM update 1610 Hotfix KB4010155

SCCM update 1610 Hotfix KB4010155

SCCM update 1610 Hotfix KB4010155

If you are using Microsoft’s System Center Configuration Manager (SCCM), you may have experienced known bugs and issues. Fortunately, Microsoft released a hotfix on February 16, 2017, to fix them. In this article, we will discuss the hotfix, its features, and how it addresses some of SCCM’s known issues.

Fixing Known Bugs and Issues The following are some of the known bugs and issues that are fixed by this update rollup:

SCCM update 1610 Hotfix KB4010155

An update has been released for Microsoft’s System Centre Configuration Manager on the 16 of February 2017.

This update rollup for SCCM is to fix the following known bugs and issues;

Component Bug/Issue
Client
Internet-only clients can’t connect to management points or distribution points when proxy auto-configuration is used, and they change networks without restarting.
Client
The Content Transfer Manager component of the Configuration Manager client repeatedly checks for content after the client roams to a location without available distribution points.
Microsoft Intune and Mobile Device Management
Communication between a Configuration Manager site server and the Microsoft Intune service may fail randomly.
Microsoft Intune and Mobile Device Management
After integrating Lookout mobile threat protection with Microsoft Intune, Windows devices are incorrectly displayed in the Device Threat Protection Compliance Status (iOS/Android) charts in the Administrator Console.
Site systems
The Microsoft.Management.Services.ClientManagementService.Host.exe process doesn’t start if the Process ID (PID) assigned by Windows is greater than 32,767.
Site systems
After you upgrade to Configuration Manager current branch, version 1610, the cloud management gateway connection point doesn’t start.
Site systems
When you configure the SQL Server Service Broker for a database replica server, execution of the sp_BgbConfigSSBForRemoteService stored procedure fails.
Site systems
Installing the Service Connection Point on a computer that’s not a site server triggers CPU usage of 100%.
Operating system deployment
Deployment of the Windows 10 Anniversary Update (1607) to Windows 10 clients triggers a “0x80091007 (Hash value is not correct)” error.
Software distribution and content management
The transfer of package contents between sites over slow network connections fails intermittently.
Software distribution and content management
Every time content is sent to a distribution point, site control data is updated unnecessarily.
Administrator console
After you add a new boundary to the Default-Site-Boundary-Group, that group is no longer listed on the Boundary Groups tab of the boundary properties.
Administrator console
Individual threat details are not displayed as expected on the Device Threat Protection Details tab of the Devices screen in the Administrator console.
Administrator console
The UpdatesDeployment.log file contains errors that resemble the following: Failed to get SDM CI for update (Site_{guid} SUM_{guid}) from type store, error = 0x80070002 Failed to GetSupersededUpdatesFromDigest for the update
Administrator console
After you upgrade to Configuration Manager current branch, version 1610, resolving conflicting records fails for non-mobile device clients.
Software updates
When an Alternate Content Provider encounters an error or retry condition while downloading an Office 365 job, the client does not fall back to the default download system as expected.
Software updates
After you start installation of Office updates from Software Center, users do not receive a notification message to exit all open Office 365 applications.
Software updates
The Allow clients to use Microsoft Update as a fallback source option doesn’t work as expected when you use it in a software update deployment or automatic deployment rule (ADR).

How to install KB4010155 update rollup for SCCM 1610

Now that you have learnt about what are the fixes for this update rollup, now lets look at how to install this next. It is quite a simple process and should take you no longer than 30 minutes.


Step 1 – Open your SCCM console.

Open your SCCM console and navigate to Administration, then expand Cloud Services and finally highlight Updates and Servicing. Your SCCM should have downloaded the update and have it ready to deploy to your SCCM infrastructure.

KB4010155 SCCM step 1


Step 2 – Run Prerequisite Check

Highlight the Configuration Manager 1610 Hotfix (KB4010155), then right click and choose Run Prerequisite Check. 

KB4010155 SCCM step 2

The prerequisite check should take no longer than five minutes as sn the background, SCCM will run and verify that you are able to install this hotfix.

KB4010155 SCCM step 3

Refresh your console until you see that the Prerequisite check passed notification.

KB4010155 SCCM step 4


Step 3 – Install Update Pack (KB4010155)

Hopefully the KB4010155 update pack is compatible with your SCCM environment and you are now ready for the installation. Again, highlight the update pack, right click and choose Install Update Pack.

KB4010155 SCCM step 2

Now the Configuration Manager Updates Wizard starts up. Click Next to proceed.

KB4010155 SCCM step 5

On the Client Updates Options window, you have the option to Upgrade without Validating or to Validate in pre-production collection. In this example, Im choosing to go ahead and update without validation. Click Next when ready to proceed.

KB4010155 SCCM step 6

The next window is the License Agreement window. You have to check the checkbox to accept the license terms and privacy statement before you can continue to install. Once you have done so, click Next to continue.

KB4010155 SCCM step 7

The Summary window details your installation options. Confirm these are correct before clicking on Next and continuing and then the installation will not start.

KB4010155 SCCM step 8

Now KB4010155 will install and update your SCCM environment. Once complete you will be presented with the following screen and KB4010155 will install in the background. Keep refreshing your SCCM console to confirm when it has udpated. You can additionally view the installation progress by looking at the CMUPDATE.LOG.

 KB4010155 SCCM step 9

Conclusion

In summary, Microsoft released an update for System Center Configuration Manager (SCCM) on February 16, 2017, to address various known bugs and issues. These issues include problems with client connectivity, increased CPU activity, communication failures between Configuration Manager and Microsoft Intune, and errors during the deployment of Windows 10 Anniversary Update (1607) to Windows 10 clients. Other issues addressed by the update include software distribution and content management, problems with the Administrator console, and software updates. The update aims to resolve these issues to improve the performance and functionality of SCCM.

Filtering Users and Groups using Azure AD Connect

Filtering Users and Groups using Azure AD Connect

Filtering Users and Groups using Azure AD Connect

OOOOH the Cloud

Microsoft’s Azure AD Connect allows you to sync your on-prem AD to your Azure AD / Office 365.  If you leave all the settings as default, then AD Connect will happily sync all your AD objects. This is fine for some, however many large organisations do not want to sync their entire environment. There are options to filter the objects by selecting specific OU’s, but sometimes this isn’t granular enough. Another option is to select a group and filter based on its memberships – but this is considered “pilot” mode and should not be used in a production environment. Personally, this is my preferred method, it’s easy to setup and you can add or remove users and groups to this “sync” group whenever you wish – but who am I to argue with Microsoft.

So if you can’t filter based on OU, and you don’t want to go against Microsoft’s “best practice”, what other options do you have?

Well, you need to look use the “Synchronization Rules Editor”.

The rules editor allows you to create filter rules, to either filter in or filter out the AD objects you want to sync.

In the below example I will show you how to filter out Users and Groups from syncing.

The rules editor uses the AD Attributes of the object to determine whether or not to sync them. By attributes, I mean these…

Azure AD Connect


If you have Exchange in your environment then you will have the extensionAttribute 1 – 15 in your schema. I tend to use these attributes, but you may decide to use any that suits.

OK, so what I want to achieve is to only sync the users or groups that have the extensionAttribute1 set to “Sync to Azure”. Any object without this value will not get synced.

First, lets modify the attribute for 1 user and 1 group.

Open AD Users and Computers and click View, and make sure the Advanced Features option is ticked. Without this option you won’t see the attributes tab.

Azure AD Connect 2


Find a test user and open the properties, then click on the Attribute Editor tab.

Scroll through and find the extensionAttribute1 and click Edit. Set the value to Sync to Azure.


Repeat the process for a Group.

OK, now that we’ve set the attribute on both a user and group object, launch the Synchronization Rules Editor.

Azure AD Connect 4


We will now create two rules, one to filter users, and another to filter groups.

Ensure the Direction is set to Inbound and click the Add new rule button.

Give the rule a descriptive name and provide a description. I suggest something useful so when you come back in 3+ months it will make sense to you.

  1. Set the Connected System to your domain.
  2. Set the Connected System Object Type to User
  3. Set the Metaverse Object Type to Person
  4. Set the Link Type to Join
  5. Set the Precedence to 50 (or any value lower than the lowest value – if you haven’t created any other rules, then 50 will be fine).
  6. Click Next

Azure AD Connect 5


Click the Add Group button, and then the Add Clause button.

Azure AD Connect 6


Set the Attribute to the attribute you selected as the “filtering attribute”. In our example, it’s extensionAttribute1.

Set the Operator to NotEqual

And enter the value to look for, which in our example is “Sync to Azure”.

Click Next.

Azure AD Connect 7


Click Next on the Join Rules window, as it’s not used with this rule.

Azure AD Connect 8


In the Transformations section, click Add transformation

  1. Set the FlowType to Constant
  2. Set the Target Attribute to cloudFiltered
  3. In the Source field, enter true
  4. Leave all other settings and click Add

Azure AD Connect 9


The new rule should now appear at the top of the list.

Azure AD Connect 10


OK, so that’s the Users rule done. Let’s move onto the Groups rule.

The groups rule is a little tricker, so instead of trying to create it from scratch, we’ll use the existing one.

Select the In from AD – Group Join rule and click Edit.

Azure AD Connect 11


Click Yes to the message – which will disable the existing rule and create a copy for us to work with.

Azure AD Connect 12


Give the rule a name and description.

Set the Precedence to 55.

Click Next

Azure AD Connect 13


In the Scoping Filter section, select both of the existing clauses and click Remove Clause.

Azure AD Connect 14


Once all the Clauses have been removed, click Add Clause.

Azure AD Connect 15


Set the Attribute to the attribute you selected as the “filtering attribute”. In our example, it’s extensionAttribute1.

Set the Operator to Equal (with the user rule we set it to NotEqual, but here we use the Equal operator).

And enter the value “Sync to Azure”, or whatever value you are using.

Click Next.

In the Join rules, ensure the Source Attribute is set to objectGUID and the Target Attribute is sourceAnchorBinary.

Click Next.

Azure AD Connect 16


Leave the settings as default in the Transformations window and click Save.

Azure AD Connect 17


If you receive an expression warning, click Yes to continue saving the rule.

You should now have two rules in your rule set.

Azure AD Connect 18


OK, now that we’ve made our rules, we need to kick off a full sync.

Open up a PowerShell console, and enter: Start-ADSyncSyncCycle -PolicyType Initial

Once the sync finishes, log into the Azure or 365 portal and have a look under the Users and Groups sections.

As you can see, only my two test users have been synced

Azure AD Connect 19


And in the groups, only my two test groups are synced too.

Azure AD Connect 20


While you are here, please take the time to check out our software products for Azure, VMWare, Hyper-V and SCCM.

Azure VM Scheduler tasks not running

Azure VM Scheduler tasks not running

Azure VM Scheduler tasks not running

If you are having any issues with the Azure VM Scheduling tool not running a scheduled task, it could be one of the following issues

First thing to check is your log file which is located in the following location:

C:Program Files (x86) – SMIKAR Software – AVMS – avms.log

Error 1:

Scour through the log file and look for something similar to below:

01/11/2016 11:23:46 AM Attempting to ADD-azureaccount using account XXXX@XXXX.onmicrosoft.com
01/11/2016 11:23:46 AM Failed to ADD-azureaccount using account XXXX@XXXX.onmicrosoft.com – error user_realm_discovery_failed: User realm discovery failed: The remote server returned an error: (407) Proxy Authentication Required.

So the issue in the above example is that your onsite proxy server requires authentication to allow AVMS to talk to Azure.

The reason why the AVMS console can connect to Azure is because it is running under your own Domain Account and has the appropriate permissions to use the proxy server. The scheduled task however runs under your computers system account and more than likely does not have this permission.

So how do you fix this you ask?

Well go in to your control panel, then in to scheduled tasks. Highlight the AVMS task, right click it and choose properties.

Azure VM Scheduler Tasks

Next you need to change the user account from System to a domain and proxy appropriate account with the highest privileges you can.

Azure VM Scheduler tasks 2

AVMS will now run its scheduled tasks.

Error 2:

Again through the log another possible error to look out for is;

01/11/2016 12:45:23 PM Attempting to ADD-azureaccount using account XXXX@XXXX.onmicrosoft.com
01/11/2016 12:45:23 PM Connected to ADD-azureaccount using account XXXX@XXXX.onmicrosoft.com
01/11/2016 12:46:56 PM Attempting to ADD-AzureRmAccount using account XXXX@XXXX.onmicrosoft.com
01/11/2016 12:46:56 PM Connected to ADD-AzureRmAccount using account XXXX@XXXX.onmicrosoft.com
01/11/2016 12:46:56 PM Started code block to Stop VMs
01/11/2016 12:46:56 PM Adding servers to array for email
01/11/2016 12:46:56 PM email form created notifying task has started

If your log file stops as shown in the above, it is your email settings that are causing AVMS to not progress any further. Please check and confirm your email settings are correct, alternatively turn off notifications. Please be warned, turning this off will result in you not receiving any emails from the AVMS software.

Upgrade SCCM 1610 – A Comprehensive Guide

Upgrade SCCM 1610 – A Comprehensive Guide

How to upgrade SCCM 1610​

SCCM 1610

Microsoft has recently released SCCM 1610, the much-awaited upgrade to their System Center Configuration Manager. This upgrade includes new features and enhancements in Office 365 management, application management, Windows 10, client management, end-user experience, and new functionality for customers using Intune with SCCM. In this article, we will discuss how to upgrade to SCCM 1610 and its new features and enhancements.

A quick overview of these enhancements are;

  • Windows 10 Upgrade Analytics integration allows you to assess and analyze device readiness and compatibility with Windows 10 to allow smoother upgrades.
  • Office 365 Servicing Dashboard and app deployment to clients features help you to deploy Office 365 apps to clients as well as track Office 365 usage and update deployments.
  • Software Updates Compliance Dashboard allows you to view the current compliance status of devices in your organization and quickly analyze the data to see which devices are at risk.
  • Cloud Management Gateway provides a simpler way to manage Configuration Manager clients on the Internet. You can use the ConfigMgr console to deploy the service in Microsoft Azure and configure the supported roles to allow cloud management gateway traffic.
  • Client Peer Cache is a new built-in solution in Configuration Manager that allows clients to share content with other clients directly from their local cache with monitoring and troubleshooting capabilities.
  • Enhancements in Software Center including customizable branding in more dialogs, notifications of new software, improvements to the notification experience for high-impact task sequence deployments, and ability for users to request applications and view request history directly in Software Center.
  • New remote control features including performance optimization for remote control sessions and keyboard translation.

and if you use SCCM with Microsoft’s Intune you get the following new features;

  • New configuration item settings and improvements now only show settings that apply to the selected platform. We also added lots of new settings for Android (23), iOS (4), Mac (4), Windows 10 desktop and mobile (37), Windows 10 Team (7), Windows 8.1 (11), and Windows Phone 8.1 (3).
  • Lookout integration allows to check device’s compliance status based on its compliance with Lookout rules.
  • Request a sync from the admin console improvement allows you to request a policy sync on an enrolled mobile device from the Configuration Manager console.
  • Support for paid apps in Windows Store for Business allows you to add and deploy online-licensed paid apps in addition to the free apps in Windows Store for Business.

SCCM 1610 FAQs

Question Answer

What is SCCM 1610?

SCCM 1610 is the upgrade to Microsoft’s System Centre Configuration Manager.

What new features are included in SCCM 1610?

SCCM 1610 includes new features and enhancements in Office 365 management, Windows 10, application management, client management, end user experience, and new functionality for customers using Intune with SCCM.

What is Windows 10 Upgrade Analytics integration?

Windows 10 Upgrade Analytics integration allows you to assess and analyze device readiness and compatibility with Windows 10 to allow smoother upgrades.

What is the Office 365 Servicing Dashboard?

The Office 365 Servicing Dashboard is a feature that helps you to deploy Office 365 apps to clients as well as track Office 365 usage and update deployments.

What is the Software Updates Compliance Dashboard?

The Software Updates Compliance Dashboard allows you to view the current compliance status of devices in your organization and quickly analyze the data to see which devices are at risk.

What is the Cloud Management Gateway?

The Cloud Management Gateway provides a simpler way to manage Configuration Manager clients on the Internet. You can use the ConfigMgr console to deploy the service in Microsoft Azure and configure the supported roles to allow cloud management gateway traffic.

What is Client Peer Cache?

Client Peer Cache is a new built-in solution in Configuration Manager that allows clients to share content with other clients directly from their local cache with monitoring and troubleshooting capabilities.

What are the enhancements in Software Center?

The enhancements in Software Center include customizable branding in more dialogs, notifications of new software, improvements to the notification experience for high-impact task sequence deployments, and ability for users to request applications and view request history directly in Software Center.

What are the new remote control features?

The new remote control features include performance optimization for remote control sessions and keyboard translation.

What new features are available if you use SCCM with Microsoft’s Intune?

If you use SCCM with Microsoft’s Intune, you get new configuration item settings and improvements, Lookout integration, Request a sync from the admin console improvement, and support for paid apps in Windows Store for Business.

How do you upgrade to SCCM 1610?

To upgrade to SCCM 1610, you need to follow several steps, including checking to see if SCCM 1610 has downloaded, enabling the Fast Ring, forcing a check for the update, and downloading and installing the SCCM 1610 update.

Upgrade to SCCM 1610

Now to upgrade your SCCM to version 1610, follow the following steps;


Check to see if SCCM 1610 has downloaded.

Open your SCCM console, and go to Administration, expand Cloud Services, then Updates and Servicing.

no sccm 1610

As in the picture above, you can see that the update to SCCM 1610 has not downloaded as yet. You can choose to right click and check for updates, but as Microsoft are slowly rolling out this update over the next few weeks it may not download. If you cannot wait for it to download itself, you can force the update to do so by running the following Powershell script located here https://gallery.technet.microsoft.com/ConfigMgr-1610-Enable-046cc0e9


Download SCCM 1610 Fast Ring

If you have waited quite sometime and SCCM 1610 hasn’t downloaded, then you need to download the EnableFastRing.Exe to do this for you. Once downloaded. launch the file and extract the powershell script and follow these steps.

SCCM 1610 Fast Ring

  • Launch an elevated command prompt
  • Run PowerShell
  • Run the EnableFastUpdateRing1610.ps1 script
    • EnableFastUpdateRing1610.ps1 where SiteServer refers to the CAS or standalone primary site server
  • Force a check for the update.
    • If you are upgrading from version 1602 or higher go to Administration, Overview, Cloud Services, Updates and Servicing and click “Check for Updates”.  You may need to try “Check for Updates” more than once if the package is not downloaded on the first try.
    • If you are upgrading from version 1511, restart the SMS_Executive.
  • The new 1610 Update should now be available in the Configuration Manager Console.

Download SCCM 1610 update

Now that Fastring has been enabled, go back to your SCCM console and right click the Updates and Servicing node and click check for updates.

sccm-1606-check-for-updates

Give SCCM sometime to start the download of SCCM 1610. Refresh the console to see the status and then proceed to install when downloaded.

sccm 1610 downloading


 SCCM 1610 Downloaded

Now hopefully your SCCM 1610 update has downloaded and is now available in your console.

sccm 1610 downloaded

Select the Configuration Manager 1610 update, right click and choose Run prerequisite check.

sccm 1610 prerequisite check

SCCM will now check your environment is ready for the upgrade to SCCM 1610.

sccm 1610 prerequisite checks

Let SCCM complete the check, refresh the console to see when it has completed.

 sccm 1610 prerequisite check complete


SCCM 1610 Update Installation

Now that the prerequisites have been checked and passed, you can now start to install the upgrade to SCCM 1610. Right click the update and choose Install Update Pack.

sccm 1610 install update pack


SCCM 1610 Update Installation – General Tab

The General Tab starts off the installation of the SCCM 1610 update. Click Next when you are ready to install.

sccm 1610 update 1


SCCM 1610 Update Installation – Features Tab

On the Features tab, you can select which options you wish to install. Click Next when ready to proceed.

sccm 1610 update 2


SCCM 1610 Update Installation – Client Update Options Tab

Next is the Client update options Tab, you can choose on this tab to upgrade without validating or validate the upgrade in a pre-production collection. As this is one of our lab environments, I have chosen to upgrade without validating. If this is your production environment, it always pays to be mindful of any upgrades, SCCM included so it may be worth you choosing the other option and validating the upgrade against a test collection.

Choose the option you wish and click Next.

sccm 1610 update 3


SCCM 1610 Update Installation – Licensing Terms Tab

Accept the license terms and privacy statement and click Next.

sccm 1610 update 4


SCCM 1610 Update Installation – Summary Tab

On the Summary Tab, confirm the options you have chosen are correct and then click on Next to continue.

sccm 1610 update 5


SCCM 1610 Update Installation – Progress Tab

The update to SCCM 1610 will now install.

sccm 1610 update 6


SCCM 1610 Update Installation – Completion Tab

Hopefully all went with your installation of SCCM 1610 and you should see a screen similar to the one below. Click now on Close and SCCM will continue updating in the background.

sccm 1610 update 7


SCCM 1610 Update Installation – Update Log

To view the installation logs, go to your C Drive of your SCCM server and locate the ConfigMgrSetup.log. If you have Trace32 installed, double click the log file to see the installation status.

sccm 1610 update log

Refreshing the console shows that the SCCM 1610 update is installing. Depending on your infrastructure, this could take some time.

sccm 1610 update 8


Monitor the SCCM 1610 upgrade – Installation Status

You can additionally monitor the status of the installation of SCCM 1610 in your console. Go to the Monitoring tab, then Updates and Servicing Status where you can see the updates you have applied. Highlight the Configuration Manager 1610 update and right click and chose show status.

sccm 1610 update 9

sccm 1610 update 10

Also, the cmupdate.log contains more details of the installation progress.

sccm 1610 update 11


You should see after quite sometime that your SCCM version is now showing as version SCCM 1610

sccm 1610 installed

You can finally go and party like its 1999. Dont forget since you are here, to check out our many software products that help make an Administrators life easy.

sccm 1610 finally upgraded