Microsoft Azure Infrastructure as a Service (IaaS) Platform
What is Infrastructure Service (IaaS)
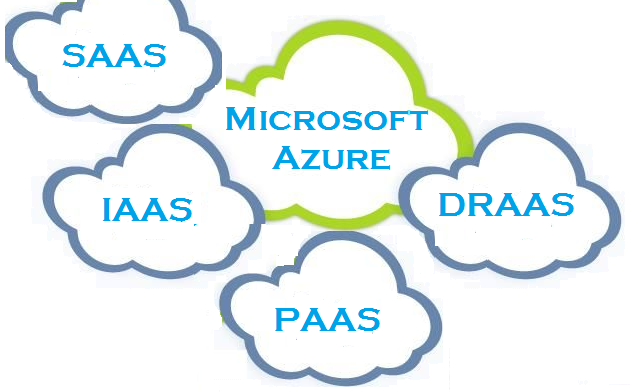
Infrastructure as a Service (IaaS) is an IT infrastructure provided and managed on the Internet. IaaS is a form of cloud computing that provides virtualized computing resources on the Internet. Microsoft Azure IaaS offers a variety of platforms to build application and deliver value to your user, from IaaS (infrastructure as a service), platform offerings like managed SQL in PaaS (platform as a service) and fully managed offers in SaaS (software as a service).
Azure IaaS helps you avoid the costs and complexity of purchasing and managing your physical servers and other data center infrastructures. Each feature is offered as a separate service component, and only one rental is required. The cloud service provider manages the infrastructure during purchase, installation, and configuration.
What is the difference between IaaS, PaaS and SaaS?
IaaS (Infrastructure as a Service), PaaS (Platform as a Service), and SaaS (Software as a Service) are all models of cloud computing that provide different levels of access to computing resources and application management.
IaaS provides virtualized computing infrastructure, such as servers, storage, and networking, over the internet. The user manages the operating systems, middleware, and applications.
PaaS provides a platform for developing, testing, and deploying applications, including web and mobile apps. The provider manages the underlying infrastructure and provides development tools, such as databases and programming frameworks.
SaaS delivers applications over the internet, which are managed and maintained by the provider. The user typically accesses the applications through a web browser, without having to manage any underlying infrastructure.
In summary, IaaS provides the most basic level of access to computing resources, while PaaS offers a more complete platform for application development and deployment, and SaaS provides fully managed, turnkey access to applications.
What are the drawbacks of IaaS?
While IaaS offers a range of benefits, it also has some drawbacks. IaaS solutions provide a virtual environment, and the security of the infrastructure is the responsibility of the customer. Therefore, it is important to have a robust security strategy in place to protect against cyber-attacks, data breaches, and other security threats. Using IaaS can be complex and challenging, especially for organizations that are not familiar with cloud computing and virtualization technologies. IaaS solutions can also be expensive, especially when considering the cost of purchasing and maintaining the necessary hardware, software, and storage solutions. IaaS requires ongoing maintenance and management, which can be time-consuming and costly, and often come with limited customization options, which can make it difficult for organizations to fully meet their specific requirements.
Security Risks: IaaS solutions provide a virtual environment and security of the infrastructure is the responsibility of the customer. Therefore, it is important to have a robust security strategy in place to protect against cyber-attacks, data breaches, and other security threats.
Complexity: Using IaaS can be complex and challenging, especially for organizations that are not familiar with cloud computing and virtualization technologies.
Cost: IaaS solutions can be expensive, especially when considering the cost of purchasing and maintaining the necessary hardware, software, and storage solutions.
Maintenance: IaaS requires ongoing maintenance and management, including software updates, security patches, and backups, which can be time-consuming and costly.
Lack of Customization: IaaS solutions often come with limited customization options, which can make it difficult for organizations to fully meet their specific requirements.
Network Latency: The network latency can be an issue with IaaS, especially for organizations that require real-time data processing and access to mission-critical applications.

Benefits of IaaS Azure
Eliminate capital expenditure and reduce current costs.
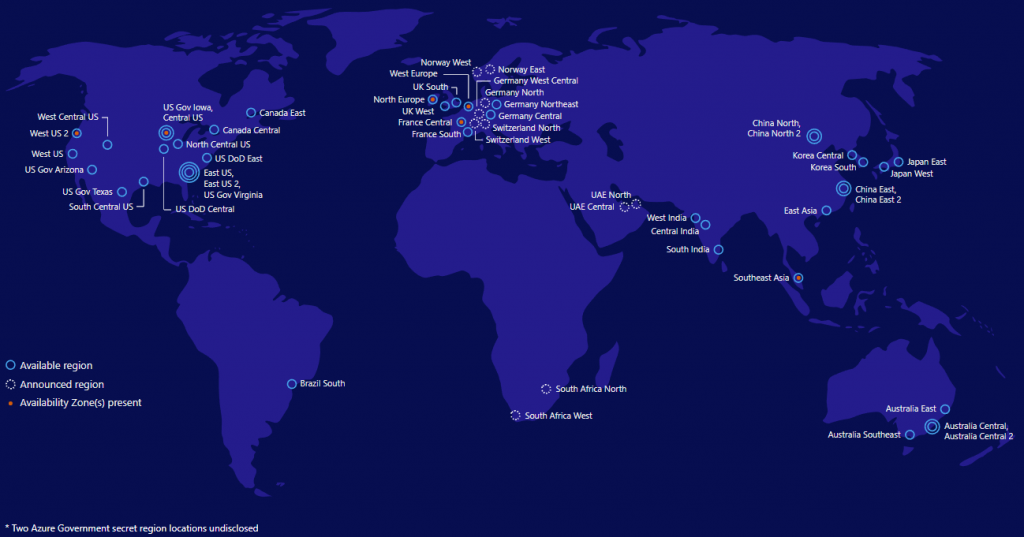
Azure IaaS offers a fully maintained and scalable data centers throughout the world (known as Azure regions (54 regions worldwide) and (currently available in 140 countries) and eliminates the initial cost of managing it, making it an economical choice for companies and start-ups testing new ideas.
Improve business continuity and disaster recovery.
Achieving high availability, business continuity and disaster recovery is expensive as it requires a significant amount of technology and personnel. However, with the correct Service level Agreement (SLA), IaaS can reduce this cost and regularly access applications and data in the event of a disaster or disruption.
Innovate quickly.
Azure offers IAAS on a large scale; with an almost infinite amount of infrastructure available within minutes rather than weeks or months. When you decide to use a new product or initiative, the IT infrastructure you need may be available in minutes or hours instead of days, months or months for internal configuration. This scale allows you to deliver solutions quicker, faster, more often than not and lower cost solutions to provide real value to users and clients.
Respond more quickly to changes in business conditions.
IaaS enables you to quickly increase resources (with auto-scaling and content delivery networks) to meet the demand levels of applications and users, for example during peak periods (or big sales, considering Black Friday sales), and to reduce them when activities decrease in order.
Focus on your core business.
Instead of having a team of engineers to manage your on-premise infrastructure, Azure IaaS removes the need for hardware to be managed. This allows your team to focus on their core business and not managing your IT infrastructure.
Better security
Azure Security and compliance has the following features: Detects and Investigate Security Concerns
It gets new applications faster for users.
With almost infinite infrastructure availability and availability from anywhere in the globe, Microsoft Azure can save you time and money and most importantly, deploy applications to your user base faster than your traditional on-premise environment.
Microsoft Azure IaaS Features
Virtual Machines
Microsoft Azure IaaS offers a wide range of virtual machines (VMs) that can be customized to meet the specific needs of organizations. VMs can be created in minutes, and can be easily scaled up or down based on demand. Azure VMs also support a wide range of operating systems, including Windows, Linux, and SQL Server.
Virtual Networks
Azure Virtual Networks allows organizations to create and manage virtual private networks (VPNs) in the cloud. This enables secure communication between different parts of an organization, and also allows for remote access to the organization’s resources.
Storage
Azure Storage provides a scalable, secure, and highly available storage solution for organizations. It supports different types of storage, including blob, file, queue, and table storage, and also offers backup and disaster recovery capabilities.
Load Balancers
Azure Load Balancer distributes incoming traffic across multiple VMs, ensuring high availability and scalability of the organization’s applications. It supports both inbound and outbound scenarios, and can also be used for cross-region scenarios.
Autoscaling
Azure Autoscaling allows organizations to automatically adjust the capacity of their applications based on demand. This enables organizations to handle sudden spikes in traffic without compromising performance, and also reduces costs by scaling down when demand decreases.
Azure Resource Manager
Azure Resource Manager is a management layer that enables organizations to manage and organize their Azure resources. It provides a unified view of all resources, and also allows organizations to create templates that can be used to automate the deployment of their resources. Resource Manager also enables organizations to group resources into resource groups, which can be used to manage and monitor the resources together.
Azure Security
Azure Security provides a comprehensive set of security features to protect the organization’s resources. This includes Azure Security Center, which provides threat protection across all Azure resources, Azure Active Directory, which provides identity and access management, and Azure Key Vault, which provides secure storage of cryptographic keys and secrets.
Azure Monitoring and Management
Azure Monitoring and Management provides a set of tools and services to monitor and manage the organization’s Azure resources. This includes Azure Monitor, which provides real-time monitoring and alerts, Azure Automation, which enables organizations to automate their Azure resources, and Log Analytics, which enables organizations to collect and analyze log data from different Azure resources.

Common IaaS corporate scenarios
Typical things that companies do with IaaS:
Testing and development.
Teams can quickly set up and remove test and development environments, and enable new applications to reach the market faster. IaaS makes development test environments faster and cheaper.
Website Hosting
The use of IaaS may be less than the cost of traditional web hosting.
IaaS is cost effective with no system administration skills required. Hosted platforms are a subset of cloud computing that allows you to virtually set up technologies such as web applications.
Archiving, backup and recovery.
Organizations avoid the complexity of storage management, which requires qualified personnel to manage the data and typically meet data and legal compliance requirements from storage-related capital cost. IaaS is useful for managing unpredictable demand and increasing storage needs. It can also simplify the planning and management of backup and recovery systems.
Web Applications
IaaS provides all the infrastructure required to support Web applications, including storage, web servers, applications, and network resources. Companies can quickly implement IaaS Web applications and easily scale their infrastructure when the application demand is unpredictable.
High performance computing.
High-performance computing (HPC) in supercomputer, computer networks, or computer clusters can solve complex problems with millions of variables or calculations. Examples include earthquake and protein folding simulations, climate and weather forecasting, financial models, and product design assessment.
Big data analysis.
Big data is a popular term for large data sets that contain potentially valid models, trends, and associations. Working with datasets to identify or reveal these hidden models requires a large amount of processing power that IaaS offers at low cost.
Why choose Microsoft Azure IaaS for your infrastructure requirements?
Protect and manage your workloads with integrated tools
Azure IaaS offers a complete intergrated, intelligent service package for all your security and management needs. Activate Azure Security Center to gain complete visibility into the security status of virtual machines, proactively identify and mitigate risk and quickly detect and respond to advanced threats.
Safely implement your hybrid cloud strategy
Move beyond connecting your data center to the cloud. Azure IaaS is the only cloud that delivers truly consistent hybrid cloud capabilities across all on-premises and cloud environments.
Reduce and optimize infrastructure costs
For virtual machines with Azure IaaS, you only pay for the infrastructure you use per second billing, reduce the dedicated Azure VM instances to the workloads you expect, and take advantage of the Azure Hybrid for more savings.
Quickly provide infrastructure for all your workloads
With Azure IaaS, if critical applications are running on Linux, Windows Server, SAP, or Oracle, Azure IaaS will provide certification and support for these and other workloads, including preferred open source technologies.
Now that you know some more about Microsoft Azure IaaS, you should see how our Azure Management tools will assist you to quickly and easily manage your Azure environment. For more information click here
Use Cases of Microsoft Azure IaaS
DevOps
Microsoft Azure IaaS provides a great platform for DevOps teams to build, test, and deploy their applications. It provides a wide range of tools and services, including Azure DevOps, which enables organizations to build, test, and deploy their applications on Azure.
Disaster Recovery
Microsoft Azure IaaS provides a reliable and cost-effective disaster recovery solution for organizations. It allows organizations to replicate their on-premises infrastructure to the cloud, providing a backup in case of an outage or disaster.
Hybrid Cloud
Microsoft Azure IaaS also provides a great platform for organizations to build a hybrid cloud. This allows organizations to use both on-premises and cloud resources, providing increased flexibility and scalability.
Azure IAAS FAQs
| Question |
Answer |
What is Microsoft Azure IaaS?
|
Microsoft Azure IaaS (Infrastructure as a Service) is a cloud computing service that provides virtual machines, storage, and networking services. |
Is Microsoft Azure IaaS or PaaS or SaaS?
|
Microsoft Azure provides all three types of cloud services – IaaS, PaaS, and SaaS. Azure IaaS is a part of its IaaS offerings. |
What are the 4 types of Azure services?
|
Microsoft Azure offers four types of cloud services – compute, storage, networking, and app services. |
What is the difference between Azure PaaS and IaaS?
|
The main difference between Azure PaaS (Platform as a Service) and IaaS (Infrastructure as a Service) is that PaaS offers a platform for developing and deploying applications, while IaaS provides virtual machines and other infrastructure components. |
What are some benefits of using Microsoft Azure IaaS?
|
Microsoft Azure IaaS offers benefits such as scalability, flexibility, cost savings, increased security, and global reach. |
How does Microsoft Azure IaaS help with disaster recovery?
|
Microsoft Azure IaaS offers features such as automated backups, replication, and failover, which can help with disaster recovery. |
What are some popular use cases for Microsoft Azure IaaS?
|
Some popular use cases for Microsoft Azure IaaS include hosting websites and applications, running virtual machines, and storing and analyzing data. |
Can I use my own operating system with Azure IaaS?
|
Yes, you can use your own operating system with Azure IaaS. Azure offers a variety of virtual machine images, including those with Linux and Windows. |
Is Microsoft Azure IaaS suitable for small businesses?
|
Yes, Microsoft Azure IaaS can be suitable for small businesses as it offers scalability and cost savings, allowing businesses to pay only for the resources they use. |
How does Azure IaaS compare to other cloud providers?
|
Azure IaaS offers competitive pricing, a wide range of virtual machine sizes, and integration with other Microsoft services, making it a popular choice among businesses. |
Conclusion
Microsoft Azure IaaS provides a wide range of features and benefits for organizations looking to migrate their IT infrastructure to the cloud. Its features include virtual machines, virtual networks, storage, load balancers, and autoscaling, which can be easily managed and customized using the Azure Resource Manager. Azure Security provides a comprehensive set of security features to protect the organization’s resources, while Azure Monitoring and Management provides a set of tools and services to monitor and manage the organization’s Azure resources. Additionally, Azure Pricing is based on a pay-as-you-go model, providing organizations with cost-effective and scalable solutions.


