The Ultimate Planning Checklist for Migrating Azure VMs to VMware

The Ultimate Planning Checklist for Migrating Azure VMs to VMware

Azure Virtual Machines to VMware Migration

Migrating virtual machines from Microsoft Azure to VMware can be a complex and time-consuming process. But with the right planning and preparation, it can be a smooth and stress-free transition. In this blog post, we will be providing you with a comprehensive planning checklist to help guide you through the process of migrating Azure VMs to VMware. And with Carbon – the automated migration software – you can simplify and streamline the process even further.

Understanding the Migration Process

The process of migrating Azure VMs to VMware involves several steps. These steps include:

  • Preparing the environment
  • Configuring the migration settings
  • Performing the actual migration
  • Post-migration verification and cleanup

To help you successfully complete these steps, we have put together a comprehensive planning checklist. This checklist will help you gather all the necessary information, tools and resources, and ensure that you have a clear understanding of the migration process.

The Azure VM Migration Planning Checklist

Preparation

  • Identify the VMs you need to migrate
  • Gather information about the source environment (Azure)
  • Gather information about the target environment (VMware)
  • Plan the network infrastructure for the target environment
  • Plan the storage infrastructure for the target environment

Configuration

  • Download and install Carbon software
  • Set up a migration project in Carbon
  • Configure the migration settings in Carbon
  • Plan and configure the network settings in the target environment
  • Plan and configure the storage settings in the target environment

Migration

  • Perform a test migration to ensure that everything is configured correctly
  • Start the actual migration process
  • Monitor the migration process to ensure that everything is running smoothly
  • Resolve any issues that may arise during the migration process

Post-Migration

  • Verify that the VMs have been successfully migrated to the target environment
  • Clean up any unnecessary resources from the source environment
  • Update the network and storage settings in the target environment if necessary
  • Update any necessary DNS settings in the target environment


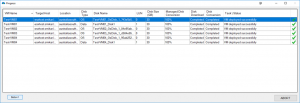
Carbon Azure Migration Progress Screen

Common Migration FAQs

  1. What is Carbon? Carbon is an automated migration software that simplifies and streamlines the process of migrating Azure VMs to VMware. With Carbon, you can easily migrate your VMs with just a few clicks.
  2. What are the requirements for using Carbon? You will need to have an Azure account and a VMware environment to use Carbon. Carbon is compatible with both vSphere and vCenter.
  3. Can Carbon migrate multiple VMs at once? Yes, Carbon supports the migration of multiple VMs at once, making it a highly efficient and convenient tool for large-scale migrations.
  4. How long does it take to migrate VMs with Carbon? The time it takes to migrate VMs with Carbon depends on several factors, including the size and number of VMs, network speed, and storage capacity. In general, Carbon can complete a migration in a matter of hours, saving you time and effort compared to manual migration methods.

Azure VM to VMware Migration Conclusion

Migrating Azure VMs to VMware can be a complex process, but with the right planning and preparation, it can be a smooth and stress-free transition. By following the planning checklist outlined in this blog post, you can ensure that you have all the information, tools, and resources you need to complete the migration successfully. And with Carbon – the automated migration software – you

can simplify and streamline the process even further. With its user-friendly interface and support for multiple VMs, Carbon is the perfect tool to help you with your migration. So, why not try it out today and experience the ultimate solution for migrating Azure VMs to VMware.

In conclusion, The title of the blog post is “The Ultimate Planning Checklist for Migrating Azure VMs to VMware” is designed to provide you with a comprehensive guide to migrating Azure VMs to VMware. Whether you’re a seasoned IT professional or new to the world of virtualization, this checklist will help you successfully plan and execute your migration. And with the added benefits of using Carbon, you can simplify and automate the process, saving you time and effort in the process. So, start your migration today and see the benefits of migrating Azure VMs to VMware with Carbon!

How to clone a Azure VM

How to clone a Azure VM

How to clone a Azure VM

If you ever need to duplicate or clone your Azure VMs or perhaps even migrate your Azure VMs from Azure Service Manager (ASM) to Azure Resource Manager (ARM) you can use one of our Azure Management Tools, Azure VM Cloner (AVMC) to quickly and easily do this for you. (You can download a fully functioning trial here)

In the last blog post I showed you how you could schedule the deployment of Azure VMs. Using those same VMs and Azure Subscription I will now show you how we can clone your Azure VMs.

Why clone your Azure VM?

Use Case Description

Disaster Recovery

In case of a disaster or outage, having a cloned VM in a different Azure region or datacenter can provide a quick failover option and ensure business continuity.

Testing and Development

Cloning a VM can provide a safe and isolated environment for testing and development purposes without affecting the production environment.

Scaling Out

Cloning a VM can help quickly and easily scale out an application or service by creating multiple copies of the same VM to distribute the workload.

Migrating to a New Subscription

When migrating to a new Azure subscription, cloning a VM can help ensure that all the necessary configurations and settings are preserved.

Creating a Backup

Cloning a VM can also serve as a backup option in case the original VM experiences any issues or failures.

Cloning an Azure Virtual Machine

Start cloning your Azure VM

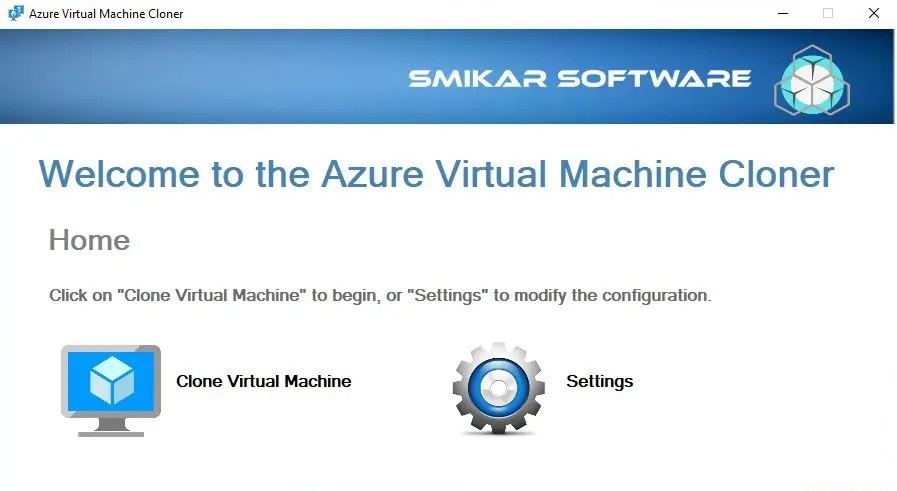
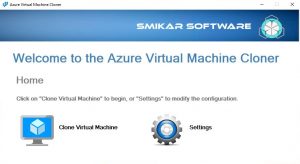
Start up the Azure VM Cloner tool then click on Clone Virtual Machine in the home window


Clone Azure VM

Select the Azure VM to Clone

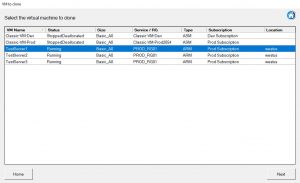
Next we are presented with a list of the Azure VMs you have in your subscription. Highlight one of the Virtual Machines and then click on Next.


Shutdown your Azure VM to be Cloned

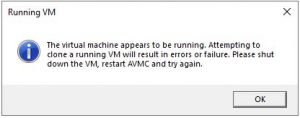
Note if the VM is running you will get the following error. Best to shutdown any virtual machines within Azure that you need to clone.


Clone Azure VM running VM

Choose the Destination for your cloned Azure VM

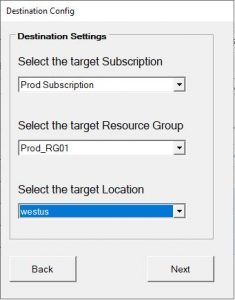
We are next presented on some destination settings we need to migrate the cloned Azure VM to. Choose your Azure Target Subscription (you can clone your Azure VMs across subscriptions only if you have access)
Select a target Azure Resource Group and then finally the Azure Location for the VM to reside in.
Click on NEXT to continue with the cloning process.

Clone Azure VM Destination

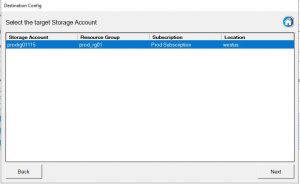
Cloned Azure VM Destination Storage Account

Now we need to choose which Azure storage account to place the cloned Azure VM in.

Highlight the correct storage account then click on NEXT.


Clone Azure VM Storage Account

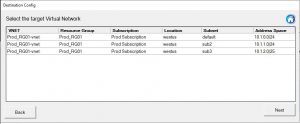
Cloned Azure VM Destination vNet

The next selection window we are presented with is the Azure Virtual Network that you would like the cloned virtual machine in.

Highlight the correct Azure vNet and again click on NEXT.  The Azure VM Cloner will read the vnet configuration before continuing.


Clone Azure VM vNet

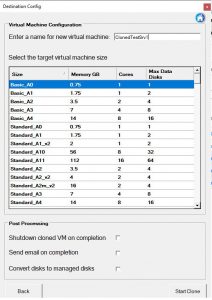
Choose the VM Size for your cloned VM

The last configuration window before the cloning of the Azure VM kicks off is the VM sizing window. Choose an Azure VM size and give the server a name.

You can also select whether to shutdown the cloned VM on completion, Send an email to let you know once done and even convert the disks to Azure Managed Disks if they were in an Azure Storage Account before.
Click on START CLONE to continue.


Clone Azure VM Sizing

Ready to start the cloning of your Azure VM

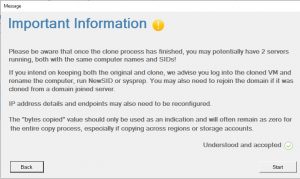
You are now ready to proceed with the cloning process. The Cloning Warning screen informs you that may have two servers with the same SIDs and computers names after the server has been cloned, this is of course not something you want to have happen in a Production environment.

Read the warning and when you are ready to do so, check the Understood and Accepted then click on START.


Clone Azure VM Warning

Cloning process for your Azure VM

In the Console Output you can see the tasks and status of your Azure VM cloning and as seen in the Azure Portal you can see that the VM has now cloned successfully.

Now the last things you will need to do if it is a Microsoft Windows virtual machine that you cloned, is to login with its local Administrator account and password and possibly run a Sysprep to change the server name and SSID before you rejoin it to the domain.


Clone Azure VM Azure Portal

Download a Trial of Azure VM Cloner today.

To trial our Azure VM Cloner, fill in the form below to get access to download the trial software.


The cost of our Azure VM Cloner is $500 USD.


FREE DOWNLOAD

Send download link to:

I confirm that I have read and agree to the End User License Agreement.

Download a trial of the Azure VM Cloner and see all of our Azure Management Tools.

Cloning an Azure VM is an important process that can save you a lot of time and effort. With Azure VM Cloner (AVMC), you can easily and quickly clone your Azure VMs, ensuring that you have an exact replica of the original virtual machine. By following the steps outlined in this guide, you can clone your Azure VMs with ease, without any errors or issues.