Securing External Sharing in SharePoint Online

Securing External Sharing in SharePoint Online

A Comprehensive Guide to sharing with external parties in SharePoint Online

In today’s interconnected business world, external collaboration is essential. SharePoint Online provides the flexibility to share documents with external partners, clients, and vendors, but this can also expose organizations to data security risks. Securing external sharing while ensuring smooth collaboration is key to maintaining trust and protecting sensitive information. Here’s how you can achieve that balance.

Squirrel Main Dashboard
Key Takeaway Description
Define organization-wide sharing policies Limit sharing permissions to only essential users, ensuring sensitive data is not exposed.
Enable Multi-Factor Authentication (MFA) and Conditional Access MFA adds an extra layer of security, while Conditional Access restricts access based on device/location.
Use Microsoft Information Protection (MIP) and Sensitivity Labels These tools encrypt and restrict access to sensitive documents, ensuring only authorized users can view them.
Always use ‘Specific People’ option and set expiration dates for shared links This minimizes the risk of unauthorized access and ensures access is time-bound.
Regularly monitor and audit external sharing activities Set up alerts for unusual behavior and review logs to prevent data breaches.
Leverage Azure AD B2B for managing external users securely Azure AD B2B provides enhanced security by treating external users like internal users.
Conduct periodic access reviews and implement guest expiration policies Revoke access for users who no longer require it, preventing outdated permissions from becoming vulnerabilities.

Key External Sharing Challenges

When sharing documents with external users, several challenges arise, each posing unique risks to your organization’s security. Understanding these challenges is the first step toward mitigating them:

  • Unauthorized Access: External users might inadvertently gain access to confidential or sensitive information. This typically happens when sharing permissions are overly broad or not managed properly, allowing users outside the intended circle to view sensitive documents.
  • Overexposure of Internal Documents: Without proper sharing controls, external users can share links further or gain access to content that they were never supposed to view. This could expose your organization to data breaches or loss of intellectual property.
  • Lack of Control Over Shared Content: Once a document is shared externally, it’s difficult to monitor what recipients do with the content. They might copy, modify, or further distribute the documents, leaving the original owner with no control over their data.

Step 1: Defining Organization-Wide Sharing Policies

To address these challenges, the first step is to establish clear organization-wide sharing policies. These policies set boundaries on who can share, what can be shared, and how sharing can be conducted.

In SharePoint Online, administrators can configure sharing permissions both at the organization and individual site level. This allows you to limit external sharing in sensitive departments, such as HR or legal, while giving marketing or project management teams more flexibility. For example:

  • Restricting sharing to authenticated users: External sharing should be limited to users who can authenticate themselves, reducing the risk of anonymous access.
  • Department-specific controls: HR teams may handle sensitive personal information, requiring stricter controls compared to marketing teams who may need to share materials more frequently with external partners.

Balancing security with collaboration ensures that external sharing is carefully managed, with only trusted documents and users permitted.


Step 2: Multi-Factor Authentication (MFA) and Conditional Access

Implementing Multi-Factor Authentication (MFA) is one of the most effective ways to protect your SharePoint environment when sharing externally. MFA requires users to provide more than one form of verification (e.g., a password and a code sent to their phone) before gaining access. This additional step significantly reduces the risk of unauthorized access, even if external users’ credentials are compromised.

Beyond MFA, Conditional Access Policies further enhance security by enforcing restrictions based on a range of factors such as user location, device type, or network. For example:

  • Location-based access: Only allow external users to access SharePoint from specific geographic locations or trusted IP addresses.
  • Device-based access: Block access to SharePoint unless the external user is using a managed or trusted device.

Real-world example: A construction company working with external project managers enforces MFA and Conditional Access to ensure that these users can only access SharePoint from their corporate devices, reducing the risk of access from untrusted networks.


Step 3: Managing Access with Sensitivity Labels and Microsoft Information Protection (MIP)

Sensitive documents need special protection, especially when shared externally. Microsoft Information Protection (MIP) and Sensitivity Labels provide a robust solution to this problem. By using these tools, organizations can classify documents based on their level of sensitivity and apply protections such as:

  • Automatic encryption: Sensitive documents are encrypted, preventing unauthorized users from accessing the content.
  • Watermarks and access restrictions: Watermarks can be added to files to visibly mark their sensitivity, while access restrictions can limit who can open, edit, or forward the document.

For example, if a document is labeled as “Confidential,” it will be encrypted, and only authorized users (both internal and external) can open it. Even if the link is shared beyond the intended group, unauthorized recipients won’t be able to access the content.

This helps organizations maintain compliance with data privacy regulations like GDPR or HIPAA while keeping sensitive data secure.


Step 4: Best Practices for Sharing Links

When sharing content externally, it’s essential to control who can access the documents and for how long. The “Specific People” sharing option is the best way to limit access to particular individuals, reducing the risk of unauthorized access. Unlike the more open “Anyone with the link” setting, “Specific People” ensures that only those who are explicitly invited can view the content.

Additionally, setting expiration dates on shared links ensures that access is only available for the duration it’s needed. For example, if you’re collaborating on a proposal with a client, you can set the link to expire after a few weeks, preventing the file from being accessed indefinitely.

This is particularly useful when working with temporary collaborators or vendors, as it minimizes the chances of files being shared long after a project is completed.


Step 5: Regular Monitoring and Auditing

Monitoring and auditing external sharing activities are essential to maintaining control over shared content. SharePoint provides detailed activity logs that allow administrators to track:

  • Who accessed or shared a document.
  • When and from where the document was accessed.
  • Any unusual patterns of behavior, such as mass downloads or unexpected sharing events.

If, for example, a contractor suddenly downloads a large number of files, an alert could be triggered for administrators to investigate potential unauthorized access. Regularly reviewing these logs and setting up automated alerts ensures timely responses to suspicious activity, helping to prevent data breaches before they escalate.


Step 6: Leveraging Azure AD B2B for Secure External Collaboration

Azure Active Directory (AD) B2B offers a more secure way to manage external users by integrating them into your organization’s Azure AD environment. With Azure AD B2B, external users are treated as guest users, but their access is governed by the same security policies applied to internal users.

This means you can apply Conditional Access, MFA, and other security measures to external collaborators, ensuring they comply with your organization’s security requirements. Additionally, you can revoke access easily when the collaboration ends.

Example: An IT services company uses Azure AD B2B to manage external consultants, allowing them to access only specific SharePoint sites with secure credentials.


Step 7: Ongoing Access Reviews and Guest Expiration

To ensure that external access is always in line with your current needs, it’s important to conduct periodic access reviews. This involves reviewing which external users have access to your SharePoint sites and revoking access for those who no longer need it. This step prevents outdated permissions from becoming a security liability.

Additionally, using Guest Expiration Policies ensures that external access is automatically revoked after a set period. For instance, if a vendor’s contract ends in six months, the guest access can be configured to expire automatically at that time.

This automated process minimizes the need for manual intervention and ensures that only current, active collaborators retain access.


Conclusion

External sharing in SharePoint Online provides valuable collaboration opportunities, but it comes with risks if not managed carefully. By following these best practices—defining clear sharing policies, using MFA and Conditional Access, applying sensitivity labels, and monitoring sharing activities—you can safeguard your organization’s data while fostering secure and productive collaborations with external partners.

Security doesn’t have to hinder productivity. By adopting the right tools and processes, you can protect your data and ensure seamless, secure collaboration. Encourage your teams to follow these best practices, and regularly review and update your sharing policies to stay ahead of evolving security challenges.

Your content goes here. Edit or remove this text inline or in the module Content settings. You can also style every aspect of this content in the module Design settings and even apply custom CSS to this text in the module Advanced settings.

Managing Your SharePoint Online Costs Doesn’t Have to Be Hard.

With Squirrel, you can reduce your SharePoint Online Storage cost without reducing deleting a file. Intelligent Archiving for SharePoint made easy with Squirrel.

Squirrel for SharePoint Site Size Reporting

Archive SharePoint Online without reducing Functionality with Squirrel

Ready To Get Saving?

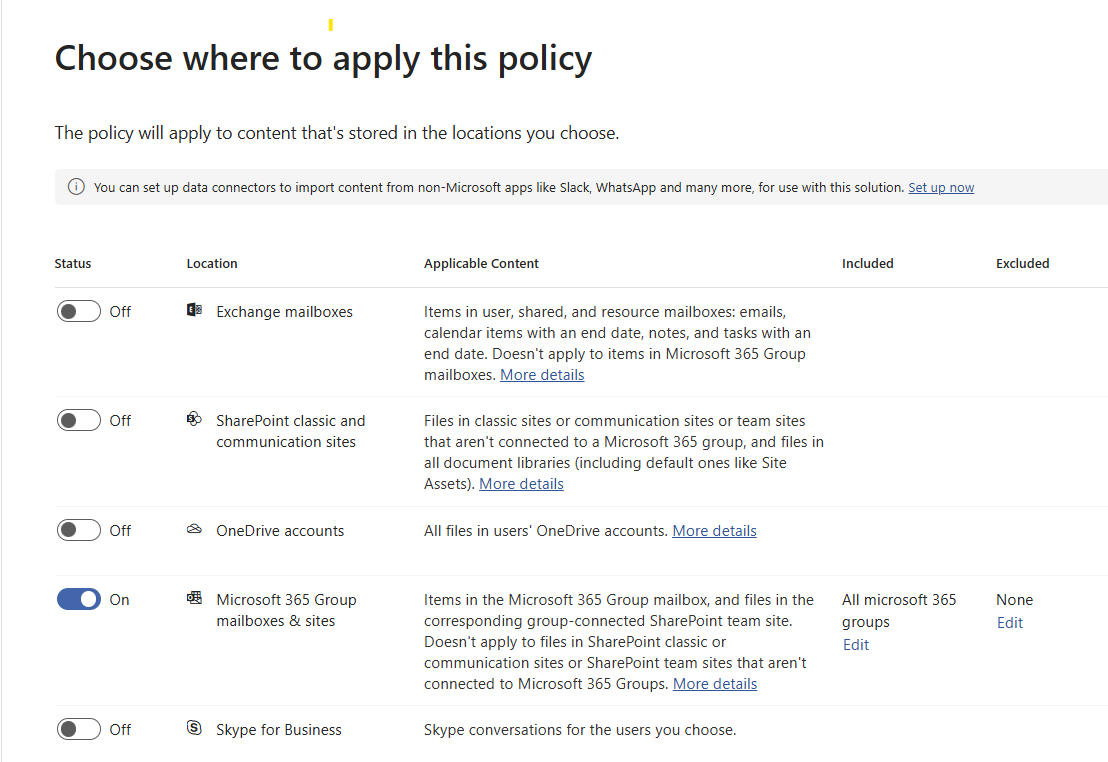
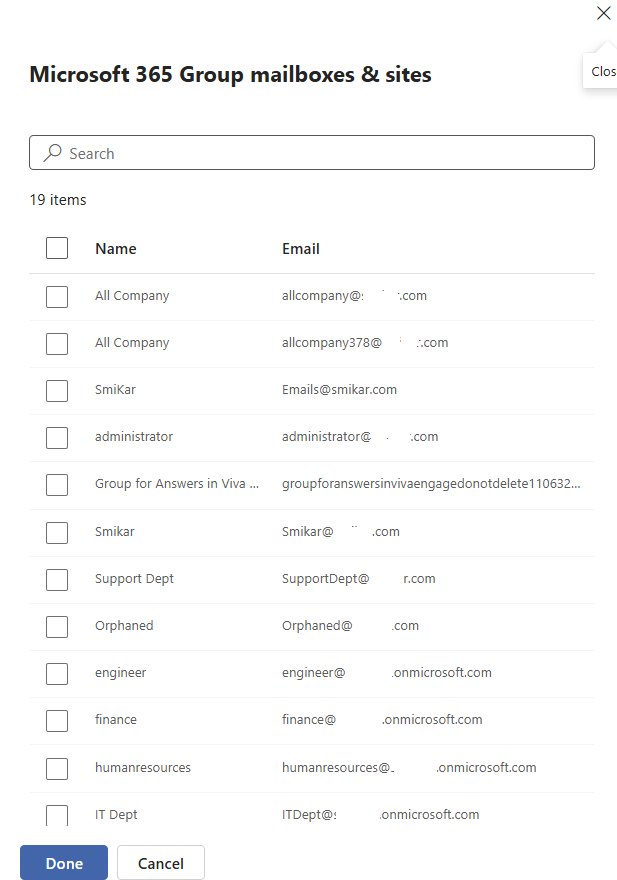
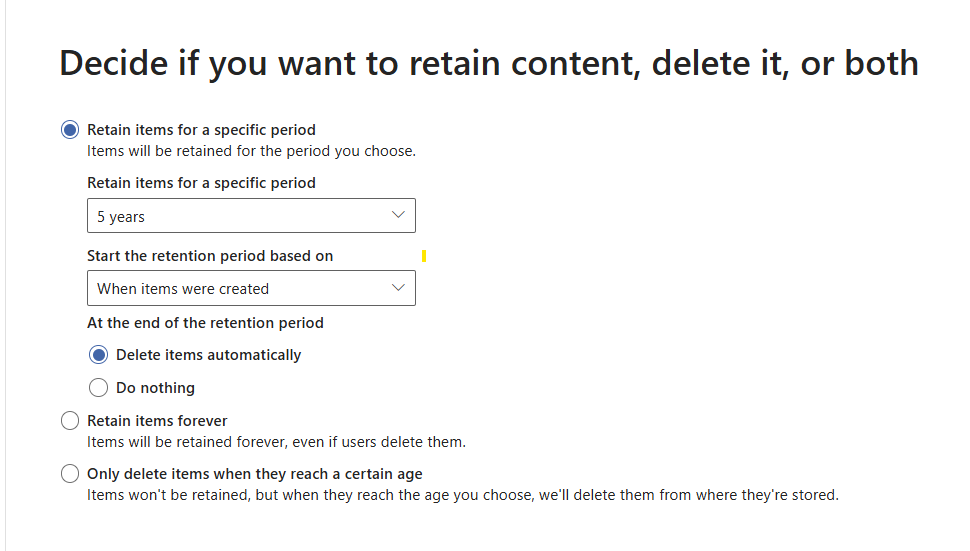
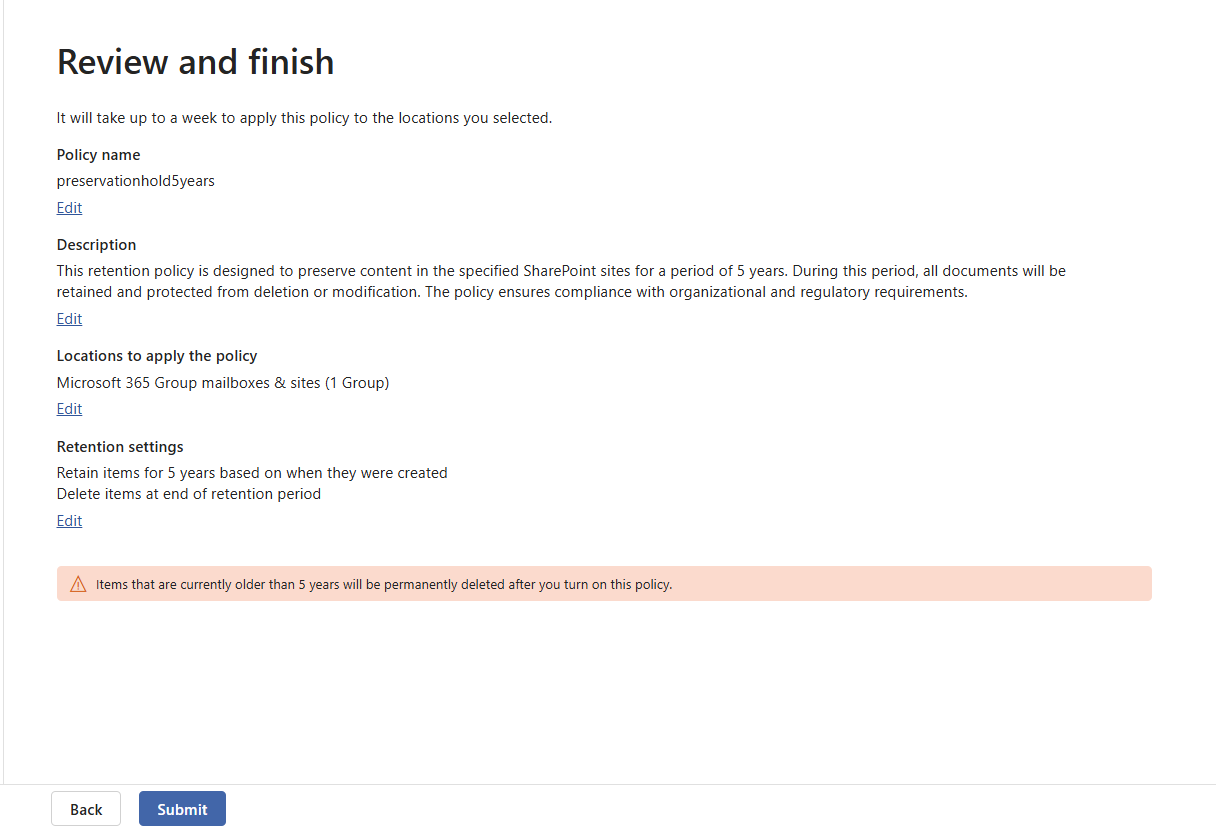
Best Practices with Microsoft 365 Compliance Center

Best Practices with Microsoft 365 Compliance Center

Maximizing Archiving in SharePoint Online

As businesses continue to generate and store massive amounts of data, effective document management becomes increasingly important. SharePoint Online, one of Microsoft 365’s core collaboration tools, allows organisations to store, share, and manage documents effortlessly. However, simply storing data isn’t enough—effective archiving is essential to ensure compliance, optimize storage costs, and preserve critical information for the long term.

Squirrel Main Dashboard
Archiving is not just about saving space; it’s about maintaining control over your data’s lifecycle, ensuring that documents are retained or removed according to legal, regulatory, and operational requirements. Microsoft provides built-in archiving tools within the Microsoft 365 Compliance Center, which help organisations manage data retention, govern compliance, and enable efficient document lifecycle management. This post will explore how you can leverage these features and how Squirrel—an automated document archiving solution for SharePoint—can further enhance your archiving strategy.
Key Takeaway Description
Retention Labels Classify and manage document lifecycles in SharePoint Online for compliance purposes. Labels can be applied manually or automatically.
Retention Policies Apply broad retention rules across entire SharePoint sites to ensure consistency in document management and compliance.
Microsoft Information Protection (MIP) Use MIP to classify and protect sensitive documents through encryption and restricted access, ensuring only authorised users can view or edit documents.
Squirrel Integration Squirrel enhances SharePoint Online by automatically archiving documents to Azure Blob Storage, optimising costs and storage management.
Stub Files Squirrel leaves stub files in place of archived documents, allowing users to easily rehydrate files with one click, maintaining a seamless user experience.
Version Control Squirrel preserves document versions and metadata, ensuring full restoration of documents with their complete history.
Cost Savings Archiving older or inactive documents to Azure Blob Storage with Squirrel reduces SharePoint storage costs significantly.
Compliance and Security Combining Microsoft 365 Compliance Center with Squirrel ensures compliance with regulatory requirements while maintaining secure and encrypted document archives.
Best Practices Regularly test your archiving strategy, ensure encryption keys are managed correctly, and adjust archiving policies to match evolving business and legal requirements.
Microsoft 365 Compliance Center Overview

The Microsoft 365 Compliance Center is your command center for managing data retention, information protection, and compliance across all Microsoft 365 services, including SharePoint Online. It is designed to help organisations address a range of data governance needs, from basic archiving and retention to advanced compliance requirements such as legal holds and information governance.

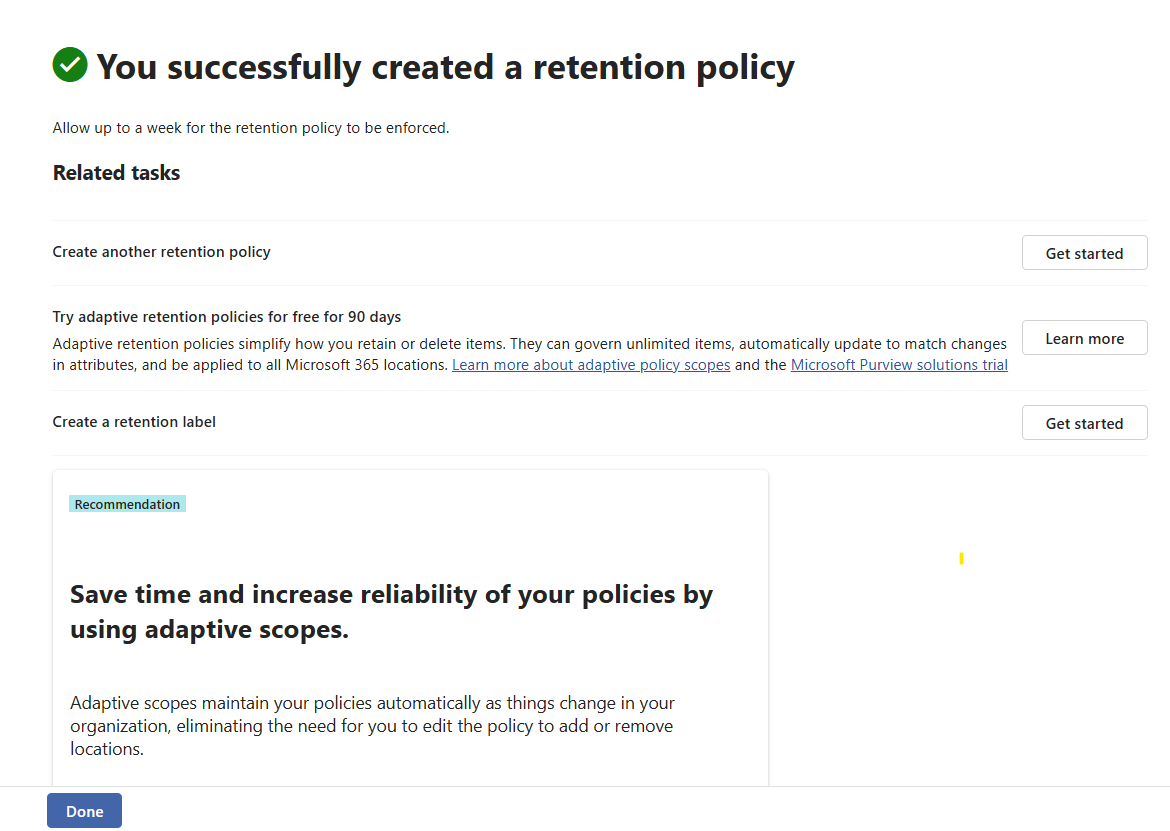
Through this centralized interface, you can configure policies that determine how long your content is kept, when it is deleted, and how you can ensure compliance with both internal policies and external regulations. Let’s dive into two of the most important tools offered by the Compliance Center for archiving and retention in SharePoint Online: Retention Labels and Retention Policies.

Retention Labels

Retention labels are one of the primary ways you can classify and manage the lifecycle of documents in SharePoint Online. By applying retention labels, you essentially instruct SharePoint on how to handle a document over its lifetime—whether that means retaining it for a specified period, archiving it, or deleting it after it’s no longer needed.

Key Features of Retention Labels:

  • Classification and Lifecycle Control: Retention labels allow organisations to classify documents based on predefined criteria such as document type, content, or sensitivity. This classification directly informs how long the document will be retained, when it should be archived, and when it should be deleted.
  • Automatic and Manual Application: Labels can be applied manually by users or automatically based on rules that examine the document’s content or metadata. For example, you could configure a rule to automatically apply a retention label to all documents containing sensitive information, like financial data or client records.
  • Retention Without Deletion: One of the standout features of retention labels is the ability to preserve documents without necessarily deleting them. This means you can configure a document to be retained and archived beyond its active use, ensuring it is still accessible for legal or compliance reasons while not cluttering up active document libraries.
  • Label Policies: Retention labels are part of a larger retention strategy where you can define policies that group multiple labels together, helping ensure that documents across various departments, such as HR, Finance, or Legal, are archived or retained according to specific rules.

How Retention Labels Work in SharePoint Online:

Retention labels work seamlessly within SharePoint Online by attaching directly to documents or entire libraries. For instance, you could apply a retention label to every document within a particular site collection or document library to ensure that all documents are kept for a period of 7 years (a common legal requirement) before being archived or deleted.

Once the label is applied, SharePoint enforces the retention period defined by the label. If a document needs to be archived after 5 years, the system ensures that the document is preserved in its archived state and is either automatically moved to an archive library or retained in place for further compliance purposes.

Retention Policies

While retention labels are highly useful for classifying and managing individual documents, Retention Policies provide a broader, more holistic approach to data retention across entire SharePoint Online environments. These policies allow you to define retention rules that apply to entire site collections or even across multiple services within Microsoft 365, such as Exchange or OneDrive.

Key Features of Retention Policies:

  • Site-Wide Application: Retention policies apply to all content within a specific site, ensuring that every document, list, or library is managed under a single set of retention rules. This is particularly helpful when you need to ensure compliance across an entire department or project.
  • Consistent Retention Across Workloads: One of the most powerful aspects of retention policies is their ability to govern retention across multiple Microsoft 365 services. This means you can apply a single retention policy that ensures consistency across SharePoint, OneDrive, and Exchange—important for organisations with complex workflows that span multiple platforms.
  • Archiving and Deletion Triggers: Retention policies can be configured to trigger document archiving or deletion based on various conditions. For instance, documents might be archived after a set period of inactivity, or they might be retained for legal reasons until a case is closed. These automated triggers help organisations stay compliant without requiring constant manual intervention.

How Retention Policies Work in SharePoint Online:

Retention policies in SharePoint Online work by monitoring the activity of documents and applying the rules defined in the policy. For example, a retention policy might specify that all documents within a specific project site must be archived after 3 years of inactivity. SharePoint automatically applies these rules, ensuring that the documents are moved to a more cost-effective archive location or deleted once the retention period has ended.

Microsoft Information Protection (MIP)

In addition to retention labels and policies, organisations often need to go a step further when it comes to protecting sensitive data, especially in industries that require strict compliance with regulations like GDPR or HIPAA. This is where Microsoft Information Protection (MIP) comes into play. MIP helps organisations classify, label, and protect sensitive information across SharePoint Online, as well as other Microsoft 365 services.

How MIP Works in SharePoint Online:

MIP allows organisations to classify and label documents based on sensitivity. For example, documents that contain financial data, intellectual property, or personally identifiable information (PII) can be labelled as “Confidential” or “Highly Sensitive.” These sensitivity labels can then trigger various protection measures, such as encryption or restricted access, to ensure that only authorised users can view or edit the document.

MIP integrates directly with Azure Information Protection (AIP) to apply encryption and other protections to files. Once a sensitivity label is applied, the file is protected, regardless of where it is stored or shared. This is particularly important for SharePoint Online, where documents are often shared widely across teams and departments.

Encryption and Compliance with MIP:

When it comes to archiving, MIP adds another layer of complexity due to its encryption capabilities. Files that are encrypted by MIP are secured with a set of encryption keys managed either by Microsoft or by the customer (in cases where Customer Key is used). This can introduce challenges when archiving encrypted files, as organisations must ensure that the encryption keys remain accessible for the duration of the archive period.

Potential Challenges:

  • Key Rollover: Encryption keys can change over time, a process known as “key rollover.” If a document is archived for several years, and the encryption key is rolled over or no longer accessible, it may become difficult—or even impossible—to decrypt the document when it is needed in the future.
  • Decryption Limitations: While MIP ensures that sensitive data remains protected, it can also limit how and when documents can be decrypted. For instance, if a document is archived with Squirrel but has MIP encryption applied, Squirrel will not be able to decrypt the document because it cannot access the MIP encryption keys.

To mitigate these challenges, it’s crucial for organisations to carefully manage their encryption policies and key lifecycles, ensuring that they remain in sync with archiving strategies.

How Squirrel Complements SharePoint Online Archiving

While Microsoft provides robust tools for retention and protection, these features alone may not be sufficient for organisations managing large-scale SharePoint environments. This is where Squirrel steps in, offering a powerful, automated archiving solution designed specifically for SharePoint Online.

Squirrel extends and complements Microsoft’s native archiving capabilities, providing additional flexibility, cost savings, and features that make managing the document lifecycle more efficient.

Here’s how Squirrel adds value:

Squirrel’s Seamless Integration with SharePoint Online

Squirrel is built to work hand-in-hand with SharePoint Online, leveraging Microsoft’s APIs to ensure a seamless and transparent experience for administrators and users alike. The integration with SharePoint allows Squirrel to automatically archive documents based on predefined policies, moving them to more cost-effective storage without requiring manual intervention from users or IT teams.

Unlike Microsoft’s native retention labels and policies, which primarily focus on compliance and governance, Squirrel is designed to optimise storage costs by moving older, inactive documents to Azure Blob Storage, freeing up valuable SharePoint storage space.

Squirrel’s Key Features for SharePoint Online Archiving

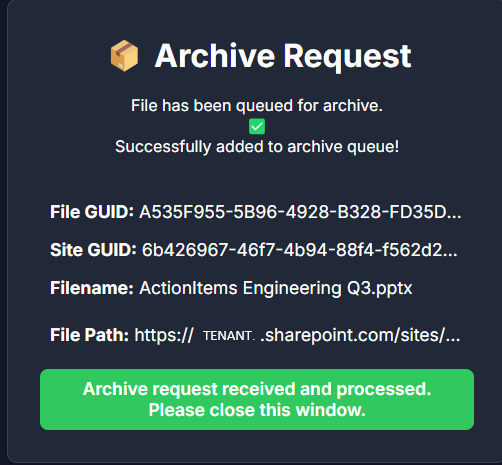
  • Automated Document Archiving: Squirrel allows organisations to set up lifecycle policies that automatically archive documents from SharePoint Online based on various criteria such as document age, inactivity, or size. Once archived, the documents are moved to Azure Blob Storage, significantly reducing storage costs while maintaining accessibility.
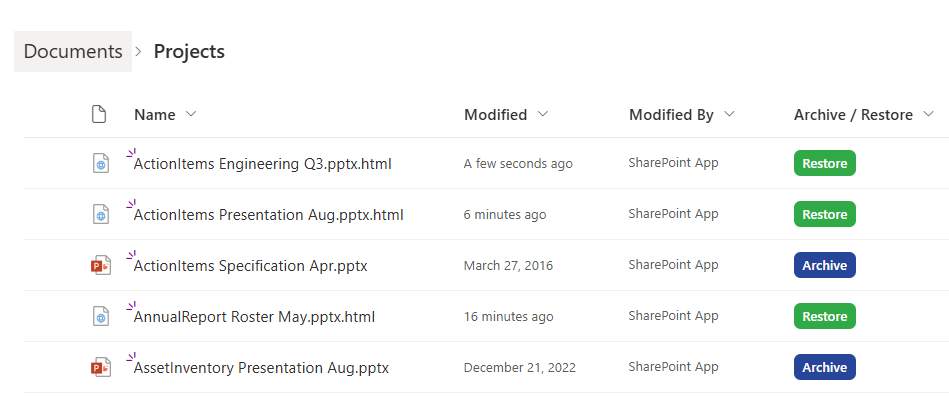
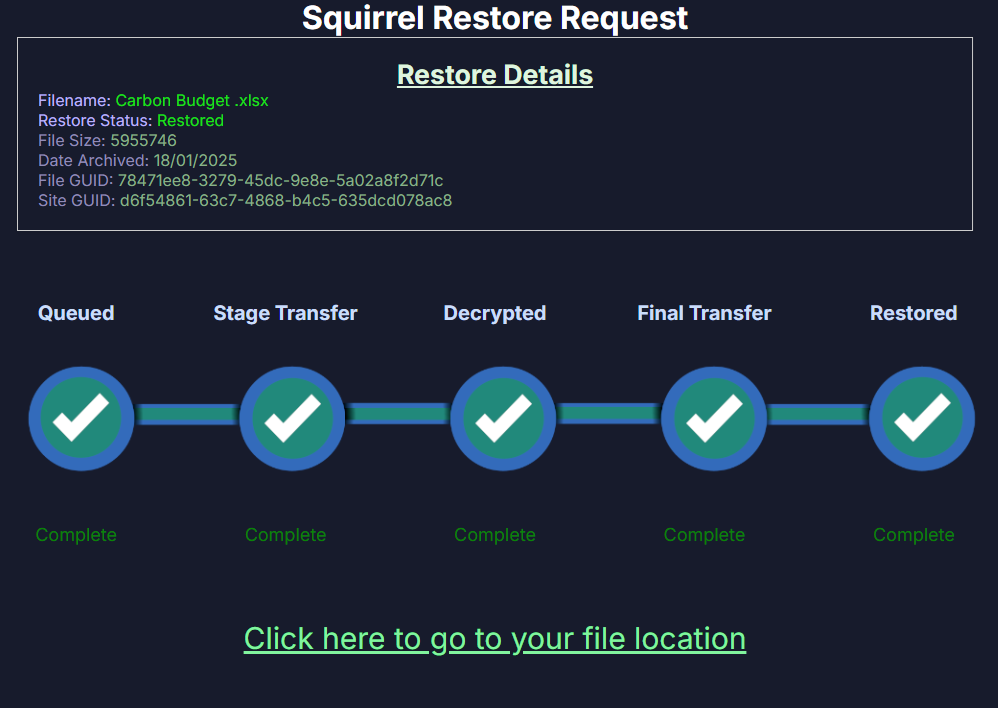
  • Stub Files for Easy Rehydration: One of Squirrel’s standout features is its use of “stub files.” When a document is archived, Squirrel replaces the original file in SharePoint with a small placeholder (stub file) that maintains the file’s original name and location. Users can simply click the stub file to “rehydrate” the document back to its original state, restoring all versions and metadata in the process. This creates a seamless experience for users, as they can retrieve archived documents with minimal effort.
  • Version Control and Metadata Preservation: When Squirrel archives a document, it doesn’t just move the current version—it archives all versions of the document along with its metadata (e.g., tags, permissions, audit logs). This ensures that when the document is rehydrated, it retains all the historical information that may be required for legal or regulatory purposes.  
  • Data Encryption and Security: Like Microsoft, Squirrel takes data security seriously. All documents archived by Squirrel are encrypted and stored securely in Azure Blob Storage. Importantly, Squirrel manages its own encryption layer, which means that while MIP-encrypted documents can still be archived, Squirrel does not handle their decryption. Instead, it stores these documents in their encrypted state, ensuring compliance without compromising security.  
  • Cost-Effective Storage: By archiving inactive or infrequently accessed documents to Azure Blob Storage, Squirrel helps organisations significantly reduce their SharePoint storage costs. Given that Azure Blob Storage is much cheaper than SharePoint storage, this can result in substantial savings for organisations managing large volumes of data.  
  • Compliance and Retention: Squirrel works in tandem with Microsoft’s retention policies, ensuring that documents are archived according to legal or regulatory requirements. This dual approach ensures that documents are both securely stored and accessible when needed.

Best Practices for Archiving SharePoint Documents

Effectively managing your SharePoint Online environment requires a comprehensive archiving strategy that addresses both storage optimisation and regulatory compliance. By combining the capabilities of Microsoft 365 Compliance Center with a dedicated archiving solution like Squirrel, organisations can create a more efficient, secure, and cost-effective data management system.

Here are some best practices to help you get the most out of both tools:


1. Leverage Retention Labels and Policies for Compliance

Start by establishing clear data retention policies that align with your organisation’s compliance requirements. Microsoft 365 Compliance Center’s retention labels and policies are powerful tools that help ensure your documents are managed according to internal guidelines and external regulations.

Best Practice: Use retention labels to classify documents based on content sensitivity, legal requirements, or department-specific needs (e.g., legal, HR, or finance documents). For example:

  • Apply retention labels to documents that must be archived for a specific period (e.g., 7 years) before deletion.
  • Use retention policies to enforce document retention and archival for entire SharePoint sites or libraries, ensuring consistency across your environment.

Retention labels and policies should be reviewed regularly to ensure they remain up-to-date with evolving compliance regulations and business needs.


2. Implement Sensitivity Labels for Additional Security

For organisations dealing with sensitive information, such as personally identifiable information (PII), financial data, or intellectual property, Microsoft Information Protection (MIP) is essential. Sensitivity labels not only classify data but also protect it through encryption and restricted access.

Best Practice: Apply sensitivity labels to protect sensitive files and ensure only authorised users can access them. If you archive documents with Squirrel, be aware that MIP encryption will remain intact, and you’ll need to manage encryption keys carefully to ensure access during the archiving period.

Key Consideration: Before archiving, ensure you have a process in place to maintain access to encryption keys, especially if your organisation rotates encryption keys or enforces key rollover policies. Failure to maintain these keys may result in an inability to decrypt archived documents when they are restored.


3. Use Squirrel for Cost-Effective Archiving

While Microsoft 365 Compliance Center provides robust data governance, it does not directly address storage cost optimisation. This is where Squirrel’s automated archiving solution comes into play, enabling you to move large volumes of inactive or infrequently accessed documents from SharePoint to Azure Blob Storage, where the cost of storage is significantly lower.

Best Practice: Configure Squirrel to automatically archive documents based on criteria such as:

  • Document age (e.g., archive documents older than 1 year).
  • Inactivity (e.g., archive documents that haven’t been accessed in 6 months).
  • File Type (e.g. archive files based on file extension)

By archiving these documents to Azure Blob Storage, you’ll free up SharePoint storage, potentially saving your organisation thousands of dollars annually.

Bonus Tip: Monitor your SharePoint storage usage and adjust Squirrel’s archiving policies regularly to ensure that only the most relevant data remains in active storage. You can also archive entire site collections or large document libraries that are no longer actively used but need to be retained for compliance purposes.


4. Maintain Metadata and Version History with Squirrel

One common challenge when archiving documents is the risk of losing important metadata and version history. Fortunately, Squirrel ensures that all versions and metadata associated with a document are preserved during the archiving process. This is especially useful when dealing with legal or regulatory requirements where version history must be maintained.

Best Practice: Enable Squirrel’s version control feature to ensure that when a document is archived, all versions are stored and can be restored alongside the original document. This allows your team to easily rehydrate a document back to its original state without losing any historical context.

This level of detail is essential for audit trails, legal discovery, or compliance checks, where the full history of a document’s changes must be available.


5. Use Squirrel’s Stub Files for Seamless Rehydration

Squirrel’s use of stub files makes it easy for users to access archived documents without disrupting their workflow. When a file is archived, a lightweight placeholder remains in SharePoint Online, allowing users to rehydrate the file with a single click. This eliminates the need for manual document retrieval, making the process transparent to end users.

Best Practice: Leverage stub files to create a seamless experience for your users. When Squirrel archives a document, users won’t even notice it’s been moved to Azure Blob Storage. They can simply click the stub file when they need access, and the document will be rehydrated with all its versions and metadata intact.

This feature can be especially useful in environments where users frequently need access to older documents but don’t want the hassle of navigating an archiving system.


6. Regularly Test and Validate Your Archiving Strategy

A successful archiving strategy isn’t something you “set and forget.” Regular testing and validation are crucial to ensure that your retention policies, sensitivity labels, and archiving workflows are functioning as expected.

Best Practice: Perform regular checks to:

  • Ensure that documents are being archived according to your retention policies.
  • Verify that archived documents can be successfully rehydrated using Squirrel’s stub files.
  • Test the accessibility of MIP-encrypted documents to ensure that encryption keys are still valid and accessible during the archiving period.

Incorporating these tests into your data governance routine will help avoid surprises when you need to restore critical documents or meet regulatory audits.

Conclusion

Effectively managing the lifecycle of your SharePoint Online documents requires a balance between compliance, security, and storage optimisation. Microsoft 365 Compliance Center offers powerful tools for retention and protection, but integrating a dedicated archiving solution like Squirrel can significantly enhance your organisation’s ability to manage large volumes of data cost-effectively.

By using Microsoft’s retention labels, policies, and sensitivity labels in tandem with Squirrel’s automated archiving, version control, and stub file rehydration features, you can create a comprehensive archiving strategy that meets your organisation’s needs for both compliance and efficiency.

Whether you’re archiving to reduce storage costs, retain documents for regulatory reasons, or secure sensitive data, combining these tools ensures that your organisation stays compliant, secure, and cost-effective—all while providing a seamless experience for end users.

Reduce SharePoint Storage Costs with Squirrel

Squirrel automatically archives inactive documents to Azure Blob Storage, which is significantly cheaper than storing them within SharePoint Online. By optimising storage costs, organisations can save thousands annually without compromising data accessibility.

Squirel Storage Comparison

Cost-Efficient Archiving for SharePoint Online with Squirrel

Curious about Squirrel?

What is SharePoint REST API? Explained for Beginners

What is SharePoint REST API? Explained for Beginners

SharePoint Online REST APIs

The SharePoint REST API is a powerful tool that allows developers to interact with SharePoint data and resources remotely. Whether you’re managing documents, configuring sites, or building custom applications, the REST API provides a flexible, efficient way to programmatically access and manipulate data within a SharePoint environment. In the modern digital landscape, where integration and automation are key, understanding and leveraging the SharePoint REST API can significantly enhance your ability to customize and extend SharePoint’s functionality.

Squirrel Main Dashboard
Topic Key Takeaways
Introduction to SharePoint REST API The SharePoint REST API allows developers to interact with SharePoint data and resources remotely.
Understanding REST API REST (Representational State Transfer) APIs use standard HTTP methods for operations like CRUD.
Flexibility and Customization The SharePoint REST API offers flexibility, enabling tailored solutions for various use cases.
Integration with Other Systems REST API facilitates seamless integration between SharePoint and other systems or services.
Automation of Tasks You can automate tasks like document management and workflow approvals using REST API.
Core Concepts Important concepts include endpoints, HTTP methods, request/response formats, and authentication.
Common Use Cases Use cases include retrieving list data, managing files and folders, and customizing the UI.
Advanced Topics Advanced use includes working with SharePoint search, integrating with external services, and building custom workflows.
Best Practices Implement error handling, optimize performance, and follow best practices for API usage.
Conclusion The SharePoint REST API is a powerful tool that enhances SharePoint’s functionality and integration capabilities.

What is a REST API?

Before diving into the specifics of SharePoint, it’s essential to understand what a REST API is. REST stands for Representational State Transfer, a widely-used architectural style for designing networked applications. REST APIs provide a way for systems to communicate over HTTP, enabling different software applications to exchange data and perform actions. REST APIs are stateless, meaning each request from a client to a server must contain all the information needed to understand and process the request, without relying on any stored context on the server. This statelessness makes REST APIs highly scalable and suitable for a wide range of applications.

In the context of web services, a REST API defines a set of rules that developers follow when creating APIs. These rules dictate how data should be structured, which HTTP methods should be used, and how responses should be formatted. The key principles of REST include the use of standard HTTP methods (like GET, POST, PUT, and DELETE), uniform resource identifiers (URIs) for resources, and a stateless communication model. REST APIs often exchange data in JSON (JavaScript Object Notation) or XML (Extensible Markup Language) formats, making them highly interoperable and easy to use across different platforms.

How Does REST API Relate to SharePoint?

SharePoint, a widely-used platform for document management and collaboration, has embraced REST as a key technology for interacting with its data and services. The SharePoint REST API provides endpoints for accessing SharePoint resources, such as lists, libraries, sites, and user profiles, directly over HTTP. This allows developers to create, read, update, and delete (CRUD) operations on SharePoint data from any application that can make HTTP requests.

One of the main advantages of the SharePoint REST API is its ability to integrate seamlessly with other systems. Whether you’re connecting SharePoint with a CRM system, pulling data into a business intelligence tool, or building a custom user interface, the REST API provides the flexibility to tailor SharePoint to your specific needs. Furthermore, because REST is based on standard web technologies, developers can use familiar tools and languages like JavaScript, C#, and Python to interact with SharePoint, reducing the learning curve and speeding up development.

SharePoint Storage Explorer

Gain insights in to your SharePoint Online Storage Consumption


Download our completely FREE TOOL

FREE DOWNLOAD

Send download link to:

I confirm that I have read and agree to the End User License Agreement.

Benefits of Using SharePoint REST API

The SharePoint REST API isn’t just another tool in a developer’s arsenal—it’s a gateway to a more dynamic and integrated SharePoint experience. Below are some of the key benefits that make the SharePoint REST API an essential tool for anyone looking to extend SharePoint’s capabilities.


Flexibility and Customization

One of the most significant benefits of the SharePoint REST API is its flexibility. Unlike some other APIs that may have rigid structures or limited functionality, the REST API offers a broad range of operations that can be tailored to meet your specific requirements. Whether you need to create a custom workflow, automate document management tasks, or build an entirely new application on top of SharePoint, the REST API gives you the tools to do so.

For example, you can use the REST API to retrieve data from a SharePoint list, apply filters or sorting to that data, and then present it in a custom web part or external application. You can also update metadata for documents, move files between libraries, or even manage user permissions—all through simple HTTP requests. This level of customization allows businesses to tailor SharePoint to their unique workflows and processes, maximizing efficiency and productivity.

Integration with Other Systems

In today’s interconnected world, the ability to integrate different systems is crucial for achieving streamlined operations. The SharePoint REST API excels in this area by providing a straightforward way to connect SharePoint with other systems and services. Whether you’re integrating with cloud services like Azure, connecting to third-party applications, or building cross-platform mobile apps, the REST API provides the necessary endpoints to facilitate these connections.

For instance, imagine a scenario where you need to sync customer data between SharePoint and a CRM system. With the SharePoint REST API, you can easily pull data from SharePoint lists and push it to the CRM, or vice versa, ensuring that both systems are always up-to-date. This integration capability not only improves data consistency but also enables automation of routine tasks, freeing up time for more strategic activities.


Automation of Tasks

Automation is a key driver of efficiency in any organization, and the SharePoint REST API is a powerful enabler of automation within the SharePoint ecosystem. By leveraging the REST API, you can automate a wide range of tasks that would otherwise require manual intervention, such as document management, workflow approvals, and data synchronization.

For example, you can create a script that automatically archives documents in SharePoint based on their age or usage, or one that updates metadata across multiple documents in bulk. These automated processes can be triggered by external events, such as the arrival of a new file in a specific library, or scheduled to run at regular intervals. The ability to automate these tasks not only reduces the likelihood of human error but also ensures that your SharePoint environment is always in optimal condition.

Target Audience: Developers, Administrators, Power Users

The SharePoint REST API is a versatile tool that can be utilized by a variety of professionals, each benefiting in different ways.

  • Developers: For developers, the REST API offers the ability to build custom solutions that enhance SharePoint’s out-of-the-box functionality. Whether you’re developing new applications, integrating with other systems, or creating custom workflows, the REST API provides the flexibility and control needed to achieve your goals.
  • Administrators: SharePoint administrators can use the REST API to manage and maintain SharePoint environments more effectively. From automating routine tasks to retrieving detailed reports on site usage, the REST API helps administrators ensure that SharePoint is running smoothly and efficiently.
  • Power Users: For power users who are not necessarily developers but have a deep understanding of SharePoint, the REST API opens up new possibilities for customization and automation. By learning how to use the REST API, power users can take their SharePoint skills to the next level, creating more dynamic and responsive sites that better meet their organization’s needs.

In summary, the SharePoint REST API is a powerful and versatile tool that offers flexibility, integration, and automation capabilities that are invaluable to developers, administrators, and power users alike. Whether you’re looking to extend SharePoint’s functionality, connect it with other systems, or automate routine tasks, the REST API provides the tools you need to achieve your goals.

Mastering SharePoint Online

Please fill out the form below to get our free Ebook "Mastering SharePoint Online" emailed to you

FREE DOWNLOAD

Send download link to:

I confirm that I have read and agree to the End User License Agreement.

Understanding the Basics

To effectively use the SharePoint REST API, it’s essential to understand some core concepts and terminologies. This section will walk you through the foundational elements that form the backbone of working with the SharePoint REST API, including endpoints, HTTP methods, request and response formats, and authentication mechanisms.

Core Concepts

At its core, the SharePoint REST API is about interacting with SharePoint resources through a set of well-defined operations. These resources can include lists, libraries, sites, users, and more. Each resource is represented by a URI (Uniform Resource Identifier), which is essentially a web address pointing to a specific resource in SharePoint. By sending HTTP requests to these URIs, you can perform various operations such as retrieving data, creating new items, or updating existing records.

The key concept to grasp is that everything in SharePoint—whether it’s a list, a document library, or a user profile—can be accessed and manipulated using these URIs in combination with the appropriate HTTP methods.

Endpoints

Endpoints are the specific URLs that you use to access SharePoint resources via the REST API. Each endpoint corresponds to a particular resource or a collection of resources. For example, to retrieve all the items in a SharePoint list, you would use an endpoint that points to that list, such as:

https://yourdomain.sharepoint.com/sites/yoursite/_api/web/lists/getbytitle(‘YourListTitle’)/items

In this example:

  • https://yourdomain.sharepoint.com/sites/yoursite/ is the base URL for your SharePoint site.
  • _api/web/lists/getbytitle('YourListTitle')/items is the endpoint that retrieves all items from the specified list.

The SharePoint REST API provides a comprehensive set of endpoints, covering everything from site collection operations to managing lists and libraries, working with users and groups, and even performing search queries. Understanding how to navigate and use these endpoints is crucial for effectively working with the REST API.

HTTP Methods (GET, POST, PUT, DELETE)

The SharePoint REST API relies on standard HTTP methods to perform different operations:

  • GET: Used to retrieve data from SharePoint. For example, you might use a GET request to fetch all the items in a list.
  • POST: Used to create new resources. For instance, you can use a POST request to add a new item to a list.
  • PUT: Used to update existing resources. For example, a PUT request can be used to update the metadata of a document in a library.
  • DELETE: Used to remove resources. A DELETE request can delete an item from a list or a file from a document library.

Each of these methods has its specific use cases, and understanding when and how to use them is key to successfully interacting with SharePoint through the REST API. Additionally, each method requires a different structure for the request payload and may return different types of responses.


Request and Response Formats (JSON, XML)

When working with the SharePoint REST API, you’ll typically exchange data in either JSON (JavaScript Object Notation) or XML (Extensible Markup Language) formats. JSON is the more commonly used format due to its simplicity and ease of use, especially when working with web applications.

JSON FORMAT

{
“Title”: “New Item Title”,
“Description”: “A brief description of the new item.”
}

XML Format

<entry xmlns=”http://www.w3.org/2005/Atom” xmlns:d=”http://schemas.microsoft.com/ado/2007/08/dataservices” xmlns:m=”http://schemas.microsoft.com/ado/2007/08/dataservices/metadata”>
<content type=”application/xml”>
<m:properties>
<d:Title>New Item Title</d:Title>
<d:Description>A brief description of the new item.</d:Description>
</m:properties>
</content>
</entry>

When you send a request to the SharePoint REST API, you need to specify the format of the data you’re sending or expecting to receive. This is done using HTTP headers. For example, to request a response in JSON format, you would include the following header in your request:

Accept: application/json;odata=verbose

Understanding how to structure your requests and interpret the responses in these formats is fundamental to working with the REST API. Most modern development environments and tools, like Postman or Fiddler, support both JSON and XML, making it easier to test and debug your API calls.

Authentication and Authorization

Security is a critical aspect of working with the SharePoint REST API, and understanding how to authenticate and authorize requests is essential. SharePoint offers several authentication methods, including:

  • OAuth 2.0: The most commonly used method for authenticating REST API requests in SharePoint Online. OAuth tokens are issued by Azure Active Directory and are required to authenticate API requests.
  • App-Only Authentication: This method allows you to authenticate using an app principal without requiring a user context. It’s particularly useful for background services or scripts that need to interact with SharePoint without user interaction.
  • NTLM and Kerberos: These are more traditional authentication methods used in on-premises environments, but they’re generally not recommended for modern development due to their complexity and limitations.

When making API calls, your application must include a valid authentication token in the HTTP headers. This token proves that your application has the necessary permissions to perform the requested operation. Without proper authentication, SharePoint will deny access to its resources.

For example, an OAuth 2.0 authentication header might look like this:

Authorization: Bearer eyJ0eXAiOiJKV1QiLCJhbGciOiJIUzI1NiJ9.eyJhdWQiOiJodHRwczovL215c2l0ZS5zaGFyZXBvaW50LmNvbSIsImV4cCI6MTYyMjM4Njg3MSwiaXNzIjoiaHR0cHM6Ly9sb2dpbi5taWNyb3NvZnRvbmxpbmUuY29tLyIsImlhdCI6MTYyMjM4MzI3MSwibmJmIjoxNjIyMzgzMjcxLCJzdWIiOiJub25pYW1lQGV4YW1wbGUuY29tIn0.Qw4C2PcHb9wtyQvGjM1YIgLrEsdmZIUkFYKsiYjV5Ug

It’s crucial to handle these tokens securely, ensuring that they are not exposed or logged inappropriately, as they grant significant access to your SharePoint environment.

SharePoint Storage Explorer

Gain insights in to your SharePoint Online Storage Consumption


Download our completely FREE TOOL

FREE DOWNLOAD

Send download link to:

I confirm that I have read and agree to the End User License Agreement.

Getting Started with SharePoint REST API

Once you have a solid understanding of the basics, it’s time to start interacting with the SharePoint REST API. This section will guide you through the prerequisites and provide a step-by-step approach to making your first API request.

Prerequisites

Before you can start working with the SharePoint REST API, there are a few prerequisites you need to have in place:

SharePoint Environment: You need access to a SharePoint Online or SharePoint Server environment where you can test and deploy your API requests.

Development Tools: Tools like Postman, Fiddler, or any IDE (Integrated Development Environment) that supports HTTP requests will be invaluable. These tools allow you to build, test, and debug your API calls easily.

Authentication Setup: Ensure you have the necessary credentials and access rights to perform API requests. For SharePoint Online, this typically involves setting up OAuth 2.0 authentication via Azure Active Directory.

Understanding of REST API Concepts: Familiarity with the core concepts of REST API, as outlined in the previous section, will make the process smoother.

With these prerequisites in place, you’re ready to dive into building your first REST API request. 

Building Your First REST API Request

Let’s walk through the process of making a simple GET request to retrieve items from a SharePoint list. This example will help you understand how to structure your requests and interpret the responses. 

Step 1: Identify the Endpoint

First, you need to identify the endpoint that corresponds to the resource you want to interact with. For example, to retrieve items from a list named “Projects,” your endpoint might look like this:

https://yourdomain.sharepoint.com/sites/yoursite/_api/web/lists/getbytitle(‘Projects’)/items

Step 2: Prepare the Request

Using a tool like Postman, create a new GET request and paste the endpoint URL into the address bar. In the headers section, add the following to specify that you want the response in JSON format:

Accept: application/json;odata=verbose

If your API requires authentication, include the necessary headers as discussed in the previous section.

Step 3: Send the Request and Analyze the Response

Click the “Send” button to execute the request. If everything is set up correctly, you should receive a response containing the list items in JSON format. The response will include details such as item IDs, titles, and any other fields you’ve defined in the list.

Here’s a sample response:

{
  “d”: {
   “results”: [
      {
           “Title”: “Project A”,
           “ID”: 1
      },
    {
          “Title”: “Project B”,
          “ID”: 2
      }
   ]
  }
}

This response indicates that the API successfully retrieved two items from the “Projects” list, displaying their titles and IDs.

Step 4: Explore More Endpoints

Now that you’ve made your first successful request, you can explore additional endpoints and HTTP methods. Try creating a new list item with a POST request or updating an existing item with a PUT request. The more you experiment, the more comfortable you’ll become with the SharePoint REST API.

By following these steps, you’ll be well on your way to mastering the basics of the SharePoint REST API. This foundational knowledge will serve you well as you delve deeper into more advanced use cases and customizations.

Squirrel for SharePoint Download

Squirrel - SharePoint Online Archiving Solution

Unlock the potential of seamless, secure, and cost-effective document management.


Download our Squirrel Information Pack now to see how Squirrel can revolutionise your SharePoint Online experience.


Learn about our innovative SharePoint Online archiving solution, data encryption, and effortless file retrieval.


Take the first step towards smarter document management today!

DOWNLOAD A SQUIRREL INFO PACK

Send download link to:

I confirm that I have read and agree to the End User License Agreement.

SharePoint REST APIs Common Use Cases

Understanding the basics of the SharePoint REST API opens the door to a wide range of practical applications. In this section, we’ll explore some of the most common use cases that demonstrate the power and flexibility of the API. These examples will help you see how you can leverage the REST API to streamline tasks, automate processes, and enhance the functionality of your SharePoint environment.

Retrieving and Manipulating List Data

One of the most frequent tasks developers and administrators perform with the SharePoint REST API is interacting with list data. Whether you’re retrieving information, adding new items, or updating existing records, the REST API provides a straightforward way to manage SharePoint lists programmatically.

Retrieving List Items

To retrieve data from a SharePoint list, you can use the GET method to send a request to the appropriate endpoint. For example, to get all items from a list called “Tasks,” you would use the following endpoint:

https://yourdomain.sharepoint.com/sites/yoursite/_api/web/lists/getbytitle(‘Tasks’)/items

You can also apply filters and sorting to this request to retrieve only specific items. For instance, if you only want to retrieve tasks that are marked as “Completed,” you can modify the endpoint like this:

https://yourdomain.sharepoint.com/sites/yoursite/_api/web/lists/getbytitle(‘Tasks’)/items?$filter=Status eq ‘Completed’

This query will return only the tasks where the Status field is equal to “Completed.” You can further refine the results by adding $orderby to sort the data by a specific field, such as due date.

Creating, Updating, and Deleting List Items
In addition to retrieving data, the SharePoint REST API allows you to create, update, and delete list items. These operations are performed using POST, PUT, and DELETE methods, respectively.

  • Creating an Item: To add a new item to a list, use the POST method. You’ll need to send a JSON payload containing the data for the new item. Here’s an example of creating a new task:{
       “__metadata”: { “type”: “SP.Data.TasksListItem” },
       “Title”: “New Task”,
       “DueDate”: “2024-09-01”
    }

This JSON object specifies the metadata and fields for the new task, which will be added to the “Tasks” list.

  • Updating an Item: To update an existing item, use the PUT method along with the item’s ID. The following example updates the due date of a task with ID 5:

 {
    “__metadata”: { “type”: “SP.Data.TasksListItem” },
   “DueDate”: “2024-09-15”
}

Send this JSON payload to the appropriate endpoint, and the specified task will be updated with the new due date.

  • Deleting an Item: Deleting an item is as simple as sending a DELETE request to the item’s endpoint. For example, to delete the task with ID 5, you would use:

 https://yourdomain.sharepoint.com/sites/yoursite/_api/web/lists/getbytitle(‘Tasks’)/items(5)

These operations provide the building blocks for managing SharePoint lists programmatically, enabling you to automate tasks that would otherwise require manual intervention.

Working with List Views and Filters

List views are a powerful feature in SharePoint, allowing users to display specific subsets of data based on defined criteria. The SharePoint REST API allows you to interact with these views programmatically, enabling dynamic and customized data presentations.

Retrieving Data Using Views
To retrieve data from a specific view in a list, you can append the view’s name to your request. For example, if you have a view called “Overdue Tasks” that only shows tasks past their due date, you can retrieve these items as follows:

 https://yourdomain.sharepoint.com/sites/yoursite/_api/web/lists/getbytitle(‘Tasks’)/views/getbytitle(‘Overdue Tasks’)/items

This request will return all items that match the criteria defined in the “Overdue Tasks” view.

Applying Filters Dynamically
You can also apply filters on the fly without needing to create a separate view in SharePoint. For example, if you want to retrieve tasks assigned to a specific user, you can add a $filter parameter to your request:

https://yourdomain.sharepoint.com/sites/yoursite/_api/web/lists/getbytitle(‘Tasks’)/items?$filter=AssignedTo eq ‘John Doe’

This request specifies the destination folder and includes the file in the request body. The overwrite=true parameter ensures that any existing file with the same name is replaced.

Downloading Files
Downloading a file is as simple as sending a GET request to the file’s endpoint. For example:

GET https://yourdomain.sharepoint.com/sites/yoursite/_api/web/GetFileByServerRelativeUrl(‘/sites/yoursite/Documents/report.pdf’)/$value

This request returns the file’s content, which you can then save or process as needed.

Conclusion

The SharePoint REST API is an incredibly powerful tool that opens up a world of possibilities for developers, administrators, and power users alike. Whether you’re looking to automate routine tasks, integrate SharePoint with other systems, or build custom applications, the REST API provides the flexibility and control needed to achieve your goals.

By mastering the basics and exploring advanced topics, you can unlock the full potential of SharePoint, creating solutions that are tailored to your organization’s specific needs. As you continue to work with the SharePoint REST API, don’t hesitate to explore the wealth of resources available, including Microsoft’s documentation, community forums, and online tutorials. These resources will help you stay up-to-date with the latest features and best practices, ensuring that your SharePoint solutions are both powerful and efficient.

Frequently Asked Questions (FAQs)

  1. What is the SharePoint REST API?
    • The SharePoint REST API is a service that allows developers to interact with SharePoint data and resources programmatically using HTTP requests.
  2. What are the main HTTP methods used in the SharePoint REST API?
    • The main HTTP methods are GET (retrieve data), POST (create data), PUT (update data), and DELETE (remove data).
  3. What formats are used for requests and responses in the SharePoint REST API?
    • The SharePoint REST API typically uses JSON (JavaScript Object Notation) or XML (Extensible Markup Language) formats.
  4. How does authentication work with the SharePoint REST API?
    • Authentication can be done using methods like OAuth 2.0, App-Only Authentication, NTLM, or Kerberos, depending on the environment.
  5. Can I use the SharePoint REST API to automate tasks?
    • Yes, the SharePoint REST API is often used to automate tasks such as document management, workflows, and data synchronization.
  6. What are some common use cases for the SharePoint REST API?
    • Common use cases include retrieving and manipulating list data, managing files and folders, and customizing the SharePoint user interface.
  7. Is it possible to integrate SharePoint with other systems using the REST API?
    • Yes, the REST API enables integration with other systems like CRM, BI tools, or cloud services, enhancing SharePoint’s functionality.
  8. What are some best practices for using the SharePoint REST API?
    • Best practices include proper error handling, optimizing API performance, and following security guidelines.
  9. How can I improve the performance of my SharePoint REST API calls?
    • You can improve performance by batching requests, using selective retrieval, and caching results where appropriate.
  10. Where can I find more resources to learn about the SharePoint REST API?
    • Microsoft documentation, community forums, and online tutorials are excellent resources for learning more about the SharePoint REST API.

Automate, Archive, Achieve – With Squirrel!

Squirrel seamlessly integrates with your SharePoint environment, automating document archiving and enhancing your workflow efficiency.

Squirrel SharePoint Individual Site Archive Settings

Unlock the Power of Your SharePoint with Squirrel!

Ready To Start Saving on Sharepoint?

The Ultimate Guide to Archiving Software

The Ultimate Guide to Archiving Software

Boost Efficiency and Secure Your Data

In today’s fast-paced digital world, businesses generate vast amounts of data every day. Managing this data efficiently is crucial for ensuring smooth operations and long-term success. That’s where archiving software for SharePoint comes into play. This article will break down what archiving software is, why it’s essential, and how it can benefit your organization. We’ll also take a closer look at Squirrel, an innovative archiving solution for SharePoint Online

Squirrel Main Dashboard

What is Archiving Software?

Archiving software helps businesses store and manage data that is no longer actively used but still needs to be retained. This can include emails, documents, databases, and other types of files. By archiving old data, companies can save on storage costs, keep their systems running efficiently, and ensure they meet various legal and compliance requirements.

Key Features of Archiving Software

Data Compression:

Archiving software reduces the size of files, helping to save on storage space. By compressing data, businesses can store more information in less space, which translates to lower storage costs and improved efficiency.

Search and Retrieval:

One of the most important features of archiving software is its ability to search and retrieve archived data quickly. It indexes files with metadata, allowing users to find specific documents without sifting through endless folders.

Automated Archiving:

Automated archiving features enable the software to move data to the archive automatically based on set policies, such as file age or activity levels. This ensures that the archiving process is consistent and reduces the burden on IT staff.

Data Integrity:

Ensuring that archived data remains unchanged and secure is vital. Archiving software typically includes features that maintain the integrity of data over time, preventing unauthorized alterations.

Compliance Support:

Many industries have strict regulations regarding data retention. Archiving software helps businesses meet these legal and regulatory requirements by providing tools and features that ensure data is stored appropriately.

SharePoint Storage Explorer

Gain insights in to your SharePoint Online Storage Consumption


Download our completely FREE TOOL

FREE DOWNLOAD

Send download link to:

I confirm that I have read and agree to the End User License Agreement.

Frequently Asked Questions about Archiving Software

Why Do Businesses Need Archiving Software?

Businesses need archiving software to manage data growth, reduce storage costs, and ensure compliance with legal and regulatory requirements. By archiving old data, companies can free up valuable primary storage space, making their systems more efficient and easier to manage. Without archiving, data can pile up and lead to inefficiencies, increased costs, and potential compliance issues.

How Does Archiving Software Work?

Archiving software works by moving data from primary storage (like active databases or servers) to a secondary storage location (like cloud storage or dedicated archive servers). This process involves compressing the data to save space, encrypting it for security, and storing it securely. The software uses metadata to create indexes, making it easy to search and retrieve the archived files. This ensures that even though the data is no longer in active use, it can still be accessed quickly when needed.

What Are the Benefits of Using Archiving Software?

Cost Savings:

By moving inactive data to cheaper storage, businesses can save on the costs associated with primary storage and backups. This reduction in costs can be significant, especially for large organizations with massive amounts of data.

Improved Performance:

Archiving reduces the load on primary storage systems, which can improve their performance. This leads to faster access times for active data and more efficient system operations.

Regulatory Compliance:

Many industries require businesses to retain data for a certain period. Archiving software helps ensure that these requirements are met, making it easier to comply with regulations and avoid legal issues.

Data Security:

Archived data is often less vulnerable to cyber-attacks since it is stored separately from active systems. Additionally, archiving software typically includes encryption and access controls to protect sensitive information.

Enhanced Productivity:

With less data clutter in primary systems, employees can find and manage active data more easily, leading to increased productivity. The ability to quickly search and retrieve archived data also saves time and effort.

SharePoint Storage Explorer

Gain insights in to your SharePoint Online Storage Consumption


Download our completely FREE TOOL

FREE DOWNLOAD

Send download link to:

I confirm that I have read and agree to the End User License Agreement.

Squirrel for SharePoint Dashboard

What Types of Data Can Be Archived?

Archiving software can handle various data types, including emails, documents, databases, multimedia files, and more. It’s particularly useful for managing unstructured data that accumulates over time. For example, emails and documents that are no longer needed for daily operations but must be retained for compliance can be efficiently archived. 

How to Choose the Right Archiving Software?

Selecting the right archiving software is a critical decision that can significantly impact your organization’s data management and overall efficiency. Here are the key factors to consider when choosing an archiving solution:

Scalability

Scalability is essential because your business’s data volume will likely grow over time. As your organization expands, the archiving solution must handle increasing amounts of data without compromising performance. Ensure that the software can:

  • Expand Storage Capacity: It should be capable of accommodating more data without requiring a complete system overhaul.
  • Handle More Users: As your team grows, the software should support additional users without performance degradation.
  • Manage Increased Complexity: With more data types and sources, the solution should adapt to new requirements and data structures seamlessly.

Compatibility

Compatibility with your existing systems and applications is crucial to avoid disruptions and ensure a smooth integration process. When assessing compatibility, consider the following:

  • Operating Systems: Ensure the software is compatible with the operating systems used in your organization (e.g., Windows, Linux, macOS).
  • Applications and Databases: Verify that it integrates well with your current applications, such as email systems (e.g., Microsoft Outlook, Gmail), databases (e.g., SQL, Oracle), and other software tools.
  • Cloud Services: If you use cloud storage or services (e.g., AWS, Azure, Google Cloud), the archiving solution should seamlessly integrate with these platforms.
  • APIs and Connectors: Check if the software offers APIs or connectors that facilitate integration with custom applications or other third-party systems.

Ease of Use

Ease of use is vital to ensure that your team can efficiently adopt and utilize the archiving software. A user-friendly solution should offer:

  • Intuitive Interfaces: Look for clean, easy-to-navigate dashboards and controls that simplify the archiving process.
  • Clear Documentation: Comprehensive guides, tutorials, and manuals should be available to help users understand and make the most of the software’s features.
  • Training and Support: Consider vendors that offer training sessions, webinars, and responsive customer support to assist with setup, troubleshooting, and ongoing usage.

Security Features

Security features are paramount to protect sensitive and confidential data. Ensure the archiving software includes robust security measures such as:

  • Encryption: Data should be encrypted both in transit and at rest to prevent unauthorized access.
  • Access Controls: Implement role-based access controls (RBAC) to ensure that only authorized personnel can access or modify archived data.
  • Compliance Certifications: Verify that the software complies with industry standards and regulations (e.g., GDPR, HIPAA, SOC 2) to meet legal and regulatory requirements.
  • Audit Trails: The software should provide detailed logs and audit trails to track data access and modifications, helping with accountability and forensic analysis.

Cost

Cost considerations go beyond the initial purchase price. Evaluate the total cost of ownership (TCO), which includes:

  • Licensing Fees: Understand the pricing model, whether it’s a one-time purchase, subscription-based, or pay-as-you-go. Ensure it fits your budget and financial planning.
  • Storage Costs: Assess the costs associated with storing archived data, whether on-premises or in the cloud. Consider the price per gigabyte or terabyte and any additional fees for data retrieval.
  • Maintenance and Support: Factor in costs for software updates, patches, and ongoing technical support. Ensure that these services are covered in the initial agreement or understand any additional charges.
  • Hidden Costs: Be aware of potential hidden costs, such as training, customization, integration, and migration expenses.

Additional Considerations

When evaluating archiving software, also consider the following additional factors to make a well-informed decision:

  • Performance and Reliability: Check for performance benchmarks and user reviews to ensure the software is reliable and performs well under different conditions.
  • Vendor Reputation: Research the vendor’s reputation, customer feedback, and case studies to gauge their reliability and customer satisfaction.
  • Flexibility and Customization: Ensure the software can be customized to fit your specific needs and workflows.
  • Future-Proofing: Look for a solution that can adapt to future technological advancements and business requirements, ensuring long-term viability.

By carefully considering these factors, you can select an archiving solution that not only meets your current needs but also supports your organization’s growth and evolution over time.

SharePoint Storage Explorer

Gain insights in to your SharePoint Online Storage Consumption


Download our completely FREE TOOL

FREE DOWNLOAD

Send download link to:

I confirm that I have read and agree to the End User License Agreement.

Squirrel for SharePoint Site Size Reporting

SharePoint Document Archiving with Squirrel

If your organization uses SharePoint Online, efficient document archiving is crucial for managing storage costs and ensuring compliance. Squirrel, developed by SmiKar, is a powerful archiving solution designed specifically for SharePoint Online.

Key Features of Squirrel

Automated Archiving:

Squirrel moves SharePoint Online documents to cheaper Azure Blob Storage based on lifecycle policies. This automation ensures that data is archived according to predefined rules, reducing manual effort and potential errors.

Stub File Creation:

When a document is archived, Squirrel leaves a stub file in SharePoint, allowing seamless rehydration of data with a single click. This means that users can still access and restore archived documents easily without disruption.

Data Integrity:

All versions of the document and its metadata are copied to Azure Blob Storage, ensuring complete data retention. This comprehensive approach ensures that all relevant information is preserved.

Security:

Squirrel encrypts all data and uses robust authentication mechanisms to protect archived documents. This ensures that sensitive information is safeguarded against unauthorized access.

Reporting:

Provides detailed reports on the documents and files in SharePoint, helping organizations maintain transparency and compliance. These reports can be invaluable for audits and compliance checks.

Benefits of Using Squirrel for SharePoint Archiving

Cost Efficiency:

Reduces storage costs by moving infrequently accessed data to cheaper storage. This can result in substantial savings, especially for organizations with large volumes of data.

Seamless User Experience:

The stub file system ensures that users can easily access and restore archived documents. This user-friendly feature minimizes disruption and maintains productivity.

Enhanced Compliance:

Helps organizations meet legal and regulatory requirements for data retention. By ensuring that data is archived according to compliance standards, businesses can avoid legal issues and penalties.

Improved Performance:

Offloads inactive data from SharePoint, improving system performance and user experience. This can lead to faster access times for active data and a more efficient SharePoint environment.

Squirrel’s Impact on SharePoint Users

A survey conducted by SmiKar found that businesses using Squirrel experienced a 42% reduction in storage costs and a increase in SharePoint performance. This makes Squirrel an invaluable tool for any organization looking to optimize their SharePoint environment.

Valuable Insights and Statistics

  • Data Growth: According to IDC, the global datasphere is expected to reach 175 zettabytes by 2025, making effective data management critical for businesses. This highlights the importance of having robust archiving solutions in place.
  • Cost Reduction: Gartner reports that organizations can save up to 60% on storage costs by implementing effective archiving solutions. This demonstrates the significant financial benefits of archiving software.
  • Compliance: A survey by Osterman Research found that 74% of businesses face challenges in meeting compliance requirements without archiving software. This underscores the necessity of archiving solutions for regulatory compliance.
  • Productivity: Businesses that use archiving software report a 30% increase in employee productivity due to streamlined data access and management. This illustrates the operational advantages of archiving solutions.

Conclusion

Archiving software is an essential tool for modern businesses, providing cost savings, improved data management, and enhanced compliance and security. By choosing the right archiving solution, you can ensure that your organization’s data is well-organized, easily accessible, and securely stored. For SharePoint Online users, Squirrel offers a specialized and efficient solution to streamline your document archiving process and boost overall efficiency.

Slash Your SharePoint Expenses with Squirrel’s Archiving Solution!

Learn how Squirrel helps you save on storage costs by efficiently archiving your SharePoint data to Azure Blob Storage.

Squirrel Main Dashboard

Cut SharePoint Costs with Squirrel!

Want to see how much you can save with Squirrel?

Comprehensive SharePoint Glossary

Comprehensive SharePoint Glossary

SharePoint Essentials Glossary

Welcome to the comprehensive SharePoint glossary. This resource is designed to help you understand the various terms and concepts associated with SharePoint, a powerful platform used for collaboration, document management, and business processes. Whether you are new to SharePoint or looking to deepen your existing knowledge, this glossary provides clear and detailed explanations to guide you through the complexities of the platform.


Squirrel Main Dashboard

SharePoint Key Terms and Concepts


SharePoint offers a wide range of features that can significantly enhance organizational productivity and efficiency. From document libraries and lists to advanced functionalities like Business Connectivity Services and the SharePoint Framework, each term in this glossary is explained in detail to help you grasp its importance and application. Understanding these terms will empower you to make the most of SharePoint’s capabilities, ensuring that your team can collaborate effectively and manage information seamlessly.

In addition to definitions, we have included practical examples for each term to illustrate how these concepts are used in real-world scenarios. This approach ensures that you not only learn the theoretical aspects of SharePoint but also see how they can be applied to solve everyday business challenges. Whether you are setting up a new SharePoint site, managing permissions, or integrating external data, this glossary will be your go-to guide for all things SharePoint.

Explore the glossary to enhance your SharePoint experience and optimize your organization’s workflows. With a better understanding of SharePoint’s features and how to use them, you’ll be able to leverage the platform to its full potential, driving collaboration, efficiency, and innovation within your team.

SharePoint Storage Explorer

Gain insights in to your SharePoint Online Storage Consumption


Download our completely FREE TOOL

FREE DOWNLOAD

Send download link to:

I confirm that I have read and agree to the End User License Agreement.

SharePoint Terminology Guide

App:

An app in SharePoint is a small, purpose-specific application or program that adds new features or functionality to a SharePoint site. These apps can be installed from the SharePoint Store or developed specifically for your needs. They help to customize the SharePoint experience without complex coding.

Example: An app that provides a calendar for booking meeting rooms. Team members can check room availability and reserve rooms directly from the SharePoint site.


Archiving:

Archiving in SharePoint refers to moving inactive documents from primary storage to secondary storage for long-term retention, freeing up space and improving system performance.

ExampleA company uses SharePoint to manage project files. Older documents that haven’t been accessed in over a year are automatically moved to Azure Blob Storage. This reduces storage costs and maintains easy access to archived documents via stub files left in SharePoint.


BCS (Business Connectivity Services):

BCS stands for Business Connectivity Services. It allows SharePoint to connect and interact with external data sources, such as databases or web services, making it possible to display and manipulate external data as if it were native to SharePoint. This integration helps consolidate different data sources into a single interface.

Example: Integrating an external SQL Server database that stores customer information into SharePoint, so employees can view and update customer data directly from a SharePoint list.


Check-in/Check-out:

Check-in and check-out are features that help manage document editing by multiple users. When a document is checked out, it is locked for editing by one person, preventing others from making changes simultaneously. Once the editing is complete, the document is checked back in, making the updated version available to others.

Example: Alice checks out a financial report to update quarterly figures. During this time, Bob and Carol can see the report but cannot edit it. When Alice finishes her updates, she checks the report back in, allowing Bob and Carol to make further changes if needed.


Column:

A column in SharePoint is a vertical section in a list or library that holds a specific type of information. Columns help organize and categorize data, making it easier to manage and retrieve. Different types of columns can store text, numbers, dates, or even choices from a predefined list.

Example: In a list of company contacts, columns might include “Name,” “Phone Number,” “Email Address,” and “Department.” Each column stores specific information about the contacts.


Content Type:

A content type is a reusable collection of settings and metadata that define a specific kind of content in SharePoint. It ensures consistency across similar items by applying the same structure, rules, and behaviors. Content types can include specific columns, workflows, and templates.

Example: A “Project Plan” content type might include columns for “Project Name,” “Start Date,” “End Date,” and “Project Manager.” Any document labeled as a “Project Plan” will follow this structure, making it easier to manage and find project plans across the organization.


Custom List:

A custom list is a user-created list in SharePoint designed to store and manage information in a structured format. Users can define the columns and settings according to their needs, making it a flexible tool for various tasks and data types.

Example: A custom list for tracking IT support tickets might include columns for “Ticket ID,” “Issue Description,” “Submitted By,” “Assigned To,” and “Status.” This allows the IT team to keep track of all support requests and their resolution status.


Document Library:

A document library in SharePoint is a specialized type of list designed to store and manage files. It supports version control, metadata tagging, and custom views, making it easy to collaborate on and organize documents.

Example: A document library for marketing materials might include folders for “Brochures,” “Presentations,” and “Logos.” Team members can upload new files, check out documents for editing, and track changes through version history.


External List:

An external list displays data from an external data source, such as a database or web service, using Business Connectivity Services (BCS). It allows users to view and interact with external data within SharePoint, as if it were part of the SharePoint environment.

Example: An external list showing customer orders from an ERP system. Employees can view order details, update statuses, and add comments directly within SharePoint, without needing to access the ERP system separately.


Farm:

A SharePoint farm is a collection of one or more SharePoint servers that work together to provide the SharePoint service. It includes various types of servers, such as web servers, application servers, and database servers, each handling different tasks to ensure the system runs smoothly and can handle large volumes of traffic.

Example: A large organization might have a SharePoint farm with multiple servers to support thousands of employees. The farm ensures high availability and scalability, so users experience fast and reliable access to SharePoint resources.


Field:

A field is a single piece of data in a SharePoint list or library, similar to a cell in a spreadsheet. Fields are defined by columns and store specific types of information, such as text, numbers, dates, or choices.

Example: In a project task list, fields might include the task name, due date, and status. Each field corresponds to a specific column, like “Task Name” or “Due Date,” and holds the relevant data for each task.


Hub Site:

A hub site in SharePoint is a special type of site that connects and organizes multiple related sites under a common structure. Hub sites provide unified navigation, search, and branding, helping users find content and collaborate across associated sites.

Example: A company might have a hub site for its marketing department, connecting sites for social media, content creation, and campaign management. The hub site provides a centralized navigation menu and search feature, making it easy for team members to find and access resources across all marketing sites.


InfoPath:

InfoPath is a Microsoft application used to design, distribute, fill, and submit electronic forms with structured data. InfoPath forms can be integrated into SharePoint to facilitate data entry and workflow automation, allowing users to collect and manage information efficiently.

Example: An employee expense report form created in InfoPath can be embedded in a SharePoint site. Employees fill out the form to submit their expenses, and the data is automatically routed for approval and processing.


List:

A list in SharePoint is a collection of data organized into rows and columns, similar to a table in a database. Lists can store various types of information, such as tasks, contacts, or events, and support features like sorting, filtering, and grouping to improve data management and retrieval.

Example: A list for tracking employee onboarding tasks might include columns for task description, assigned to, due date, and completion status. This helps HR manage and monitor the onboarding process for new hires.


Lookup Column:

A lookup column is a type of column in a SharePoint list that retrieves data from another list. It allows users to create relationships between lists, making it possible to reference data from one list in another.

Example: In a project task list, a lookup column might be used to select a project name from a separate project list. This creates a relationship between tasks and their associated projects, making it easier to manage and report on project activities.


Master Page:

A master page in SharePoint is a template that defines the overall layout and design of a site. It ensures a consistent look and feel across all pages by controlling elements such as the header, footer, and navigation menus. Custom master pages can be created to match an organization’s branding and design standards.

Example: A company might create a custom master page to include its logo, corporate colors, and navigation links in the header and footer. This ensures all SharePoint pages adhere to the company’s branding guidelines.


Metadata:

Metadata is data that provides information about other data, such as the author, date created, and keywords. In SharePoint, metadata helps organize, find, and manage documents by enabling advanced search, filtering, and sorting capabilities. Users can tag documents with relevant metadata to improve content discoverability and management.

Example: A document library for research papers might include metadata fields for “Author,” “Publication Date,” “Keywords,” and “Department.” This makes it easy to search for papers by specific criteria, such as all papers written by a particular author.


My Site:

My Site is a personal SharePoint site for individual users that provides features like personal storage, social networking, and a personalized newsfeed. It allows users to store and manage their own documents, share information with colleagues, and track activities and updates.

Example: John uses his My Site to store personal documents, such as project notes and drafts. He also follows his colleagues’ updates and shares links to interesting articles with his team through his newsfeed.


Navigation:

Navigation in SharePoint refers to the set of links and menus that allow users to move around a site. Effective navigation improves usability and access to content, helping users find information quickly and efficiently. SharePoint supports various navigation elements, including top navigation, quick launch, and breadcrumb trails.

Example: A SharePoint site for a sales team might have a top navigation bar with links to “Home,” “Leads,” “Opportunities,” “Reports,” and “Resources.” This helps team members easily find and access the information they need.


Office 365 Group:

An Office 365 Group is a shared workspace in Office 365 that includes a group mailbox, calendar, document library, OneNote notebook, and other collaboration tools. Office 365 Groups facilitate team collaboration by providing integrated tools for communication, file sharing, and task management.

Example: A project team creates an Office 365 Group for a new product launch. The group includes a shared mailbox for team emails, a calendar for scheduling meetings, a document library for storing project files, and a OneNote notebook for taking meeting notes.


OneDrive:

OneDrive is Microsoft’s cloud storage service that integrates with SharePoint for file storage and sharing. It allows users to store and protect files, share them with others, and access them from anywhere on all devices. OneDrive provides personal storage for users, while also enabling collaboration through shared libraries in SharePoint.

Example: Mary uses OneDrive to store her work documents. She shares a project folder with her team, allowing them to collaborate on documents and presentations. The shared folder is also accessible from the team’s SharePoint site.


Permissions:

Permissions in SharePoint are the set of rules that control what users can and cannot do on a site. Permissions can be set at the site, library, folder, or item level, allowing for granular control over access and actions. SharePoint supports role-based permissions, enabling administrators to assign predefined roles such as “Owner,” “Member,” and “Visitor” to users and groups.

Example: In a document library, an administrator grants “Read” permissions to visitors, “Contribute” permissions to members, and “Full Control” permissions to owners. This ensures that visitors can only view documents, members can add and edit documents, and owners can manage library settings.


Search:

Search functionality in SharePoint allows users to find content across sites and libraries. Search results can be customized with filters, refiners, and search scopes, helping users locate relevant information quickly. SharePoint search supports advanced features like content indexing, query suggestions, and result ranking to improve search accuracy and efficiency.

Example: A user types “annual report” into the SharePoint search bar and receives a list of all documents containing that term. They can filter results by date, author, or document type to find the specific report they need.


Site:

A site in SharePoint is a container that holds lists, libraries, pages, and other content. Sites can be created for different purposes, such as team collaboration, document management, or publishing. Sites provide a structured environment for organizing and managing content, supporting features like workflows, permissions, and branding.

Example: A department site for the HR team includes document libraries for employee policies, lists for tracking training sessions, and pages for sharing company news and announcements.


Site Collection:

A site collection in SharePoint is a group of sites that share common features, such as content types, templates, and permissions. A site collection includes a top-level site and any subsites below it, allowing for hierarchical organization and management of content. Site collections enable centralized administration and governance of related sites.

Example: A company might have a site collection for its intranet, with the main site serving as the home page and subsites for each department, such as HR, IT, and Finance. Each subsite inherits permissions and settings from the top-level site but can also have its own unique content and structure.


Site Template:

A site template is a pre-defined configuration of a SharePoint site that includes specific lists, libraries, and settings. Site templates can be used to create new sites with a consistent structure, saving time and ensuring uniformity. SharePoint includes built-in site templates for common scenarios, such as team sites, project sites, and publishing sites.

Example: A project site template might include a task list, document library, and calendar, providing a standardized setup for managing new projects. When a new project starts, the team can quickly create a site using this template.


SPFx (SharePoint Framework):

The SharePoint Framework (SPFx) is a page and web part model that provides full support for client-side development, integration with SharePoint data, and support for open-source tools. SPFx enables developers to create responsive and dynamic web parts and extensions using modern web technologies. It enhances the customization and extensibility of SharePoint, allowing for rich and interactive user experiences.

Example: A developer creates a custom SPFx web part that displays a real-time dashboard of sales data, integrating with external APIs and SharePoint lists. The web part can be added to any SharePoint page, providing interactive and visually appealing data insights.


Team Site:

A team site in SharePoint is designed for team collaboration, providing tools for document sharing, task management, and communication. Team sites include features like document libraries, calendars, and discussion boards, enabling teams to work together effectively. Team sites can be customized to meet specific team needs and integrated with other Office 365 services.

Example: A sales team uses a team site to store client proposals, track sales leads, and schedule meetings. The site includes a document library for shared files, a calendar for team events, and a task list for tracking sales activities.


Term Store:

The Term Store is a feature in SharePoint that allows you to manage metadata and taxonomies centrally. Terms can be used to tag and categorize content across sites, improving consistency and searchability. The Term Store supports hierarchical term sets, synonyms, and multi-language support, facilitating effective metadata management.

Example: A company uses the Term Store to manage a taxonomy of product categories. Documents in the product library are tagged with terms like “Electronics,” “Home Appliances,” and “Furniture,” making it easy to organize and search for documents by category.


Version Control:

Version control is a system in SharePoint that records changes to a file or set of files over time so that you can recall specific versions later. Version control helps track document history and manage edits by multiple users, providing a clear audit trail. SharePoint supports major and minor versioning, allowing for detailed tracking of changes and approvals.

Example: A marketing team uses version control for their campaign plans. Each time a plan is edited, a new version is saved. If the team needs to revert to a previous version or see who made specific changes, they can access the version history.


Web Part:

A web part is a modular unit of information that can be added to a SharePoint page. Web parts can display data, provide interactivity, and integrate with other systems. Examples of web parts include document libraries, lists, image galleries, and embedded videos. Web parts enable users to create dynamic and customizable pages, enhancing the functionality and user experience of SharePoint sites.

Example: A company homepage might include a news web part to display recent announcements, a calendar web part to show upcoming events, and a document library web part to provide quick access to important documents.

Workflow:

A workflow in SharePoint is a sequence of automated steps that perform specific actions, such as approving a document or sending an email. Workflows help streamline business processes and ensure consistency by automating repetitive tasks. SharePoint includes built-in workflows for common scenarios, such as document approval, feedback collection, and task management. Custom workflows can also be created using tools like Microsoft Power Automate.

Example: An expense report approval workflow automatically routes submitted reports to the appropriate managers for approval. Once approved, the workflow sends the report to the finance department for processing and notifies the employee of the approval status.


Zone:

A zone is a section of a SharePoint page layout that can hold web parts. Zones help organize and arrange content on a page, allowing for flexible and responsive design. Zones enable users to customize the layout and presentation of information, enhancing the visual appeal and usability of SharePoint pages.

Example: A team site homepage might be divided into zones for announcements, quick links, and a document library. Each zone contains web parts that display relevant content, making it easy for team members to find and access information.

Slash Your SharePoint Online Storage Costs

 See how Squirrel can reduce your SharePoint storage expenses with smart, automated archiving.

Squirrel for SharePoint File Type Reporting

Maximize SharePoint Online Savings with Squirrel

Want to see Squirrel in Action?