With rising storage costs and limits, organizations often look for efficient ways to offload files. One highly scalable and cost-effective solution is moving documents from SharePoint Online to Azure Blob Storage. In this article, we’ll explore why this migration is beneficial, methods to move your data—including automated archiving with Squirrel—and best practices for managing the process.
Why Move Documents from SharePoint Online to Azure Blob Storage?
Cost Efficiency:
SharePoint Online storage can become expensive, especially as organizations scale up and accumulate terabytes of data. SharePoint’s storage costs are higher because it’s designed for frequent access and collaboration, but not all files need to stay in this high-cost environment. Azure Blob Storage, on the other hand, offers a much more cost-efficient solution by providing tiered pricing based on access frequency (hot, cool, or archive tiers). Archiving older, unused documents to Azure Blob Storage significantly reduces storage expenses by moving infrequently accessed data to cheaper, scalable cloud storage, allowing businesses to free up expensive SharePoint storage for more active documents.
Scalability:
One of the challenges with SharePoint Online is its storage limits, which, while flexible, may require purchasing additional capacity as your organization grows. Azure Blob Storage offers virtually unlimited scalability, allowing you to store vast amounts of data without worrying about reaching storage caps. This makes it a seamless option for large enterprises or growing businesses that anticipate exponential data growth. By offloading older documents from SharePoint to Azure Blob Storage, you can ensure that your SharePoint environment remains manageable, while your archived files are stored securely without the need for costly storage upgrades.
Data Management:
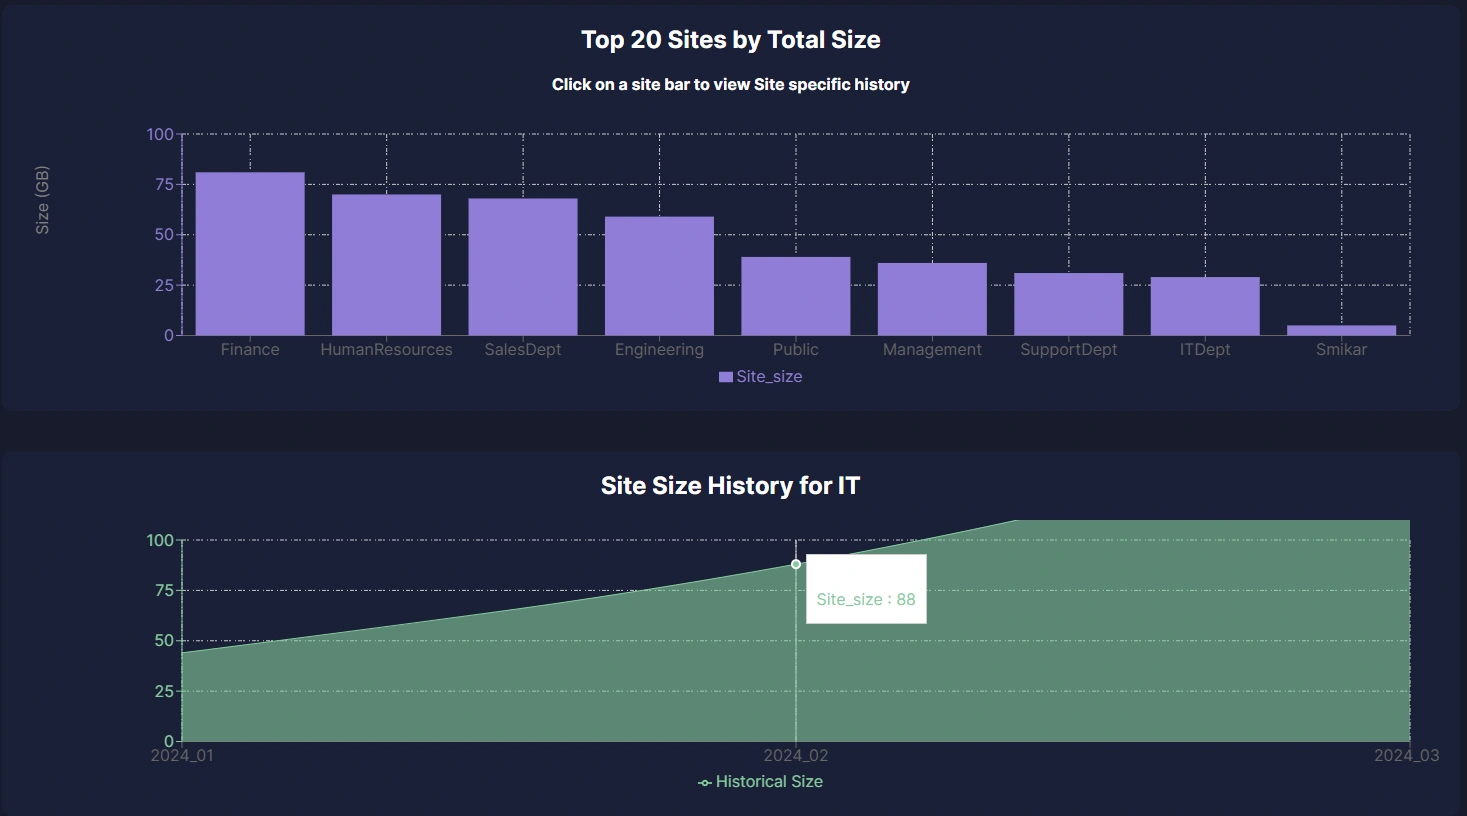
As document libraries expand over time, it becomes increasingly difficult to manage, search, and retrieve important files. The clutter of older, less frequently accessed documents can slow down performance and impact productivity. Offloading these older files to Azure Blob Storage not only helps streamline SharePoint libraries by keeping them more organized and optimized for daily use, but also ensures that important files remain easy to access. By reducing the volume of files in SharePoint, organizations can improve overall data management, enabling teams to locate key documents more efficiently while still maintaining access to archived data when necessary.
Compliance and Archiving:
In many industries, regulatory compliance requires organizations to retain records for specific periods, even if they are no longer actively used. Moving older, unused files to Azure Blob Storage helps organizations meet these compliance requirements by securely storing data in a cost-effective and highly durable environment. Azure Blob Storage offers features like encryption and access control, ensuring that archived data remains protected. Additionally, offloading documents from SharePoint to Azure Blob Storage reduces the risk of non-compliance by ensuring only essential and current documents are retained in SharePoint, while archived files remain accessible for audits or future retrieval.
Methods for Moving Documents
There are multiple ways to move documents from SharePoint Online to Azure Blob Storage, depending on your organization’s needs, the size of your data, and the level of automation required. These methods range from using manual workflows to fully automated, hands-off solutions that can handle large-scale document migrations. Below, we explore three primary methods: Power Automate for smaller, rule-based transfers, Azure Data Factory for large-scale data pipelines, and Squirrel for automated archiving with minimal manual intervention.
Power Automate:
Power Automate (formerly known as Microsoft Flow) is a cloud-based service that enables users to create automated workflows between various applications and services. This is a relatively simple solution to move files from SharePoint Online to Azure Blob Storage. It’s particularly useful for small-scale operations where you want to automate repetitive tasks, such as moving specific files based on certain criteria (e.g., when a file is created or modified).
However, Power Automate comes with some limitations, such as restrictions on file size (typically 100-250MB per file), making it less suitable for large datasets or frequent large file transfers. Additionally, Power Automate workflows can become complex to manage if your data needs grow, but it’s a good starting point for smaller or selective migrations. It’s ideal for scenarios where you need quick, one-off solutions or for businesses that need to move specific documents based on custom rules.
When to use Power Automate:
- Small-to-medium file sizes and datasets.
- Selective transfers, such as specific document types, categories, or time-based rules.
- Minimal complexity with a limited number of workflows.
Azure Data Factory:
Azure Data Factory (ADF) is a robust cloud-based data integration service designed for building complex data pipelines. It allows organizations to move large-scale data between systems, including SharePoint Online and Azure Blob Storage. Unlike Power Automate, Azure Data Factory is highly scalable and can handle the transfer of large datasets, including terabytes of data. It supports advanced workflows, including data transformation, monitoring, and scheduling.
With Azure Data Factory, you can create data pipelines that automatically retrieve files from SharePoint Online using connectors, apply transformations if necessary, and then store the data in Azure Blob Storage. While it requires more technical expertise than Power Automate, ADF offers far greater flexibility and scalability, making it ideal for enterprises handling large volumes of documents or organizations looking for a more automated and hands-off solution.
Using Azure Data Factory also provides more control over how data is processed, with features like data integration from multiple sources, real-time data monitoring, and built-in security. However, the setup can be more complex, requiring knowledge of data engineering and pipeline configuration, which may require dedicated resources.
When to use Azure Data Factory:
- Large-scale datasets and frequent transfers.
- Complex data integration requirements, including file transformation and multiple data sources.
- Advanced scheduling, monitoring, and automation capabilities.
- Organizations with technical resources for managing complex workflows.
Squirrel for Automated Archiving:
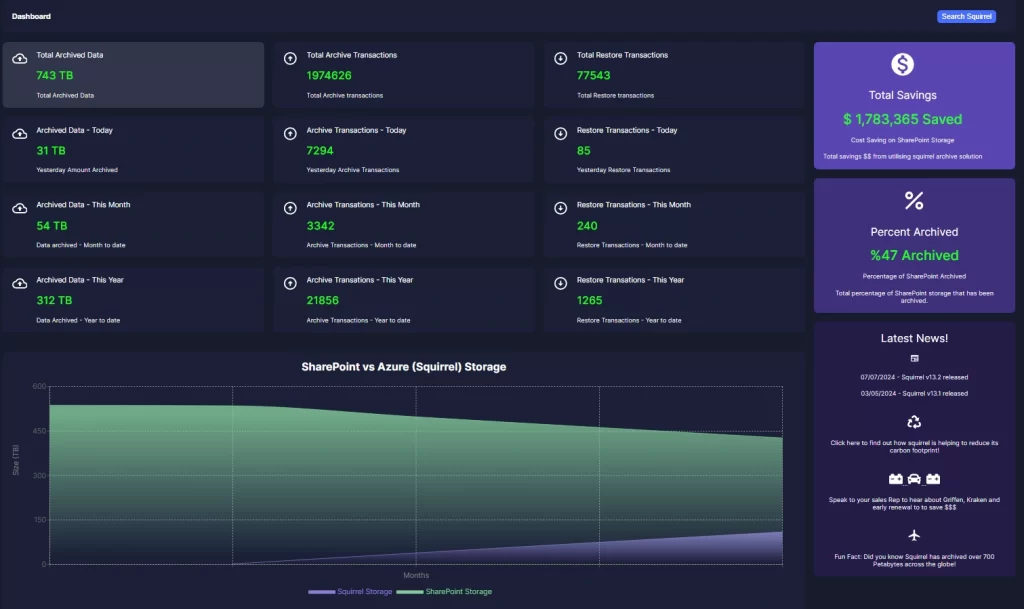
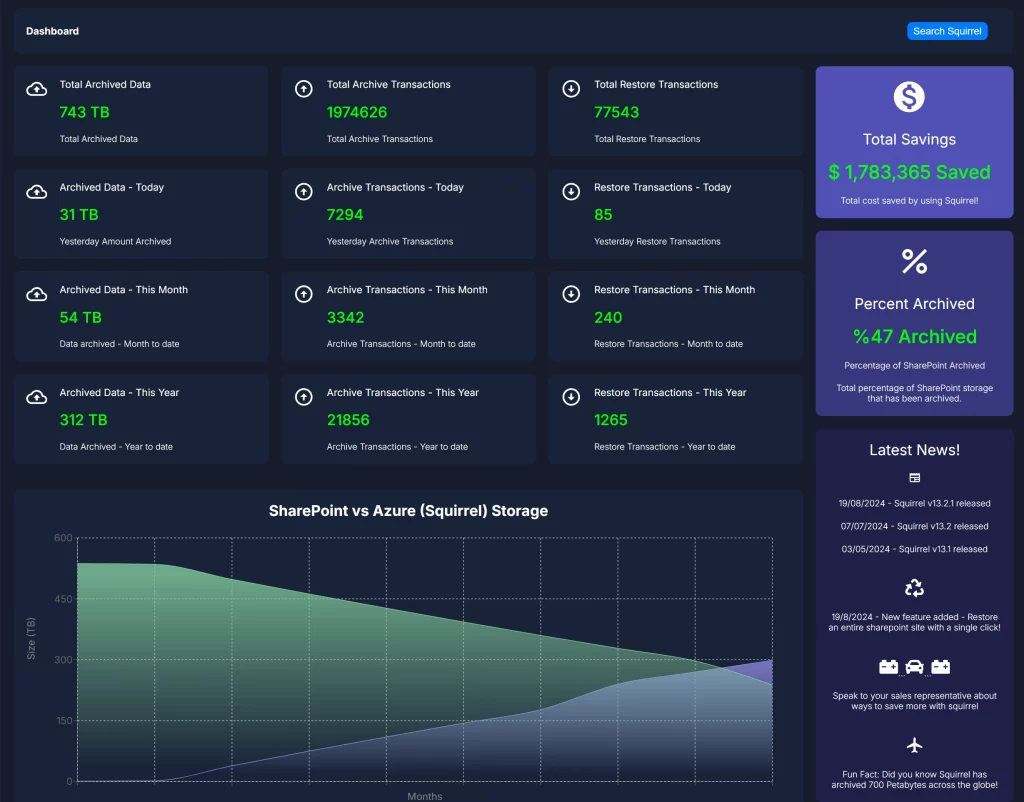
For organizations that need an easy-to-implement, fully automated solution, Squirrel offers the ideal tool for moving SharePoint Online documents to Azure Blob Storage. Squirrel is designed to automate the process of archiving documents from SharePoint to Azure Blob Storage based on pre-configured lifecycle policies. This reduces the need for manual workflows or the creation of complex pipelines, making it a hands-off solution for busy IT teams and large organizations.
Squirrel simplifies the archival process by allowing you to set rules that determine when and how documents are moved from SharePoint to Azure Blob Storage. For instance, you can configure Squirrel to archive documents that haven’t been accessed or modified within a certain timeframe, ensuring that only active and relevant data remains in SharePoint while older files are securely stored in Azure. This allows you to free up SharePoint storage space without having to constantly monitor and manually manage the archiving process.
Unlike Power Automate and Azure Data Factory, Squirrel requires little to no ongoing management. It runs automatically in the background, reducing storage costs and improving the performance of your SharePoint environment without disrupting user workflows. Additionally, Squirrel offers built-in security features, ensuring that sensitive data is securely transferred and stored in Azure Blob Storage, fully compliant with industry standards.
When to use Squirrel:
- Large organizations that require a fully automated, hands-off solution.
- Frequent need for archiving based on lifecycle policies, such as last modified or last accessed dates.
- IT teams looking to reduce manual oversight and administrative workload.
- Businesses wanting to optimize SharePoint storage while securely archiving documents to Azure Blob Storage.
Methods for Moving Documents
There are several methods for moving documents from SharePoint to Azure Blob Storage, ranging from manual workflows to fully automated solutions like Squirrel. Below, we’ll cover Power Automate, Azure Data Factory, and how Squirrel can simplify the entire process.
How to Guide for Power Automate:
Power Automate allows you to create workflows that can automate tasks like moving files from SharePoint to Azure Blob Storage. However, it comes with limitations, such as a file size limit (typically 100-250MB per file), which can restrict its use for larger datasets.
Step 1: Create a New Flow in Power Automate
Sign in to Power Automate: Go to Power Automate and sign in with your Microsoft account.
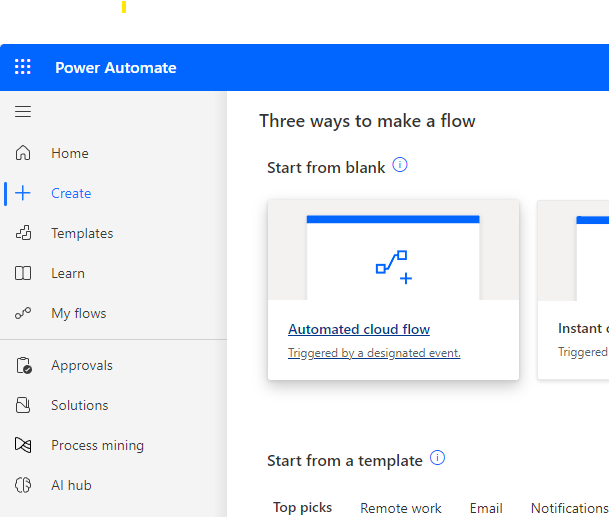
Create a New Flow: On the homepage, click Create and select Automated Cloud Flow.
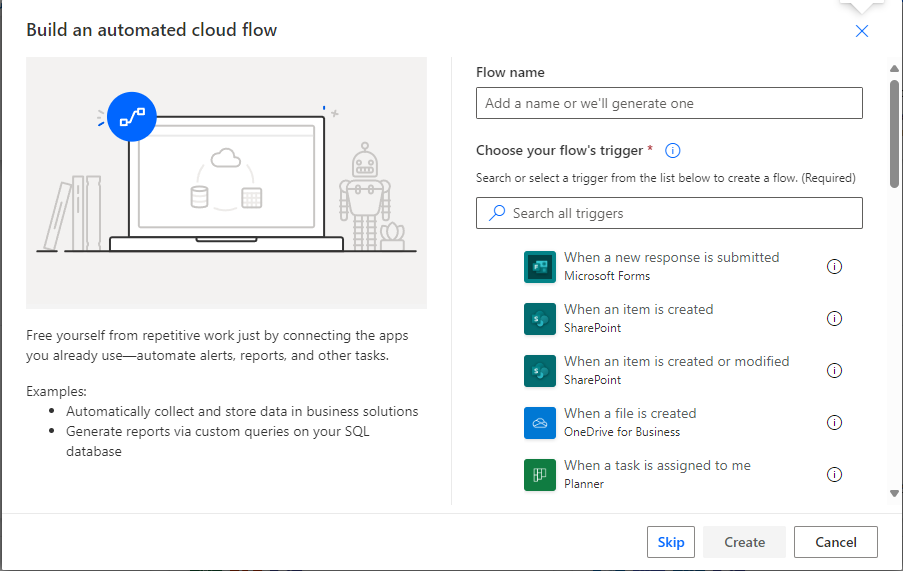
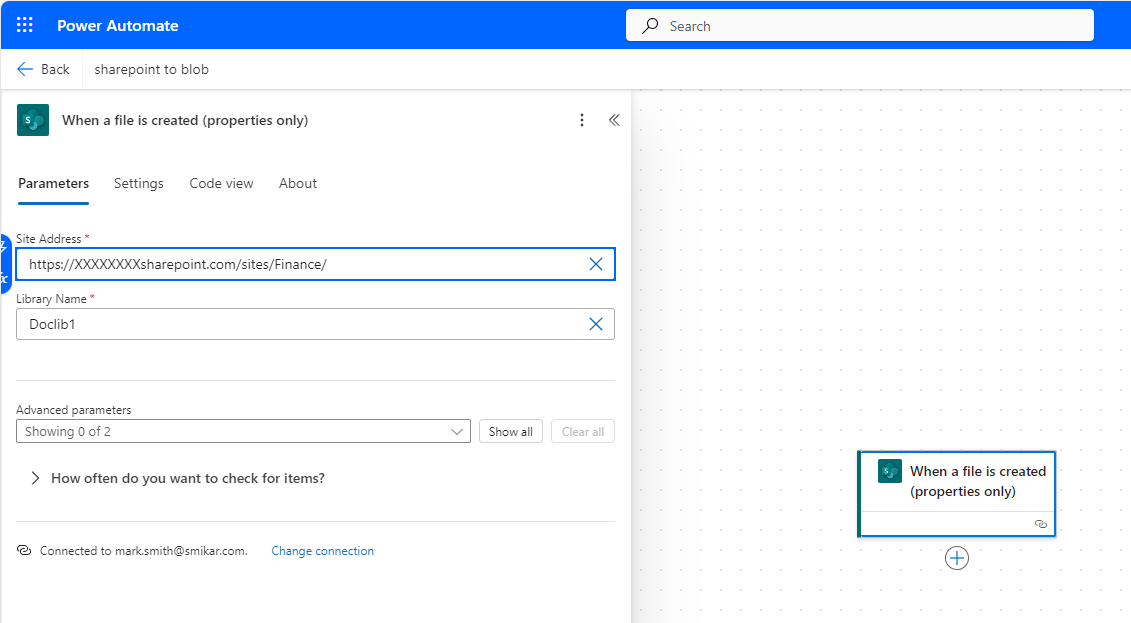
Choose a Trigger: Set a trigger for when a file will be moved. For example, select the When a file is created (SharePoint) trigger to start the flow when a new file is added to a document library.
Step 2: Configure the SharePoint Action
Select SharePoint Site: In the trigger settings, choose your SharePoint Site Address from the dropdown or enter the site URL.
Select Library Name: Choose the Library Name where files will be monitored for movement.
Step 3: Add a SharePoint ‘Get File Content’ Action
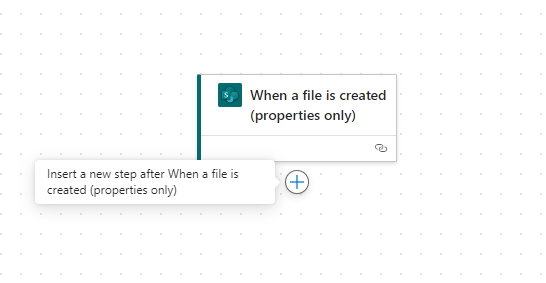
Get the File Content: After the trigger, click + New Step and search for the Get File Content action under SharePoint.
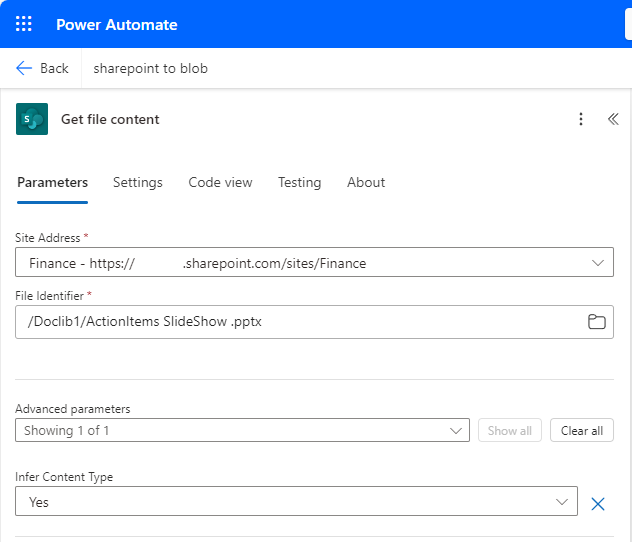
Configure the “Get file content” Action
- Site Address: Select your SharePoint site
https://XXXXXXX.sharepoint.com/sites/Finance
This points Power Automate to the correct SharePoint site where the document library is located. - File Identifier: Now you can browse through our SharePoint site, and choose the file you want to move to blob storage.
/Doclib1/ActionItems SlideShow.pptx
This means that the file you’re retrieving is located in the Doclib1 document library within the Finance site, and the file is named “ActionItems SlideShow.pptx.”
Step 4: Add an Azure Blob Storage Action
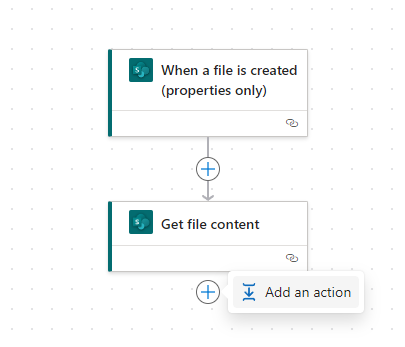
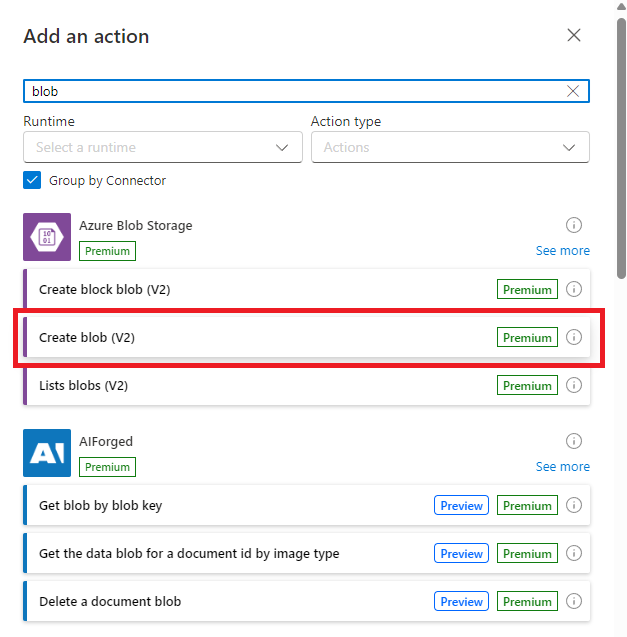
Add ‘Create Blob’ Action: Click + New Step and search for Azure Blob Storage. Select the Create blob action.
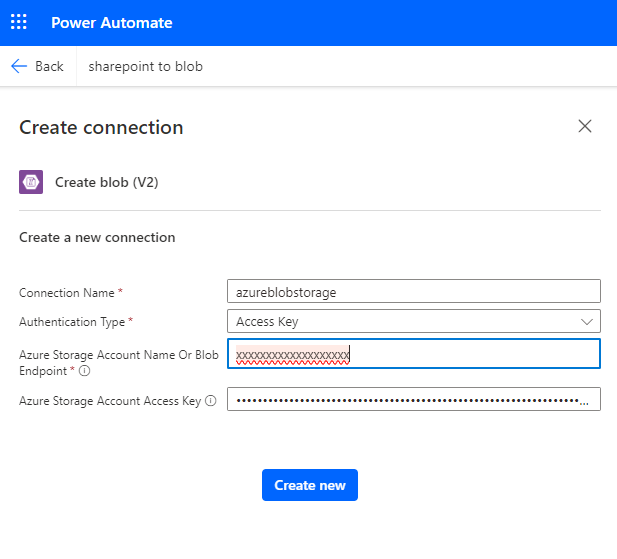
Provide the following;
- Connection Name: Give the azure blob storage connection a name
- Authentication Type: You can choose how to authentice, either Service Principal Authentication, Access Key or Microsoft Entra ID integrated
- Azure Storage account name or blob endpoint: Here is where you input the storage account name, or endpoint name
- Since I chose to use Access Key for authentication, you simply copy that from your blob storage account and paste it here
Set Blob Storage Parameters:
- Folder Path: Enter the container path where the file will be stored in Azure Blob.
- File Name: Define the file name for the uploaded file (you can use dynamic content like
File Namefrom the previous step). - File Content: Select the File Content dynamic content from the previous Get File Content action.
Step 5: Test and Monitor the Flow
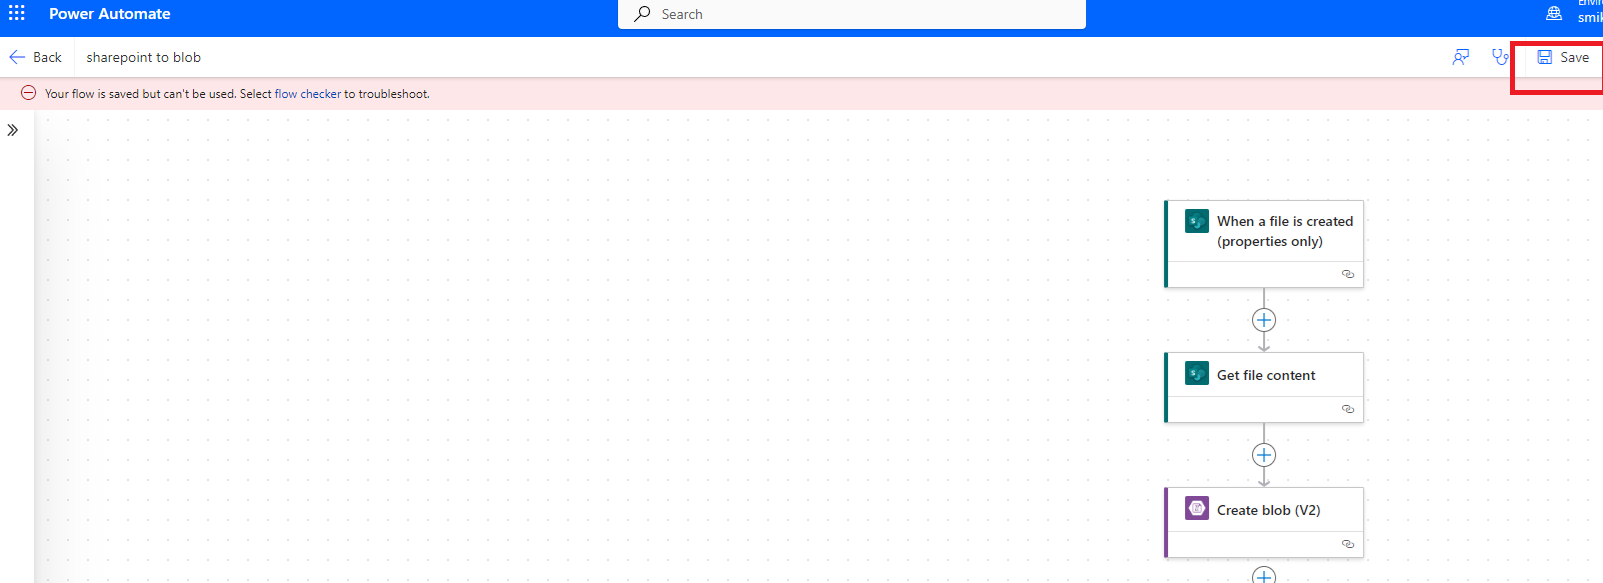
Test the Flow: Click Save and run a test by uploading a file to the SharePoint document library. The flow should automatically upload the file to Azure Blob Storage.
Monitor Flow Performance: Under the Monitor section of Power Automate, check the flow history to see if the flow runs successfully and inspect any errors.
PowerAutomate Use Case:
Power Automate works well for smaller files and selective transfers but may not be suitable for organizations dealing with very large datasets or needing more complex migrations. The above example will move a single file from the SharePoint site to Azure Blob Storage.
How to Guide using Azure Data Factory:
Azure Data Factory is a cloud-based data integration service that allows you to create data pipelines for moving data between SharePoint and Azure Blob Storage. It’s more scalable than Power Automate, making it ideal for larger datasets, though it requires more setup and configuration.
Step 1: Create a Data Factory in the Azure Portal
Sign in to the Azure Portal: Go to Azure Portal and log in with your Azure account.
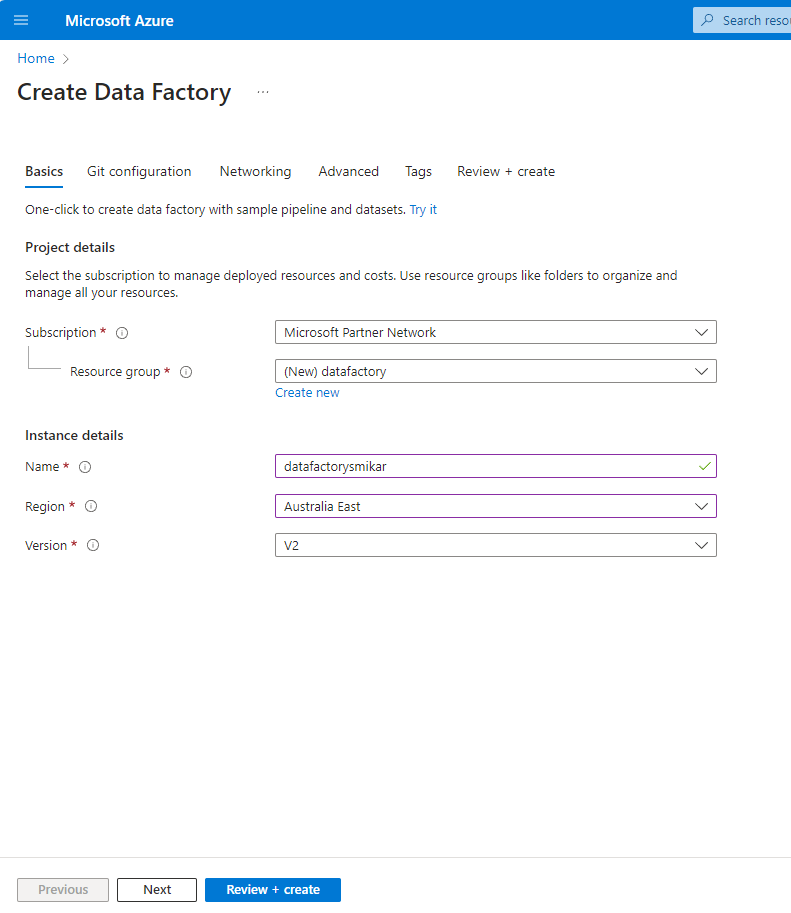
Create a New Data Factory: Search for Data Factory in the search bar.
Click Create and fill in the required details like Subscription, Resource Group, and Region.
Click Review + Create to deploy the Data Factory.
Step 2: Set Up a New Pipeline
Navigate to the Data Factory Resource: Once your Data Factory is created, go to the resource and click on Launch Studio.
Now you are in the Data Factory Page.
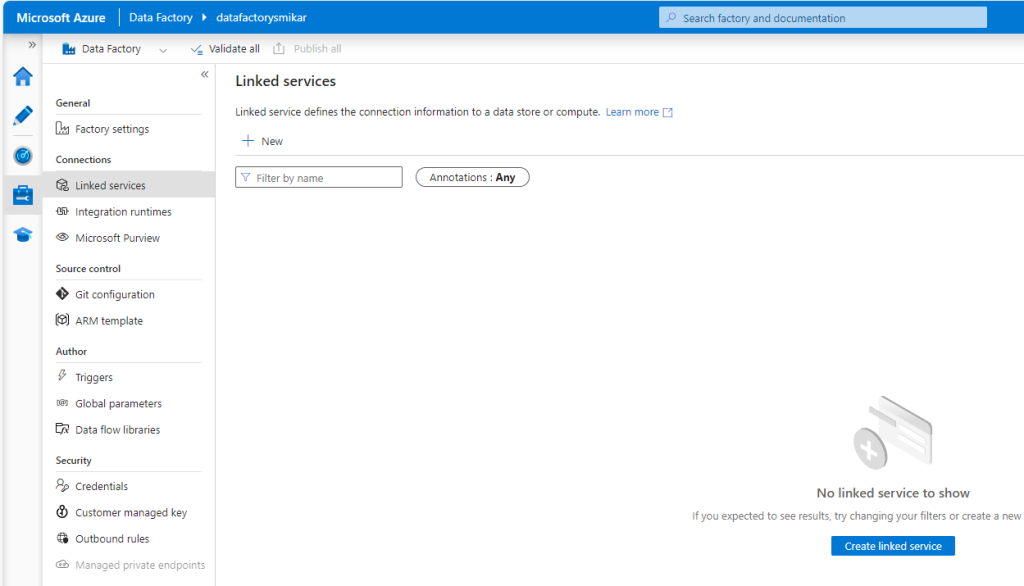
Create a Linked Service for SharePoint Online
Click on “Author & Monitor” to open the ADF studio.
In the left menu, click on the “Manage” icon (toolbox).
Under “Linked services”, click “Create New“.
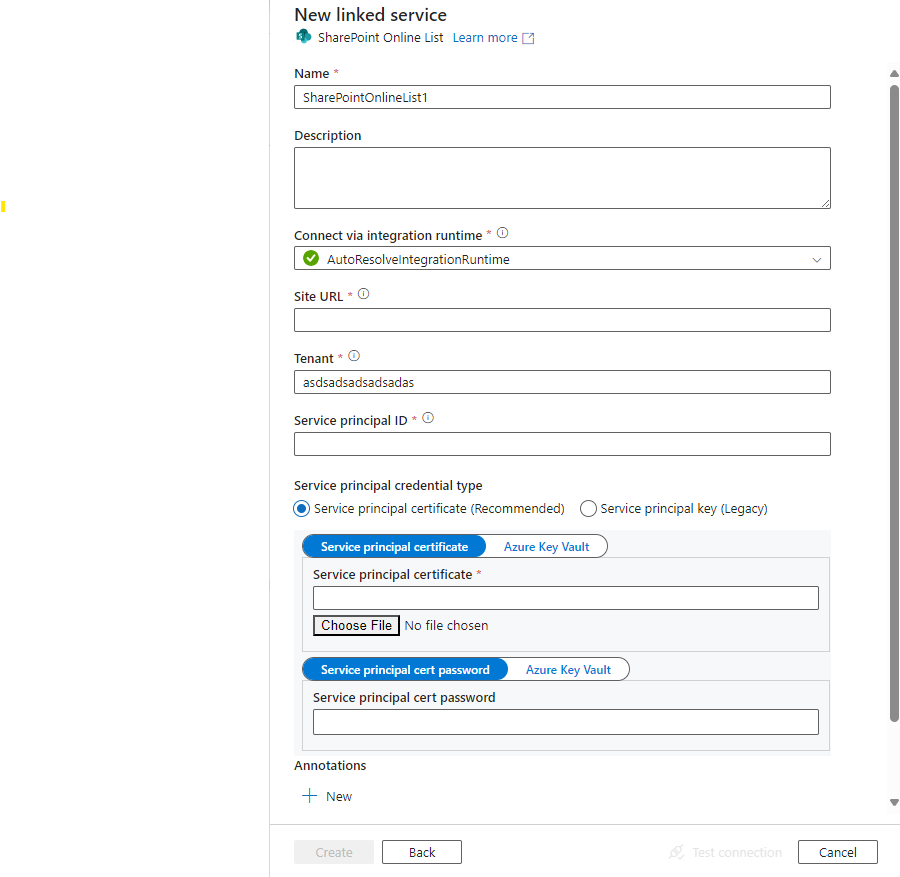
Search for and select “SharePoint Online List“.
Click “Continue“.
Fill in the details:
- Name: Give your linked service a name
- Description: (Optional)
- Connect via integration runtime: AutoResolveIntegrationRuntime
- Authentication method: Choose “OAuth2” for modern authentication
- SharePoint Online site URL: Enter your SharePoint site URL
- Tenant: Enter your Azure AD tenant ID
- Service Principal ID: Enter your Azure AD application ID
- Service Principal Key: Enter your Azure AD application key
Click “Test connection” to verify.
If successful, click “Create”.
Step 3: Create a Linked Service for Azure Blob Storage
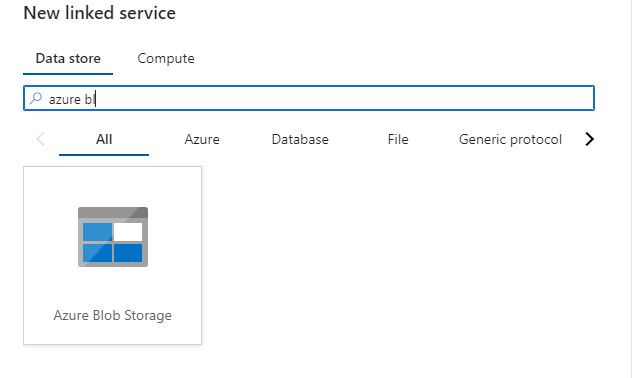
Still in the “Manage” section, click “New” under “Linked services”.
Search for and select “Azure Blob Storage”.
Click “Continue”.
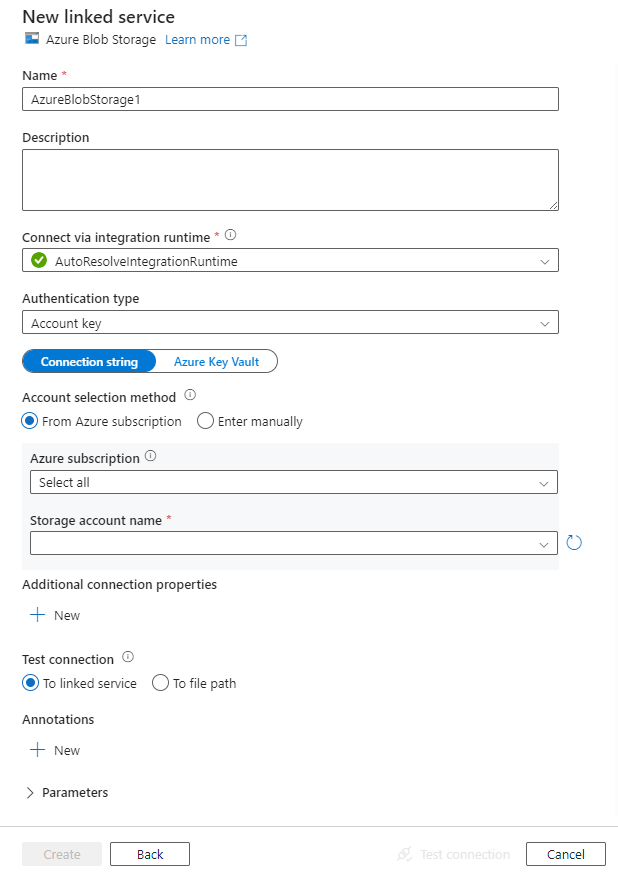
Fill in the details:
- Name: Give your linked service a name
- Description: (Optional)
- Connect via integration runtime: AutoResolveIntegrationRuntime
- Authentication method: Choose “Account key”
- Account selection method: “From Azure subscription”
- Azure subscription: Select your subscription
- Storage account name: Select the storage account you created earlier
Click “Test connection” to verify.
If successful, click “Create”.
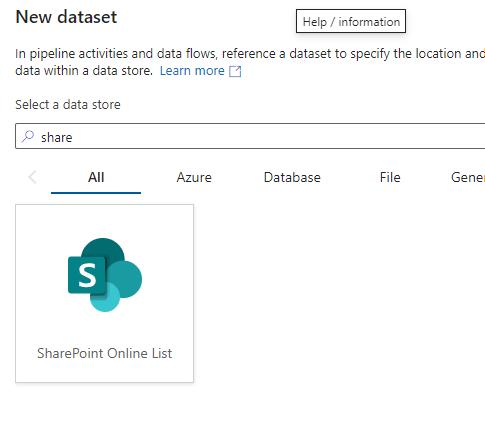
Step 4: Create a Dataset for SharePoint Online
In ADF studio, click on the “Author” icon (pencil) in the left menu.
Click the “+” button and select “Dataset“.
Search for and select “SharePoint Online List“.
Click “Continue“.
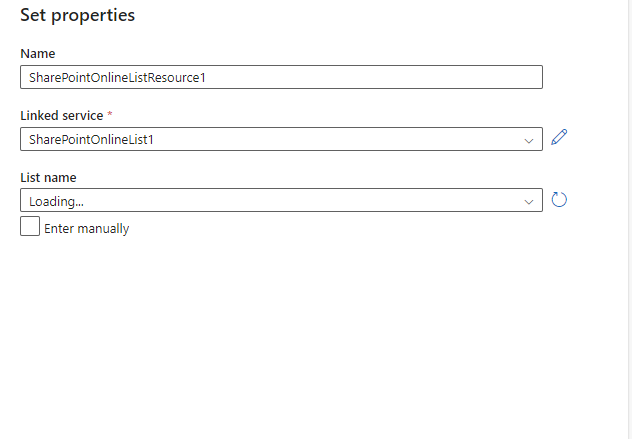
Configure the dataset:
- Name: Give your dataset a name
- Linked service: Select the SharePoint Online linked service you created
- List name: Enter the name of your SharePoint list or document library
Click “OK“.
In the dataset settings, specify any additional parameters if needed.
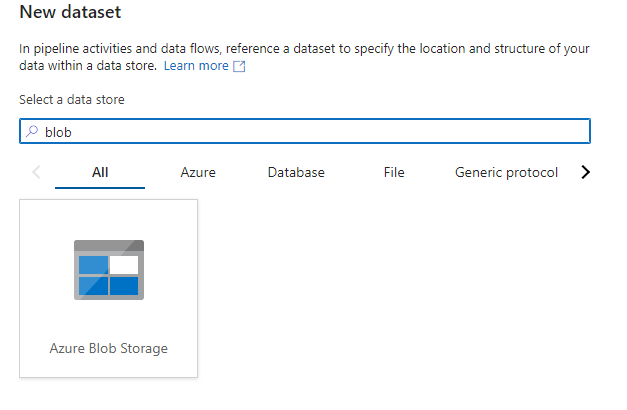
Step 4: Create a Dataset for Azure Blob Storage
Still in the “Author” section, click the “+” button and select “Dataset“.
Search for and select “Azure Blob Storage“.
Click “Continue”.
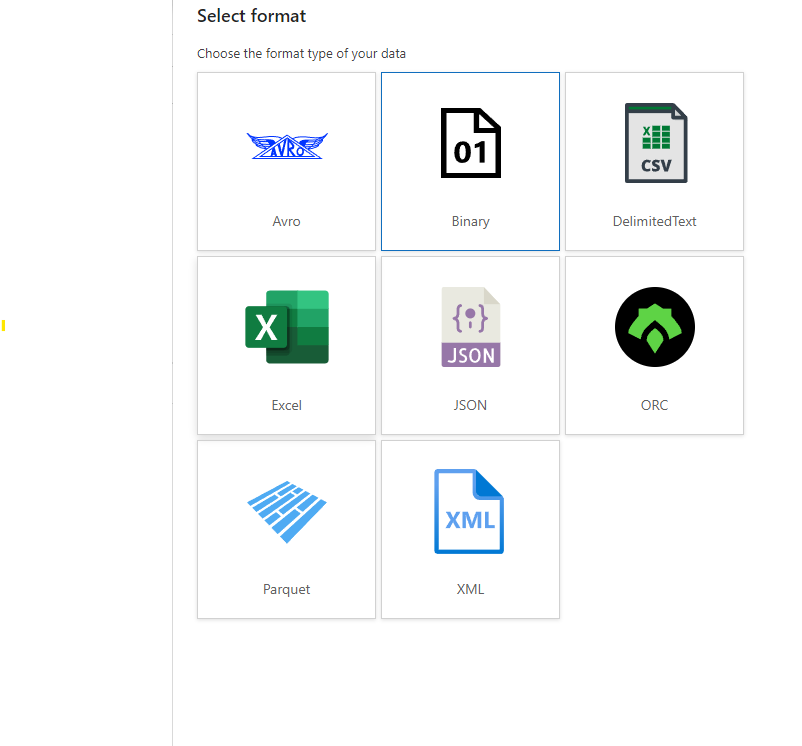
Choose “Binary” in the “Select Format” section.
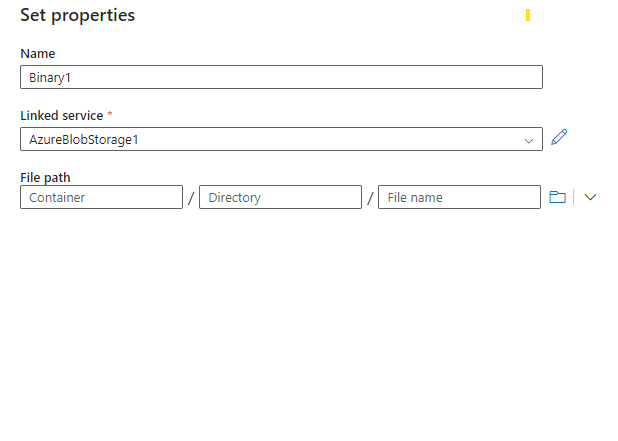
Configure the dataset:
- Name: Give your dataset a name
- Linked service: Select the Azure Blob Storage linked service you created
- File path: Browse to select your container and specify a folder path if needed
- File Name: You can leave file name blank to keep the files original name.
Click “OK”.
Step 5: Create a Pipeline
In the “Author” view, click the “+” button and select “Pipeline”.
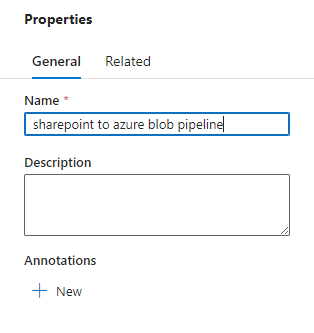
Give your pipeline a name.
Step 6: Add and Configure a Copy Activity
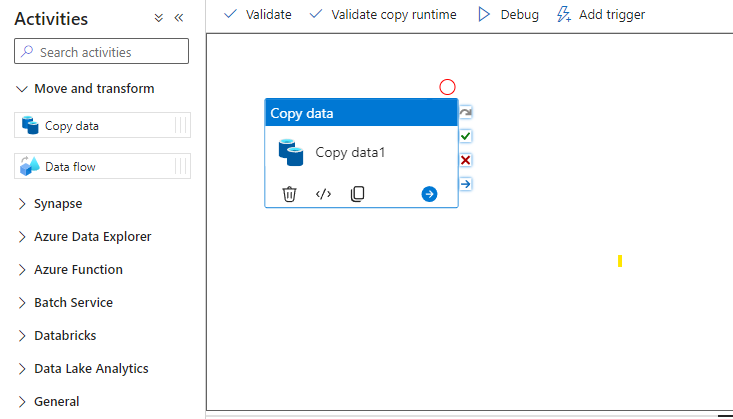
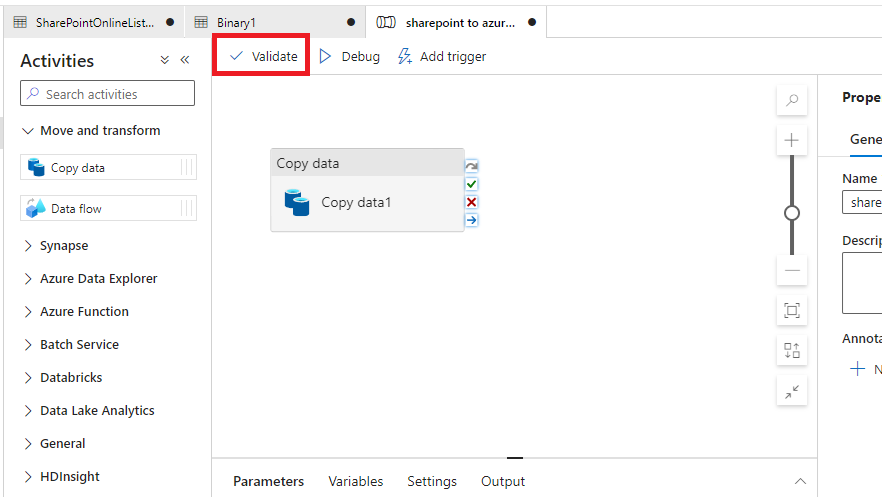
In the pipeline canvas, expand “Move & transform” in the Activities pane.
Drag and drop “Copy data” onto the canvas.
In the bottom pane, configure the Copy activity:
General tab:
- Name: Give your copy activity a name
- Source tab:
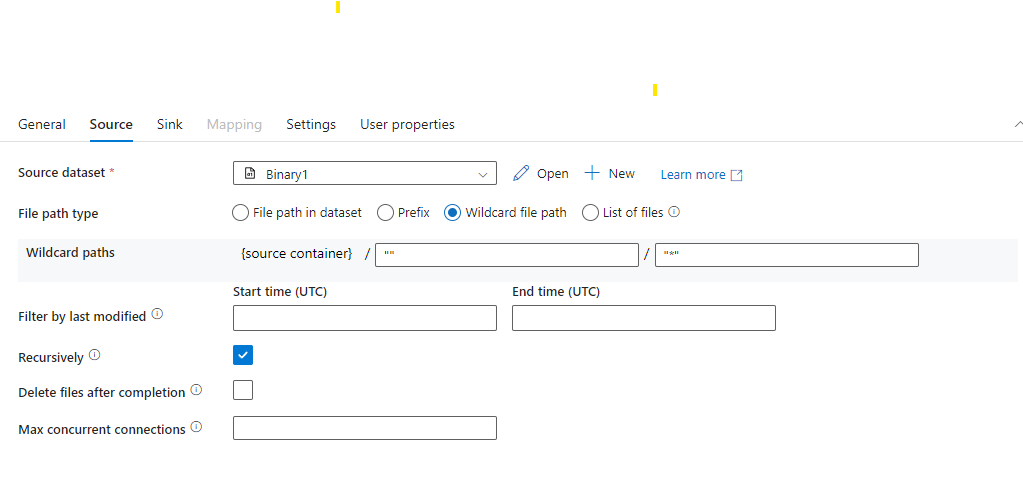
- Source dataset: Select your SharePoint Online dataset
- File path type: Wildcard file path (“”)
- Wildcard file name: Enter a pattern to match files (“*”)
- Sink tab:
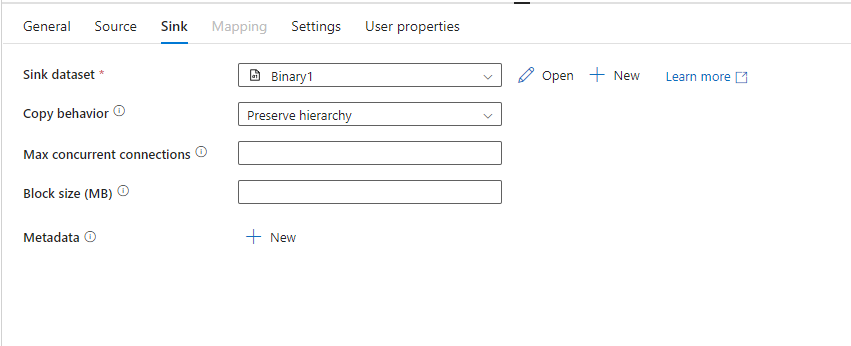
- Sink dataset: Select your Azure Blob Storage dataset
- Copy behavior: Choose appropriate option (e.g., “Preserve hierarchy”)
- Settings tab:
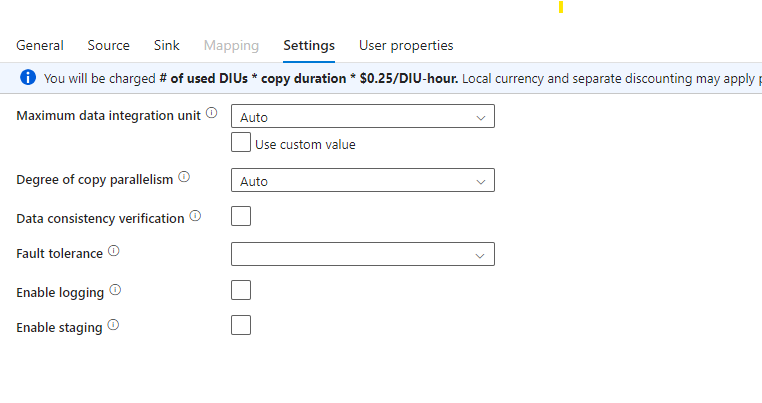
- Enable staging: Leave unchecked unless you need it
- Enable incremental copy: Configure if needed for incremental loads
Step 7: Validate and Publish
Click “Validate” in the pipeline toolbar to check for errors.
If validation passes, click “Publish all” to save your changes.
Step 7: Trigger the Pipeline
In your pipeline view, click “Add trigger” in the toolbar.
Select “Trigger now” for a manual run, or set up a schedule.
Click “OK” to run the pipeline.
Azure Data Factory Use Case:
Azure Data Factory is highly flexible and scalable, making it ideal for moving larger datasets, but it requires more technical expertise than Power Automate.
The above steps will copy all files from the SharePoint site to your Azure Blob Storage Account.
Squirrel for Automated Archiving:
For organizations looking for a more automated solution that eliminates manual intervention, Squirrel is the ideal tool. Squirrel automatically archives SharePoint documents to Azure Blob Storage based on lifecycle policies, freeing up valuable SharePoint storage space and minimizing administrative overhead.
How Squirrel Works:
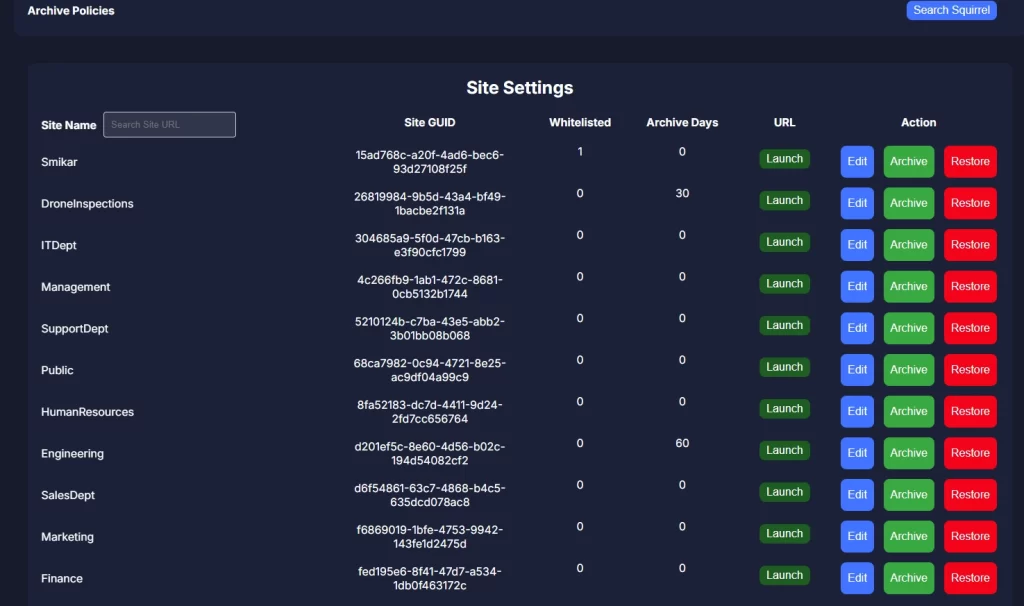
Lifecycle Policies: Squirrel allows you to set lifecycle policies based on file properties like last modified or last accessed date, ensuring only older, unused files are archived.
Squirrel Administrators can set a Global lifecycle policy which will be applied to all their SharePoint Online Document Libraries, or individual lifecycle policies if required. These policies can be based on either when files where last accessed, or last modified, or even a combination of the two.
Automated Archiving: Once configured, Squirrel runs in the background, automatically moving files to Azure Blob Storage without manual oversight.
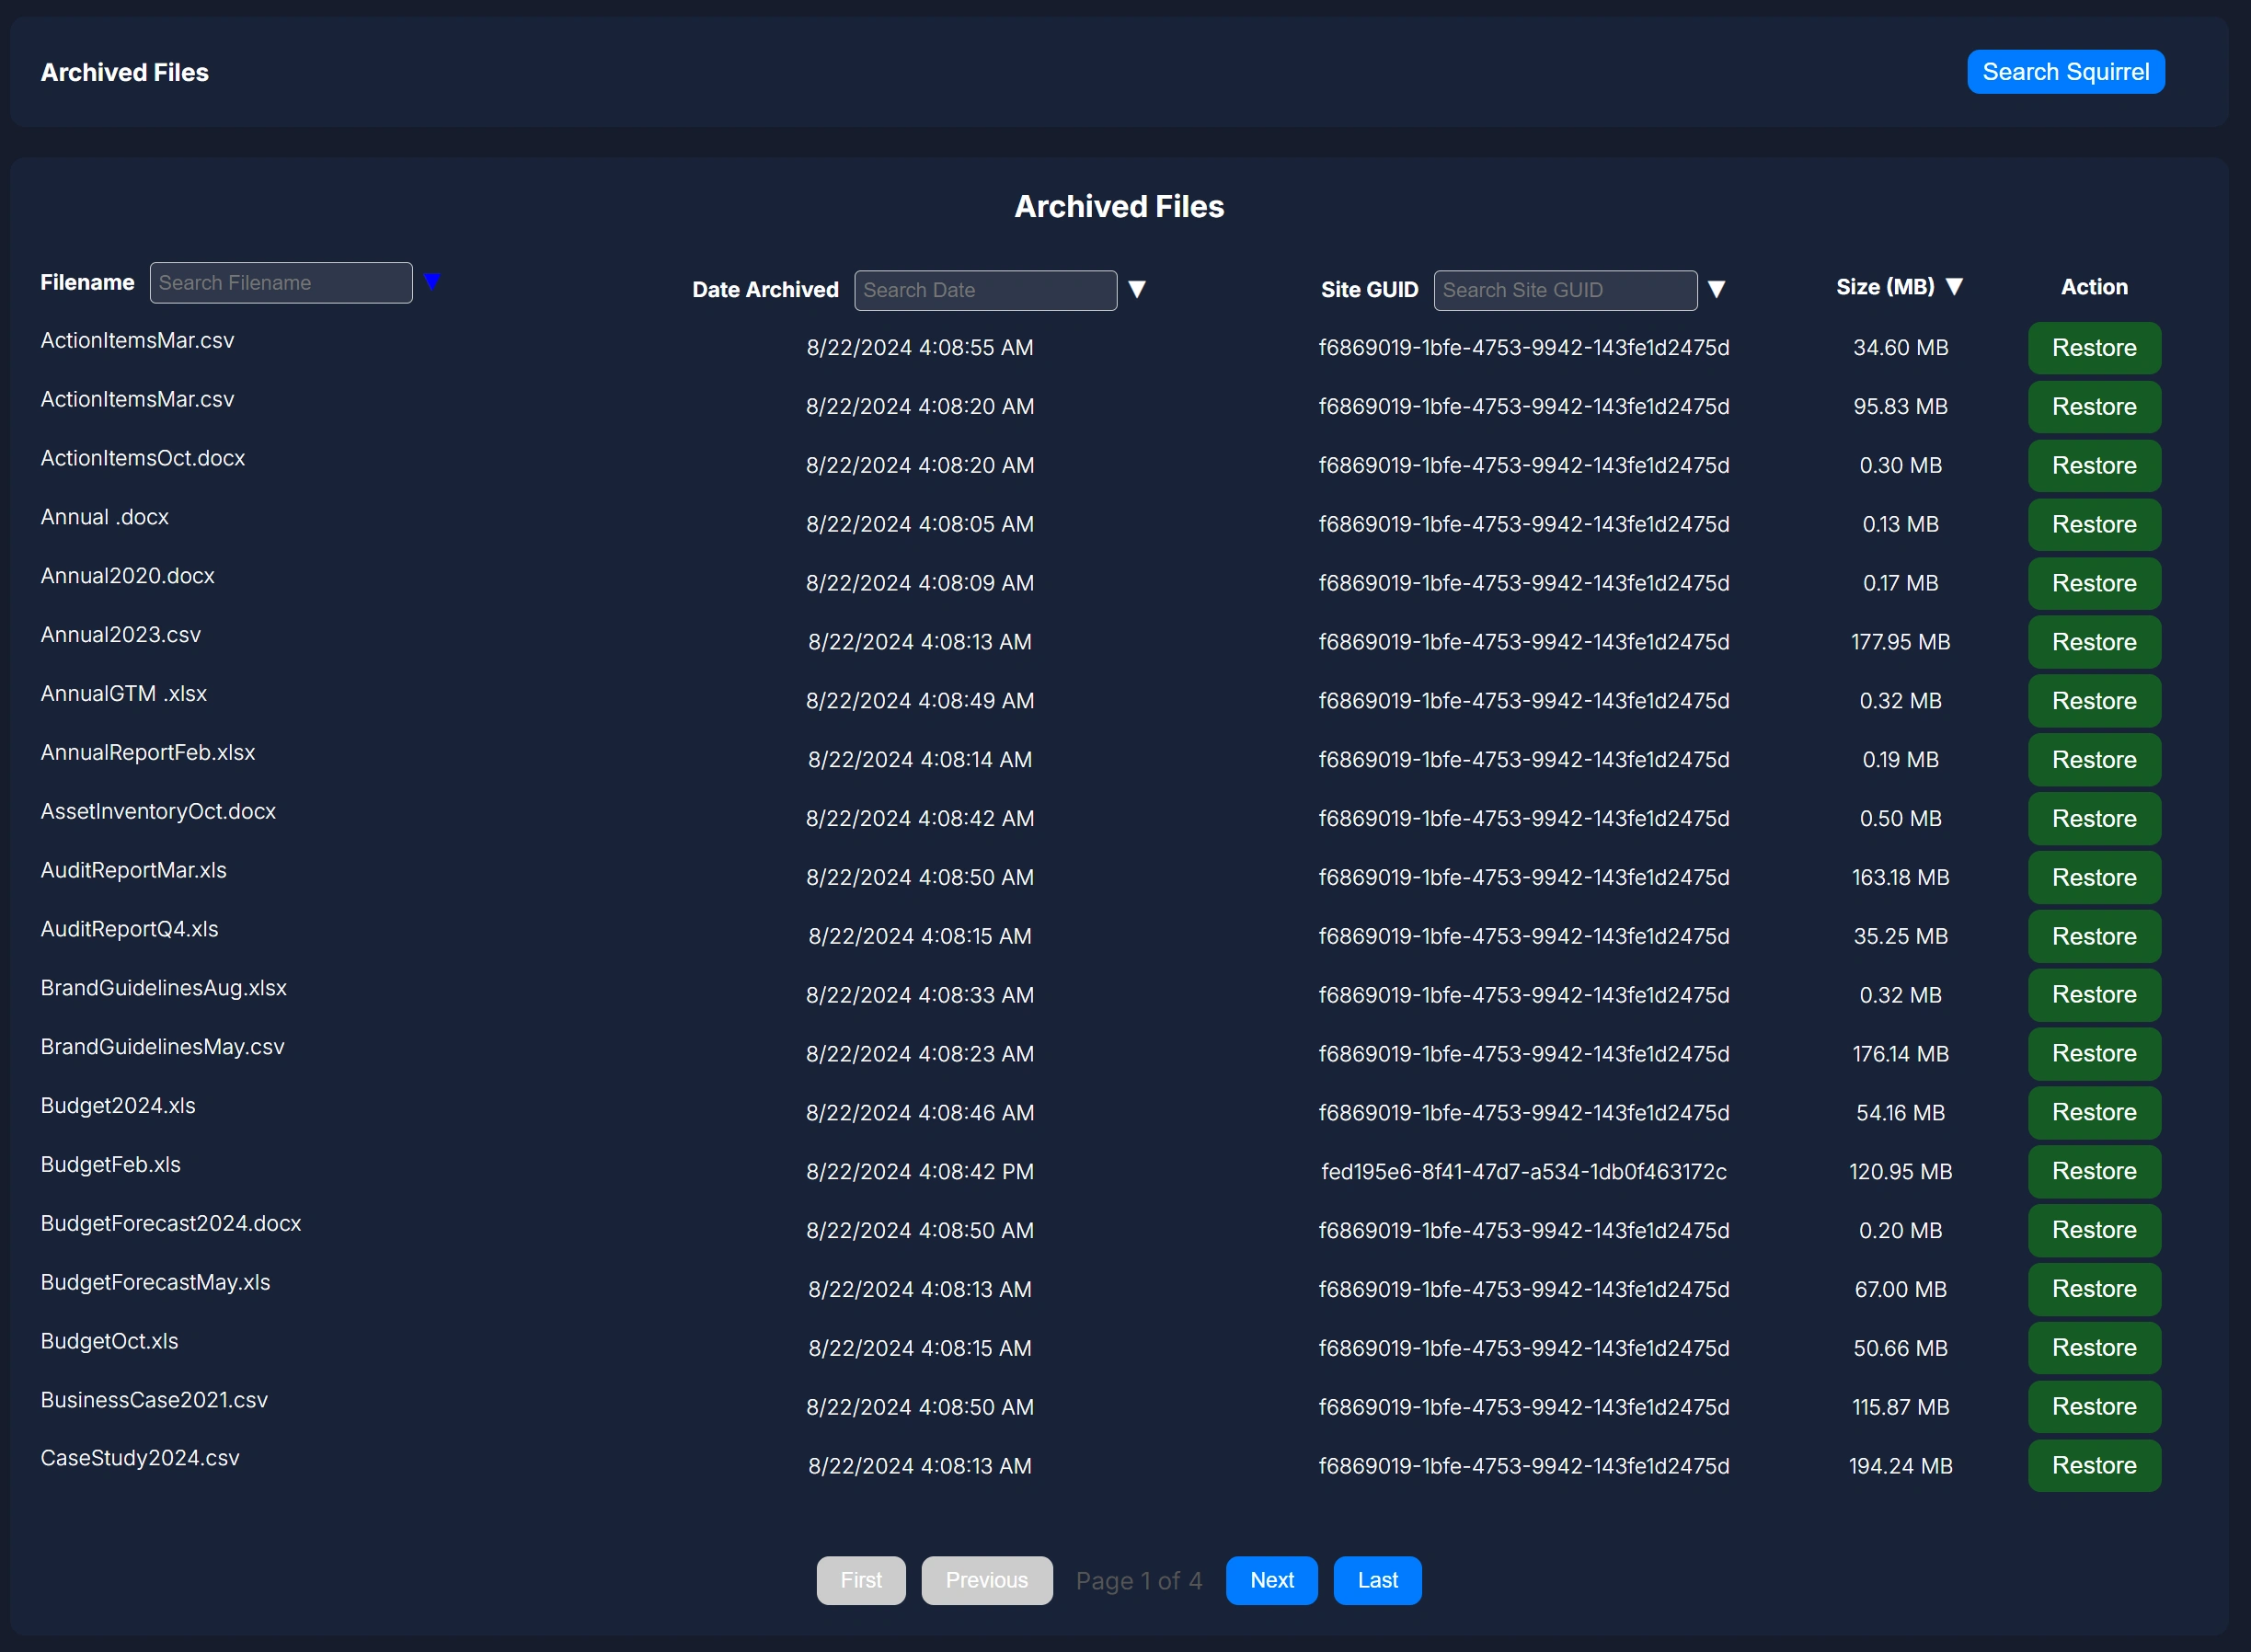
When a file becomes of age and triggers a lifecycle policy, the file will be copied, compressed, obfuscated and encrypted in a squirrel native format. The file will then be moved to your Azure Blob Storage Account, and once compete the file is deleted from your SharePoint Online site, and replaced with a stub file.
Secure Archiving: Squirrel ensures that all data is securely transferred and encrypted when stored in Azure Blob Storage, maintaining compliance with data protection standards.
Each file is hash checked to ensure it is correct, then encrypted and secured in your Azure Blob Storage.
Squirrel SharePoint Online Archiving Use Case:
Squirrel is perfect for organizations that need an automated, hands-off solution to efficiently archive large volumes of SharePoint documents to Azure Blob Storage.a
Conclusion
Moving SharePoint documents to Azure Blob Storage offers significant advantages in terms of cost savings, scalability, and data management. While Power Automate and Azure Data Factory are viable options for moving files, Squirrel offers a comprehensive automated solution that simplifies the process, reduces manual effort, and improves SharePoint storage management. By automating the archival process with Squirrel, organizations can focus on managing active data while ensuring that older files are securely stored in Azure.

