Deep Dive into System Center Configuration Manager

Deep Dive into System Center Configuration Manager

Introduction: Unveiling SCCM

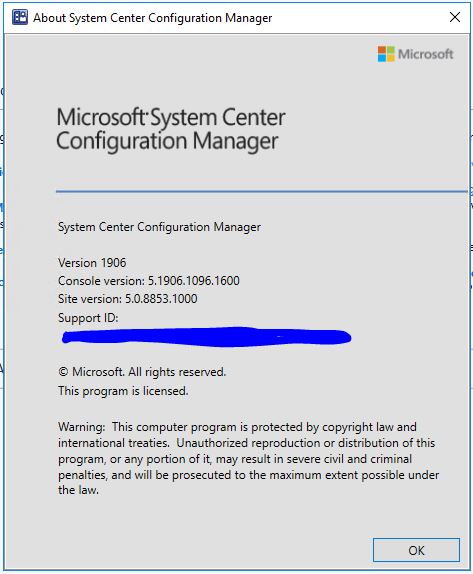
SCCM, standing for System Center Configuration Manager, now known as Microsoft Endpoint Configuration Manager, is a software suite from Microsoft’s stable of products. Often dubbed as the cornerstone of IT administration, SCCM offers a comprehensive management solution. It assists IT administrators in managing the deployment and security of devices and applications within an organization. From serving as a unified management console to providing a set of automated administrative tools, SCCM empowers IT professionals to manage software deployment, data protection, health monitoring, and compliance enforcement across all devices within the enterprise.

The Journey of SCCM: From SMS to Current Incarnation

Tracing the history of SCCM gives us a fascinating timeline, reflecting its evolution as a critical tool in IT management.

The Dawn of Systems Management Server

In 1994, Microsoft launched a tool named “Systems Management Server” (SMS). This early incarnation was a stripped-down version focusing on three core functionalities – hardware inventory, software inventory, and software metering. Despite its limited offerings, SMS marked a significant step towards organized and efficient IT administration.

SCCM: The New Identity and Advanced Features

As the world of IT management started becoming increasingly complex, the demand for an advanced, comprehensive management tool grew. Meeting these changing needs, SMS underwent a major overhaul, emerging as SCCM. This new avatar brought a broader feature set, including software distribution, OS deployment, and system health reporting, enhancing its value for IT administrators.

The Emergence of Microsoft Endpoint Configuration Manager

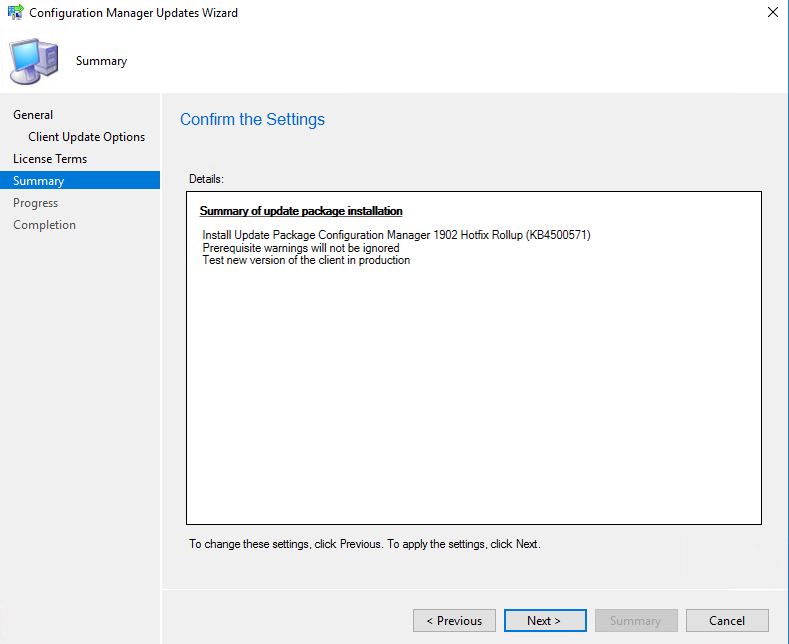
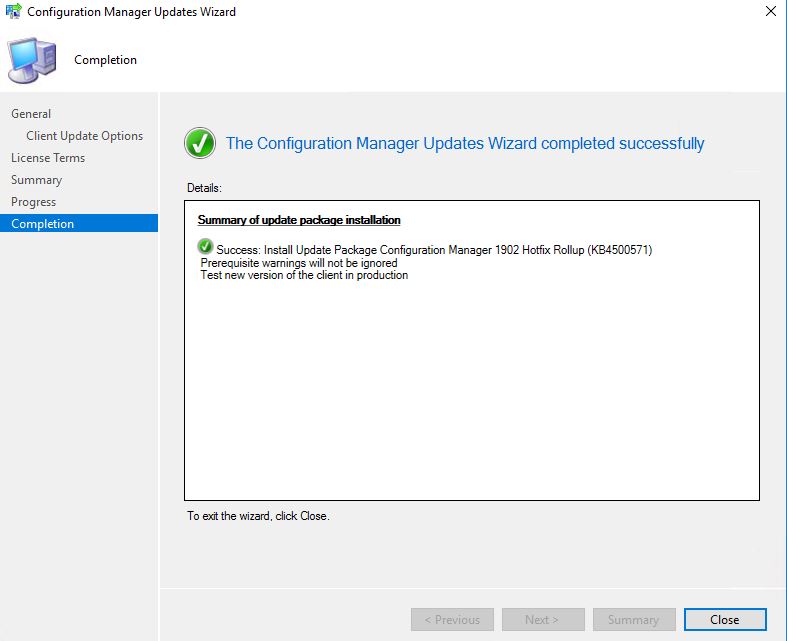
The evolution didn’t stop at SCCM. The most recent update in 2019 marked another significant transition – the rebranding of SCCM to “Microsoft Endpoint Configuration Manager”. This change not only acknowledged the rapidly growing field of endpoint management but also positioned the tool as a leading solution in this space.

SnaPatch for SCCM Home

The Architecture of SCCM: Core Components

SCCM’s sophisticated capabilities owe their existence to its complex yet efficient architecture.

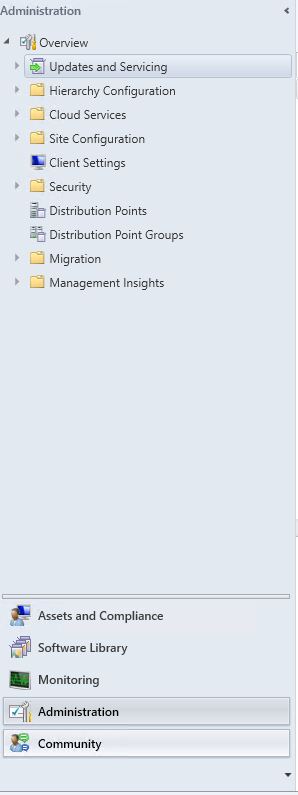
Site Systems: The Pillars of SCCM

Site systems form the backbone of SCCM’s architecture. These are servers that host different roles critical to the functioning of SCCM, including distribution point, management point, reporting services point, and software update point, to name a few.

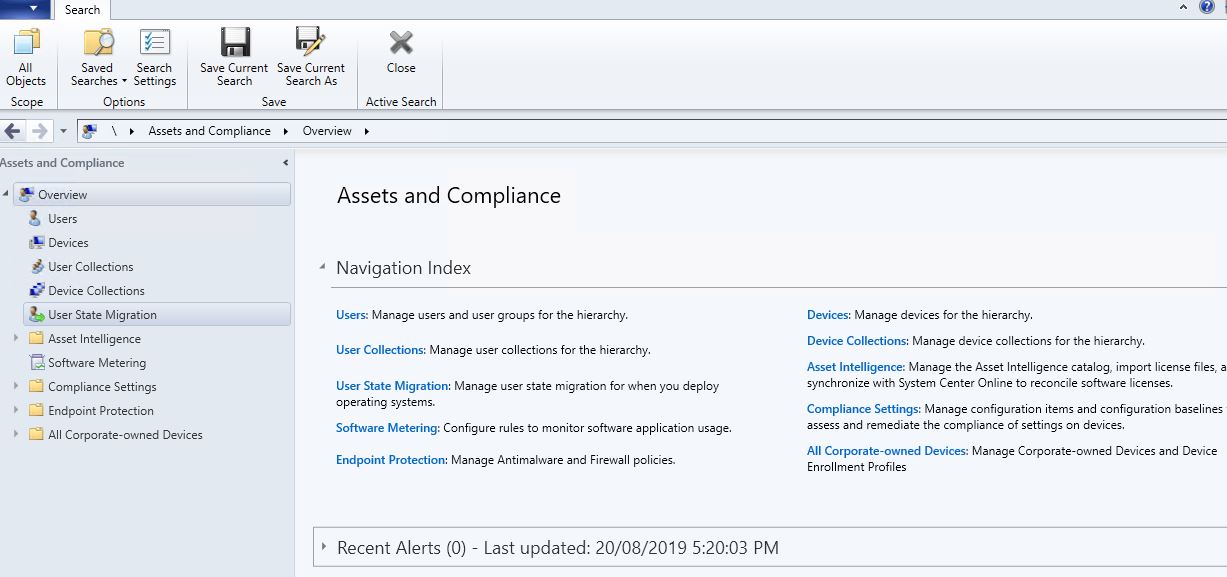
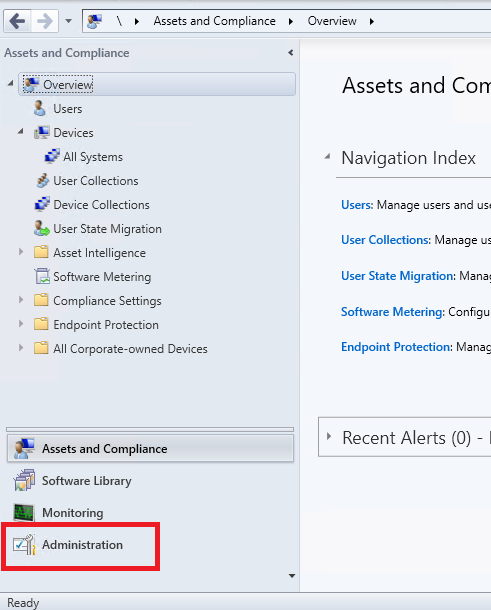
The Command Center: SCCM Console

The SCCM Console serves as the command center, offering a centralized interface for managing all administrative tasks. Whether it’s deploying software updates, managing system health, or overseeing hardware and software inventory, the SCCM Console is the nerve center where all these operations converge.

The Operatives: SCCM Clients

SCCM Clients are essentially the devices that SCCM manages. This could range from servers and desktop computers to laptops and mobile devices. Once these devices have the SCCM client software installed, they can be managed from the SCCM server.

The Multifaceted Functionality of SCCM

SCCM is more than just a unified management console. It is a powerhouse that offers a wide range of functionalities.

Comprehensive Hardware and Software Inventory

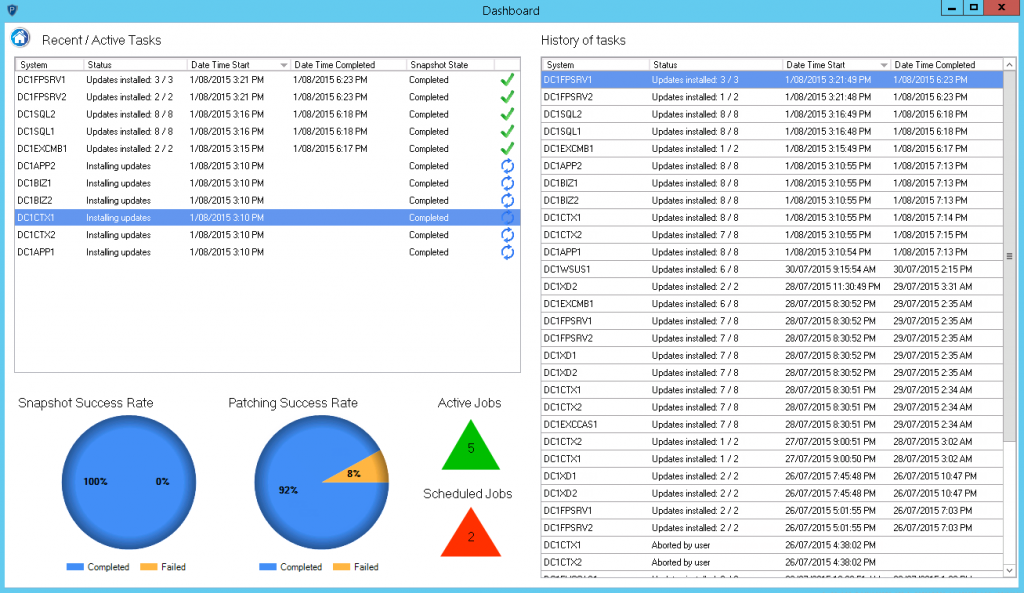
One of the core capabilities of SCCM is its ability to manage hardware and software inventory. It allows IT administrators to monitor and track all hardware assets and software applications used within the organization.

Streamlined Software Distribution and Deployment

Software distribution is another critical feature offered by SCCM. It provides tools for administrators to distribute, install, update, and uninstall software applications across computers within an organization, ensuring that every device is equipped with the necessary software it needs to function efficiently.

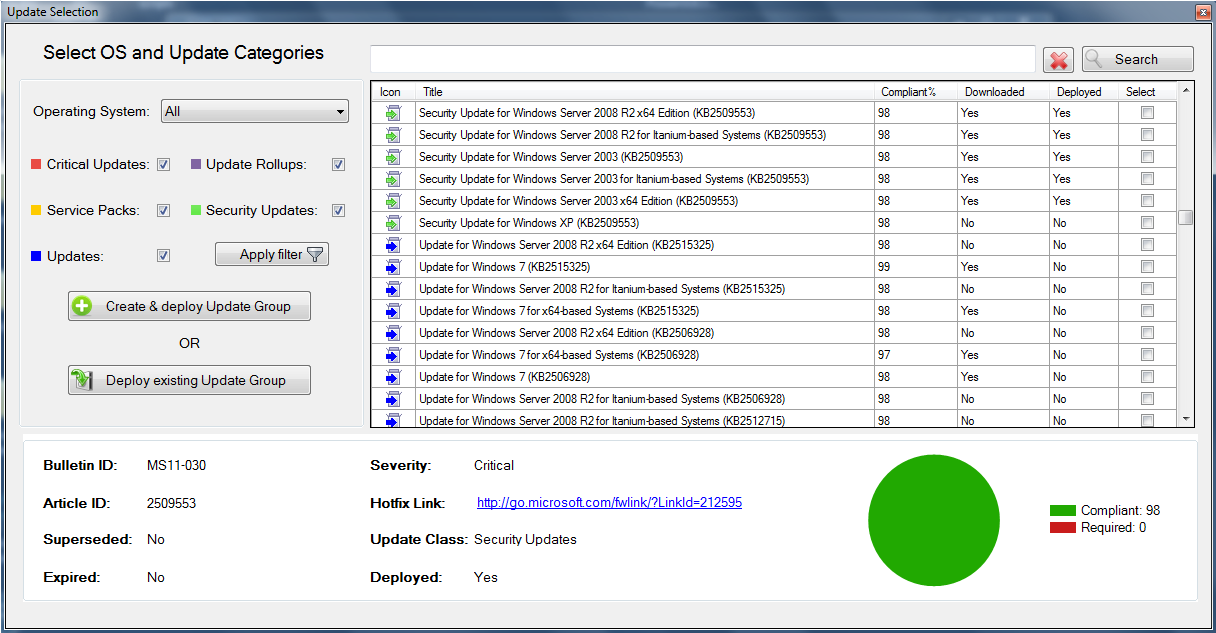
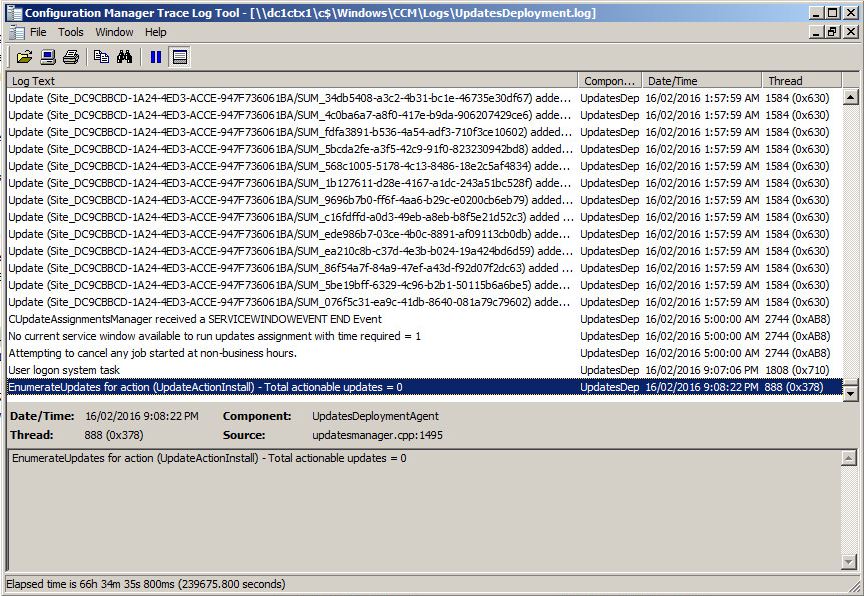
Automation of Software Updates

SCCM also integrates with Windows Server Update Services (WSUS) to facilitate the seamless distribution of updates. This feature automates the traditionally time-consuming process of software updates, freeing up IT staff to focus on other critical tasks.

Robust Operating System Deployment (OSD)

SCCM is not just about managing existing systems; it’s also about setting up new ones. With its Operating System Deployment (OSD) feature, SCCM can deploy new operating systems to computers across an organization, simplifying the process of onboarding new hardware.

Integrated Endpoint Protection and Compliance Settings Management

In a world where data breaches and cyber threats are rampant, the security of endpoints is critical. SCCM offers integrated endpoint protection, enabling IT administrators to manage security policies, monitor system status, and respond to threats in real-time.

SCCM Client Updates Deployment Log

The Inner Workings of SCCM: A Peek Under the Hood

SCCM operates on a client-server model. Once the client software is installed on devices, the SCCM server takes over the management of these clients. IT administrators can create policies for updates, security, and deployment that are then distributed to the clients.

The Value of SCCM in IT Ecosystem

SCCM is not just a tool; it’s an asset that adds significant value to IT management.

Simplification of IT Administration

With SCCM, IT administration is simplified. Its comprehensive feature set offers a unified solution to handle IT tasks, including remote support, updating applications and operating systems, managing PCs and servers, and much more.

Enhancement of System Security

The importance of system security cannot be overstated, and this is another area where SCCM shines. It provides the tools and capabilities to manage security policies, keep a close eye on system health, and take immediate action in response to any threats.

SnaPatch Patch Management Dashboard

SCCM Versus Its Peers: A Comparative Overview

While there are other tools available for IT management, SCCM stands out due to its comprehensive feature set, ability to scale as per the organization’s needs, and its seamless integration with other Microsoft products.

Leveraging SCCM for Success: Final Thoughts

As the IT landscape continues to evolve, tools like SCCM that offer comprehensive, centralized, and automated IT management will become increasingly indispensable. Leveraging SCCM effectively can pave the way for streamlined operations, enhanced security, and successful IT management.

SCCM Feature Set

FeatureDescription
Hardware and Software InventoryEnables IT administrators to monitor and manage all hardware assets and software applications used within the organization.
Software Distribution and DeploymentAllows administrators to distribute, install, update, and uninstall software applications across all computers within an organization.
Software Updates AutomationIntegrates with Windows Server Update Services (WSUS) to automate the process of software updates distribution, saving time for IT staff.
Operating System Deployment (OSD)Provides the ability to deploy new operating systems to computers across an organization, easing the process of setting up new systems.
Endpoint ProtectionFacilitates the management of security policies, system status monitoring, and real-time threat response, enhancing the security of all endpoints.
Compliance Settings ManagementProvides tools to enforce compliance with company policies regarding system configurations, security, and other settings.
Remote ControlAllows IT administrators to remotely control client computers for troubleshooting or administration tasks.
ReportingOffers robust reporting features to track and analyze data on hardware, software, and SCCM operations.
Power ManagementEnables IT administrators to monitor and manage the power consumption of devices across the organization.
Internet-Based Client ManagementFacilitates management of internet-based clients outside of the organization’s network.

Please note that this is not an exhaustive list of all the features that SCCM provides, but it covers the most commonly used and powerful functionalities.

FAQs

  1. What is SCCM?
    SCCM, or System Center Configuration Manager, is a management suite from Microsoft that enables IT administrators to manage the deployment and security of devices and applications across an organization.
  2. How has SCCM evolved over the years?
    SCCM started as Systems Management Server (SMS) with basic functionalities. Over the years, it has evolved to include advanced features such as software distribution, OS deployment, and system health reporting. The latest update renamed SCCM as Microsoft Endpoint Configuration Manager, reflecting the industry’s focus on unified endpoint management.
  3. What are some core functionalities of SCCM?
    SCCM offers functionalities like comprehensive hardware and software inventory management, software distribution and deployment, automation of software updates, robust operating system deployment, and integrated endpoint protection.
  4. What is the value of SCCM in IT management?
    SCCM simplifies IT administration by offering a unified solution to manage multiple IT tasks. It enhances system security through its integrated endpoint protection and offers tools to manage security policies and monitor system health.
  5. How does SCCM compare to its peers?
    While there are other IT management tools available, SCCM stands out due to its comprehensive feature set, scalability, and seamless integration with other Microsoft products.
SCCM Software Center Cannot Be Loaded?

SCCM Software Center Cannot Be Loaded?

SCCM Software Center Cannot Be Loaded:

Introduction to SCCM Software Center

System Center Configuration Manager (SCCM) is a popular tool used by IT administrators to manage and deploy software, updates, and operating systems across a network. SCCM Software Center is the user interface that allows end users to interact with the tool and install applications, updates, or operating systems. However, sometimes users may encounter issues where the SCCM Software Center cannot be loaded. This article will help you understand the reasons behind this problem and offer solutions to fix it.

Common Reasons for SCCM Loading Issues

There are several reasons why the SCCM Software Center might not load properly. Here, we will discuss the most common ones:

SCCM Configuration Issues

Misconfiguration of the SCCM environment, such as incorrect boundaries, boundary groups, or client settings, can prevent the Software Center from loading. Additionally, issues with the SCCM server or site server components may also cause the problem.

Network Connectivity Problems

Network connectivity issues, including problems with DNS resolution, firewalls, or proxy servers, can prevent the SCCM Software Center from communicating with the necessary servers and services, resulting in a failure to load.

Client Installation Errors

If the SCCM client is not installed properly or is corrupted, the Software Center may not load correctly or at all. This can occur due to incomplete installations, software conflicts, or malware.

How to Troubleshoot SCCM Loading Issues

To resolve issues with the SCCM Software Center not loading, follow these steps:

Checking SCCM Configuration

Ensure that the SCCM environment is correctly configured, with appropriate boundaries, boundary groups, and client settings. Verify that the SCCM server and site server components are functioning correctly.

Verifying Network Connectivity

Check for network connectivity issues by testing DNS resolution, reviewing firewall settings, and ensuring that proxy servers are configured correctly. Make sure that the client device can communicate with the SCCM servers and services.

Reinstalling the SCCM Client

If the SCCM client is corrupt or improperly installed, uninstall the client and reinstall it using the latest version. Make sure to follow the proper installation guidelines and ensure that there are no software conflicts or malware present on the system.

Advanced Troubleshooting Techniques

If the basic troubleshooting steps fail to resolve the issue, you can try the following advanced techniques:

Reviewing SCCM Logs

SCCM maintains logs that can provide insights into the root causes of issues. Review the relevant logs, such as AppDiscovery.log, AppEnforce.log, or ClientIDManagerStartup.log, to identify any errors or issues that may be causing the Software Center to fail to load.

Repairing SCCM Client Components

In some cases, SCCM client components may become corrupt or damaged, causing the Software Center to malfunction. You can repair these components by running the Configuration Manager client repair process or by using the “ccmrepair.exe” command.

Resetting the SCCM Client Policy

Sometimes, issues with the client policy can cause the Software Center not to load. Resetting the client policy can help resolve this issue. To reset the policy, follow these steps:

  1. Open the Configuration Manager Properties window on the client device.
  2. Navigate to the “Actions” tab.
  3. Select “Machine Policy Retrieval & Evaluation Cycle” and click “Run Now.”


SnaPatch Patch Management Patching Screen

Solutions to Fix SCCM Software Center Cannot Be Loaded Error:

Now that you know the possible causes of the error, let’s discuss the solutions to fix the “Software Center Cannot Be Loaded” error in SCCM.

Solution 1: Restart the SCCM Client Service

Sometimes, restarting the SCCM client service can resolve the software center’s loading issues. Here’s how to do it:

  1. Open the Run dialog box by pressing Windows key + R.
  2. Type “services.msc” and press Enter.
  3. Locate the “SMS Agent Host” service and right-click on it.
  4. Select “Restart” from the context menu.
  5. Wait for the service to restart, then check if the software center is loading correctly.

Solution 2: Reinstall the SCCM Client

Reinstalling the SCCM client can resolve configuration issues or corrupted files that are preventing the software center from loading. Here’s how to do it:

  1. Open the SCCM console.
  2. Go to “Assets and Compliance” > “Devices.”
  3. Locate the device with the “Software Center Cannot Be Loaded” error.
  4. Right-click on the device and select “Client Notification” > “Download Computer Policy.”
  5. Wait for the policy to download and install on the device.
  6. If the issue persists, right-click on the device again and select “Client Notification” > “Download Package.”
  7. Select the SCCM client package and click on “Download.”
  8. Wait for the package to download and install on the device.
  9. After the installation is complete, check if the software center is loading correctly.

Solution 3: Check Firewall and Network Settings

SCCM requires specific ports to be open for communication with the server. Check if your firewall or network settings are blocking these ports. Here’s how to check:

  1. Open the Control Panel and go to “Windows Firewall.”
  2. Click on “Advanced settings.”
  3. Check if the following ports are open for inbound and outbound traffic:
  • TCP port 135
  • TCP port 445
  • TCP port 80
  • TCP port 443
  1. If any of these ports are blocked, add them to the exception list.
  2. After making the changes, restart the SCCM client service a loading correctly.

Solution 4: Check SCCM Permissions

Check if the user account you are using to access the software center has sufficient permissions. Here’s how to do it:

    1. Open the SCCM console and go to “Administration” > “Security” > “Administrative Users.”
    2. Check if the user account you are using has been added to the “Administrative Users” group.
    3. If not, add the user account to the group and restart the SCCM client service.
    4. Check if the software center is loading correctly.

If none of the above solutions work, consider reinstalling SCCM. Before doing so, ensure that you have taken a backup of SCCM database, configuration files, and any other relevant data. Here’s how to do it:

    1. Uninstall SCCM from the server.
    2. Reinstall SCCM using the installation media.
    3. Restore the backup of SCCM database, configuration files, and other data.
    4. After the installation is complete, check if the software center is loading correctly.
Issue Solution
SCCM client service is not running
Restart the SCCM client service
Network connectivity issues
Check network settings and connectivity
Corrupted files related to software center
Clear the cache and reset the software center
User account does not have sufficient permissions
Add user account to the “Administrative Users” group
SCCM client software is corrupted
Reinstall SCCM after taking a backup of relevant data

The “Software Center Cannot Be Loaded” error in SCCM can be frustrating for users and can cause productivity loss. However, with the troubleshooting steps provided in this article, you can resolve the issue and access the software center again. Remember to check the SCCM client service, permissions, network settings, and files related to the software center. If all else fails, consider reinstalling SCCM after taking a backup of all relevant data.

Update SCCM to Version 1906 – Easy Update Instructions

Update SCCM to Version 1906 – Easy Update Instructions

Step by Step guide on how to update to SCCM 1906​

SCCM 1906 upgrade

Hi all, Microsoft has just recently released their latest iteration to SCCM, version 1906. With this update of SCCM comes quite a few welcome features and to find out more go to this link on the Microsoft site.

But you are here to see how easy it is to upgrade your SCCM to the current branche 1906.

So let’s get started on the upgrade process for SCCM 1906.


  1. As always when performing any upgrades, make sure that you have a good known valid backup or snapshot of the servers you are targeting. Once you have confirmed you have both or either of these in place, open your SCCM console with your SCCM administration account.
    SCCM Console Main Window


  2. Now click on Administration then highlight Updates and Servicing.
    SCCM Administration Pane


  3. Now in the main Window you should hopefully see the SCCM 1906 update is Ready to Install. If not, click on Check for Updates and allow for sometime for SCCM to download the latest branch update from the Microsoft site. Remember to refresh your window as it wont show up automatically.SCCM 1906 download ready

  4. As you can see from the prior picture, our environment has the SCCM 1906 update all ready to install and that our previous SCCM 1902 updates had been installed. First thing we need to do is to Run prerequisite check. Highlight the Configuration Manager 1906 update, right click and choose Run prerequisite check.SCCM 1906 Run Prerequisite Check

  5. This check will take a little time, you can see the status of the check by refreshing the window.
    SCCM 1906 checking prerequisites
    You can also select Monitoring in the SCCM console Window, navigate to Updates and Servicing, highlight the Configuration Manager 1906 update, right click that and choose show status for a more detailed display of the status of the prerequisite check of SCCM 1906.
    (now this may take sometime to allow the 1906 upgrade to confirm that your SCCM environment is ready for the install, so always be patient)
    SCCM 1906 checking prerequisites detailed

  6. OK, hopefully your SCCM environment passed all the checks to confirm it is ready for the SCCM 1906 installation. Now go back to the Administration and you should see that the Prerequisite Check Passed for the Configuration Manager 1906 update as below.
    SCCM 1906 checking prerequisites passed

  7. Now to the gritty stuff, we are ready to start the upgrade process for SCCM 1906. Again, highlight the Configuration Manager 1906 update, right click and choose Install Update Pack.SCCM 1906 install update pack


  8. You are now presented with the Configuration Manager Updates Wizard. Click on Next when you are ready to start the installation, this will take around 30 – 45 minutes to complete so make sure you have a big enough change window for the update process.SCCM 1906 Configuration Manager Updates Wizard

  9. On the second windows of the SCCM updates wizard, carefully choose any options / features  that you require and then click on Next.SCCM 1906 Configuration Manager Updates Wizard Options


  10. Client Update Settings window allows you to choose if you would like to validate the client update on members of a Pre-Production collection so that you can test there are no issues with the update. As this is one of SmiKar’s software test environments, I am going to just Upgrade without Validating. When you are ready to proceed click on Next.SCCM 1906 Configuration Manager Updates Wizard Client Updates


  11. We are almost ready to start the installation and upgrade to SCCM 1906. On the License Terms window, you can read the License Terms if you wish to do so, click on Next when you are ready for the next step.
    SCCM 1906 Configuration Manager Updates Wizard License Acceptance

  12. Now the last step before the upgrade process starts off. On the Configuration Manager Updates Wizard Summary Window, check the settings and details you want have been selected and then finally click on Next. This will start the upgrade to SCCM 1906 so make sure you want to do this.SCCM 1906 Configuration Manager Updates Wizard Summary


  13. The last window you can now close and the SCCM 1906 update will complete in the background.SCCM 1906 Configuration Manager Updates Wizard Completed

  14. Now what if you dont want to refresh the SCCM console window and wish to see more details about what is happening with the update to SCCM 1906. Well you can easily get a more detailed view of the upgrade process by going to the local C Drive of your SCCM server and opening the ConfigMgrSetup.log file. If you have Trace32 installed to read your log files, it will display this in a nice and easy to read fashion.SCCM 1906 ConfigMgrSetup Log

  15. Alternatively to see the update, in your SCCM Console go to Monitoring then Updates and Servicing Status, highlight the Configuration Manage 1906 update, right click and choose Show Status. In the Update Pack Installation Status window, highlight Installation and you can also see the what the SCCM 1906 update is doing.SCCM 1906 Update Status Window

  16. Hopefully after some time (it took around 30 minutes to complete the upgrade to SCCM 1906 in our test environment), everything should have installed and updated your SCCM to the latest branche. You may get a warning that your Configuration Manager console needs to be updated as well.SCCM 1906 Console Update

  17. Close the console then reopen to update. (the SCCM 1906 update took a few minutes to complete in the lab)SCCM 1906 Console Update

  18. Finally after quite a few easy steps, we can confirm that the SCCM environment successfully installed to the current branche, SCCM 1906.SCCM 1906 install successSCCM 1906 Installed

Now that you have updated your SCCM to version 1906, perhaps you use SCCM to patch your virtual server environment. While you are here, check out SnaPatch and see how it allows you to have an easy roll back position should any issues with your patch deployment occurs.

How to update SCCM 1902 Hotfix Rollup KB4500571

How to update SCCM 1902 Hotfix Rollup KB4500571

How to update SCCM 1902 Hotfix Rollup KB4500571


SCCM Hotfix rollup KB4500571

SCCM Hotfix rollup KB4500571 bug fix overview

Microsoft has released yet another update for SCCM, hotfix rollup KB4500571.

First off, we will cover the update fixes issues with SCCM including; (how to update your SCCM environment to Hotfix rollup KB4500571 is further down the page)

  • The Download Package Content task sequence action fails and the OsdDownload.exe process terminates unexpectedly. When this occurs, the following exit code is recorded in the Smsts.log on the client:
    Process completed with exit code 3221225477
  • Screenshots that are submitted through the Send a Smile or Send a Frown product feedback options cannot be deleted until the Configuration Manager console is closed.
  • Hardware inventory data that relies on the MSFT_PhysicalDisk class reports incomplete information on computers that have multiple drives. This is because the ObjectId property is not correctly defined as a key field.
  • Client installation fails on workgroup computers in an HTTPS-only environment. Communication with the management point fails, indicating that a client certificate is required even after one has been provisioned and imported.
  • A “success” return code of 0 is incorrectly reported as an error condition when you monitor deployment status in the Configuration Manager console.
  • When the option to show a dialog window is selected for app deployments that require a computer restart, that window is not displayed again if it is closed before the restart deadline. Instead, a temporary (toast) notification is displayed. This can cause unexpected computer restarts.
  • If it is previously selected, the “When software changes are required, show a dialog window to the user instead of a toast notification” check box is cleared after you make property changes to a required application deployment.
  • Expired Enhanced HTTPS certificates that are used for distribution points are not updated automatically as expected. When this occurs, clients cannot retrieve content from the distribution points. This can cause increased network traffic or failure to download content. Errors that resemble the following are recorded in the Smsdpprov.log:
    Begin to select client certificateUsing certificate selection criteria ‘CertHashCode:’.
    There are no certificate(s) that meet the criteria.
    Failed in GetCertificate(…): 0x87d00281
    Failed to find certificate ” from store ‘MY’. Error 0x87d00281
    UpdateIISBinding failed with error – 0x87d00281

    The distribution points certificates are valid when you view them in the SecurityCertificates node of the Configuration Manager console, but the SMS Issuing certificate will appear to be expired.
    Renewing the certificate from the console has no effect. After you apply this update, the SMS Issuing certificate and any distribution point certificates will automatically renew as required.

  • A management point may return an HTTP Error 500 in response to client user policy requests. This can occur if Active Directory User Discovery is not enabled. The instance of Dllhost.exe that hosts the Notification Server role on the management point may also continue to consume memory as more user policy requests arrive.
  • Content downloads from a cloud-based distribution point fail if the filename contains the percent sign (%) or other special characters. An error entry that resembles the following is recorded in the DataTransferService.log file on the client:AddUntransferredFilesToBITS : PathFileExists returned unexpected error 0x8007007b
    The DataTransferService.log may also record error code 0x80190194 when it tries to download the source file. One or both errors may be present depending on the characters in the filename.
  • After you update to Configuration Manager current branch, version 1902, the Data Warehouse Synchronization Service (Data_Warehouse_Service_Point) records error status message ID 11202. An error entry that resembles the following is recorded in the Microsoft.ConfigMgrDataWarehouse.log file:
    View or function ‘v_UpdateCIs’ has more column names specified than columns defined.
    Could not use view or function ‘vSMS_Update_ComplianceStatus’ because of binding errors.
  • User collections may appear to be empty after you update to Configuration Manager current branch, version 1902. This can occur if the collection membership rules query user discovery data that contains Unicode characters, such as ä.
  • The Delete Aged Log Data maintenance task fails if it is run on a Central Administration Site (CAS). Errors that resemble the following are recorded in the Smsdbmon.log file on the server.
    TOP is not allowed in an UPDATE or DELETE statement against a partitioned view. : spDeleteAgedLogData
    An error occurred while aging out DRS log data.
  • When you select the option to save PowerShell script output to a task sequence variable, the output is incorrectly appended instead of replaced.
  • The SMS Executive service on a site server may terminate unexpectedly after a change in operating system machine keys or after a site recovery to a different server. The Crash.log file on the server contains entries that resemblie the following.
    Note Multiple components may be listed, such as SMS_DISTRIBUTION_MANAGER, SMS_CERTIFICATE_MANAGER, or SMS_FAILOVERMANAGER. The following Crash.log entries are truncated for readability.
    EXCEPTION INFORMATION
    Service name = SMS_EXECUTIVE
    Thread name = SMS_FAILOVER_MANAGER
    Exception = c00000fd (EXCEPTION_STACK_OVERFLOW)Description = “The thread used up its stack.”
  • Old status messages may be overwritten by new messages after promoting a passive site server to active.
  • User targeted software installations do not start from Software Center after you update to Configuration Manager current branch, version 1902. The client displays an “Unable to make changes to your software” error message. Errors entries that resemble the following are recorded in the ServicePortalWebSitev3.log::GetDeviceIdentity – Could not convert 1.0,GUID:{guid} to device identity because the deviceId string is either null or larger than the allowed max size of input
    :System.ArgumentException: DeviceId
    at Microsoft.ConfigurationManager.SoftwareCatalog.Website.PortalClasses.PortalContextUtilities.GetDeviceIdentity(String deviceId)
    at Microsoft.ConfigurationManager.SoftwareCatalog.Website.PortalClasses.Connection.ServiceProxy.InstallApplication(UserContext user, String deviceId, String applicationId)
    at Microsoft.ConfigurationManager.SoftwareCatalog.Website.ApplicationViewService.InstallApplication(String applicationID, String deviceID, String reserved)

    This issue occurs if the PKI certificates that are used have a key length that is greater than 2,048 bits.

  • Audit status messages are not transmitted to the site server in an environment with a remote SMS provider.
  • The Management Insights rule “Enable the software updates product category for Windows 10, version 1809 and later” does not work as expected for Windows 10, version 1903.

SCCM Hotfix rollup KB4500571 additional changes

Further improvements and additional functional changes to SCCM included in the KB4500571 hotfix are;

  • Manager and the Microsoft Desktop Analytics service.
  • Multiple improvements are made to support devices that are managed by using both Configuration Manager and a thirty-party MDM service.
  • Client computers that use IPv6 over UDP (Teredo tunneling) may generate excessive traffic to management points. This, in turn, can also increase load on the site database.
    This traffic occurs because of the frequent network changes that are associated with the Teredo refresh interval. After you apply this update, this data is filtered by default and is no longer passed to the notification server on the management point. This filtering can be customized by creating the following registry string under HKEY_LOCAL_MACHINESoftwareMicrosoftCCM:
    Type: String
    Name: IPv6IFTypeFilterList
    Value: If the string is created without any data (blank), the pre-update behavior applies and no filtering occurs.
    The default behavior of filtering Teredo tunnel data (interface type IF_TYPE_TUNNEL, 131) is overwritten if new values are entered. Multiple values should be separated by semicolons.
  • The Configuration Manager client now handles a return code of 0x800f081f (CBS_E_SOURCE_MISSING) from the Windows Update Agent as a retriable condition. The result will be the same as the retry for return code 0x8024200D (WU_E_UH_NEEDANOTHERDOWNLOAD).
  • The SMSTSRebootDelayNext task sequence variable is now available. For more information, see the “Improvements to OS deployment” section of Features in Configuration Manager technical preview version 1904.
  • SQL database performance is improved for operations that involve a configuration item (CI) that has associated file content by the addition of a new index on the CI_Files table.

How to update your SCCM to Hotfix rollup KB4500571

Now we get to the nitty gritty of the update process for KB4500571.

  1. Open your SCCM Console, and navigate to Administration, then highlight Updates and Servicing.
    KB4500571 Administration
  2. Now with Updates and Servicing highlighted in main window you should hopefully see the KB4500571 update has downloaded and is ready to install.
    (If you cant see it downloaded, right click on Updates and Servicing and choose Check for Updates.)
    KB4500571 Downloaded
  3. Firstly we need to run the prerequisite check for SCCM KB4500571 to ensure your environment is ready for the update.
    Right Click the downloaded update and choose Run Prerequisite Check.
    KB4500571 PrerequisiteCheck
  4. The prerequisite check will take around 10 minutes or so to complete the check.
    You can use the ConfigMgrPrereq.log located in the root of the SCCM server’s C Drive to see the status and it’s completion.
    SCCM KB4500571 Prerequisite Check
  5. Now on to the fun bit, let’s start the installation of SCCM KB4500571. Again right click the update in the main window and choose Install Update Pack.
    SCCM KB4500571 Install Update Pack
  6. The first window of the Configuration Manager Updates Wizard pops up. Choose Next to continue the installation
    SCCM KB4500571 Updates Wizard
  7. The Client Updates Settings window lets you choose whether you want to validate the update against a pre-production collection. We wont bother with that here as this is our test environment. Choose Next to continue when ready to do so.SCCM KB4500571 Client Update Settings
  8. Accept the License Terms – only if you are happy with them 🙂 – and click Next.
    SCCM KB4500571 License Terms
  9. Now the Summary tab of the Configuration Manager Updates Wizard details the installation settings you have chosen. If you are happy to proceed with the installation click Next.
    This did take some time in the SmiKar SCCM lab environment, so best go make yourself a cup of coffee and come back. 🙂
    SCCM KB4500571 Install Confirmation
  10. Hopefully all went well with your upgrade to SCCM KB4500571 and you are presented with a screen similar to this.
    SCCM KB4500571 Completed
  11. If you had any issues or want to view the status (rather than look in the logs) go to Monitoring, then high Updates and Servicing Status. Highlight and Right Click the update and choose Show Status.
    SCCM KB4500571 Updates and Servicing Status

How to upgrade to SCCM 1810

How to upgrade to SCCM 1810

Step by step how to upgrade SCCM to version 1810

What’s new in SCCM 1810?

Here is a quick run down of the exciting new features that Microsoft has added to SCCM for release 1810. You can see more information around this update on the Microsoft blog site.

Specify the drive for offline OS image servicing

Now you can specify the drive that Configuration Manager uses when adding software updates to OS images and OS upgrade packages.

Task sequence support for boundary groups

When a device runs a task sequence and needs to acquire content, it now uses boundary group behaviors similar to the Configuration Manager client.

Improvements to driver maintenance

Driver packages now have additional metadata fields for Manufacturer and Model which can be used to tag driver packages for general housekeeping.

Phased deployment of software updates

You can now create phased deployments for software updates. Phased deployments allow you to orchestrate a coordinated, sequenced rollout of software based on customizable criteria and groups.

Management insights dashboard

The Management Insights node now includes a graphical dashboard. This dashboard displays an overview of the rule states, which makes it easier for you to show your progress.

Management insights rule for peer cache source client version

The Management Insights node has a new rule to identify clients that serve as a peer cache source but haven’t upgraded from a pre-1806 client version.

Improvement to lifecycle dashboard

The product lifecycle dashboard now includes information for System Center 2012 Configuration Manager and later.

Windows Autopilot for existing devices task sequence template

This new native Configuration Manager task sequence allows you to reimage and re-provision an existing Windows 7 device into an AAD joined, co-managed Windows 10 using Windows Autopilot user-driven mode.

Improvements to co-management dashboard

The co-management dashboard is enhanced with more detailed information about enrollment status.

Required app compliance policy for co-managed devices

You can now define compliance policy rules in Configuration Manager for required applications. This app assessment is part of the overall compliance state sent to Microsoft Intune for co-managed devices.

SMS Provider API

The SMS Provider now provides read-only API interoperability access to WMI over HTTPS.

Site system on Windows cluster node

The Configuration Manager setup process no longer blocks installation of the site server role on a computer with the Windows role for Failover Clustering. With this change, you can create a highly available site with fewer servers by using SQL Always On and a site server in passive mode.

Configuration Manager administrator authentication

You can now specify the minimum authentication level for administrators to access Configuration Manager sites.

Improvements to CMPivot

CMPivot now allows you to save your favorite queries and create collections from the query summary tab. Over 100 new queryable entities added, including for extended hardware inventory properties. Additional improvements to performance.

New client notification action to wake up device

You can now wake up clients from the Configuration Manager console, even if the client isn’t on the same subnet as the site server.

New boundary group options

Boundary groups now include two new settings to give you more control over content distribution in your environment.

Improvements to collection evaluation

There are two changes to collection evaluation scheduling behavior that can improve site performance.

Approve application requests via email

you can now configure email notifications for application approval requests.

Repair applications

You can now specify a repair command line for Windows Installer and Script Installer deployment types.

Convert applications to MSIX

Now you can convert your existing Windows Installer (.msi) applications to the MSIX format.

Improvement to data warehouse

 You can now synchronize more tables from the site database to the data warehouse.

Support Center

Use Support Center for client troubleshooting, real-time log viewing, or capturing the state of a Configuration Manager client computer for later analysis. Find the Support Center installer on the site server in the cd.latestSMSSETUPToolsSupportCenter folder.

Support for Windows Server 2019

Configuration Manager now supports Windows Server 2019 and Windows Server, version 1809, as site systems.

SCCM 1810 prerequisites

As with any update, you should make sure that you have all the prerequisites to install this update to Configuration Manager, prior to starting the upgrade process.

These prerequisites to SCCM 1810 are;

  • Every site server within your existing Configuration Manager environment should be at the same version
  • To install the update, the minimum SCCM version you can currently be on is version 1710. 1802 and 1806 are also accepted
  • SQL 2017 CU2 Standard and Enterprise
  • SQL 2016 SP2 Standard and Enterprise
  • SQL 2016 SP1 Standard and Enterprise
  • SQL 2016 Standard and Enterprise
  • SQL 2014 SP3 Standard and Enterprise
  • SQL 2014 SP2 Standard and Enterprise
  • SQL 2014 SP1 Standard and Enterprise
  • SQL 2012 SP4 Standard and Enterprise
  • SQL 2012 SP4 Standard and Enterprise
  • SQL 2012 SP3 Standard and Enterprise
  • Windows Server x64
  • Windows Server 2012 R2 x64
  • Windows Server 2016
  • Windows Server 2019 version 1809

How to upgrade SCCM to release 1810.

Step 1 – Administration Tab

Open you System Centre Configuration Manager Console and navigate to Administration


Sccm 1810 Upgrade

Step 2 – Updates and Servicing

Now click on Updates and Servicing and hopefully you should see the Configuration Manager 1810 update as highlighted in the attached picture.


Sccm 1810 Upgrade Updates and Servicing

Step 3 – Check SCCM 1810 Prerequisites

Next, right click on the Configuration Manager 1810 update and choose Run Prerequisite Check


Step 4 – Checking Prerequisites

Now the SCCM 1810 prerequisites will run and check that the Configuration Manager 1810 update is compatible with your current system. This will take some time, so perhaps go make a coffee while you wait.


Step 5 – ConfigMgrPrereq.log

You can check the status of the prerequisite check by looking at the ConfigMgrPrereq.log located in the C: drive of your configuration management server.

As you can see in my logs, the prequisite check has passed.


SCCM 1810 ConfigMgrPrereq_log

Step 6 – Install Update Pack

Now the fun stuff begins. We are ready to start the upgrade process for SCCM.

Right click the Configuration Manger 1810 update and choose Install Update Pack


Sccm 1810 Upgrade Install Update Pack

Step 7 – Start the installation process for SCCM 1810

On the Configuration Manager Updates Wizard, you can choose to Ignore any prerequisite check warnings and install this update regardless of missing requirements if you so wish.

As with any production environment, it’s always best case to never ignore any warnings, but we have had none in the previous check, so do not need to click this checkbox.

When you are ready to start the update process, click next.


Step 8 – Features included in update pack

The next page on the wizard are various features you can install as part of this update.

Check if any of the features you will need and when ready click on next.


Step 9 – Review and accept the terms

You can review the license terms that Microsoft has for this update. Accept these by checking the checkbox and click Next


Step 10 – Summary

Review this page to confirm that all the settings and features you have chosen previously are correct, and again when ready click Next.


Step 11 – Installation Completed

Finally, the last screen of the Configuration Manager 1810 upgrade wizard is the completed screen. Review the summary and then click on Close.

SCCM will upgrade in the background. This can take sometime dependent on your infrastructure setup.


Step 12 – Check Installation Status

To check the status of your SCCM upgrade, you need to go to Overview, then Updates and Servicing Status. 


Step 13 – Show Upgrade Status

Select the Configuration Manager 1810, then right click and choose Show Status.


Sccm 1810 Upgrade Show Status

Step 14 – Update Pack Installation Status

Highlight Installation and you will see the status of all the components that are upgrading.

Keep on clicking Refresh until you see all the tasks with a green tick. Be mindful, this does take sometime.

Click on Close when they are all green.


Sccm 1810 Upgrade Show Status 2

Step 15 – Update the Configuration Manager Console

Once all the ticks have gone green, click refresh within the SCCM console and you should be prompted with the Console Update.

Click on OK to proceed.


Sccm 1810 Upgrade Console Update

Step 16 – Update the Configuration Manager Console

The SCCM console update will download the required files and update your configuration manager console to the latest version


Sccm 1810 Upgrade Console Update 3

Step 17 – SCCM 1810 Upgrade Finished

Finally, SCCM has updated your Config Manager environment to release 1810


Sccm 1810 Upgrade Finish

How to Snapshot your VMs before patching with SCCM and SnaPatch

Now that you have upgraded SCCM to the current branch 1810, here is a quick run down on how to use SnaPatch with SCCM to quickly and easily snapshot your VMs prior patching.