Understanding Hyper-V Checkpoints: A Comprehensive Guide

Understanding Hyper-V Checkpoints: A Comprehensive Guide

Hyper-V is a virtualization platform developed by Microsoft that allows users to create and manage virtual machines (VMs) on Windows operating systems. One of the features of Hyper-V is checkpoints, which allow users to capture the state of a VM at a particular point in time.

Hyper-V checkpoints are essential for many tasks, such as testing software in a safe and isolated environment, creating backups of virtual machines, and rolling back a virtual machine to a previous state if something goes wrong. However, understanding Hyper-V checkpoints and how to use them effectively can be challenging, especially for beginners.

In this article, we will provide a comprehensive guide to understanding Hyper-V checkpoints, including what they are, how they work, and their benefits and drawbacks. We will also provide some best practices for using Hyper-V checkpoints.

What are Hyper-V Checkpoints?

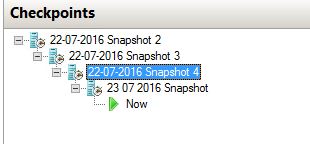
A Hyper-V checkpoint, also known as a snapshot, is a point-in-time image of a virtual machine’s state, including its memory, virtual disks, and configuration files. Checkpoints are useful for creating backups of virtual machines or testing software in an isolated environment without affecting the production environment.

Hyper-V checkpoints capture the virtual machine’s state at a particular moment, allowing you to revert the virtual machine to that state later if needed. This can be especially helpful when you need to test software, apply updates or configuration changes, or perform other maintenance tasks.

How do Hyper-V Checkpoints Work?

When you create a Hyper-V checkpoint, the virtual machine’s current state is saved as a differencing disk. The differencing disk records all the changes made to the virtual machine’s state after the checkpoint was taken. This allows the virtual machine to continue running normally while you make changes or updates to the virtual machine.

If you need to revert the virtual machine to the checkpoint state, Hyper-V will discard the differencing disk and use the checkpoint’s saved state to restore the virtual machine to that point in time.

Benefits of Hyper-V Checkpoints:

Hyper-V checkpoints offer several benefits, including:
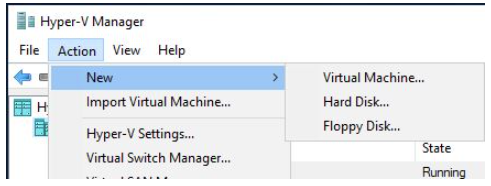
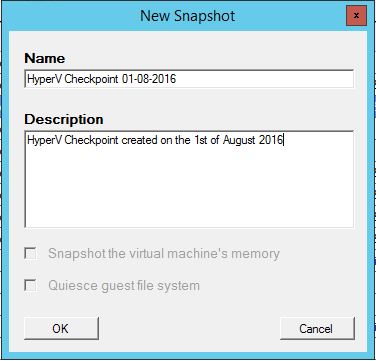
Easy to create:

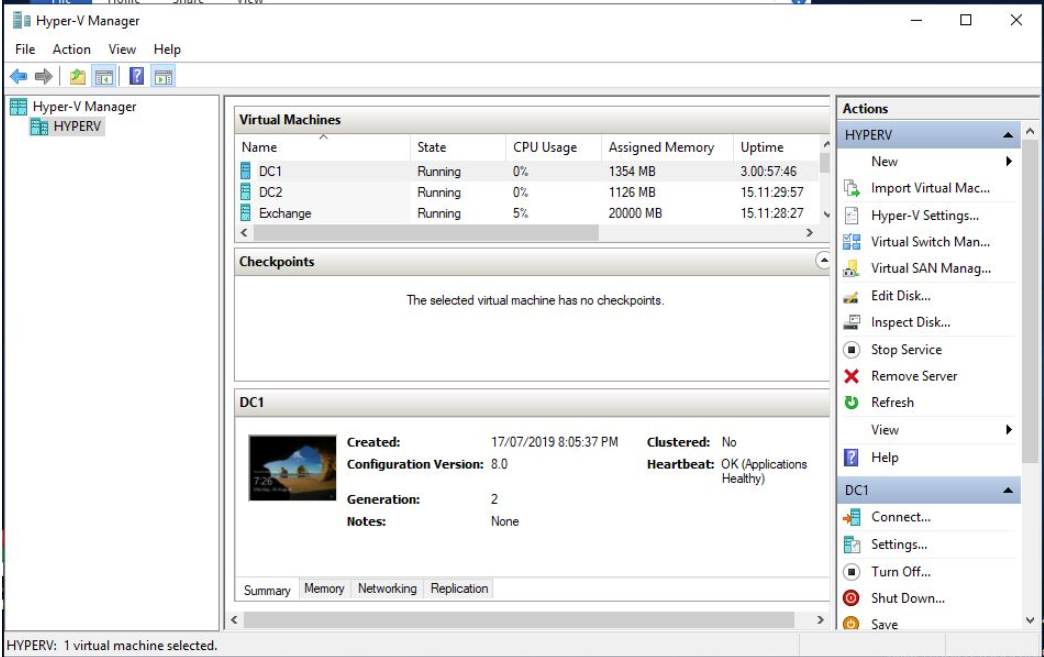
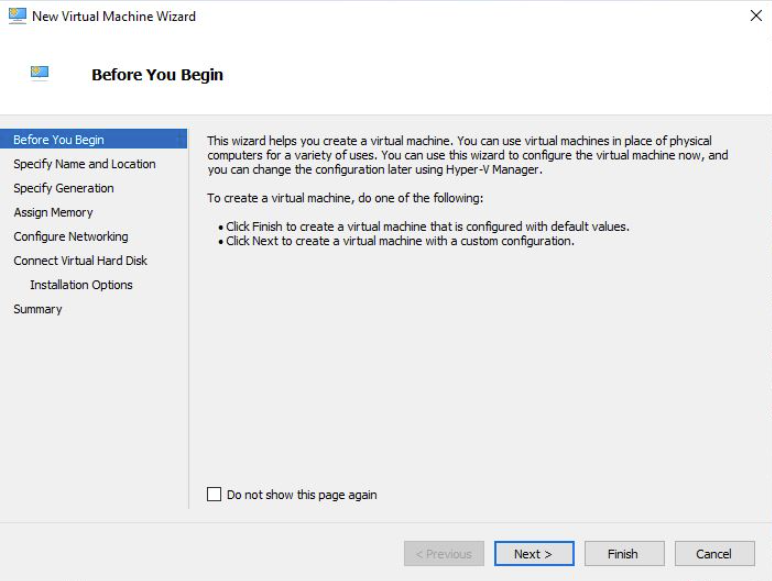
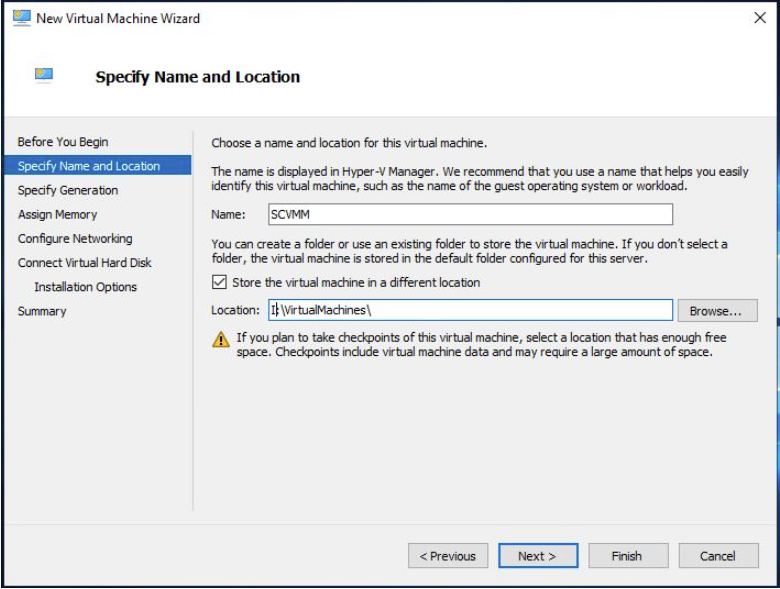
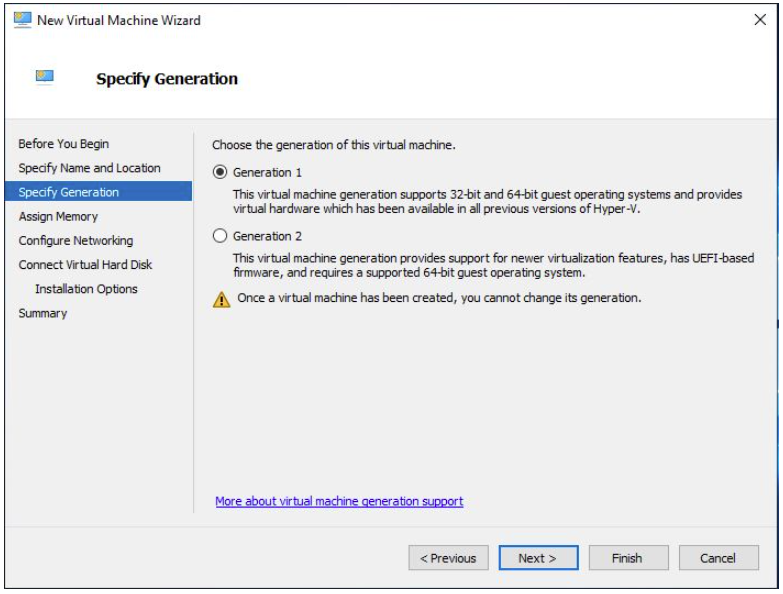
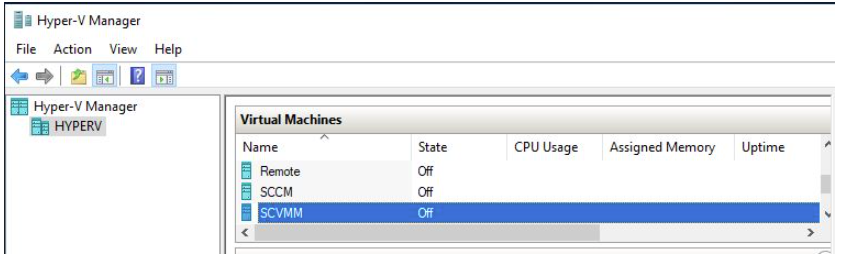
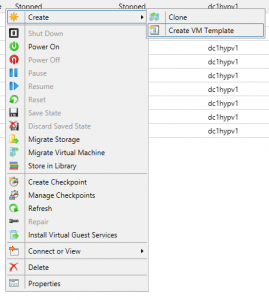
Creating a checkpoint is a straightforward process and can be done with just a few clicks in the Hyper-V Manager.

Time-saving:

Hyper-V checkpoints can save you time by allowing you to quickly revert a virtual machine to a previous state if something goes wrong during testing or maintenance.

Safe testing environment:

Hyper-V checkpoints allow you to create a safe testing environment for software, updates, or configuration changes without affecting the production environment.

Easy backups:

Hyper-V checkpoints can be used to create backups of virtual machines quickly and easily.

Drawbacks of Hyper-V Checkpoints:

Hyper-V checkpoints also have some drawbacks, including:

Increased disk space usage:

Checkpoints require additional disk space to store the differencing disk, which can quickly add up if you take frequent checkpoints.

Performance impact:

Creating and using checkpoints can have a performance impact on the virtual machine. This impact can be more noticeable on high-performance virtual machines or during heavy I/O operations.

Incompatibility with some applications:

Some applications or services may not work correctly with Hyper-V checkpoints, particularly those that rely on time-sensitive operations or write-intensive I/O operations.

Common Issues and Troubleshooting Steps Related to Hyper-V Checkpoints

Issue Troubleshooting Steps
Unable to create a checkpoint
1. Make sure the virtual machine is turned off.
2. Check the storage location for available space.
3. Verify that the virtual machine configuration is compatible with checkpoints.
Unable to apply a checkpoint
1. Make sure the virtual machine is turned off.
2. Check the virtual machine configuration to ensure it matches the configuration of the checkpoint.
3. Try deleting and recreating the checkpoint.
Unable to delete a checkpoint
1. Make sure the virtual machine is turned off.
2. Check if the checkpoint is being used by another process.
3. Try deleting the checkpoint using PowerShell.
Performance issues after applying a checkpoint
1. Check the virtual machine’s resource utilization.
2. Consider using production checkpoints instead of standard checkpoints.
3. Check the storage location for available space.

Hyper-V Checkpoints FAQs

Question Answer
Where are Hyper-V snapshots stored?
Hyper-V snapshots are stored as .avhd or .avhdx files on the same storage location as the virtual hard disk.
What is the advantage of using snapshots?
The main advantage of using snapshots is the ability to quickly restore a virtual machine to a previous state. This can be useful in situations where a change or update causes issues, allowing the VM to be rolled back to a known-good state.
Do snapshots slow down VM performance?
Yes, taking and using snapshots can potentially slow down VM performance. This is because each snapshot adds an additional layer of disk I/O, which can impact performance.
How do Hyper-V snapshots work?
Hyper-V snapshots capture the state of a virtual machine at a specific point in time, including memory, virtual hard disks, and settings. These snapshots are stored as .avhd or .avhdx files, and can be used to quickly restore the VM to a previous state if needed.
Does Hyper-V support multiple snapshots?
Yes, Hyper-V supports taking multiple snapshots of a virtual machine. However, it’s generally recommended to limit the number of snapshots to avoid performance issues and potential disk space limitations.
What is the difference between Hyper-V snapshot and backup?
Hyper-V snapshots capture the state of a virtual machine at a specific point in time, while backups capture the entire VM and its associated configuration. Backups are typically used for disaster recovery purposes, while snapshots are used for short-term changes or updates.
Is it safe to delete Hyper-V snapshots?
Yes, it’s generally safe to delete Hyper-V snapshots. However, it’s important to understand that deleting a snapshot will merge the changes made since the snapshot was taken into the base virtual hard disk, which can potentially take a long time and impact VM performance. It’s also recommended to have a backup of the VM before deleting any snapshots.

How best to manage your Hyper-V Checkpoints:

  1. Question Answer
    What is Snapshot Master?
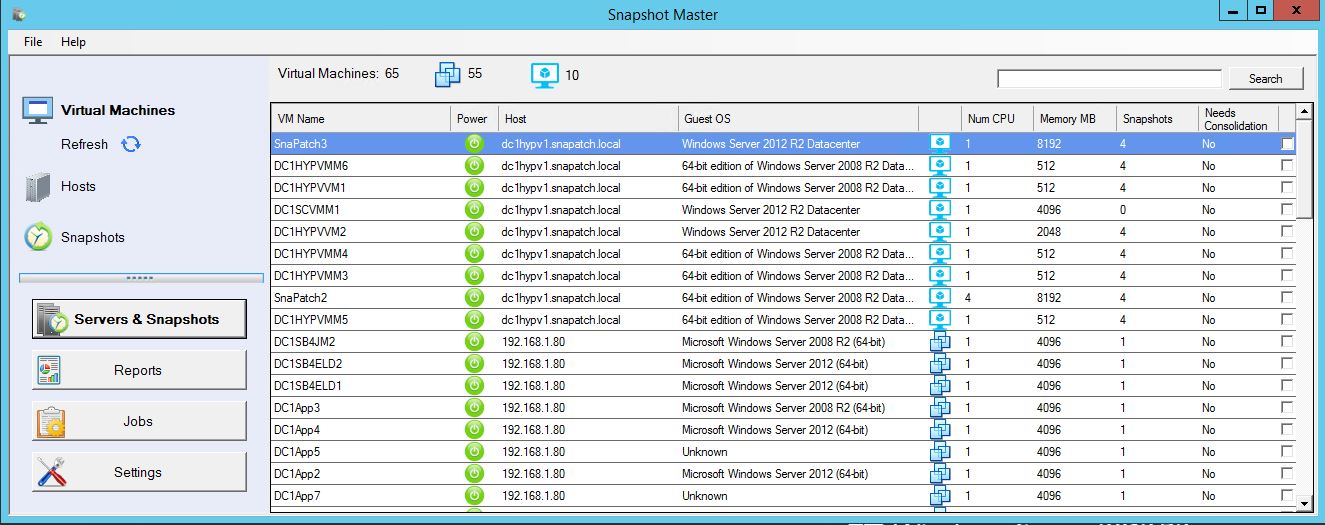
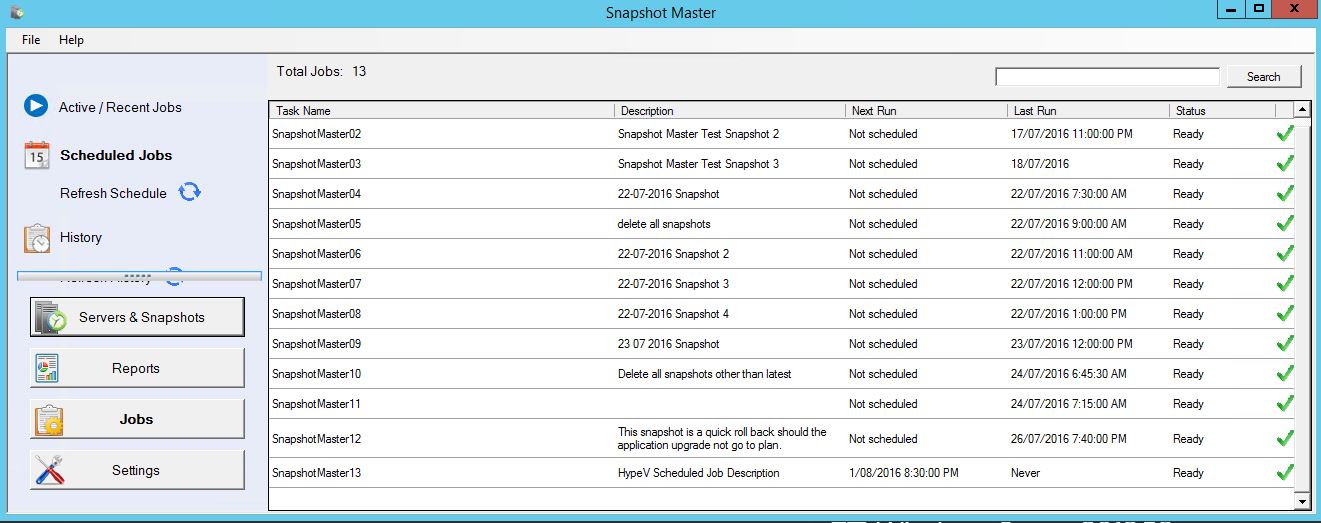
    Snapshot Master is a tool that enables users to manage their virtual machine snapshots, checkpoints, and datastores for VMWare, Hyper-V, and Azure. It allows users to view snapshot information, schedule snapshot creations or deletions, and receive email notifications and reports.
    What virtual environments can Snapshot Master work with?
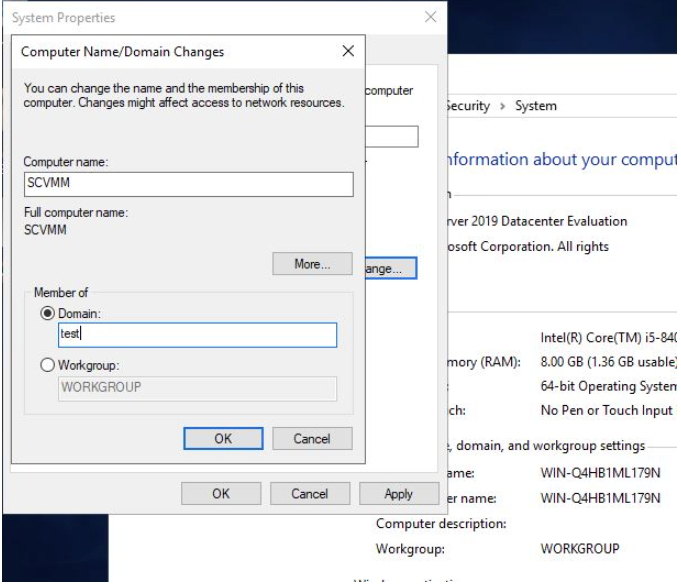
    Snapshot Master can interface with VMWare’s vCentre, Microsoft’s System Centre Virtual Machine Manager (SCVMM) (Hyper-V), and Microsoft Azure.
    What functionality can Snapshot Master provide for virtual machine snapshots?
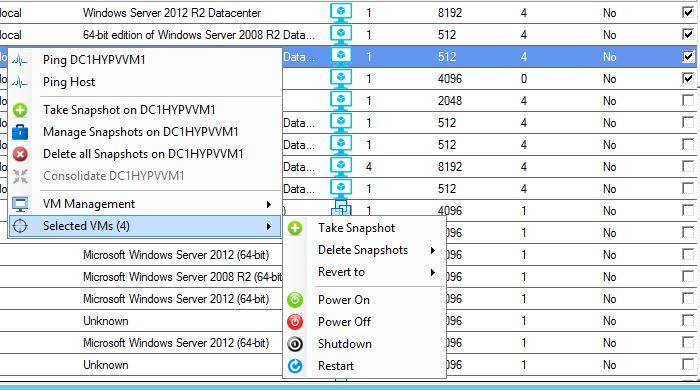
    With Snapshot Master, users can create and delete snapshots on a schedule for single or multiple virtual machines. They can choose to snapshot the VM’s memory and quiesce the file system, manage all snapshots of their VMs, consolidate their VMs snapshots, revert the snapshot of each VM, and delete snapshots (delete all, delete all except most recent, delete all larger than (X)). Users can also receive email reports of their snapshot schedules and reminders that their snapshots will automatically delete.
    What virtual machine management functionality does Snapshot Master offer?
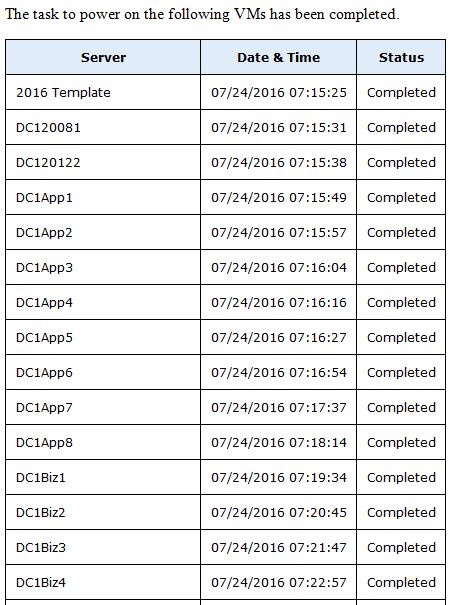
    Snapshot Master allows users to schedule the power off and power on of a single or multiple virtual machines, remotely connect to a VM via Remote Desktop (RDP) directly from the Snapshot Master console, ping each VM, ping each VMWare or HyperV host, connect to the VM’s Computer Management Console, and execute Remote Powershell.
    What kind of reporting can Snapshot Master automate and schedule?
    Snapshot Master can automate and schedule reporting of virtual servers and VMware or Hyper-V environments emailed directly to users, including all virtual machines with snapshots, all snapshots larger than (X), all snapshots older than (X) days, all snapshots, all snapshots with creator, snapshots on specific virtual machines, all virtual machines, virtual machines with alerts, virtual machines created in the last (X) days, virtual machines removed in the last (X) days, virtual machines with less than (X)% free space, all virtual machines with creation dates and creator, virtual machines without VMware tools, not running or out of date, all hosts report, all hosts with alerts, top 5 hosts with most used memory, number of virtual machines per datastore, and datastores with less than (X)% free space.
    How can Snapshot Master simplify managing virtual machine snapshots?
    Snapshot Master provides scheduling, email notification, and reporting features that make it easier to manage virtual machine snapshots. It allows users to consolidate VMs snapshots, revert VMs to their previous states, and manage virtual machines from the console.
    What are the benefits of using Snapshot Master for virtual machine snapshots?
    Snapshot Master provides an efficient and streamlined process for managing virtual machine snapshots, which can save time and reduce the risk of errors. Its scheduling, email notification, and reporting features provide greater visibility and control over virtual machine snapshots.
    How does Snapshot Master compare to other virtual machine snapshot management tools?
    Snapshot Master offers a comprehensive set of features for managing virtual machine snapshots, including scheduling, email notification, and reporting. It supports multiple virtual environments, including VMWare and Hyper-V.
    Is there a free trial for Snapshot Master?
    Yes, Snapshot Master offers a 30-day free trial for users to try out its features and functionality.
    Is customer support available for Snapshot Master?
    Yes, Snapshot Master offers customer support to assist users with any questions or issues they may encounter.
    How can I get started with Snapshot Master?
    Users can visit the Snapshot Master page to download a free trial and start managing their virtual machine snapshots more efficiently.

Best Practices for Using Hyper-V Checkpoints:

To use Hyper-V checkpoints effectively, follow these best practices:

Plan checkpoint usage:

Plan your checkpoint usage carefully to avoid excessive disk usage and minimize the performance impact on your virtual machines.

Use checkpoints for testing only:

Use checkpoints for testing software or making changes to your virtual machine’s configuration. Avoid using them for long-term backups

Limit checkpoint lifetimes:

Avoid keeping checkpoints for extended periods as they can quickly consume disk space and affect performance. Instead, delete checkpoints once they are no longer needed.

Use standard checkpoints for short-term use:

Use standard checkpoints for short-term use, such as testing or configuration changes. These checkpoints use less disk space and have less impact on performance than production checkpoints.

Use production checkpoints for long-term use:

Use production checkpoints for long-term use, such as creating backups of virtual machines. These checkpoints capture the virtual machine’s state and configuration files, making them more suitable for long-term use.

Monitor disk space usage:

Monitor disk space usage regularly to ensure that checkpoints do not consume too much space and impact performance.

Test applications with checkpoints:

Before using checkpoints in a production environment, test them with your applications and services to ensure compatibility and performance.

Step by step guide on how to install Microsoft’s System Centre Virtual Machine Manager (SCVMM)

Step by step guide on how to install Microsoft’s System Centre Virtual Machine Manager (SCVMM)

How to install Microsoft’s System Centre Virtual Machine Manager (SCVMM)


scvmm install

System Centre Virtual Machine Manager (SCVMM)

 If you run Microsoft’s Hyper-V as your virtualisation platform rather than the ever popular VMware ESX then you probably want a way to manage your Hyper-V hosts as well as the virtual machines that reside on this. Well you can do a lot of the functions that SCVMM does with the free tool for managing Hyper-V, the Hyper-V Manager (which comes as part of the Windows Operating System).

So if they are similar why would we use System Centre VMM over and above the Hyper-V Manager you ask and have to pay more money to Microsoft?

Well I list out the main differences here to hopefully guide you to a decision before going through the installation process of SCVMM later on down the page.

SCVMM vs Hyper-V Manager Key Differences

Hyper-v Manager

  • Can manage the Hyper-V hosts and the virtual machines that reside on it.
  • Can manage a single host or multiple Hyper-V hosts that are members of a failover cluster.
  • Requires Failover Cluster manager to manage multiple hosts.
  • Requires powershell to setup affinity rules.
  • No single pane of glass to manage your complete Hyper-V environment which requires you to utilise the Hyper-V Manager console, Failover Cluster console and then powershell to do only some of what SCVMM can do.

System Center Virtual Machine Manager

SCVMM can do all the Hyper-V Manager does from a single console.;

  • Configure and manage your datacentre components as a single fabric in SCVMM. (Datacentre components include virtualization servers, networking components, and storage resources.)
  • SCVMM can add, provision, and manage Hyper-V and VMware virtualization hosts and clusters. SCVMM can manage VMware ESX servers and its virtual machines in limited capacity. It does however require you to have a VMware vCentre to connect to, to be able to manage your VMware virtual machines.
  • Add networking resources to the SCVMM fabric, including network sites defined by IP subnets, virtual LANs (VLANs), logical switches, static IP address and MAC pools.
    SCVMM provides network virtualization, including support for creating and manage virtual networks and network gateways. Network virtualization allows multiple tenants to have isolated networks and their own IP address ranges for increased privacy and security.
    Using gateways, VMs on virtual networks can connect to physical networks in the same site or in different locations.
  • SCVMM can discover, classify, provision, allocate, and assign local and remote storage.
    SCVMM supports block storage (fibre channel, iSCSI, and Serial Attached SCSI (SAS) storage area networks (SANs)).
  • The SCVMM fabric retains a library of file-based and non file-based resources that are used to create and deploy VMs and services on virtualization hosts.
    File-based resources include virtual hard disks, ISO images, and scripts.
    Non file-based resources include templates and profiles that are used to standardize the creation of VMs. Library resources are accessed through library shares.
  • Integrates with Azure (Though you cannot change settings of the Azure VMs but you can see them and at least stop and start them from your SCVMM console)

The biggest issue with using Hyper-V Manager over System Centre VMM is that it cannot scale to manage large environments, and with having three different consoles (Hyper-V Manager, Failover Cluster Manager and then Powershell) can be quite daunting to use to it’s full ability.

SCVMM Capacity Limits

Planning for your SCVMM deployment is a good practice and you want to make sure to size it right for your environment. The suggested limits of the software Microsoft details for SCVMM deployment are in the table below;

Entity Recommended maximum count
Physical hosts 1000
Virtual Machines 25000
Services 1000
User roles 1000
Clouds 20
Virtual networks 2000
logical networks 20
Library resources 1000
Library Objects (templates, profiles) 100

SCVMM Limits

Recommended hardware requirements are;

Hardware VMM server VMM database VMM library VMM console
Processor (minimum) 8 core Pentium 4, 2 GHz (x64) 8 core Pentium 4, 2.8 GHz 4 core Pentium 4, 2.8 GHz 2 core Pentium 4, 1 GHz CPU
Processor (recommended) 16-core, 2.66 GHz CPU 16 core 2.6 GHz CPU 4 core 2.8 GHz CPU 2 core 2 GHz CPU
RAM (minimum) 4 GB 8 GB 2 GB 4 GB
RAM (recommended) 16 GB 16 GB 4 GB 4 GB
Hard drive (minimum) 4 GB 50 GB Based on size/amount of stored files 10 GB
Hard drive (recommended) 10 GB 200 GB Based on size/amount of stored files 10 GB

SCVMM Operating System Requirements

The recommended Windows Operating System requirements for SCVMM 2019 are

  • Windows 2016 Server Core
  • Windows 2016 Full Desktop Experience
  • Windows 2019 Server Core
  • Windows 2019Full Desktop Experience.

SCVMM Database Requirements

The last piece to the SCVMM puzzle, is the database it requires. Obviously this database is another Microsoft product, SQL Server.

The supported Microsoft SQL database versions for SCVMM 2019 are;

  • SQL 2016
  • SQL 2017

How to install System Centre Virtual Machine Manager.

A step by step guide to install SCVMM.

Now that you can see the benefits to installing and using SCVMM to manage your Hyper-V hosts and it’s Virtual Machines. We will now get to the installation part to guide you through the process. I am going to assume here that you already have your Hyper-V hosts up and running and are ready to start your installation. To continue on with this installation guide I will run you through my current infrastructure setup. I have a newly deployed Hyper-V host and have prebuilt some generic virtual machines that are running on it. I am using a demo version of SCVMM which you can download for yourself from the Microsoft site (link here) and I have already predownloaded the files ready to start the installation.

So what are the prerequisites to install SCVVM? Obviously besides the requirements detailed up above, you will need a functioning Hyper-V environment to install the SCVMM on to, as well as administrator access to manage the Hyper-V hosts. As I have downloaded an image from Microsoft and if you are doing the same you will need Domain Administrator access to add the SCVMM Windows server to the domain.

Launch SCVMM Installer

Since the files are downloaded to my location machine, browse to the SCVMM install files through windows explorer. To start the install, just run the Executable file


Installing SCVMM

Now the installation starts, click on NEXT on the SCVMM install welcome screen.


scvmm installation

SCVMM License Agreement

Accept the license agreement (make sure to read them if you wish) and click on NEXT.


scvmm install license agreement

SCVMM Installation Location

The SCVMM install needs to extract the downloaded files. Choose an appropriate folder location and make sure you have enough free disks space (approximately 28GB is needed) then click on NEXT.


scvmm install location

SCVMM File Extraction

You are now ready to extract the SCVMM files needed for the installation. Confirm the settings and folder looks right then click on EXTRACT.


scvmm install file extraction

SCVMM Install Extracting

The installation files will now extract from your downloaded media. This will take a little bit of time to complete the extraction process.


scvmm install extracting

SCVMM File Extraction Completed

Now the extraction of SCVMM is complete. Click on FINISH.


scvmm install extraction complete

SCVMM Import

Next we need to connect to one of your Hyper-V hosts with the Hyper-V Manager console to start the import of the SCVMM Virtual Machine. Open up your Hyper-V console and connect to your host.


scvmm hyper-v

SCVMM New Virtual Machine

We now need to build a new VM for the SCVMM server. Click on ACTIONthen NEWthen VIRTUAL MACHINE.


scvmm new vm

New Virtual Machine Wizard

The New Virtual Machine Wizard starts up, click on NEXT to proceed.


scvmm new virtual machine

New Virtual Machine Location

On the Specify Name and Location tab give your VM a name and you can choose where to store the VM files. When you have done that click on NEXT.


scvmm new vm location

VM Generation Selection

The Specify Generation window, make sure that Generation 1 is selected then click on NEXT


VM Memory Settings for SCVMM

Remember the minimum memory suggested by Microsoft above? Well if you dont, the minimum memory recommended was 4GB so as this is just a lab but I want some performance Im changing that to 8GB. When you have selected the memory size click on NEXT.


VM Virtual Switch Settings

Choose with virtual switch you want to deploy this VM to then click NEXT.


scvmm install networking

SCVMM Virtual Hard Disk Settings

This is one of the most important parts of the install process, make sure to change the virtual hard disk to Use an existing virtual hard disk and browse to the extracted location of the SCVMM download. When you have done that click NEXT.


SCVMM VM Deployment

Review everything on the Summary Tab and if you are happy to proceed with the SCVMM deployment click on Finish


scvmm install vm deployment

Power ON SCVMM VM

Now go back to your Hyper-V console and browse through your virtual machines until you find your newly deployed SCVMM virtual machine


Start SCVMM Installation

To start the installation you will need to power it on and open a console session so you can see what is happening.


scvmm start installation

Install Windows 2019 Server

We have to now run through the Windows 2019 server installation. Choose your country / region then click NEXT


win2019 install

Windows 2019 Server License Agreement

More license terms for you to read through, when you are happy to accept them, click on ACCEPT.


win2019 license agreement

Local Administrator Password Creation

Now provide a local administrator password and then click FINISH then the server will restart


local admin password

Login to SCVMM Server

Once Windows 2019 server has installed, log on to the server with the local administrator credentials you put in previously


win 2019 logon screen

SCVMM join Active Directory Domain

We now need to join the SCVMM virtual machine to the domain, so open up CONTROL PANEL then go to SYSTEMChange the virtual machine name so you can easily identify it in the future and add the VM to your Active Directory Domain and dont forget to Reboot the server.


Install SQL Server for SCVMM

So after your SCVMM server has rebooted and is joined to your domain, we next need to start the installation of the SQL Database if you have not got one already. On the desktop of my Windows 2019 VM, I can see Microsoft has placed two icons for me to use to start the SCVMM installation. Luckily in this case they tell me to start the SQL Server install first, so we need to DOUBLE CLICK on that.


scvmm install sql

SQL Product Key

On the Product Key page for the SQL install, put in your license details and click on NEXT.


sql install product key

SQL License Agreement

Accept the license terms and click NEXT.


sql license agreement

SQL Global Rules

On the Global Rules tab, the SQL installation will check to see if the prerequisites are met for the installation. If all went well as in the picture click on NEXT.


sql install global rules

SQL Features

The Select Prepared Features tab check the settings are correct and click NEXT


sql install features

SQL Features Confirmation

The SQL installation for SCVMM now lets you review the Features are correct. Again, review the features you have chosen are right for your environment then click NEXT


sql install confirmation

SQL Instance Selection

On the SQL Instance Configuration you need to change this to the Default Instance (if you are installing a fresh copy of SQL, if you are using another server please point the instance to what you have setup. Click  NEXT to proceed.


sql install instance

SQL Service Account

Confirm the Server Configuration tab is correct (if you want to change the accounts you can, but Im leaving this all default.) Click NEXT.


sql install service account

SQL Database Engine Configuration

The Database Engine Configuration tab make sure to add your account so that you can manage the SQL instance. In my screenshot below I added the Domain Admins for my lab environment. Click Next to continue.


sql install database engine

Review SQL Installation Options

We are almost ready to start the SCVMM SQL server installation. Double-check all these settings look correct for your environment then click on COMPLETE to start the install.


sql install review

SQL Installing

The installation will now run through the process to install the SQL server components on your Virtual Machine. Maybe go grab a coffee to give this sometime to complete and if all went well you should see something similar to the following screen.


Starting SCVMM Installation

Finally we are on to the fun bit, we can start the configuration of SCVMM. I rebooted the server after the SQL install just to be sure that the services all started correctly and there was no errors detected.
Locate the Configure VMM icon and then DOUBLE CLICK IT.


start scvmm installation

SCVMM Setup

Once the Microsoft System Centre 2019 Virtual Machine Manager setup wizard starts up, put in your details, your company details and your SCVMM licence key then click NEXT.


SCVMM Diagnostics and Usage Information

The SCVMM Diagnostics and Usage Data page describes that Microsoft does collect some data from you. Please read through this then click NEXT.


scvmm install diagnostics

SCVMM Update

It is always a good idea to turn on Microsoft Update to patch the system should any vulnerabilities be found, but this is up to you and your environment. I chose to turn on Microsoft Update, then clicked on NEXT.


scvmm microsoft update

SCVMM Database Configuration

On the Database Configuration tab make sure the settings are correct for SQL server install you did previously and when confirmed click on NEXT.


scvmm install database configuration

SCVMM System Account

Now to the Configure service account and distributed key management tab, change it to Local System account, and then click NEXT


scvmm install account

SCVMM Library Configuration

For Library Configuration you can choose to create a new library or an existing share. Im leaving it default here as its a new install of SCVMM. Click NEXT to proceed


scvmm library configuration

SCVMM Installation Summary

Finally we are almost there, SCVMM is almost configured. Review the details on the Installation Summary page and when you are happy with the details click INSTALL. 

This will start the install so be sure everything is correct.


scvmm install summary

SCVMM Installation Summary

Hopefully you got a successful screen saying that SCVMM is now installed and configured, but if you didnt the best place to look is at the SCVMM install logs located %SYSTEMDRIVE%ProgramDataVMMLogs ServerSetup.log.


scvmm installation successful

Schedule a Hyper-V Checkpoint

Now that you have SCVMM installed in the next blog post I will cover off how to add your Hyper-V Hosts and perhaps while you are already here you can see how easy it is to schedule snapshot creations and deletions of your Hyper-V or VMware virtual machines with SnapShot Master.

 Download and try it for yourself with a free and fully functioning 30 day trial.

Snapshot before Patching

Snapshot before Patching

Automate Snapshot Creation Before Deployment

Reduce Patching Risks with SnaPatch

System administrators are responsible for ensuring the smooth functioning of their organization’s computer systems. They are the ones who deploy new software and updates, perform maintenance tasks, and troubleshoot any issues that arise. However, keeping these systems up-to-date can be a daunting task, especially when new updates and patches are released frequently. This is where taking a snapshot before patching comes into play.

A snapshot before patching is a crucial tool that system administrators can use to protect their systems from vulnerabilities. In this article, we will discuss why taking a snapshot before patching is essential and how it can help system administrators safeguard their systems.

What is a Snapshot Before Patching?

A snapshot before patching is a backup copy of your system’s current state. This copy can be used to restore your system to its previous state in case something goes wrong during the patching process. Taking a snapshot before patching ensures that you have a stable and reliable system to fall back on if the patching process fails.

Why is a Snapshot Before Patching Important?

Taking a snapshot before patching is essential for several reasons. Here are some of the main reasons why system administrators should make this a standard practice:

  1. Protects Against System Failure: Patching can sometimes cause system failures. Having a snapshot before patching ensures that you can quickly restore your system to its previous state in case of such failures.
  2. Provides a Safe Environment for Testing: Taking a snapshot before patching allows system administrators to test the patches in a safe environment. This ensures that any issues that arise during the testing process can be addressed before the patches are applied to the live system.
  3. Helps in Disaster Recovery: Snapshots can be used as part of a disaster recovery plan. In case of a disaster, snapshots can be used to restore your system to a previous state.

Best Practices for Using Snapshots Before Patching

Here are some best practices for using snapshots before patching:

Always Test Patches:

Test patches in a safe environment before applying them to the live system.

Schedule Regular Snapshots:

Schedule regular snapshots so that you always have an up-to-date backup of your system.

Name Your Snapshots:

Give your snapshots meaningful names so that you can easily identify them.

Store Snapshots Securely:

Store your snapshots in a secure location to prevent unauthorized access.

Snapshots Before Patching FAQs

What is the difference between a snapshot and a backup?

A snapshot is a point-in-time copy of your system, whereas a backup is a copy of your system’s data that is stored separately.

How often should I take a snapshot before patching?

It depends on your organization’s needs. However, it is a good practice to take a snapshot before each patching session.

Can I take a snapshot of a virtual machine?

Yes, you can take a snapshot of a virtual machine. In fact, taking snapshots of virtual machines is a common practice in virtualized environments.

What happens if I don’t take a snapshot before patching?

If you don’t take a snapshot before patching, you run the risk of losing important data or causing system failures.

How to Snapshot before deploying Patches.

How SnaPatch Can Help You Take Snapshots Before Patching

When it comes to taking snapshots before patching, it can be a time-consuming and manual process for system administrators. However, there is a tool that can simplify the process and make it more efficient: SnaPatch.

What is SnaPatch?

SnaPatch is a software application that interacts with your Microsoft System Centre Configuration Manager (SCCM) environment to pull in all your machine information. It uses SCCM as the source of truth for all your VM information.

Next, it interfaces with either your vCentre or System Centre Virtual Machine Manager (SCVMM), or both. It takes control of your VM environment, allowing it to create and delete snapshots of your VMs.

How does SnaPatch work?

SnaPatch simplifies the snapshot process by automating it. It creates a snapshot of any virtual machine before allowing it to be patched. If the snapshot fails, the VM will not receive updates and will be removed from the patching schedule. SnaPatch streamlines the process and frees up your time by automating the snapshot and patching processes, while keeping you updated on progress via email notifications.

How do you deploy SnaPatch?

Deploying SnaPatch is easy and straightforward. After installation, the application discovers your SCCM environment and allows you to configure various settings such as email notifications, snapshot creation, and patch deployment.

Why use SnaPatch?

SnaPatch helps you take snapshots before patching in a more efficient and streamlined manner. It complies with SOX regulations and minimizes risk, and its automated snapshot creation feature ensures that you can easily roll back updates if necessary, giving you peace of mind and more time to focus on other critical tasks.

Conclusion

In conclusion, taking snapshots before patching is a critical step in ensuring the security and stability of your systems. SnaPatch can help simplify and automate this process, allowing you to deploy Microsoft updates in your VM environment safely and efficiently. Try SnaPatch today and streamline your patching process!

Schedule a Hyper-V Checkpoint

Schedule a Hyper-V Checkpoint

How to Schedule a Hyper-V Checkpoint.

Before I show you how to use SnapShot Master to create and schedule a Hyper-V checkpoint I will briefly describe what a checkpoint is.

HyperV checkpoint

What is a Hyper-V Checkpoint?

Hyper-V Checkpoints can be a lifesaver for IT administrators and developers alike. In this article, we’ll explore what a Hyper-V Checkpoint is and how to use it to roll back to a previous state in case of any issues.

Understanding Hyper-V Checkpoints

Hyper-V Checkpoints are essentially snapshots of a virtual machine that capture the VM’s state at a specific point in time. When you create a checkpoint, the virtual machine’s configuration and disk state are saved as differencing disks with .AVHD extension and an .XML file. If the VM was running during the checkpoint creation, additional files for the Virtual Machine Memory and Devices to be captured (.BIN and .VSV) may also be created.

Once a checkpoint has been created, any changes made to the virtual machine are saved to the differencing disk, leaving the original disk in a read-only state. This allows you to revert the virtual machine back to the checkpoint if any issues arise during upgrades, updates, or hardware reconfiguration.

Managing Hyper-V Checkpoints

SnapShot Master is a powerful software tool that can help IT administrators effectively manage their Hyper-V Checkpoints. With SnapShot Master, administrators can easily view all of their Hyper-V snapshots in one place, schedule the creation and deletion of snapshots on a schedule, and get detailed reporting on their Hyper-V snapshots.

By using SnapShot Master, administrators can avoid the hassle of manually managing their Hyper-V Checkpoints, which can be time-consuming and error-prone. Instead, they can rely on the software to handle the process automatically, ensuring that snapshots are created and deleted on a schedule that’s convenient for them.

SnapShot Master also provides detailed reporting on Hyper-V snapshots, giving administrators valuable insights into how their virtual machines are performing and helping them identify any issues that may need to be addressed. With this information, administrators can make informed decisions about how to optimize their virtual machines and ensure that they’re running at peak performance.

In summary, SnapShot Master is a must-have tool for any IT administrator who wants to effectively manage their Hyper-V Checkpoints. With its powerful features and intuitive interface, it makes it easy to schedule and manage snapshots, and provides valuable reporting that can help administrators optimize their virtual machines for maximum performance.

How to Schedule a Hyper-V Snapshot / Checkpoint

Hyper-V Checkpoint Tree

The Hyper-V Checkpoint Tree shows each and every checkpoint created for the virtual machine selected. Each subsequent checkpoint stems from the previous one with the delta changes stored on the checkpoint’s disk which is the difference between the current state and the last checkpoint created.


HyperV Checkpoint Tree

Scheduling a Hyper-V Checkpoint

List all your Hyper-V VMs

Now that you understand Hyper-V Checkpoints a little better, we can now start scheduling their creation.

Open your SnapShot Master console and let it sync with your Hyper-V environment and populate the console with your virtual machines.


Schedule HyperV Checkpoint

Select your Hyper-V VMs

Once all your virtual machines have shown up, choose the VMs you want to create a checkpoint for by checking the checkbox. You can choose to either do a single machine or multiple machines. In this example Ill create a checkpoint for multiple VMs. Right Click any VM and from the menu go to Selected VMs then Take Snapshot.

Create your Hyper-V Checkpoints

Once all your virtual machines have shown up, choose the VMs you want to create a checkpoint for by checking the checkbox. You can choose to either do a single machine or multiple machines. In this example Ill create a checkpoint for multiple VMs. Right Click any VM and from the menu go to Selected VMs then Take Snapshot.


Schedule HyperV Checkpoint Selection

Hyper-V Checkpoints Scheduled Description

You can now give the Scheduled Hyper-V Checkpoint job a name then click OK.

This makes identification of each of the Hyper-V Checkpoints at a later date.


Schedule HyperV Checkpoint Name Creation

Hyper-V Checkpoints Execution

Choose if you wish for the Hyper-V Checkpoint to run now, or to be scheduled for a later time.

If you excute now, you can skip the remaining steps, as SnapShot Master will kick off your Hyper-V Checkpoint straight away.


Schedule HyperV Checkpoint Execution

Hyper-V Checkpoints Schedule Window

The task scheduler window now starts up. Click on NEW to create a new scheduled task.


Hyper-V Checkpoints Schedule Date and Time

Choose a date and time that you want to schedule the Hyper-V Checkpoint for then click OK and then Click OK again on the task scheduling window. The Hyper-V Checkpoints will now be created at the time you have scheduled.


Hyper-V Checkpoints Scheduled Jobs

To view Job Status of your scheduled tasks within SnapShot Master, go to the JOBS tab and then Scheduled Jobs. You can see Active / Recent Jobs, Scheduled Jobs as well as Job History.


Hyper-V Checkpoints Email Alerts

Now when the time you have scheduled the creation of the Hyper-V checkpoint comes, SnapShot Master will automate this. If you have email notifications setup within SnapShot Master, you will receive emails detailing when the job started and finalised.


SnapShot Master Email Notification Status

To learn more about the features of SnapShot Master, click to Manage and Schedule your Hyper-V Checkpoints.

Download a trial of SnapShot Master today.

To trial SnapShot Master, fill in the form below to get access to download the trial software.


FREE DOWNLOAD

Send download link to:

I confirm that I have read and agree to the End User License Agreement.

Why schedule your Hyper-V Checkpoints?

Hyper-V checkpoints allow administrators to capture the state of a virtual machine (VM) at a specific point in time. Scheduling Hyper-V checkpoints provides a number of benefits, including:

  1. Disaster Recovery: By regularly scheduling checkpoints, administrators can create a historical record of the state of a VM, which can be used for disaster recovery purposes. In the event of a failure or data loss, an earlier checkpoint can be used to restore the VM to a previous state.
  2. Testing and Development: Checkpoints can also be used to test changes to a virtual environment without affecting the production environment. Administrators can make changes to a checkpointed VM, test the changes, and revert to the checkpoint if the changes prove to be unsuccessful.
  3. Maintenance: Scheduling checkpoints can also simplify the process of performing maintenance on a virtual environment. By creating a checkpoint prior to performing maintenance, administrators can revert to the checkpoint if necessary, reducing the risk of downtime.
  4. Compliance: Regular checkpoint scheduling can also help organizations meet compliance requirements by providing a historical record of the state of virtual environments.

In summary, scheduling Hyper-V checkpoints provides a simple and effective way to ensure disaster recovery, simplify testing and development processes, minimize downtime during maintenance, and meet compliance requirements.

The benefits of scheduling Hyper-V checkpoints include:

  1. Data protection: Scheduling checkpoints provides a historical record of the state of a virtual machine (VM) at a specific point in time, which can be used for disaster recovery purposes. In the event of a failure or data loss, an earlier checkpoint can be used to restore the VM to a previous state.
  2. Testing and development: Checkpoints allow administrators to test changes to a virtual environment without affecting the production environment. This can be useful for software development, testing, and quality assurance processes.
  3. Maintenance: Scheduling checkpoints can simplify the process of performing maintenance on a virtual environment. By creating a checkpoint prior to performing maintenance, administrators can revert to the checkpoint if necessary, reducing the risk of downtime.
  4. Compliance: Regular checkpoint scheduling can also help organizations meet compliance requirements by providing a historical record of the state of virtual environments.
  5. Efficient use of resources: Checkpoints are stored as differencing virtual hard disks and do not consume a large amount of disk space. This allows administrators to create multiple checkpoints without consuming a significant amount of storage resources.
How to Create a Hyper-V Template for Deployment

How to Create a Hyper-V Template for Deployment

Revolutionizing Document Archiving for SharePoint Online

How to Create a Hyper-V Template for Deployment

If you ever need to deploy Virtual Machines often a great time saving way is to create a VM Template for quick and easy deployment.

The main reason for creating a Hyper-V Template is to save time and effort when deploying Virtual Machines. By having a standardised and consistent configuration, deploying a new VM becomes a streamlined process that can be accomplished quickly and easily. This also reduces the chances of human error and helps ensure that all VMs deployed from the template have the same configuration, reducing the need for manual intervention and troubleshooting. Additionally, using a template helps enforce best practices and promotes standardisation across an organisation, improving the overall management and efficiency of the virtual infrastructure.

VM templates give you the advantage of a consistent configuration that is standardised format that is reusable.

To create a Hyper-V VM Template follow these steps;

What Are Hyper-V Templates?

A Hyper-V template is a pre-configured virtual machine (VM) that can be used to quickly create new VMs with identical configurations. Templates can include operating systems, applications, settings, and configurations. This means that you can deploy new VMs with just a few clicks, without having to manually install and configure each one.

Why Use Hyper-V Templates?

Using Hyper-V templates can save time and effort when deploying new VMs. Instead of creating each VM manually, you can simply select a pre-configured template that meets your needs. This can be especially useful for creating multiple VMs with identical configurations, such as in a test environment or for a specific application.

Templates also ensure consistency and standardization across your virtual infrastructure. By using the same template for each new VM, you can ensure that each VM has the same configuration and settings. This can make it easier to manage and troubleshoot your virtual infrastructure.

Hyper-V Template Benefits

There are several benefits to creating a Hyper-V template, including:

  1. Consistency and Standardization: By creating a Hyper-V template, administrators can ensure that all virtual machines (VMs) created from the template have a consistent configuration and operating system setup. This can help to reduce administrative overhead and minimize the risk of configuration errors.
  2. Faster Deployment: Creating a Hyper-V template allows administrators to deploy new VMs much faster compared to manually installing the operating system and configuring the necessary software on each individual VM.
  3. Reduced Storage Requirements: Hyper-V templates are stored as a single VHD (virtual hard disk) file, which can be much more efficient in terms of storage compared to storing multiple VMs each with their own VHD file.
  4. Increased Scalability: By using a Hyper-V template, administrators can quickly and easily create new VMs as needed to support business growth and changing requirements.
  5. Improved Disaster Recovery: With a Hyper-V template in place, administrators can quickly recreate VMs in the event of a disaster, reducing downtime and minimizing the impact on the business.
  6. Enhanced Security: By using a Hyper-V template, administrators can enforce security policies and configuration standards for all VMs created from the template, helping to maintain a secure computing environment.
  7. Improved Compliance: For organizations that must comply with industry or regulatory standards, using a Hyper-V template can help ensure that all VMs meet the necessary requirements.

Open System Centre Virtual Machine Manager

Open your SCVMM (Microsoft System Centre Virtual Machine Manager) console, click Hosts then Right Click and choose Create Virtual Machine.


Create HyperV Template

Create Virtual Machine Wizard

 Next, the Create Virtual Machine Wizard will start up. Choose Create the new virtual machine with a blank virtual hard disk and click Next.


Create HyperV Template 2

Create Virtual Machine Wizard

Now we need to give the VM a name and description. In this example I am using the Windows 2012 R2 operating system so the name and description are shown as such. As the Hyper-V host is Windows 2012 R2 as well, I can choose either Generation 1 or Generation 2 VM. Generation 2 VMs add the following new functionality;

  • PXE boot by using a standard network adapter
  • Boot from a SCSI virtual hard disk
  • Boot from a SCSI virtual DVD
  • Secure Boot (enabled by default)
  • UEFI firmware support

Create HyperV Template 14

Edit Virtual Machine Hardware Configuration

We can now edit the VMs hardware configuration. Choose the appropriate hardware settings you wish, make sure to have selected your installation media and then selected Hyper-V for compatibility and click on Next

Create HyperV Template 4

Choose where your Hyper-V VM Destination

Select the Destination where the VM will reside.

Create HyperV Template 5

Select your Hyper-V Host

Now Select the Host to deploy to and then click Next.


Create HyperV Template6

Select your Hyper-V Host

 On the Configure Settings tab, choose the location where the VM will keep its virtual hard disk and then click Next.

Create HyperV Template 7

Configure your Hyper-V Template Settings

 On the Configure Settings tab, choose the location where the VM will keep its virtual hard disk and then click Next.

Create HyperV Template 7

Choose your network adapter

Select the appropriate network, adapter and virtual switch then click Next.

Create HyperV Template 8

Template Hardware Options

You can now choose a few options including if you wish to Turn the machine on automatically and specify the operating system that you will install.

Create HyperV Template 9

Ready to create the Hyper-V Template

Check that the settings are correct, and when you are ready to, click Create.


Create HyperV Template 10

Power On the Hyper-V Template

Now power on the VM if you have done so already, and install the operating system of your choice

Create HyperV Template 11

Power On the Hyper-V Template

Now once you have installed the Windows Operating System, do not join the domain. Log on to the VM, open a command prompt and go to the Windows, System32, Sysprep folders then run sysprep.exe

Sysprep (System Preparation) is a Microsoft utility tool designed for system administrators to automate the deployment of Windows operating systems. It is used to prepare an operating system for disk cloning or for delivery to end-users.

Sysprep performs several key tasks, including:

  1. Generalizing the system: Sysprep removes specific information from the Windows installation that is unique to the system, such as the security identifier (SID), computer name, and drivers.
  2. Configuring the Windows Security settings: Sysprep can reset security settings to default settings, ensuring that all new installations of the operating system will have the same security settings.
  3. Removing the activation files: Sysprep can remove activation files, allowing the cloned operating system to be activated on a new computer.
  4. Shutting down the system: After preparing the operating system, Sysprep shuts down the computer, making it ready for disk imaging or delivery to an end-user.

Sysprep is a critical component in the deployment of Windows operating systems and is an essential tool for system administrators. It enables them to efficiently and easily deploy operating systems to multiple computers, ensuring that each installation is fully configured and ready to use.


Create HyperV Template 12

Power On the Hyper-V Template

You will now be presented with the System Preparation tool. Make sure to check the Generalize checkbox as well as Shutdown in the shutdown options dropdown then click OK.

Once the system has been prepared, the VM will power off.

Create HyperV Template 13

Power On the Hyper-V Template

 Now that the VM has powered off, we need to convert it to a template. Highlight the powered off VM, right click and then Create and Create VM template to start the wizard.

HyperV Create VM Template

Hyper-V Template Creation Warning

Next a warning is shown that you are about to convert this VM to a template. “Creating a template will destroy the source virtual machine “vm name”. The virtual hard disk of the virtual machine will be generalized to create the new template and any user data of the virtual machine may be lost. To prevent this, you can create a clone of “vm name”  before using it to create a template. 

Make sure you understand what you are committing this VM to and click Yes to continue.

Create HyperV Template 17

Create Hyper-V Template Wizard Starts

Now the Create VM Template Wizard starts. Give the template a name and description then click Next.

Create HyperV Template 18

Confirm Template Hardware Configuration

Check you are happy with the hardware configuration then click Next.

Create HyperV Template 19

Configure Operating System Settings

The Configure Operating System Tab we can change settings for the OS. Time Zones, whether you wish it to join a domain automatically or not, and any additional Operating System Roles or Features you wish can be configured here. Change what you need and then click Next.

Create HyperV Template 20

Choose a Server Library

On the Select Library Server tab, choose one of your library servers and choose Next.

HyperV Create VM Template 22

Choose a Server Library

Select the UNC Path location for the files to save to. Be mindful that other Hyper-V servers within your environment will require access to this folder.

Create HyperV Template 23

Choose a Server Library

Finally, on the Summary Tab, you can view the script details to see the settings you have chosen. Confirm you are happy with the settings then click on Create. 

Create HyperV Template 24

Thats all there is to it. Your SCVMM and Hyper-V environment should now be preparing the selected VM and converting it to a template for consistent deployment to your virtual environment.

Hyper-V templates can be a valuable tool for businesses looking to streamline their virtual infrastructure. By creating pre-configured templates, you can save time and effort when deploying new VMs, ensure consistency and standardization, and make it easier to manage your virtual infrastructure. By following best practices for managing templates, you can ensure that your virtual infrastructure is efficient, reliable, and scalable.

FAQ about Hyper-V templates

  1. What is a Hyper-V template?
    A Hyper-V template is a pre-configured virtual machine image used as a starting point for creating new virtual machines. It allows administrators to standardize virtual machine configurations, reducing the time and effort required to deploy new virtual machines.
  2. How do I create a Hyper-V template?
    To create a Hyper-V template, you need to create a new virtual machine and configure it as desired. Then, shut down the virtual machine and convert it to a template. This can be done through the Hyper-V Manager or through PowerShell.
  3. What are the benefits of using a Hyper-V template?
    The benefits of using a Hyper-V template include reduced deployment time, standardization of virtual machine configurations, and the ability to easily update virtual machines. Templates also allow administrators to quickly deploy new virtual machines, reducing the risk of human error.
  4. What should I include in my Hyper-V template?
    Your Hyper-V template should include all of the necessary software and configurations for your virtual machines. This might include operating systems, applications, security updates, and network configurations.
  5. Can I use a Hyper-V template for different types of virtual machines?
    Yes, Hyper-V templates can be used for different types of virtual machines, including domain controllers, file servers, and web servers.
  6. How do I update a Hyper-V template?
    To update a Hyper-V template, you need to update the virtual machine that the template is based on. After making the desired updates, shut down the virtual machine and then update the template.
  7. What are the limitations of using a Hyper-V template?
    The main limitation of using a Hyper-V template is that it only provides a starting point for virtual machines. Administrators still need to configure each virtual machine individually, as the template does not automatically configure unique settings such as IP addresses.
  8. What are some best practices for creating Hyper-V templates?
    Some best practices for creating Hyper-V templates include ensuring that all software and configurations are up-to-date, including only necessary software, and testing the template before deploying it to production. Additionally, it is important to regularly update templates to ensure that virtual machines are always running the latest software and configurations.