Azure AD Connect – How to hard match user accounts

Azure AD Connect – How to hard match user accounts

How to hard match user accounts in Azure AD

Azure AD Hard Match User Accounts

Recently we were asked if we could help out one of our clients with something I’m sure many other companies have found themselves in, user account separation. They have been using Office 365 and manually creating users that match their existing on premise accounts. It started innocently enough, with just a few test users and over time grew to 300! Of course this created huge managed overhead as they had to manage the same user in Azure and on premise AD. Of course AD Connect will allow you to synchronise your on premise users but they didn’t want to disrupt their cloud based users in the process.

Now, if you attempt to sync your on-prem users to Azure AD that have the same UPN, the sync will fail with an error indicating that the user already exists – duplicate account.

OK, so what are our options here?

One option is to delete the cloud account and have AD Connect recreate it. However, this could have issues with licensing, mailbox access and you may still have other sync issues and end up with some users missing.

Either way, the client did not want to go down this path, so the only other option is to “hard match” the cloud account with its relevant on premise object.

AD Connect uses an attribute called the “ImmutableID” to match the Azure AD object with the on premise object. However, the on premise account doesn’t have an ImmutableID attribute so you can’t just find it and apply it, instead it uses the ObjectGUID and converts it to a base64 string to get the ImmutableID.

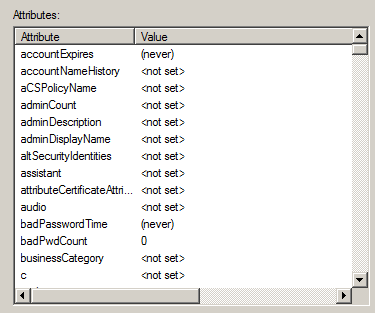
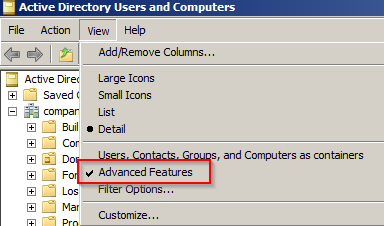
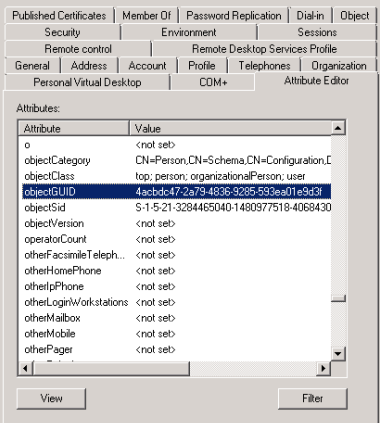
You can see the ObjectGUID for any  user by looking in ADUC, Attribute Editor tab.

OK, a bit to take in there. So here’s a quick table outlining it all.

User On-prem AD ObjectGUID On-prem AD ObjectGUID (converted to Base64) Azure AD ImmutableID
John.Smith@smikar.com 4acbdc47-2a79-4836-9285-593ea01e9d3f R9zLSnkqNkiShVk+oB6dPw== R9zLSnkqNkiShVk+oB6dPw==

As you can see, when the ObjectGUID attribute is converted to a Base64 string, the value matches the ImmutableID. If these 2 objects match, AD Connect sees them as one object and happily syncs them.

Now, when a user is manually created in Azure AD, the ImmutableID is blank. So if you have an on premise user with a UPN of john.smith@smikar.com and you manually create the same user name in Azure AD, the ImmutableID will be blank, and when AD Connect sees the object it will kick out a “duplicate object” error.

OK, so how do we fix this mess?

What we need to do is get a list of all the cloud accounts, find their equivalent on premise account, get the objectGUID, convert it to Base64 and then apply that value to the cloud account. AD Connect will then match the 2 objects.

How do we do this?

PowerShell of course.

You will need a few things for this:
The MSOnline powershell module
The ActiveDirectory powershell module
Global Admin access to the tenant containing your users
Read access to your on prem AD

If you don’t have the MSOnline module, open up PowerShell and run Install-module MSonline

Below is the code we used to hard match the user objects, it’s far from pretty but it did the job in the time we had.

WARNING: If you decide to use our script in your environment, you do so at your own risk, we accept no responsibility for any negative impacts it may cause.

Import-module msonline

Import-Module activedirectory

Connect-MsolService

#Get a list of all the Azure users

$users = get-msoluser

foreach ($user in $users) {

#Ensures the object has an @CompanyX UPN, has never been synced, and contains details for a first and last name

if ($user.UserPrincipalName -match “@companyX.com” -and !$user.LastDirSyncTime -and $user.FirstName -and $user.LastName) {

#Put the SAM account together by getting the last name, adding an underscore and adding the first name (eg. smith_john). This will need to be modified to match whatever your company uses as a SAM account format.

$sam = $user.LastName + “_” + $user.firstname

#Get the AD user object based on the created SAM above, get the ObjectGUID value and convert it to a base64 value.

$ImmID = Get-ADUser -identity $sam -Properties ObjectGUID | select ObjectGUID | foreach {[system.convert]::ToBase64String(([GUID]($_.ObjectGUID)).tobytearray())}

#Sets the converted ObjectGUID as the ImmutableID for the user

set-msoluser -UserPrincipalName $user.UserPrincipalName -ImmutableId $ImmID

}

}

After the script was executed we kicked off a sync of AD Connect which matched up all the user objects with their on premise user account and had the 300 plus manually created user accounts now synced.

Snapshot before Patching

Snapshot before Patching

Automate Snapshot Creation Before Deployment

Reduce Patching Risks with SnaPatch

System administrators are responsible for ensuring the smooth functioning of their organization’s computer systems. They are the ones who deploy new software and updates, perform maintenance tasks, and troubleshoot any issues that arise. However, keeping these systems up-to-date can be a daunting task, especially when new updates and patches are released frequently. This is where taking a snapshot before patching comes into play.

A snapshot before patching is a crucial tool that system administrators can use to protect their systems from vulnerabilities. In this article, we will discuss why taking a snapshot before patching is essential and how it can help system administrators safeguard their systems.

What is a Snapshot Before Patching?

A snapshot before patching is a backup copy of your system’s current state. This copy can be used to restore your system to its previous state in case something goes wrong during the patching process. Taking a snapshot before patching ensures that you have a stable and reliable system to fall back on if the patching process fails.

Why is a Snapshot Before Patching Important?

Taking a snapshot before patching is essential for several reasons. Here are some of the main reasons why system administrators should make this a standard practice:

  1. Protects Against System Failure: Patching can sometimes cause system failures. Having a snapshot before patching ensures that you can quickly restore your system to its previous state in case of such failures.
  2. Provides a Safe Environment for Testing: Taking a snapshot before patching allows system administrators to test the patches in a safe environment. This ensures that any issues that arise during the testing process can be addressed before the patches are applied to the live system.
  3. Helps in Disaster Recovery: Snapshots can be used as part of a disaster recovery plan. In case of a disaster, snapshots can be used to restore your system to a previous state.

Best Practices for Using Snapshots Before Patching

Here are some best practices for using snapshots before patching:

Always Test Patches:

Test patches in a safe environment before applying them to the live system.

Schedule Regular Snapshots:

Schedule regular snapshots so that you always have an up-to-date backup of your system.

Name Your Snapshots:

Give your snapshots meaningful names so that you can easily identify them.

Store Snapshots Securely:

Store your snapshots in a secure location to prevent unauthorized access.

Snapshots Before Patching FAQs

What is the difference between a snapshot and a backup?

A snapshot is a point-in-time copy of your system, whereas a backup is a copy of your system’s data that is stored separately.

How often should I take a snapshot before patching?

It depends on your organization’s needs. However, it is a good practice to take a snapshot before each patching session.

Can I take a snapshot of a virtual machine?

Yes, you can take a snapshot of a virtual machine. In fact, taking snapshots of virtual machines is a common practice in virtualized environments.

What happens if I don’t take a snapshot before patching?

If you don’t take a snapshot before patching, you run the risk of losing important data or causing system failures.

How to Snapshot before deploying Patches.

How SnaPatch Can Help You Take Snapshots Before Patching

When it comes to taking snapshots before patching, it can be a time-consuming and manual process for system administrators. However, there is a tool that can simplify the process and make it more efficient: SnaPatch.

What is SnaPatch?

SnaPatch is a software application that interacts with your Microsoft System Centre Configuration Manager (SCCM) environment to pull in all your machine information. It uses SCCM as the source of truth for all your VM information.

Next, it interfaces with either your vCentre or System Centre Virtual Machine Manager (SCVMM), or both. It takes control of your VM environment, allowing it to create and delete snapshots of your VMs.

How does SnaPatch work?

SnaPatch simplifies the snapshot process by automating it. It creates a snapshot of any virtual machine before allowing it to be patched. If the snapshot fails, the VM will not receive updates and will be removed from the patching schedule. SnaPatch streamlines the process and frees up your time by automating the snapshot and patching processes, while keeping you updated on progress via email notifications.

How do you deploy SnaPatch?

Deploying SnaPatch is easy and straightforward. After installation, the application discovers your SCCM environment and allows you to configure various settings such as email notifications, snapshot creation, and patch deployment.

Why use SnaPatch?

SnaPatch helps you take snapshots before patching in a more efficient and streamlined manner. It complies with SOX regulations and minimizes risk, and its automated snapshot creation feature ensures that you can easily roll back updates if necessary, giving you peace of mind and more time to focus on other critical tasks.

Conclusion

In conclusion, taking snapshots before patching is a critical step in ensuring the security and stability of your systems. SnaPatch can help simplify and automate this process, allowing you to deploy Microsoft updates in your VM environment safely and efficiently. Try SnaPatch today and streamline your patching process!

SCCM update 1610 Hotfix KB4010155

SCCM update 1610 Hotfix KB4010155

SCCM update 1610 Hotfix KB4010155

If you are using Microsoft’s System Center Configuration Manager (SCCM), you may have experienced known bugs and issues. Fortunately, Microsoft released a hotfix on February 16, 2017, to fix them. In this article, we will discuss the hotfix, its features, and how it addresses some of SCCM’s known issues.

Fixing Known Bugs and Issues The following are some of the known bugs and issues that are fixed by this update rollup:

SCCM update 1610 Hotfix KB4010155

An update has been released for Microsoft’s System Centre Configuration Manager on the 16 of February 2017.

This update rollup for SCCM is to fix the following known bugs and issues;

Component Bug/Issue
Client
Internet-only clients can’t connect to management points or distribution points when proxy auto-configuration is used, and they change networks without restarting.
Client
The Content Transfer Manager component of the Configuration Manager client repeatedly checks for content after the client roams to a location without available distribution points.
Microsoft Intune and Mobile Device Management
Communication between a Configuration Manager site server and the Microsoft Intune service may fail randomly.
Microsoft Intune and Mobile Device Management
After integrating Lookout mobile threat protection with Microsoft Intune, Windows devices are incorrectly displayed in the Device Threat Protection Compliance Status (iOS/Android) charts in the Administrator Console.
Site systems
The Microsoft.Management.Services.ClientManagementService.Host.exe process doesn’t start if the Process ID (PID) assigned by Windows is greater than 32,767.
Site systems
After you upgrade to Configuration Manager current branch, version 1610, the cloud management gateway connection point doesn’t start.
Site systems
When you configure the SQL Server Service Broker for a database replica server, execution of the sp_BgbConfigSSBForRemoteService stored procedure fails.
Site systems
Installing the Service Connection Point on a computer that’s not a site server triggers CPU usage of 100%.
Operating system deployment
Deployment of the Windows 10 Anniversary Update (1607) to Windows 10 clients triggers a “0x80091007 (Hash value is not correct)” error.
Software distribution and content management
The transfer of package contents between sites over slow network connections fails intermittently.
Software distribution and content management
Every time content is sent to a distribution point, site control data is updated unnecessarily.
Administrator console
After you add a new boundary to the Default-Site-Boundary-Group, that group is no longer listed on the Boundary Groups tab of the boundary properties.
Administrator console
Individual threat details are not displayed as expected on the Device Threat Protection Details tab of the Devices screen in the Administrator console.
Administrator console
The UpdatesDeployment.log file contains errors that resemble the following: Failed to get SDM CI for update (Site_{guid} SUM_{guid}) from type store, error = 0x80070002 Failed to GetSupersededUpdatesFromDigest for the update
Administrator console
After you upgrade to Configuration Manager current branch, version 1610, resolving conflicting records fails for non-mobile device clients.
Software updates
When an Alternate Content Provider encounters an error or retry condition while downloading an Office 365 job, the client does not fall back to the default download system as expected.
Software updates
After you start installation of Office updates from Software Center, users do not receive a notification message to exit all open Office 365 applications.
Software updates
The Allow clients to use Microsoft Update as a fallback source option doesn’t work as expected when you use it in a software update deployment or automatic deployment rule (ADR).

How to install KB4010155 update rollup for SCCM 1610

Now that you have learnt about what are the fixes for this update rollup, now lets look at how to install this next. It is quite a simple process and should take you no longer than 30 minutes.


Step 1 – Open your SCCM console.

Open your SCCM console and navigate to Administration, then expand Cloud Services and finally highlight Updates and Servicing. Your SCCM should have downloaded the update and have it ready to deploy to your SCCM infrastructure.

KB4010155 SCCM step 1


Step 2 – Run Prerequisite Check

Highlight the Configuration Manager 1610 Hotfix (KB4010155), then right click and choose Run Prerequisite Check. 

KB4010155 SCCM step 2

The prerequisite check should take no longer than five minutes as sn the background, SCCM will run and verify that you are able to install this hotfix.

KB4010155 SCCM step 3

Refresh your console until you see that the Prerequisite check passed notification.

KB4010155 SCCM step 4


Step 3 – Install Update Pack (KB4010155)

Hopefully the KB4010155 update pack is compatible with your SCCM environment and you are now ready for the installation. Again, highlight the update pack, right click and choose Install Update Pack.

KB4010155 SCCM step 2

Now the Configuration Manager Updates Wizard starts up. Click Next to proceed.

KB4010155 SCCM step 5

On the Client Updates Options window, you have the option to Upgrade without Validating or to Validate in pre-production collection. In this example, Im choosing to go ahead and update without validation. Click Next when ready to proceed.

KB4010155 SCCM step 6

The next window is the License Agreement window. You have to check the checkbox to accept the license terms and privacy statement before you can continue to install. Once you have done so, click Next to continue.

KB4010155 SCCM step 7

The Summary window details your installation options. Confirm these are correct before clicking on Next and continuing and then the installation will not start.

KB4010155 SCCM step 8

Now KB4010155 will install and update your SCCM environment. Once complete you will be presented with the following screen and KB4010155 will install in the background. Keep refreshing your SCCM console to confirm when it has udpated. You can additionally view the installation progress by looking at the CMUPDATE.LOG.

 KB4010155 SCCM step 9

Conclusion

In summary, Microsoft released an update for System Center Configuration Manager (SCCM) on February 16, 2017, to address various known bugs and issues. These issues include problems with client connectivity, increased CPU activity, communication failures between Configuration Manager and Microsoft Intune, and errors during the deployment of Windows 10 Anniversary Update (1607) to Windows 10 clients. Other issues addressed by the update include software distribution and content management, problems with the Administrator console, and software updates. The update aims to resolve these issues to improve the performance and functionality of SCCM.

MICROSOFT’S January 2017 PATCH RELEASES

MICROSOFT’S January 2017 PATCH RELEASES

MICROSOFT’S January 2017 PATCH RELEASES

Microsoft have released 4 new Patch Tuesday releases for deployment this month of January. Quite a small deployment of updates this month 🙂

January 2017 Patch Tuesday

See how you can remove the risk of patch deployment by adding SnaPatch to your SCCM patching infrastructure?

MS17-001 – Important

Security Update for Microsoft Edge (3199709)
This security update resolves a vulnerability in Microsoft Edge. This vulnerability could allow an elevation of privilege if a user views a specially crafted webpage using Microsoft Edge. An attacker who successfully exploited this vulnerability could gain elevated permissions on the namespace directory of a vulnerable system and gain elevated privileges

MS17-002 – Important

Security Update for Microsoft Office (3214291)
This security update resolves a vulnerability in Microsoft Office. The vulnerability could allow remote code execution if a user opens a specially crafted Microsoft Office file. An attacker who successfully exploited the vulnerability could run arbitrary code in the context of the current user. Customers whose accounts are configured to have fewer user rights on the system could be less impacted than those who operate with administrative user rights.

MS17-003 – Critical

Security Update for Adobe Flash Player (3214628)
This security update resolves vulnerabilities in Adobe Flash Player when installed on all supported editions of Windows 8.1, Windows Server 2012, Windows Server 2012 R2, Windows RT 8.1, Windows 10, and Windows Server 2016.

MS17-004 – Important

Security Update for Local Security Authority Subsystem Service (3216771)
A denial of service vulnerability exists in the way the Local Security Authority Subsystem Service (LSASS) handles authentication requests. An attacker who successfully exploited the vulnerability could cause a denial of service on the target system’s LSASS service, which triggers an automatic reboot of the system. The security update addresses the vulnerability by changing the way that LSASS handles specially crafted authentication requests.


Now that you have made it this far, a quick shameless plug for our software portfolio. 🙂

SnaPatch – Patch Management Addon for Microsoft’s SCCM.

SnapShot Master – Take control of your virtual machine snapshots, works with both Hyper-V and Vmware.

Azure Virtual Machine Scheduler – Save money and schedule the shutdown and power on of your virtual machines within Microsoft’s Azure Cloud.

Azure Virtual Machine Deployer – Deploy VMs to Microsoft’s Azure cloud easily, without the need for powershell.

KB3209501 Update for SCCM 1610

KB3209501 Update for SCCM 1610

How to update to KB3209501 for Microsoft SCCM 1610

If you’re experiencing issues with Microsoft SCCM 1610, the recently released update KB3209501 might just be the fix you need. This update resolves various problems related to Configuration Manager version 1606 to version 1610 upgrade, Software Center, BITS for Windows Express Update Files, Task Sequences, and more. In this article, we’ll guide you through the process of updating SCCM 1610 to KB3209501, step-by-step.

KB3209501 FAQs

Question Answer

What is KB3209501?

KB3209501 is an update for Microsoft SCCM 1610 that was released in December 2016. It fixes various issues with SCCM 1610.

What issues does KB3209501 fix?

KB3209501 fixes issues such as the SMS Agent Host process using 100% of available CPU time, Task sequence deployments failing, and more.

How do I update to KB3209501 for Microsoft SCCM 1610?

To update to KB3209501, open your SCCM console, navigate to Administration > Cloud Services > Update and Servicing, and follow the steps.

Should I install updates in preproduction prior to production?

It is always good practice to install any updates in preproduction prior to production.

Is KB3209501 installation time-consuming?

Yes, KB3209501 installation may take some time to finish, so be prepared to be patient.

 Update to KB3209501

So now that you know what KB3209501 fixes now just follow the below tasks to update your SCCM environment.

Open your SCCM console and navigate to Administration, Cloud Services and highlight Update and Servicing

KB3209501 Installing


Next, highlight update KB3209501, then right click and choose Run Prerequisite Check.

KB3209501 prerequisite check


Give the prerequisite checks sometime to complete.

KB3209501 checking prerequisites

Keep refreshing the console to see when it has completed.

KB3209501 prerequisite passed


Once the KB3209501 prerequisite checks have passed, again highlight the update and then right click and choose Install Update Pack.

KB3209501 Install


You are now presented with the Configuration Manager Updates Wizard. Select whether you want to ignore any prerequisite check warnings if you received them or not and then click Next.

KB3209501 Install 2


On the Client Update Options tab, you can select to update without validating against your preproduction environment before updating your production environment. As this is one of our many labs, I have chosen to go ahead without validating. While this is a lab, not everyone can has his luxury, so remember It is always good practice to install any updates in preproduction prior to production.

KB3209501 Install 3


On the License Tab page, confirm you accept the license terms and privacy statement and then click Next.

KB3209501 Install 4


Confirm what is shown is on the Summary Tab is correct and then click Next.

KB3209501 Install 5


The installation will no be performed in the background, so on the Completion Tab click Close.

KB3209501 Install 6


As you can see, KB3209501 is installing in the background. For my lab, it did take some time to finish so prepare to be patient.

KB3209501 Installing

Updating SCCM 1610 to KB3209501 is a straightforward process that can help you resolve a range of issues and improve the overall performance of your Configuration Manager environment. By following the steps outlined above, you can ensure a smooth and successful update. Don’t forget to install updates in pre-production first to avoid potential conflicts

Filtering Users and Groups using Azure AD Connect

Filtering Users and Groups using Azure AD Connect

Filtering Users and Groups using Azure AD Connect

OOOOH the Cloud

Microsoft’s Azure AD Connect allows you to sync your on-prem AD to your Azure AD / Office 365.  If you leave all the settings as default, then AD Connect will happily sync all your AD objects. This is fine for some, however many large organisations do not want to sync their entire environment. There are options to filter the objects by selecting specific OU’s, but sometimes this isn’t granular enough. Another option is to select a group and filter based on its memberships – but this is considered “pilot” mode and should not be used in a production environment. Personally, this is my preferred method, it’s easy to setup and you can add or remove users and groups to this “sync” group whenever you wish – but who am I to argue with Microsoft.

So if you can’t filter based on OU, and you don’t want to go against Microsoft’s “best practice”, what other options do you have?

Well, you need to look use the “Synchronization Rules Editor”.

The rules editor allows you to create filter rules, to either filter in or filter out the AD objects you want to sync.

In the below example I will show you how to filter out Users and Groups from syncing.

The rules editor uses the AD Attributes of the object to determine whether or not to sync them. By attributes, I mean these…

Azure AD Connect


If you have Exchange in your environment then you will have the extensionAttribute 1 – 15 in your schema. I tend to use these attributes, but you may decide to use any that suits.

OK, so what I want to achieve is to only sync the users or groups that have the extensionAttribute1 set to “Sync to Azure”. Any object without this value will not get synced.

First, lets modify the attribute for 1 user and 1 group.

Open AD Users and Computers and click View, and make sure the Advanced Features option is ticked. Without this option you won’t see the attributes tab.

Azure AD Connect 2


Find a test user and open the properties, then click on the Attribute Editor tab.

Scroll through and find the extensionAttribute1 and click Edit. Set the value to Sync to Azure.


Repeat the process for a Group.

OK, now that we’ve set the attribute on both a user and group object, launch the Synchronization Rules Editor.

Azure AD Connect 4


We will now create two rules, one to filter users, and another to filter groups.

Ensure the Direction is set to Inbound and click the Add new rule button.

Give the rule a descriptive name and provide a description. I suggest something useful so when you come back in 3+ months it will make sense to you.

  1. Set the Connected System to your domain.
  2. Set the Connected System Object Type to User
  3. Set the Metaverse Object Type to Person
  4. Set the Link Type to Join
  5. Set the Precedence to 50 (or any value lower than the lowest value – if you haven’t created any other rules, then 50 will be fine).
  6. Click Next

Azure AD Connect 5


Click the Add Group button, and then the Add Clause button.

Azure AD Connect 6


Set the Attribute to the attribute you selected as the “filtering attribute”. In our example, it’s extensionAttribute1.

Set the Operator to NotEqual

And enter the value to look for, which in our example is “Sync to Azure”.

Click Next.

Azure AD Connect 7


Click Next on the Join Rules window, as it’s not used with this rule.

Azure AD Connect 8


In the Transformations section, click Add transformation

  1. Set the FlowType to Constant
  2. Set the Target Attribute to cloudFiltered
  3. In the Source field, enter true
  4. Leave all other settings and click Add

Azure AD Connect 9


The new rule should now appear at the top of the list.

Azure AD Connect 10


OK, so that’s the Users rule done. Let’s move onto the Groups rule.

The groups rule is a little tricker, so instead of trying to create it from scratch, we’ll use the existing one.

Select the In from AD – Group Join rule and click Edit.

Azure AD Connect 11


Click Yes to the message – which will disable the existing rule and create a copy for us to work with.

Azure AD Connect 12


Give the rule a name and description.

Set the Precedence to 55.

Click Next

Azure AD Connect 13


In the Scoping Filter section, select both of the existing clauses and click Remove Clause.

Azure AD Connect 14


Once all the Clauses have been removed, click Add Clause.

Azure AD Connect 15


Set the Attribute to the attribute you selected as the “filtering attribute”. In our example, it’s extensionAttribute1.

Set the Operator to Equal (with the user rule we set it to NotEqual, but here we use the Equal operator).

And enter the value “Sync to Azure”, or whatever value you are using.

Click Next.

In the Join rules, ensure the Source Attribute is set to objectGUID and the Target Attribute is sourceAnchorBinary.

Click Next.

Azure AD Connect 16


Leave the settings as default in the Transformations window and click Save.

Azure AD Connect 17


If you receive an expression warning, click Yes to continue saving the rule.

You should now have two rules in your rule set.

Azure AD Connect 18


OK, now that we’ve made our rules, we need to kick off a full sync.

Open up a PowerShell console, and enter: Start-ADSyncSyncCycle -PolicyType Initial

Once the sync finishes, log into the Azure or 365 portal and have a look under the Users and Groups sections.

As you can see, only my two test users have been synced

Azure AD Connect 19


And in the groups, only my two test groups are synced too.

Azure AD Connect 20


While you are here, please take the time to check out our software products for Azure, VMWare, Hyper-V and SCCM.