How to find Azure BLOB files that haven’t been accessed
Azure Blob storage has provided companies with a way to store almost limitless amount of data. But just like kids in a candy store this can get out of hand, and expensive. Being able to store as much data as you want is great, however it is something that can grow to a point where you are spending more on storage than you actually need.
Azure does provide a nice method of automatically shifting old or unused files to a lower access tier to save on cost, but this still means you are potentially holding onto files you don’t really need. I mean do you really need files you haven’t accessed in over 12 months? Sure there are certain industries that require files that are kept for 7+ years, but they are a special case.
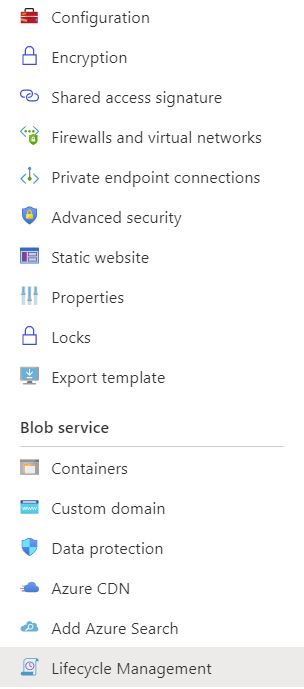
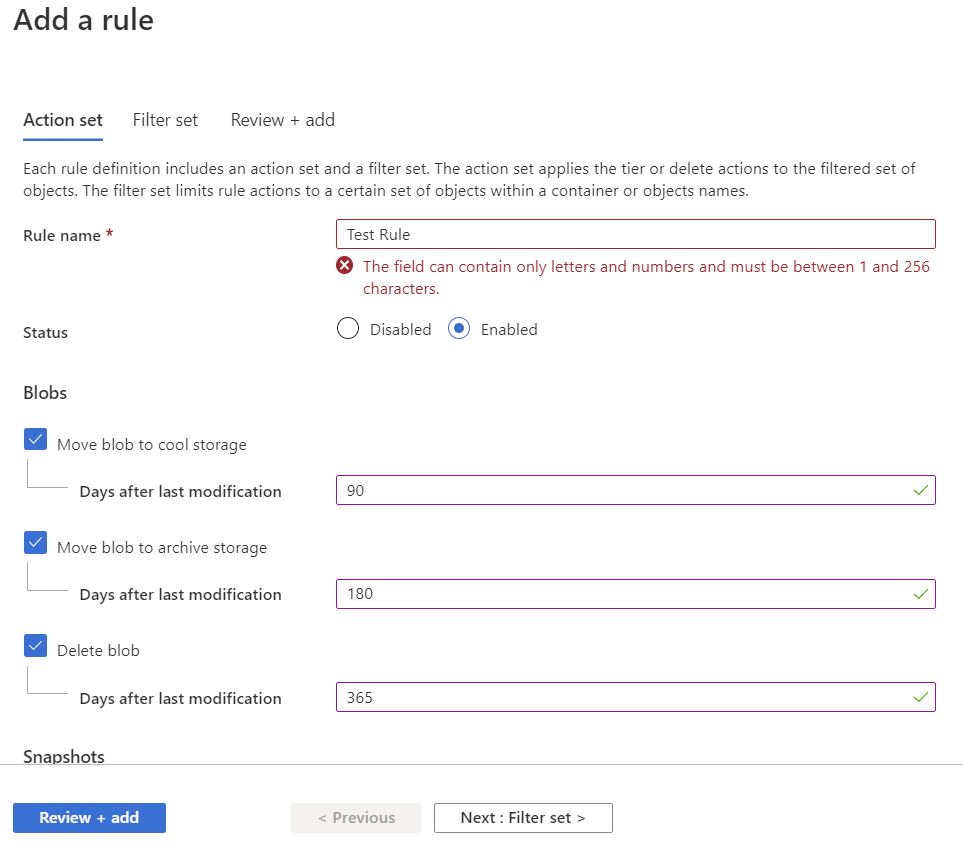
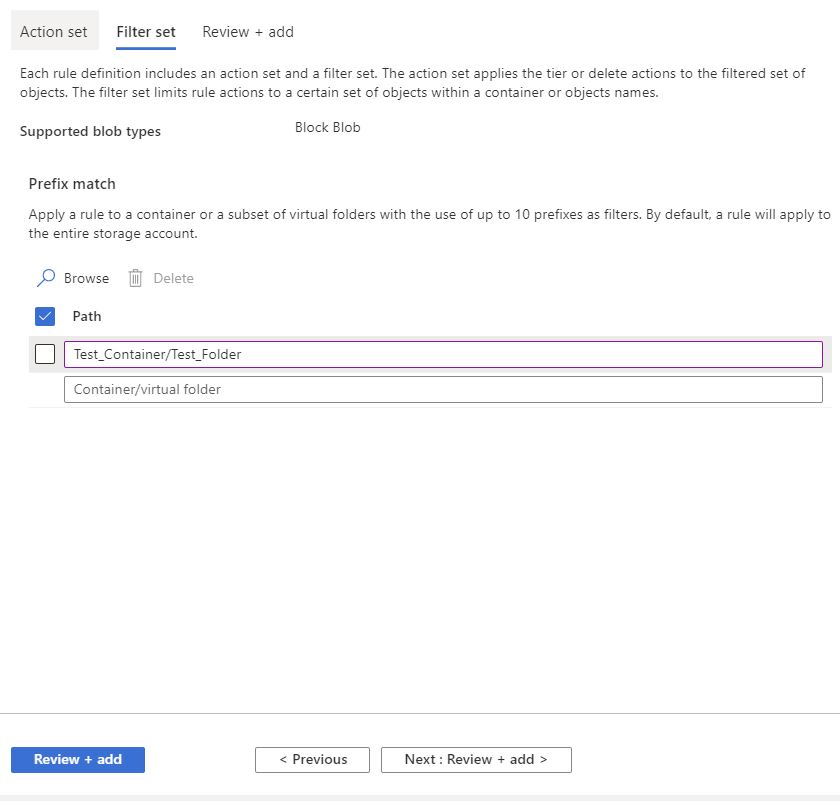
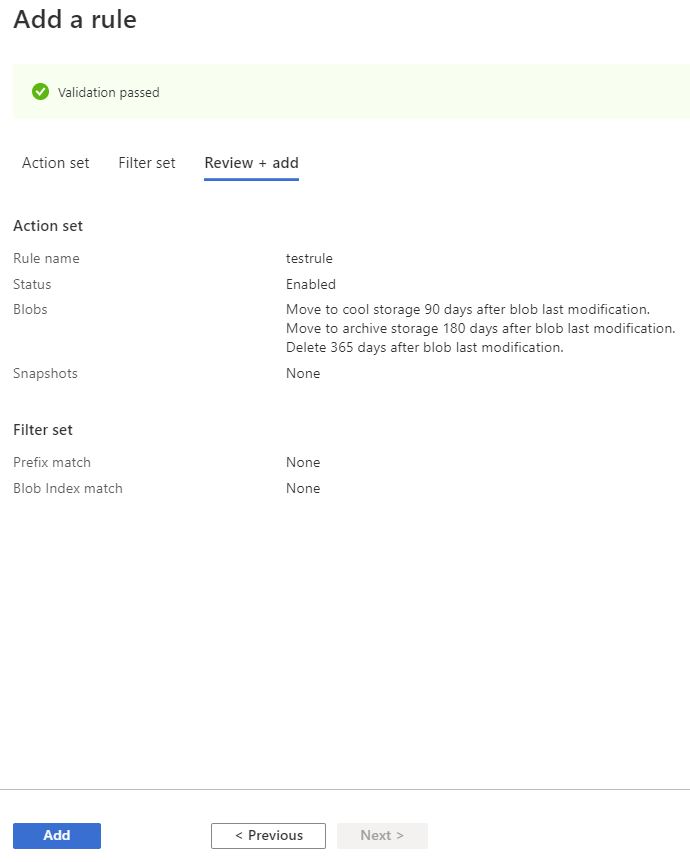
If you don’t know how to create an Azure lifecycle policy to automatically move unused files to a lower access tier, check out our other post here: https://www.smikar.com/create-azure-storage-lifecycle-policy/
OK, so do I go about finding these files that haven’t been accessed in the last 3, 6, 12 or 36 months (3 years) without having to browse through each and every Azure Storage Account and Container?
So how do you find your Azure Blobs that havent been accessed in 3 months or more?
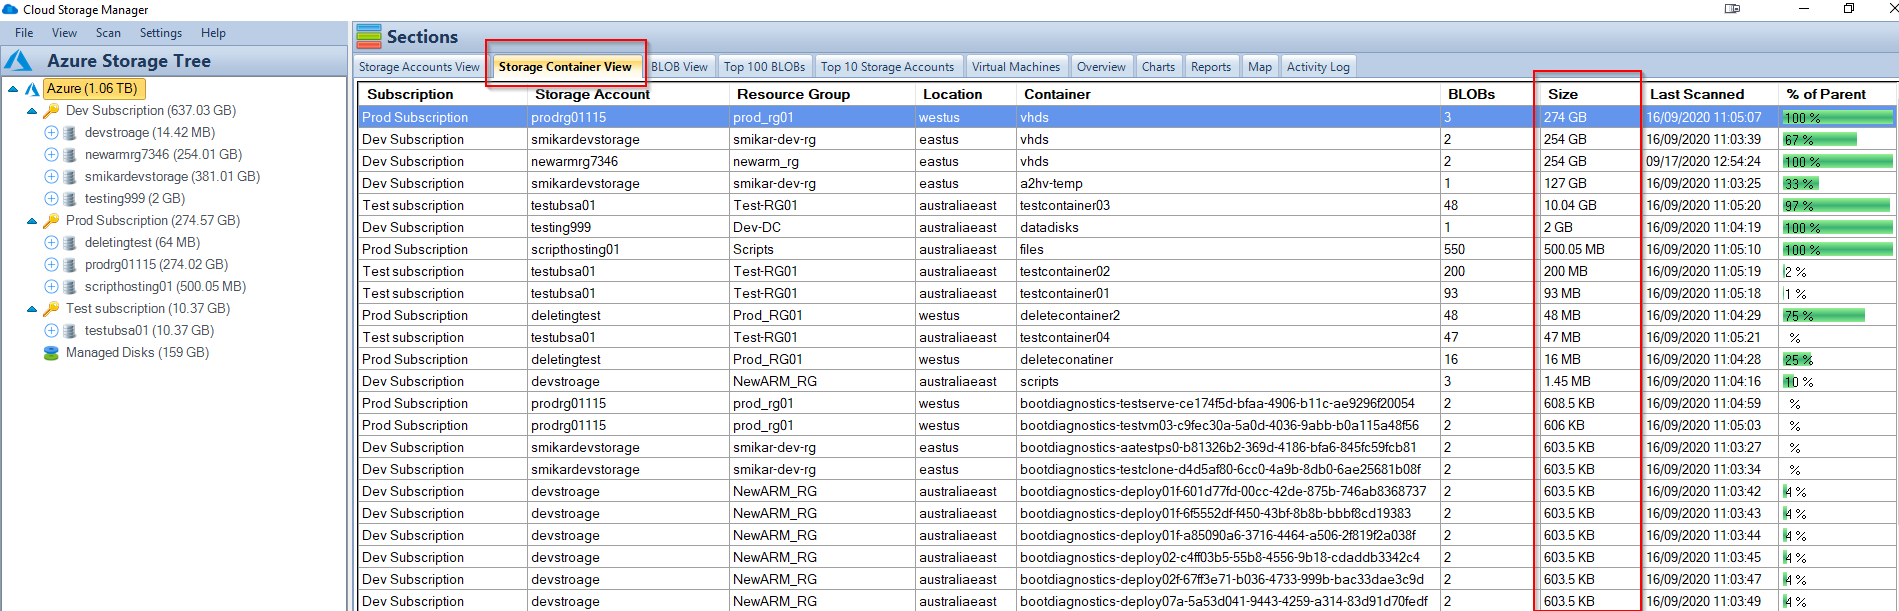
Azure Blob Storage Consumption Reports
Simple, use Cloud Storage Manager, and run one of the many usage reports.
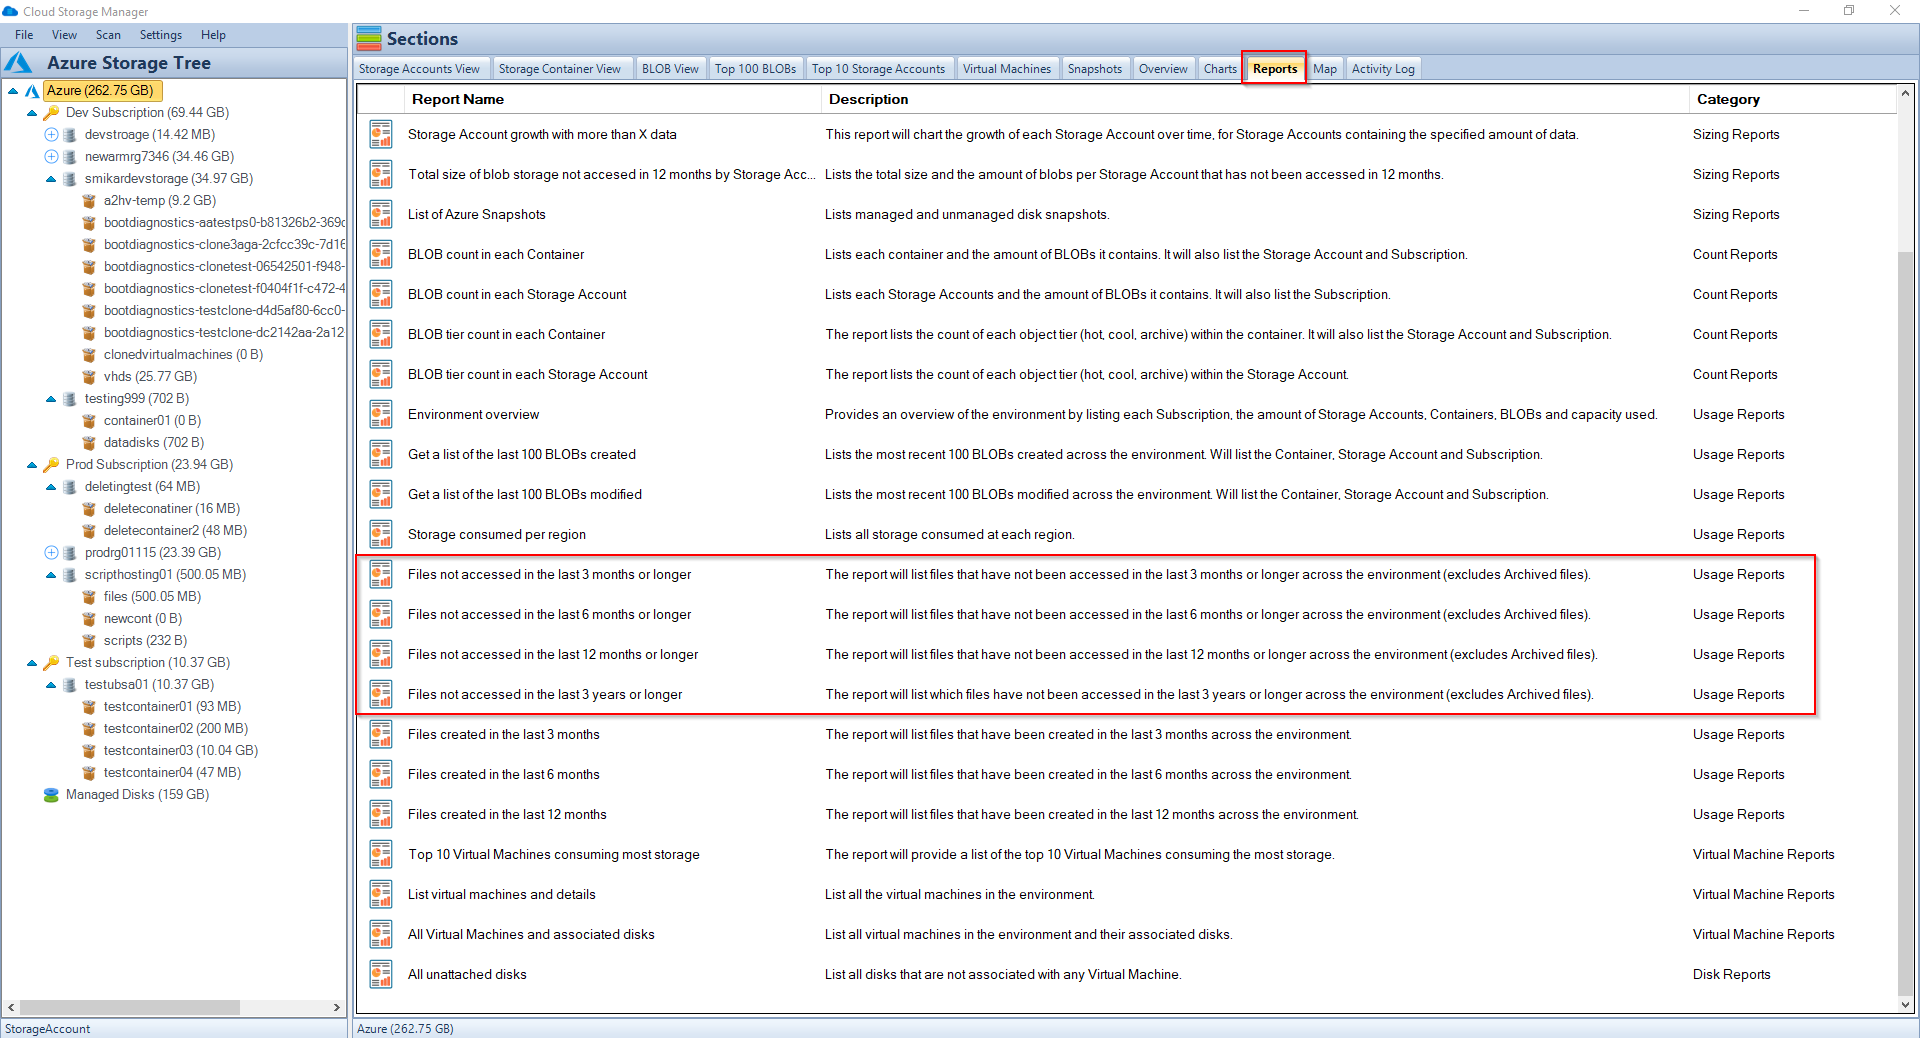
Cloud Storage Manager has a number of reports you can run to get a better insight into exactly where all your Azure Blob Storage is being consumed, but let’s focus on the specific 4 reports that will tell us which Azure BLOB files haven’t been accessed in the last 3, 6, 12 or 36 months (3 years).
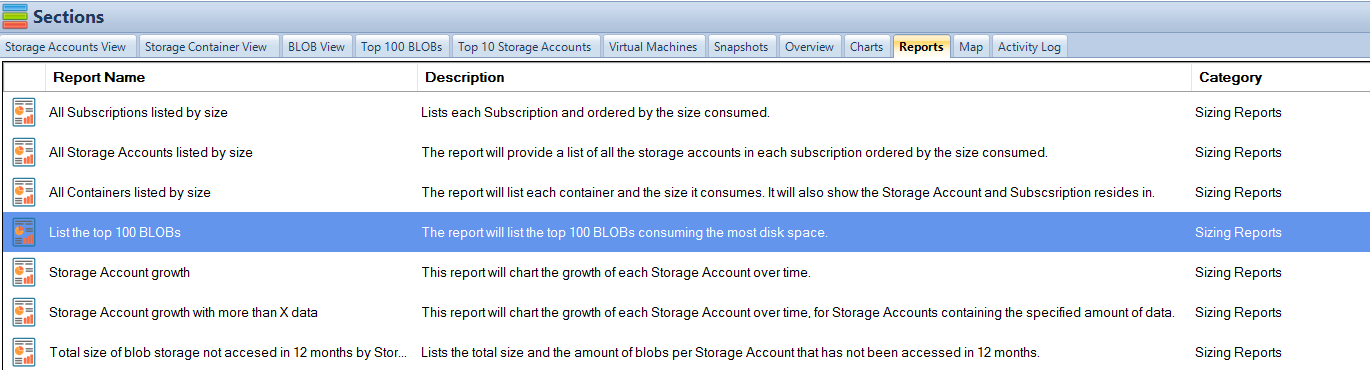
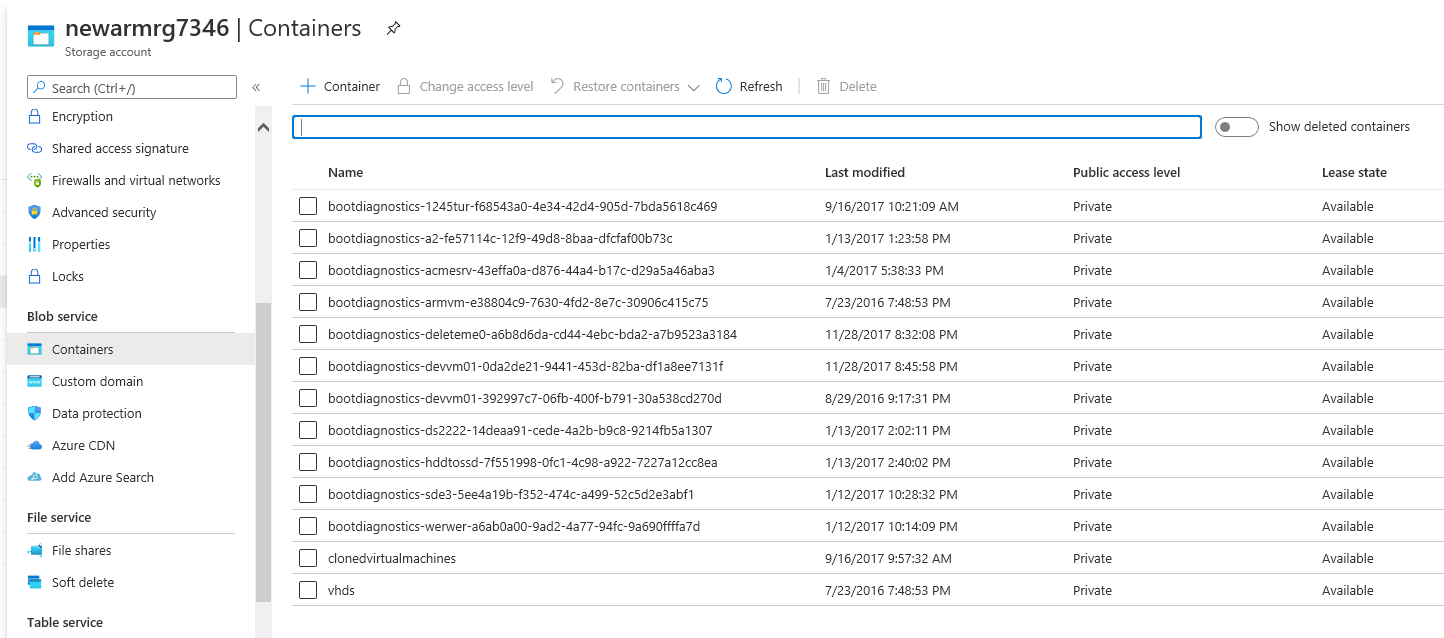
Once you’ve installed Cloud Storage Manager and allowed it some time to scan your Azure environment, browse to the Reports tab as shown here.
Azure Blobs not accessed within
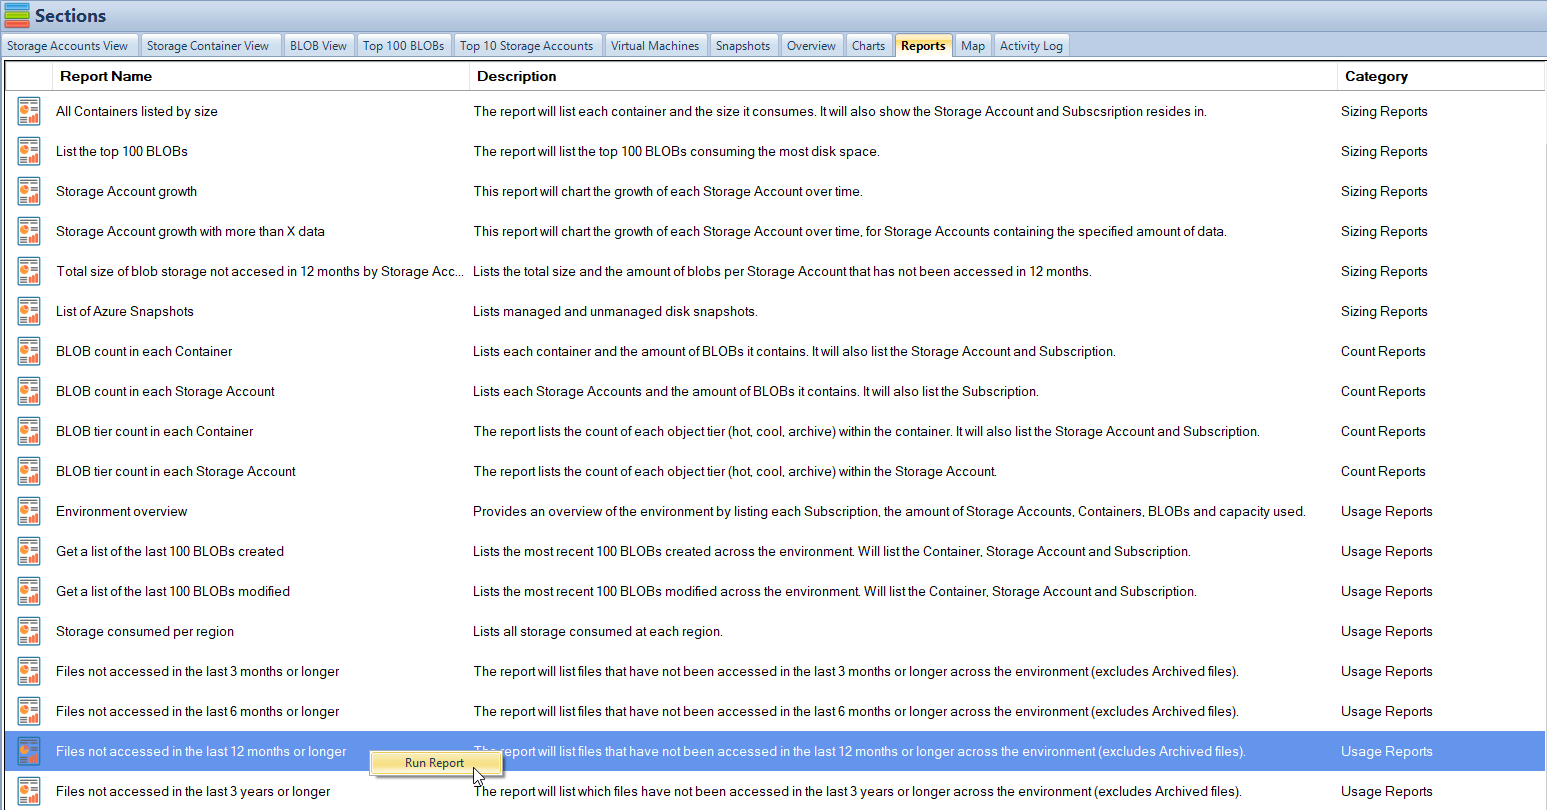
First let’s run the Files not access in the last 12 months or longer report.
Right click on the report and select Run Report.
Azure Blobs not used Report
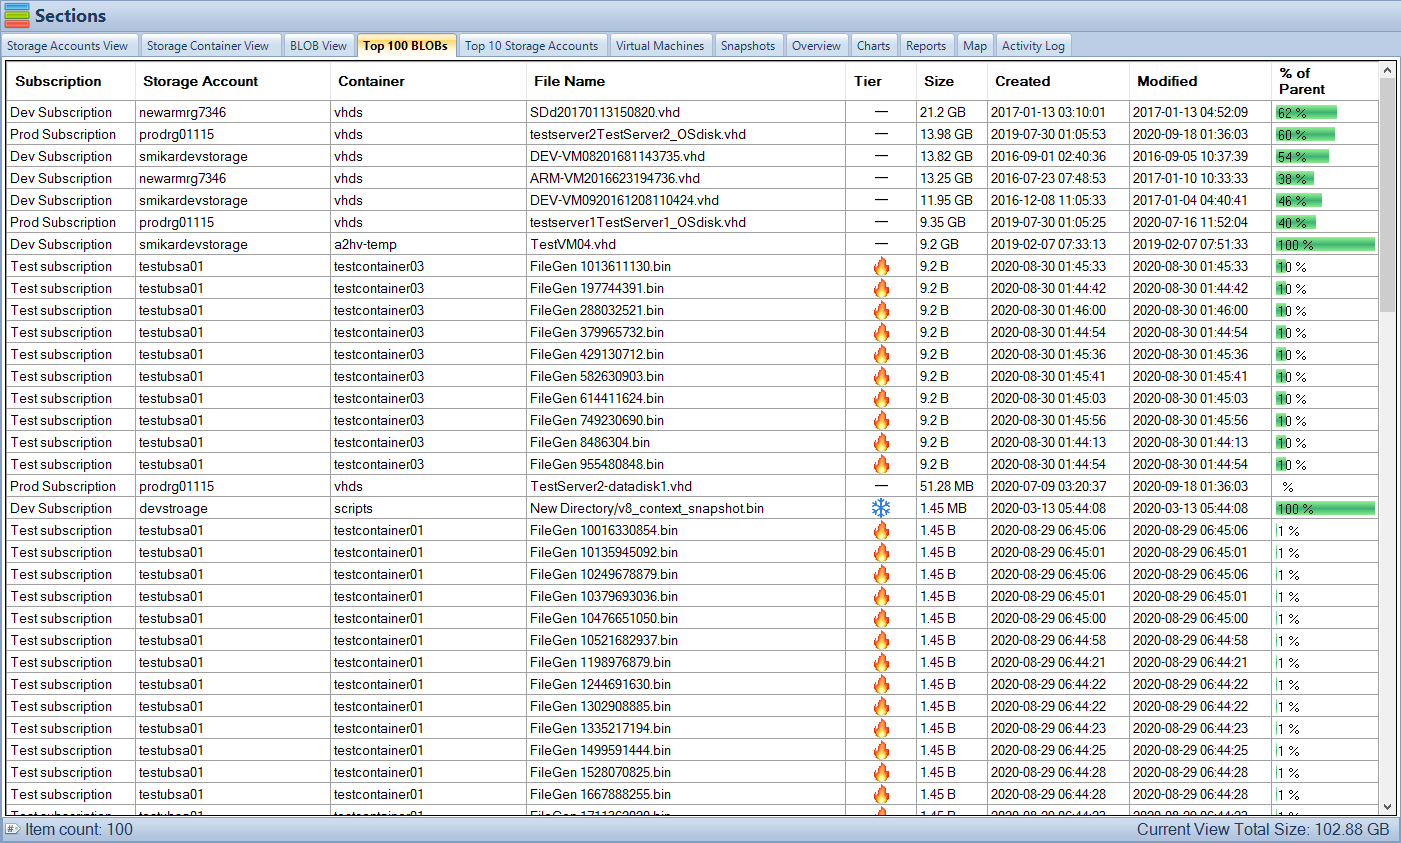
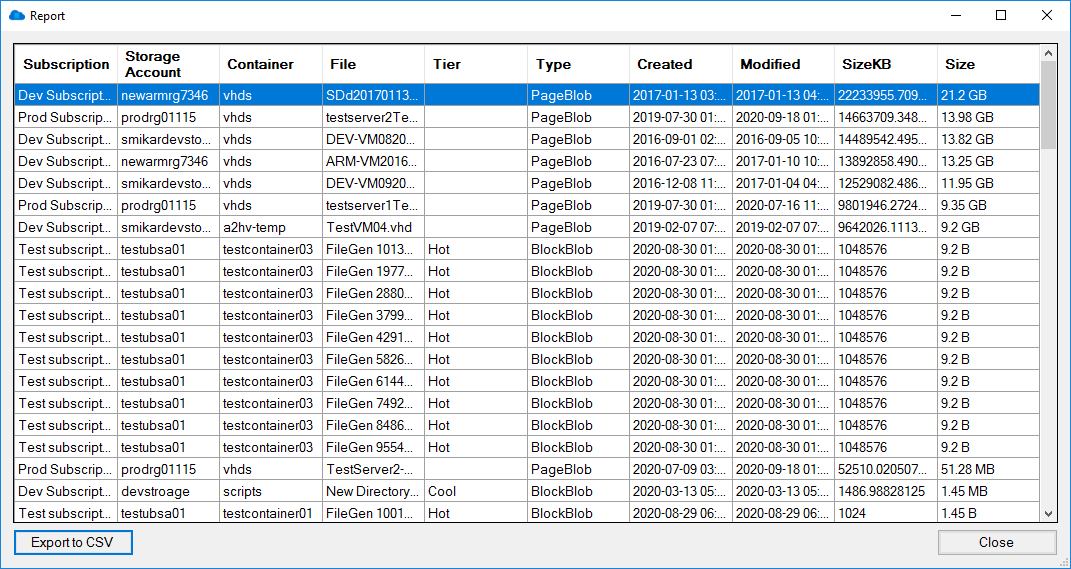
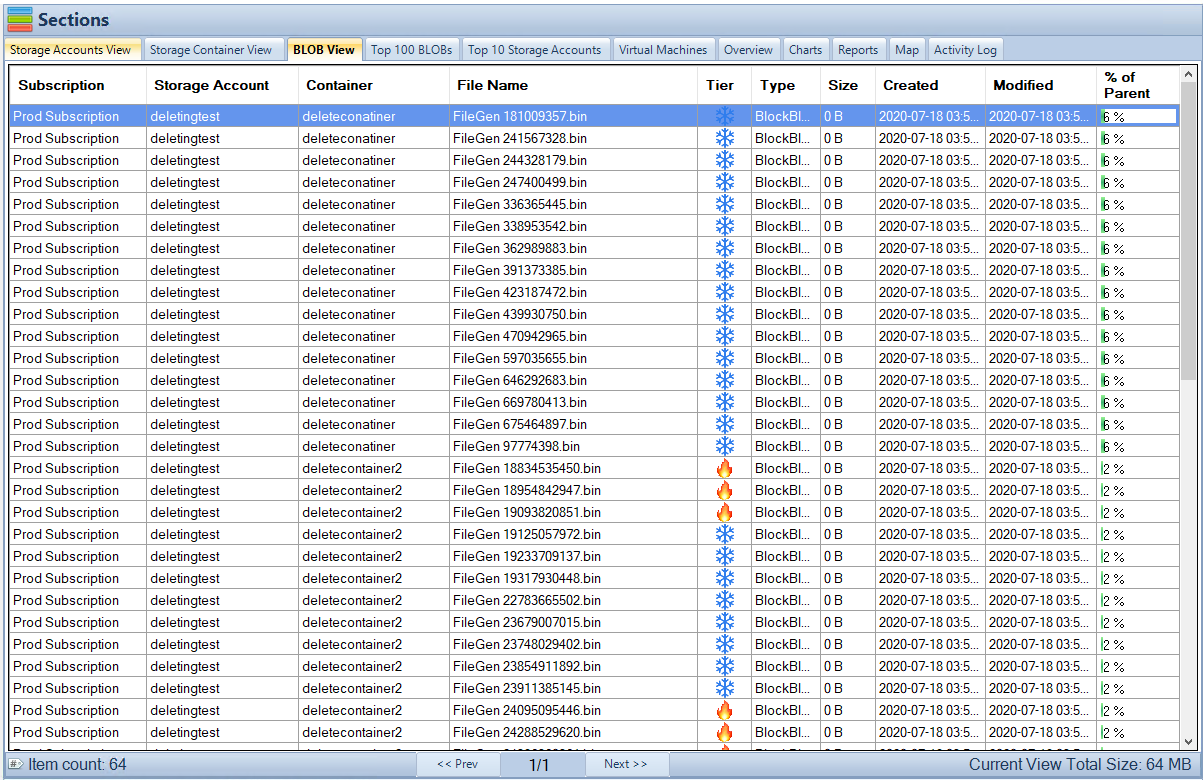
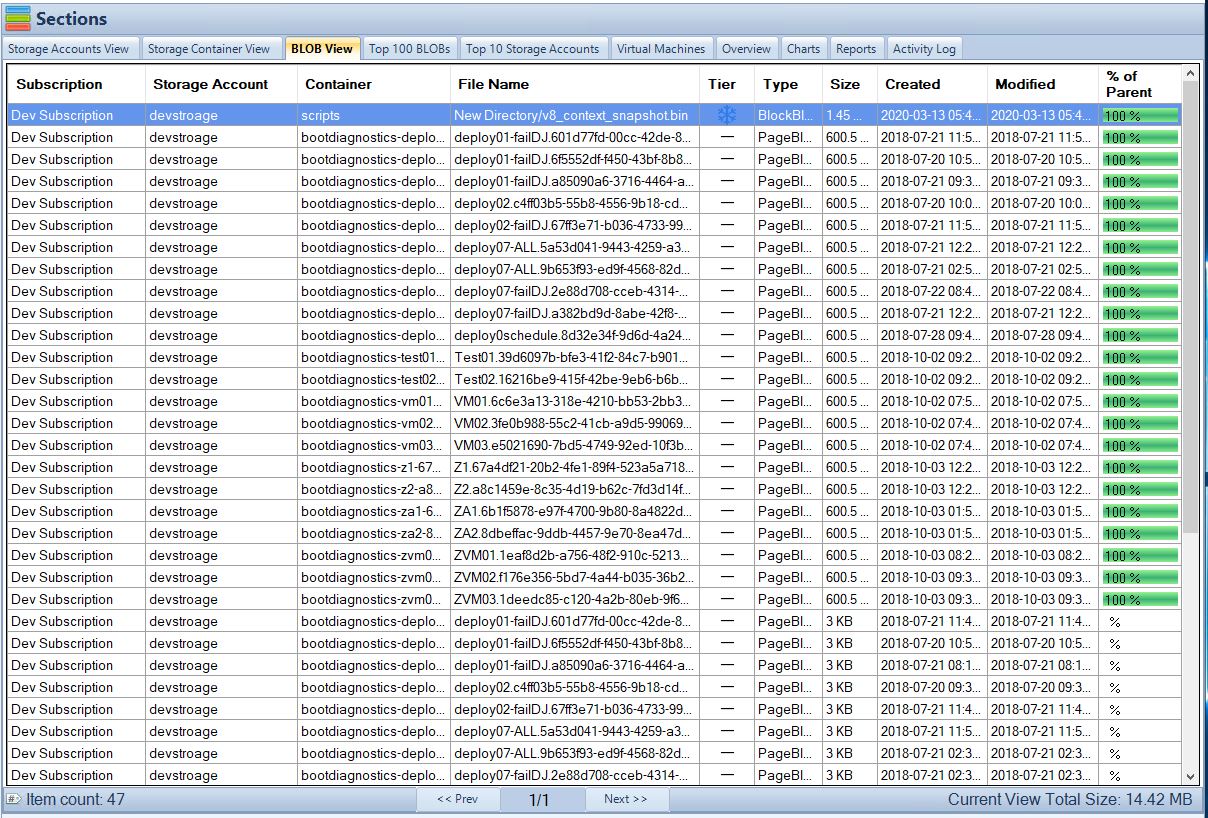
Once the report finishes, you will be shown a list of files that have not been accessed in the last 3 months or longer.
The report will show you which Subscription, Storage Account and Container the Azure BLOB file resides in. Not only that, but it will also tell you the object tier of the blob, whether that be hot or cool (archive files are excluded), the size of the file, the last time it was modified and of course the name of the file.
Here is an example of the report.
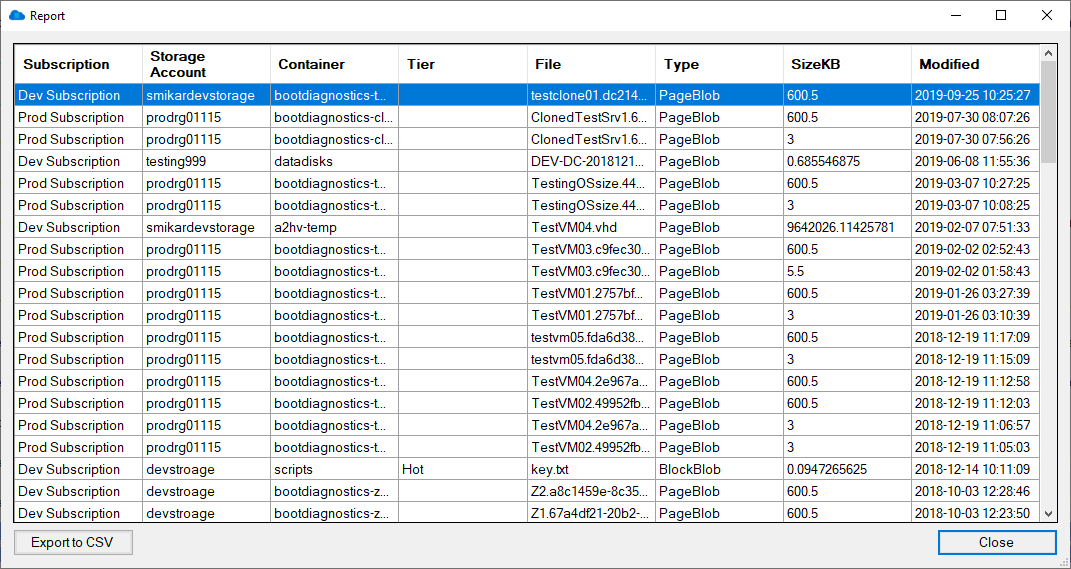
You can also export the report to Excel in order to adjust the report or present the information to others.
The same report may be executed to provide similar results but extending the criteria further out to search for files that haven’t been accessed in a longer timeframe, such as 6 months, 12 months or 3 years.
Using these reports, you can decide whether or not these files need to be retained, in which case you would move them to a lower access tier, either Cool or Archive for long-term retention, or even delete them if they are deemed unnecessary.
These reports are a great way to find files that haven’t been accessed in a long time and could provide an immediate cost saving associated with your Azure Storage consumption.
Cloud Storage Manager has free to trial. Start seeing insights in to your Azure Blob Storage consumption today.
Download a Free Trial and test it for yourself.
Free
![]()
Database size is limited to a maximum of 5MB.
Typically for small or personal environments usually consisting of 3 or less Azure Subscriptions and consuming under 30TB of Azure Blob Storage.
Advanced
![]()
Database size is limited to a maximum of 1GB.
For medium sized environments typically consisting of less than 10 Azure Subscriptions and consuming under 500TB of Azure Blob Storage.
Enterprise
![]()
Unlimited database size.
For use in large environments typically consisting of more than 10 Subscriptions and consuming more than 1PB of Azure Blob Storage.
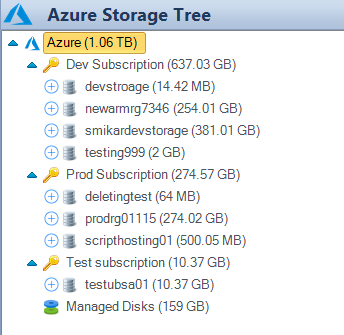
Cloud Storage Manager is licensed based on the size of it’s database which includes information of each of your Azure Subscriptions, Azure Storage Accounts, Containers and finally each Blob.
Each version has the same great functions including scheduled scans of your Azure Blob Storage and reporting.
Send download link to:
Azure Storage Cost Saving FAQs
What is Azure Blob storage?
Azure Blob storage is a cloud-based storage solution provided by Microsoft Azure that allows users to store large amounts of unstructured data such as text or binary data.
Why is it important to manage Azure Blob storage?
While Azure Blob storage can store almost limitless amounts of data, it can also become expensive to maintain as data accumulates over time. Proper management of Azure Blob storage can help reduce storage costs and improve overall efficiency.
How can Cloud Storage Manager help manage Azure Blob storage?
Cloud Storage Manager provides a number of usage reports that can be used to identify which Azure Blob files haven’t been accessed in a certain period of time, such as 3, 6, 12 or 36 months. These reports allow users to make informed decisions about whether to retain, move to a lower access tier, or delete unnecessary files, which can help reduce storage costs.
What are the benefits of using Cloud Storage Manager?
By using Cloud Storage Manager, users can gain insights into their Azure Blob storage consumption and identify areas where they can optimize storage costs. The usage reports provided by Cloud Storage Manager are easy to use and allow users to quickly identify which files haven’t been accessed in a certain period of time, which can save time and effort compared to manually browsing through each Azure Storage Account and Container.
How can I try Cloud Storage Manager for myself?
Cloud Storage Manager offers a free trial that can be downloaded and installed. This allows users to see the insights provided by the software and determine if it is a good fit for their needs.
Azure Blob Storage Consumption Reports are an excellent way to find Azure BLOB files that haven’t been accessed in a long time, and they can provide immediate cost savings associated with your Azure Storage consumption. By using Cloud Storage Manager, you can run reports and gain insights into your Azure Blob Storage consumption, allowing you to make informed decisions on how to optimize your Azure storage.
In summary, using Azure Blob Storage Consumption Reports can help you find unused Azure BLOB files and reduce storage costs, providing a cost-effective solution for storing your data in Azure. Start using Cloud Storage Manager today to see insights into your Azure Blob Storage consumption and start saving costs.