
by Mark | Feb 10, 2023 | Azure, clone, Cloud Computing, Microsoft HyperV, VMWare
Azure to VMware migration?
As organizations transition to the cloud, they are faced with the question of which platform is best suited to their needs. While Microsoft Azure has been a popular choice for cloud computing, many organizations are finding that VMware is a better fit for their virtualized infrastructure needs. This article will explore the reasons why you should consider migrating your Azure VMs to VMware and the benefits that come with making this transition.
Microsoft Azure has been a popular choice for cloud computing due to its scalability and ease of use. However, as organizations grow, they may find that they need more control over their virtualized infrastructure, which is where VMware comes in. With VMware, organizations have complete control over their virtualized environment, which can provide them with more flexibility, reliability, and security.
The Benefits of Migrating Azure VMs to VMware
There are several benefits to migrating Azure VMs to VMware, including increased control, improved performance, and enhanced security.
Increased Control
With VMware, organizations have complete control over their virtualized environment, which means they can manage their VMs in a way that best meets their business needs. They can also easily configure their virtual infrastructure to meet specific requirements, such as resource allocation and network configurations. This level of control is not possible with Azure, where organizations are limited to the resources and configurations provided by the platform.
Improved Performance
VMware also provides improved performance compared to Azure. This is because VMware provides dedicated hardware resources, which can result in faster and more reliable performance. Additionally, VMware’s virtual infrastructure is designed to support high-availability configurations, which can help ensure that VMs remain available even if there are hardware failures.
Enhanced Security
One of the biggest benefits of migrating Azure VMs to VMware is enhanced security. With VMware, organizations have complete control over their virtualized environment, which means they can implement robust security measures to protect their data and applications. This is not possible with Azure, where organizations are limited to the security measures provided by the platform.
Azure VM to VMware Migration FAQs
What is the process for migrating Azure VMs to VMware?
The process for migrating Azure VMs to VMware will depend on the specific needs of your organization. However, the process typically involves configuring a virtual infrastructure, migrating your VMs to the new infrastructure, and testing to ensure that everything is working as expected.
Can I still use Microsoft Azure after migrating my VMs to VMware?
Yes, you can still use Microsoft Azure after migrating your VMs to VMware. However, your VMs will no longer be hosted on the Azure platform, and you will have more control over your virtualized environment.
What are the costs associated with migrating Azure VMs to VMware?
The costs associated with migrating Azure VMs to VMware will depend on the specific needs of your organization. However, the costs can include hardware, software, and support costs.
How best to migrate your Azure VMs to VMware.
In conclusion, migrating Azure VMs to VMware can provide organizations with increased control, improved performance, and enhanced security. With complete control over their virtualized environment, organizations can better manage their VMs and implement robust security measures to protect their data and applications. If you are considering migrating your Azure VMs to VMware, it is important to consider the specific needs of your organization and to work with a professional who can help you make the transition.
Moreover, with the help of software such as Carbon, the administrator can quickly and easily migrate their Azure VMs to either VMWare or Hyper-V. Carbon connects directly to your Azure Subscription, displays your Azure Virtual Machines, and integrates with either your VMware or Hyper-V environments. The software replicates and converts your Azure VMs to your on-premise hypervisor of choice, automatically sets up your replicated Azure VMs on either VMware or Hyper-V with the same configurations, and provides email alerts once the process is completed. By using Carbon, the migration process becomes efficient and straightforward, giving administrators more time to focus on other important tasks.

by Mark | Feb 9, 2023 | clone, Schedule, Snapshot / Checkpoint, VMWare
VMWare Snapshot Overview.
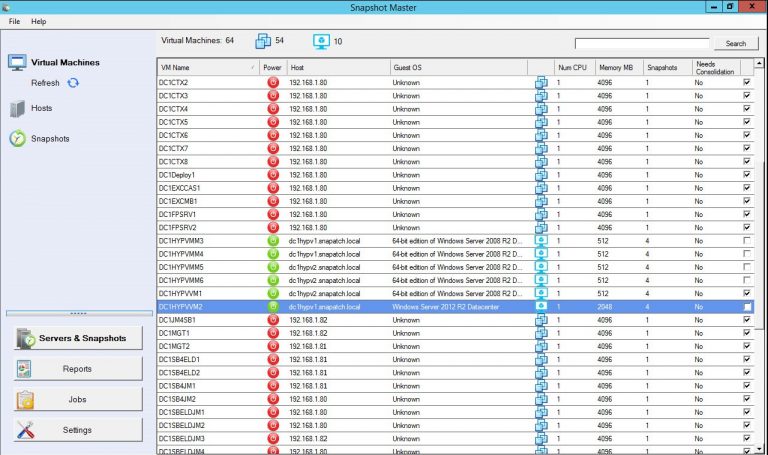
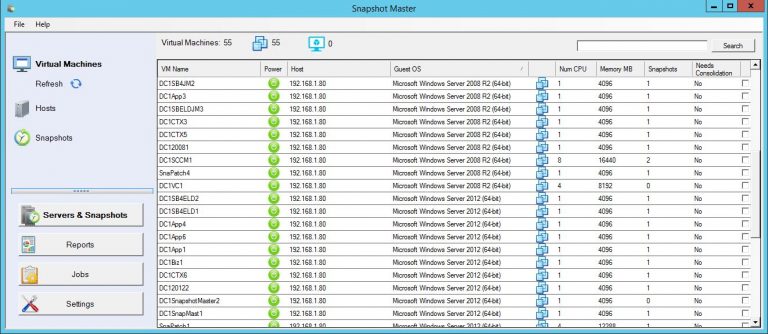
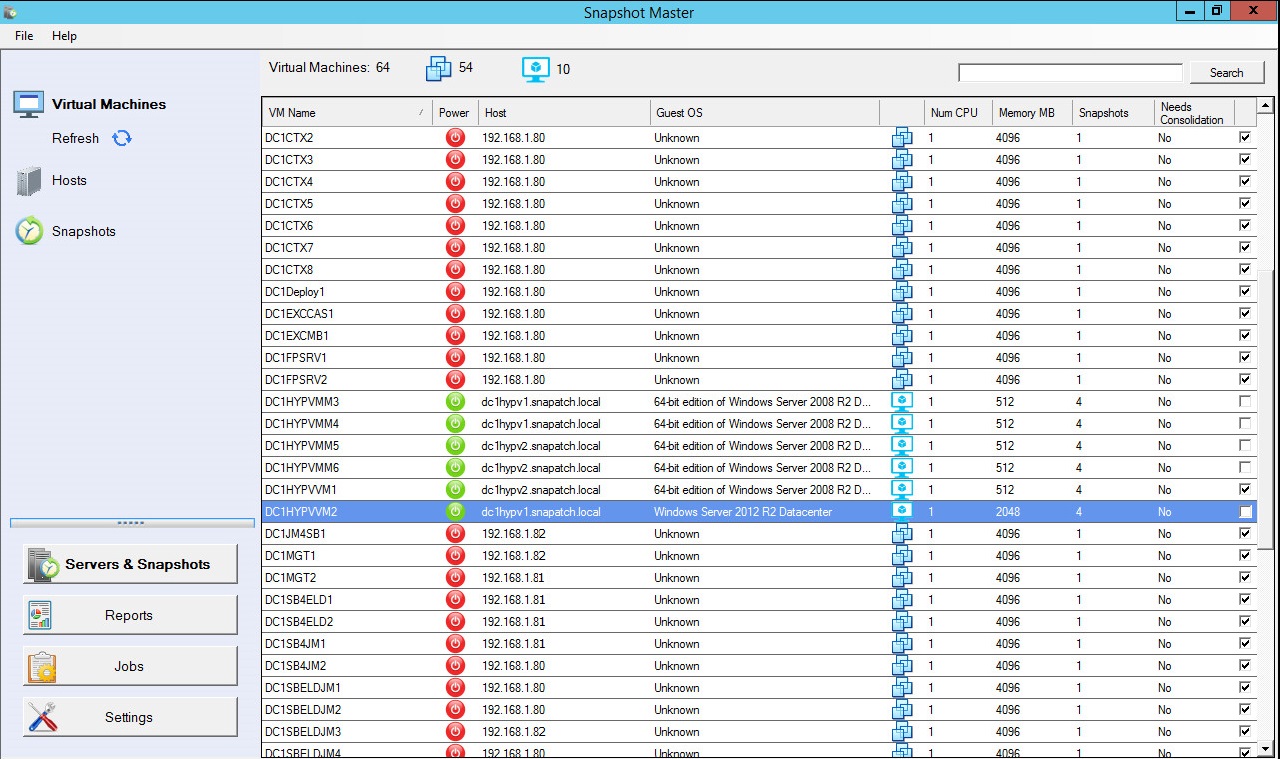
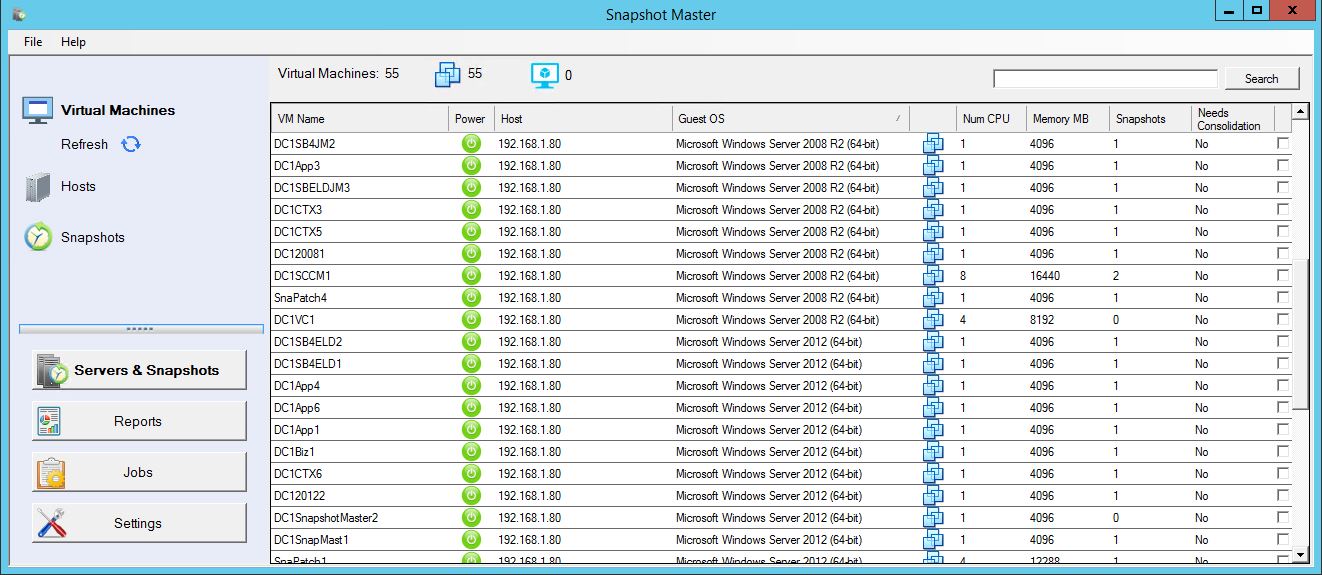
Snapshots are an essential part of virtual machine management, as they provide a convenient way to preserve the state of virtual machines and revert to an earlier version if necessary. However, without proper management, snapshots can quickly become a problem, consuming storage space and impacting performance. This is where SnapShot Master comes in.
SnapShot Master is a comprehensive solution for managing snapshots in your VMware environment. The tool offers a wide range of features to help you optimize your virtual environment, such as:
- Efficient Snapshot Management: With SnapShot Master, you can easily create, schedule, manage, and delete snapshots, and you can automate the process to run at specific intervals.
- Backup and Disaster Recovery: SnapShot Master provides reliable backup and disaster recovery solutions, ensuring that you can quickly restore your virtual environment in case of a failure.
- Storage Optimization: SnapShot Master helps you optimize your storage space by identifying and allowing you to remove stale snapshots, freeing up valuable disk space.
- Performance Optimization: The tool helps you improve the performance of your virtual environment by reducing the impact of snapshots on system performance.
- Simple and User-Friendly: SnapShot Master is designed to be user-friendly and intuitive, making it easy for you to manage snapshots and optimize your VMware environment.
Why Efficient Snapshot Management is Crucial for Your VMware Environment?
Snapshots are a critical aspect of virtual machine management, and efficient snapshot management is crucial to the success of your virtual environment. Here are some of the reasons why efficient snapshot management is important:
- Conserve Storage Space: Over time, snapshots can consume a significant amount of storage space, reducing the amount of space available for other important data.
- Improve Performance: Snapshots can have a significant impact on system performance, particularly if they are not properly managed.
- Ensure Data Protection: Snapshots are used to protect virtual machines and their data, and without proper management, they can actually create data loss or corruption.
The Benefits of Using SnapShot Master for Snapshot Management
SnapShot Master offers a range of benefits to help you maximize your VMware environment with efficient snapshot management. Here are some of the key benefits:
- Efficient and Automated Snapshot Management: SnapShot Master makes it easy to create, manage, and delete snapshots, and you can automate the process to run at specific intervals.
- Reliable Backup and Disaster Recovery: With SnapShot Master, you can be confident that your virtual environment is protected in case of a failure.
- Optimize Storage Space: The tool helps you optimize your storage space by automatically identifying and removing stale snapshots.
- Improve Performance: SnapShot Master helps you improve the performance of your virtual environment by reducing the impact of snapshots on system performance.
- Simple and User-Friendly: The tool is designed to be user-friendly and intuitive, making it easy for you to manage snapshots and optimize your VMware environment.
VMWare Snapshot FAQs
What is SnapShot Master?
SnapShot Master is a comprehensive solution for scheduling, and managing snapshots, backups, and disaster recovery in your VMware environment.
What are snapshots?
Snapshots are a feature of virtual machine management that allows you to preserve the state of a virtual machine at a particular point in time.
Why is efficient snapshot management important for my VMware environment?
Efficient snapshot management helps conserve storage space, improve performance, and ensure data protection in your virtual environment.
How does SnapShot Master help with snapshot management?
SnapShot Master offers a range of features to help you efficiently manage snapshots, including automated snapshot management, reliable backup and disaster recovery, storage optimization, and performance optimization.
Yes, SnapShot Master is designed to be simple and user-friendly, making it easy for you to manage snapshots and optimize your VMware environment.
VMWare Snapshot Final Thoughts
Maximizing your VMware environment with efficient snapshot management is crucial to the success of your virtual environment. SnapShot Master offers the best solution for managing snapshots, backups, and disaster recovery in your VMware environment. The tool offers a wide range of features to help you optimize your virtual environment, including efficient snapshot management, reliable backup and disaster recovery, storage optimization, performance optimization, and a user-friendly interface. If you’re looking for a solution to maximize your VMware environment with efficient snapshot management, look no further than SnapShot Master.
Download a fully functioning trial today and test it for yourself.

by Mark | Feb 8, 2023 | Azure, Azure Blobs, Azure FIles, Azure Tables, Blob Storage, Storage Accounts
Azure Storage Overview
Azure Storage is a cloud-based storage solution offered by Microsoft. It provides scalable and secure storage for unstructured and structured data, including blobs, files, queues, and tables. With Azure Storage, you can store and access your data from anywhere in the world. The service is flexible and customizable, making it ideal for businesses of all sizes and industries. But, with so many plans and options available, it can be difficult to determine the best plan for your business needs. To help reduce costs and optimize your storage usage, you can use Cloud Storage Manager to analyze your Azure Storage usage and suggest changes. In this article, we will compare the prices and plans of Azure Storage, so you can make an informed decision.
Understanding the Different Plans of Azure Storage
There are several plans available for Azure Storage, each with its own unique features and benefits. The four main plans are:
Blob Storage
Blob Storage is designed for unstructured data, such as images, videos, audio files, and backups. It offers low-cost and high-performance storage for large amounts of data.
File Storage
File Storage is designed for file-based storage and sharing, and it offers high-performance and scalable network storage. It is ideal for cloud-based file shares and applications.
Queue Storage
Queue Storage is designed for message-based communication between applications. It offers a reliable and scalable way to send and receive messages.
Table Storage
Table Storage is designed for structured data, such as tables and NoSQL databases. It offers low-cost and scalable storage for large amounts of data.
Factors That Influence the Cost of Azure Storage
The cost of Azure Storage is influenced by several factors, including:
- Storage capacity: The amount of data you need to store will directly impact the cost of storage.
- Data transfer: The cost of data transfer depends on the amount of data transferred and the location of the data.
- Access patterns: The cost of storage will also depend on how often you access your data and the type of access patterns you use.
How to Compare Prices of Azure Storage Plans
To compare the prices of Azure Storage plans, you need to consider the following factors:
- Storage capacity: Determine the amount of data you need to store and choose a plan that provides enough storage capacity.
- Data transfer: Consider the cost of data transfer and choose a plan that provides the right balance of cost and performance.
- Access patterns: Determine your access patterns and choose a plan that offers the right performance and scalability for your needs.
The Benefits of using Cloud Storage Manager
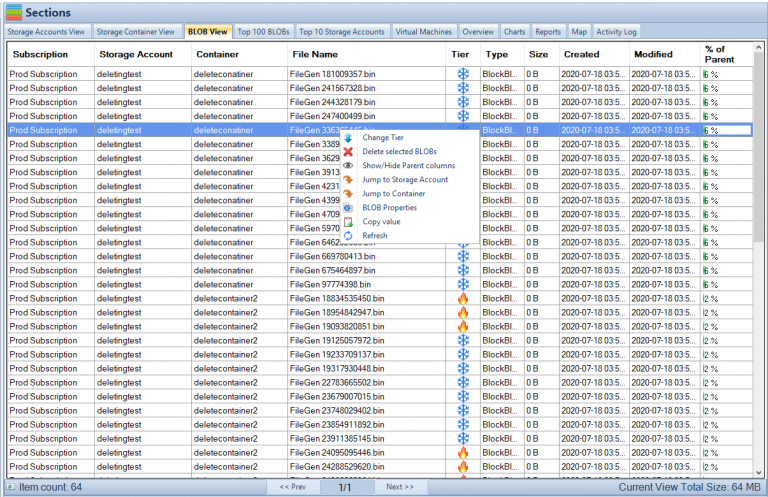
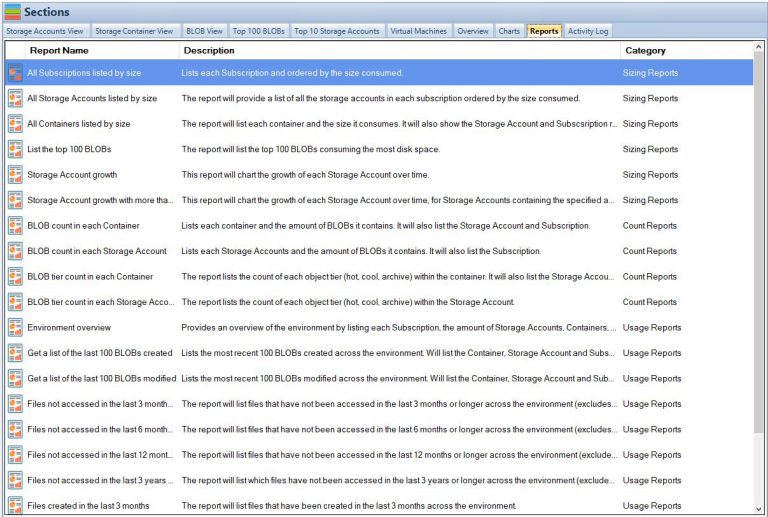
Cloud Storage Manager can provide you with an in-depth analysis of your Azure Storage usage and help you reduce costs. It can provide insights into your storage utilization, access patterns, and data transfer costs, and suggest changes that can help you optimize your storage usage. With Cloud Storage Manager, you can:
- Monitor your storage usage in real-time
- Analyze your access patterns and data transfer costs
- Identify areas where you can optimize your storage usage
- Implement changes that can help you reduce your storage costs
Azure Storage Frequently Asked Questions (FAQ)
- What is Azure Storage? Azure Storage is a cloud-based storage solution offered by Microsoft. It provides scalable and secure storage for unstructured and structured data, including blobs, files, queues, and tables.
- What are the different plans available for Azure Storage? The four main plans available for Azure Storage are Blob Storage, File Storage, Queue Storage, and Table Storage.
- What factors influence the cost of Azure Storage? The cost of Azure Storage is influenced by factors such as storage capacity, data transfer, and access patterns.
- How can I compare prices of Azure Storage plans? To compare prices of Azure Storage plans, consider factors such as storage capacity, data transfer, and access patterns. Determine the amount of data you need to store, the cost of data transfer, and your access patterns to find the best plan for your needs.
- How can a Cloud Storage Manager help me reduce my costs for Azure Storage? A Cloud Storage Manager can provide an analysis of your Azure Storage usage and suggest changes to help you optimize your storage usage and reduce costs. It can provide insights into storage utilization, access patterns, and data transfer costs, and help you identify areas where you can make changes to reduce your storage costs.
Final Thoughts
Azure Storage is a powerful and flexible cloud-based storage solution that offers scalable and secure storage for unstructured and structured data. By comparing prices and plans, you can find the best plan for your business needs. Cloud Storage Manager can provide you with an analysis of your Azure Storage usage and help you reduce costs by optimizing your storage usage. Whether you need to store large amounts of data, share files, communicate between applications, or store structured data, Azure Storage has a plan that is right for you. So, compare prices and plans of Azure Storage today and find the right solution for your business needs.

by Mark | Feb 7, 2023 | Azure, Azure Blobs, Azure FIles, Blob Storage, Security, Storage Accounts
Learn how to keep your data secure with Azure Storage security
In today’s digital world, data security is a top priority for businesses and individuals alike. With the increasing popularity of cloud computing, many organizations are relying on cloud storage services to store their sensitive information. Microsoft Azure Storage is one of the most popular cloud storage services, offering a range of storage solutions to meet the needs of different users. However, with the growing number of cyber threats, it’s essential to ensure that your data is secure in the cloud. In this article, we’ll explore Azure Storage security and the best practices you can follow to keep your data safe.
What is Azure Storage Security?
Azure Storage security is a set of features and tools provided by Microsoft Azure to ensure the security of your data stored in the cloud. Azure Storage security helps you protect your data from unauthorized access, theft, and other security threats. The security features provided by Azure Storage include encryption, access controls, monitoring, and more.
Best Practices for Azure Storage Security
To ensure the security of your data stored in Azure Storage, it’s essential to follow best practices. Here are some of the most important ones:
- Encryption: Azure Storage supports encryption at rest, which means your data is encrypted when it is stored on disk. This helps to prevent unauthorized access to your data even if someone gains access to your storage account.
- Access controls: You can use Azure Active Directory (AD) or Shared Access Signatures (SAS) to control access to your storage accounts. Azure AD allows you to manage access to your storage accounts through role-based access controls, while SAS allows you to grant limited access to specific resources in your storage accounts.
- Monitoring: Azure Storage provides a range of monitoring tools that you can use to monitor your storage accounts. You can use Azure Monitor to monitor the performance of your storage accounts, and Azure Activity Logs to track events and changes in your storage accounts.
- Backups: It’s essential to regularly back up your data stored in Azure Storage to ensure that you can recover your data in the event of a disaster. Azure Backup provides a range of backup solutions that you can use to back up your data stored in Azure Storage.
Encryption in Azure Storage
Encryption is an essential aspect of Azure Storage security. Azure Storage supports encryption at rest, which means that your data is encrypted when it is stored on disk. You can use Azure Storage Service Encryption (SSE) to encrypt your data automatically, or you can use Azure Disk Encryption to encrypt your virtual machines’ disks.
Access Controls in Azure Storage
Access controls are an important part of Azure Storage security. Azure Storage provides two main access control mechanisms: Azure Active Directory and Shared Access Signatures.
Azure Active Directory allows you to manage access to your storage accounts through role-based access controls. This means that you can assign different roles to different users, such as Read-Only, Contributor, and Owner. Click here to see how to setup Azure AD and Storage Accounts.
Shared Access Signatures allow you to grant limited access to specific resources in your storage accounts. You can use SAS to grant access to your storage accounts to specific users, applications, or services for a specified period of time.
Monitoring in Azure Storage
Monitoring is an important aspect of Azure Storage security. Azure Storage provides a range of monitoring tools that you can use to monitor your storage accounts. You can use Azure Monitor to monitor the performance of your storage accounts, including metrics such as storage usage, request rates, and response times. Additionally, you can use Azure Activity Logs to track events and changes in your storage accounts, such as changes to access control policies, data deletion, and more. By monitoring your storage accounts, you can detect and respond to security threats in real-time.
You should also monitor the growth of your storage accounts, by using a tool like Cloud Storage Manager, to provide you with analytics on your Azure Storage.
Backups in Azure Storage
Regular backups are critical to ensure that you can recover your data in the event of a disaster. Azure Backup provides a range of backup solutions that you can use to back up your data stored in Azure Storage. Whether you need to back up your data stored in Blob storage, File storage, or Queue storage, Azure Backup has a solution that meets your needs. Additionally, Azure Backup integrates seamlessly with other Azure services, such as Azure Site Recovery, to provide a comprehensive disaster recovery solution.
Risks not securing your Azure Storage
There are several potential risks and consequences of not securing data stored in Azure Storage. Some of the most significant ones are:
- Data Breaches: Unsecured data stored in Azure Storage is vulnerable to unauthorized access, theft, and other security threats. This can result in sensitive information being exposed, causing damage to a business’s reputation and potentially leading to legal consequences.
- Compliance Violations: Depending on the type of data being stored, businesses may be required to comply with various regulations such as HIPAA, PCI DSS, or GDPR. Failing to secure data stored in Azure Storage can result in non-compliance and penalties.
- Financial Losses: Data breaches can result in financial losses due to the cost of responding to the breach, restoring the data, and repairing damage to the business’s reputation.
- Loss of Confidence: Data breaches can erode trust in a business and result in a loss of confidence among customers, partners, and stakeholders.
- Competitive Disadvantage: Unsecured data stored in Azure Storage can provide a competitive advantage to other businesses who are able to access and use the data for their own gain.
- Intellectual Property Loss: Unsecured data stored in Azure Storage can result in the loss of intellectual property, such as trade secrets and confidential information, to unauthorized third parties.
Therefore, it is essential to secure data stored in Azure Storage by following best practices, such as encryption, access controls, monitoring, and regular backups.
Frequently Asked Questions about Azure Storage Security
- How does Azure Storage protect my data from unauthorized access?
Azure Storage protects your data from unauthorized access through a combination of network security, access control policies, and encryption. Network security measures such as virtual networks and firewalls help prevent unauthorized access to your data over the network. Access control policies, such as shared access signatures, allow you to control who has access to your data, and when. Encryption of both data at rest and data in transit helps ensure that even if your data is accessed by unauthorized parties, it cannot be read or used.
- Is Azure Storage secure for storing sensitive data?
Yes, Azure Storage can be used to store sensitive data, and Microsoft provides a range of security features and certifications to help ensure the security of your data. Azure Storage supports encryption of data at rest and in transit, as well as access control policies, network security, and audits. Additionally, Azure Storage is certified under a number of security and privacy standards, including ISO 27001, SOC 1 and SOC 2, and more.
- How can I be sure that my data is not accidentally deleted or modified in Azure Storage?
Azure Storage provides several features to help prevent accidental deletion or modification of your data, such as soft delete and versioning. Soft delete allows you to recover data that has been deleted for a specified period of time, while versioning helps you maintain a history of changes to your data and recover from unintended modifications. Additionally, Azure Backup provides a range of backup solutions that you can use to back up your data stored in Azure Storage.
- What is Azure Storage and why is it important to secure it?
Azure Storage is a cloud storage service provided by Microsoft Azure. It offers various storage options such as Blob storage, Queue storage, Table storage, and File storage. Azure Storage is important because it is used to store and manage large amounts of data in the cloud. The data stored in Azure Storage can be sensitive, such as financial information, personal information, and confidential business information. Therefore, securing this data is crucial to prevent unauthorized access, data theft, and data breaches.
- What are some common security threats to Azure Storage?
Unauthorized access: Azure Storage data can be accessed by unauthorized individuals if the storage account is not properly secured. This can result in sensitive information being stolen or altered.
Data breaches: A data breach can occur if an attacker gains access to the Azure Storage account. The attacker can steal, alter, or delete the data stored in the account.
Man-in-the-middle attacks: An attacker can intercept data transmitted between the Azure Storage account and the user. The attacker can then steal or alter the data.
Malware attacks: Malware can infect the Azure Storage account and steal or alter the data stored in it.
- How can Azure Storage be secured?
Azure Storage account encryption: Data stored in Azure Storage can be encrypted to prevent unauthorized access. Azure offers several encryption options, including Azure Storage Service Encryption and Azure Disk Encryption.
Access control: Access to the Azure Storage account can be controlled using Azure Active Directory (AD) authentication and authorization. Azure AD can be used to manage who can access the data stored in the Azure Storage account.
Network security: Azure Storage can be secured by restricting access to the storage account through a virtual network. This can be achieved using Azure Virtual Network service endpoints.
Monitoring and auditing: Regular monitoring and auditing of the Azure Storage account can help detect security incidents and respond to them promptly. Azure provides various tools for monitoring and auditing, including Azure Log Analytics and Azure Activity Logs.
- What are the consequences of not securing Azure Storage?
Loss of sensitive information: Unsecured Azure Storage accounts can result in sensitive information being stolen or altered, leading to a loss of trust and reputation.
Financial loss: Data breaches can result in financial losses, such as the cost of investigations, lawsuits, and compensation to affected individuals.
Compliance violations: If sensitive data is not properly secured, organizations may be in violation of various regulations, such as the General Data Protection Regulation GDPR) and the Payment Card Industry Data Security Standard (PCI DSS).
Business interruption: A security incident in the Azure Storage account can result in downtime, which can impact business operations and lead to loss of revenue.
Final thoughts about Azure Storage Security
Azure Storage is a highly secure and reliable cloud storage solution that provides a range of security features to help protect your data from unauthorized access, accidental deletion or modification, and more. Whether you are storing sensitive data or simply need a secure and reliable storage solution for your data, Azure Storage is a great choice. With regular backups, network security measures, encryption, and access control policies, you can be sure that your data is safe and secure in Azure Storage.

by Mark | Feb 6, 2023 | Azure, Azure FIles
Azure File Shares: A Beginner’s Guide
Azure File Shares is a cloud-based file sharing service that provides a secure, scalable, and highly available solution for storing and sharing files in the cloud. With Azure File Shares, you can store, share, and access files from anywhere, at any time, and from any device. Whether you’re a small business owner, a freelancer, or an enterprise-level organization, Azure File Shares can help you meet your file storage and sharing needs.
What are Azure File Shares?
Azure File Shares is a part of the Microsoft Azure platform and is designed to provide a scalable and highly available file storage solution in the cloud. With Azure File Shares, you can store files of any size and type, including documents, images, videos, and audio files. You can also share files with others, either by granting them access to your file share or by sending them a link to the file.
One of the key benefits of Azure File Shares is that it provides a high degree of security. All files stored in Azure File Shares are encrypted at rest, and you can control access to your files by setting permissions. You can also monitor access to your files and audit usage with Azure Activity Logs.
How Does Azure File Shares Work?
Azure File Shares uses the Server Message Block (SMB) protocol to allow users to access files in the cloud. SMB is a standard protocol used for sharing files and printers on a local network. When a user accesses a file share, Azure File Shares uses SMB to connect the user to the file share and allow them to access the files.
Benefits of Azure File Shares
There are many benefits to using Azure File Shares, including:
- Scalability: Azure File Shares can scale to meet the needs of any organization, whether it’s a small business or a large enterprise.
- Accessibility: Azure File Shares allows users to access files from anywhere, at any time, as long as they have an internet connection.
- Collaboration: Azure File Shares makes it easy for multiple users to share files and collaborate on projects.
- Security: Azure File Shares uses industry-standard security measures to protect files and keep them safe from unauthorized access.
Getting Started with Azure File Shares
To get started with Azure File Shares, you’ll need to create an Azure account and sign in to the Azure portal. Once you’re signed in, you can create a new file share by following these steps:
- Click on the “Create a resource” button in the Azure portal.
- Select “Storage” from the list of available resources.
- Choose “Storage account” as the type of storage account you want to create.
- Fill in the required information, such as the name of your storage account, the subscription you want to use, and the resource group you want to use.
- Click the “Create” button to create your storage account.
Once your storage account is created, you can create a new file share by following these steps:
- Navigate to your storage account in the Azure portal.
- Click on the “File shares” option in the left-side menu.
- Click the “Add” button to create a new file share.
- Fill in the required information, such as the name of your file share and the quota for the file share.
- Click the “Create” button to create your file share.
Storing and Sharing Files in Azure File Shares
With Azure File Shares, you can store and share files in a number of different ways. Here are a few of the most common ways to store and share files in Azure File Shares:
Storing Files
To store files in Azure File Shares, you can simply drag and drop files into your file share in the Azure portal, or you can use the Azure File Share REST API to programmatically upload files. You can also use the Azure File Sync service to synchronize your on-premises file servers with your Azure File Shares, allowing you to store and access your files from anywhere.
Alternatively, you can map a drive from your server or workstation so you can access all the file directly.
Analyzing Azure File Shares
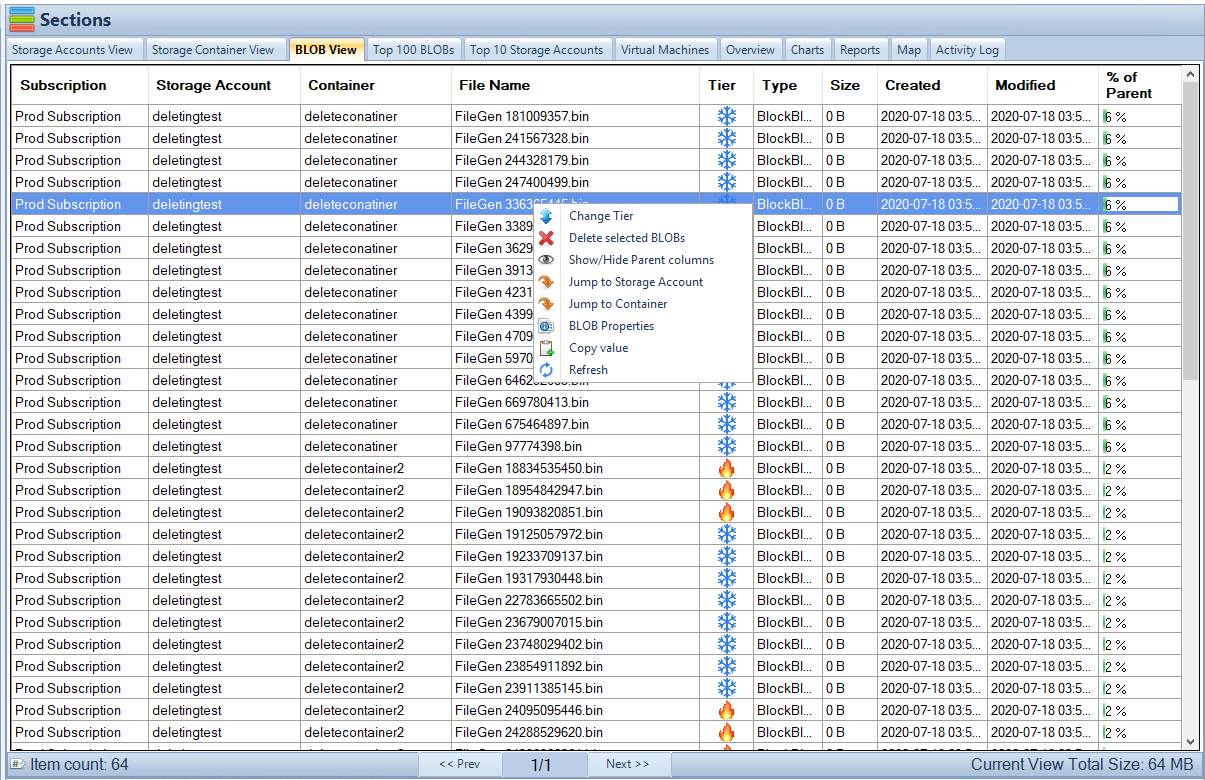
To really optimize the cost of your cloud storage and make sure you’re not wasting money on unnecessary files, you need to have a good understanding of what files or blobs have or have not been used.
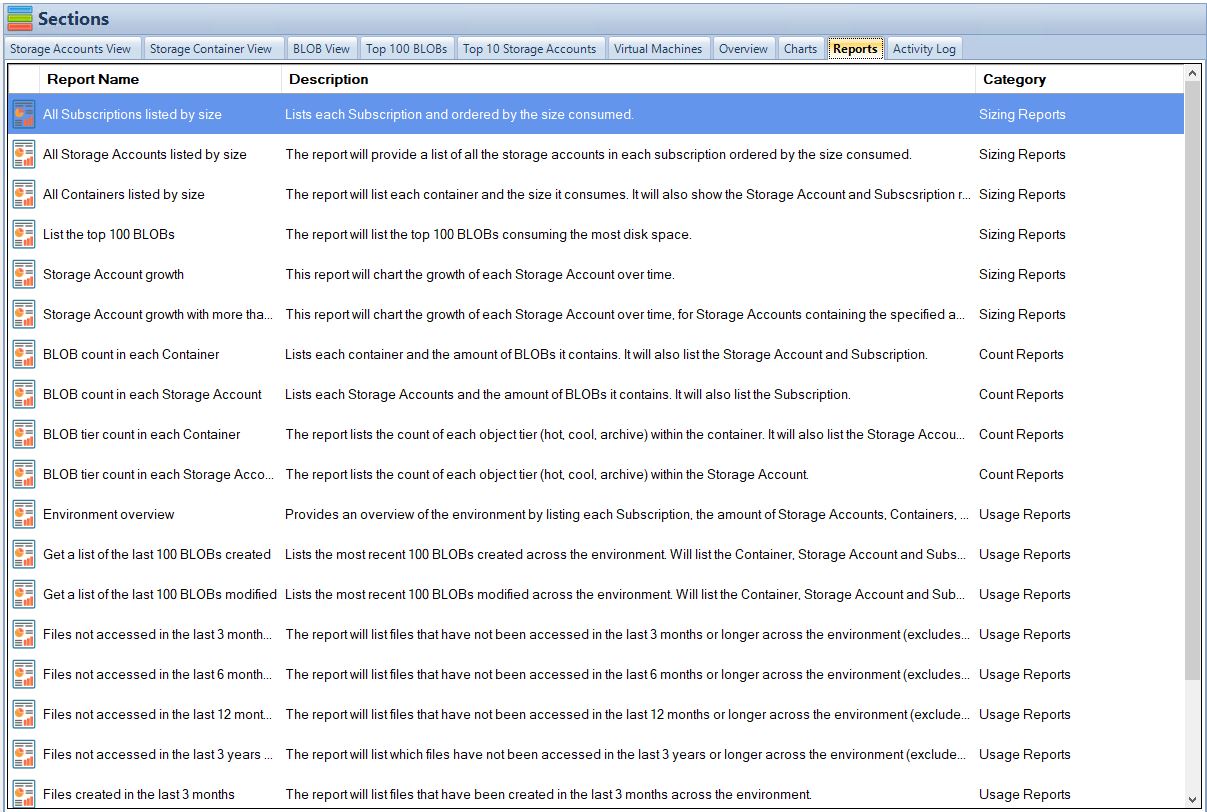
This is where Cloud Storage Manager comes in. Cloud Storage Manager is a software that provides analytics of both Azure Blob and File storage, allowing the user to see which files or blobs have or have not been used, so that they can reduce the cost of their cloud storage. With this software, you can easily identify and delete unnecessary files to save on storage costs.
To learn more about Cloud Storage Manager and start optimizing your Azure File Shares, visit https://www.smikar.com/cloud-storage-manager/
What are the limitations of Azure File Shares?
- Maximum file size: The maximum size for a single file in an Azure File Share is 1 TB.
- Maximum file share size: The maximum size for an Azure File Share is 5 TiB (5,120 GB).
- Maximum IOPS per share: A single Azure File Share can support up to 1000 IOPS (input/output operations per second).
- Maximum throughput per share: A single Azure File Share can support up to 60 MB/s (megabytes per second) of throughput.
- Maximum number of files: The maximum number of files that can be stored in an Azure File Share is not limited by Azure. However, the performance of the file share may be impacted by a large number of small files.
- Limitations on filenames and path length: Azure File Shares have restrictions on the length of filenames and paths. Filenames must be between 1 and 255 characters in length, and the total length of the path to the file (including the share name, directories, and filename) must be less than 4096 characters.
- Limitations on naming conventions: Azure File Shares have restrictions on naming conventions for files and directories. Names cannot contain certain special characters and names must be unique within a directory.
Conclusion
In conclusion, Azure File Shares is a highly beneficial and cost-effective solution for businesses and individuals who require cloud storage. With its scalability, reliability, and security features, it offers a comprehensive solution for storing, accessing and sharing files. Whether you’re a small business, a large corporation, or an individual, Azure File Shares can help you store and manage your data in the cloud.
Read our further blog posts on Azure Files, from saving money, or what are Azure files.
If you’re looking to optimize your Azure storage costs, it’s essential to have a tool that can help you monitor your usage and identify unused files or blobs. This is where Cloud Storage Manager comes in, providing analytics of both Azure Blob and File storage, allowing you to see what files or blobs have or have not been used, to reduce the cost of your cloud storage.
So, if you’re looking for an easy-to-use and cost-effective solution for storing and managing your data in the cloud, Azure File Shares is the perfect choice. And if you want to take it a step further and optimize your Azure storage costs, be sure to check out Cloud Storage Manager at https://www.smikar.com/cloud-storage-manager/.
