
Virtual machines have become an essential part of modern IT infrastructure, as they allow administrators to create and manage multiple computing environments on a single physical machine. This can be incredibly useful for tasks such as testing, development, and training. When deploying a virtual machine, it is often necessary to perform customizations, such as joining the machine to a domain, setting network configurations, and specifying local administrator password, among others. This article provides a step-by-step guide to deploying a virtual machine and joining it to a domain automatically using VMWare Customization script. The article covers each step of the customisation process, including how to specify domain information, set the computer name, configure the Windows license, set the time zone, and much more. This guide is intended for administrators who want to automate the process of deploying virtual machines and joining them to a domain, and it provides detailed, actionable instructions for achieving this goal.
How to Deploy a VM and join a Domain Automatically
If you ever have the need to deploy a Virtual Machine and have some customisations for deployment (i.e. Network Settings or have the automatically join a domain), this post will show you how to.
The VMWare Customistation script will allow you to specify;
- Domain to join automatically
- Network settings
- Registration Settings
- Computer Name
- Windows License
- Time Zone
- Local Administrator Password
- Operating System Settings.
Assuming here (I know, never assume anything) that you have already created a VM template to deploy (If you havent already created one, click the link to see a blog post on How to Create a VMWare Template) follow these steps to create your very own VMWare Customisation Script.
VMWare vCentre Console
1. Log in to your Vmware vCentre Console. Choose Home, then Inventory, Management and finally Customistation Specifications Manager.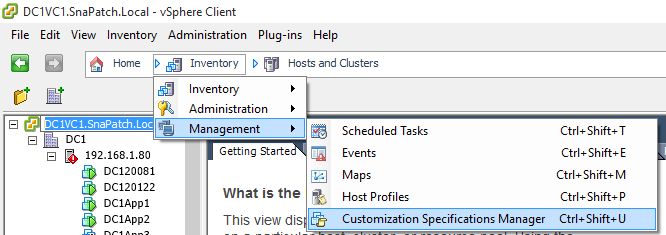
VM Properties Tab
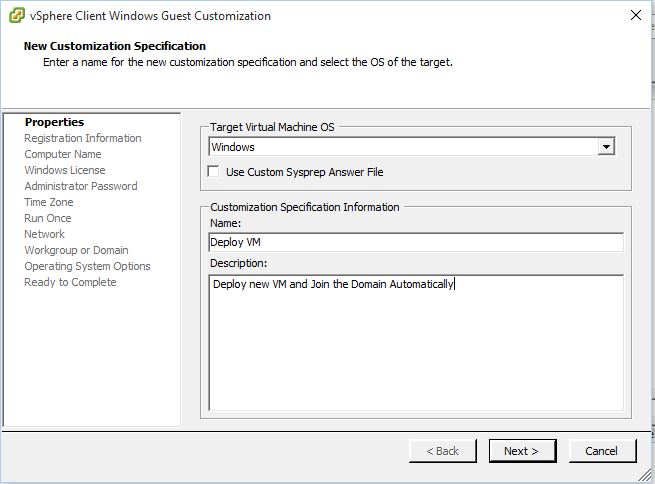
2. The VMware Customisation Wizard starts. Choose the Operating System and provide a Name and Description then click Next.
Registration Information Tab
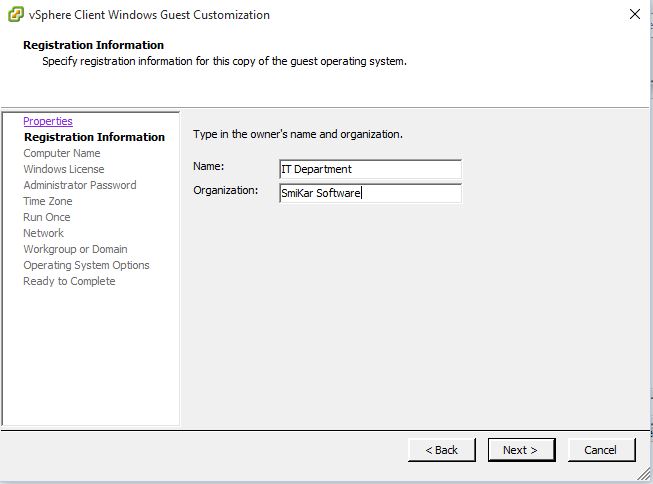
3. Provide the Name and Organisation that the server will belong to then click Next.
Virtual Machine Computer Name Tab
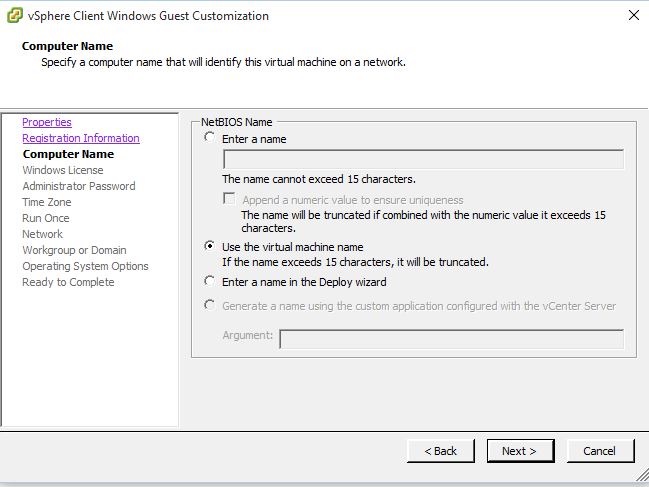
4. Next we need to configure the name of the VM. In this example, I am choosing to use the Virtual Machine name as this will match against Vmware and Active Directory making it easier to identify. Click Next when ready to proceed.
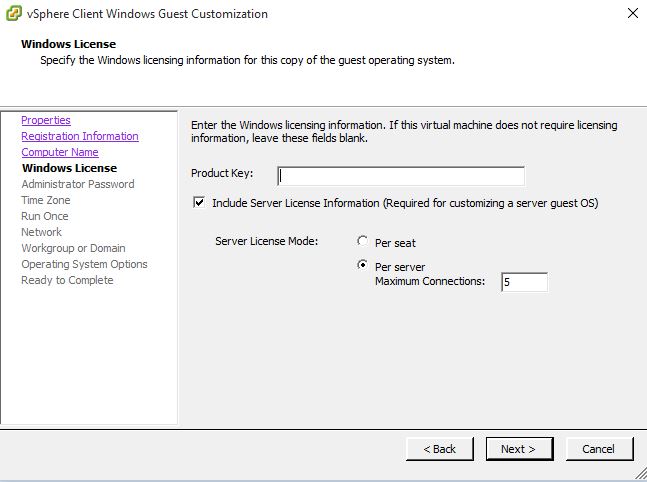
Windows License Tab
5. If you have a product key you can enter it here. As I am using KMS in my domain for Windows Licensing, I chose to leave this blank. Again, click Next when ready.
Administrator Password Tab
6. Add the Administrator password and how many times you wish for the Administrator account to login. This is used for the Local Administrator account not a Domain Administrator. Click Next.

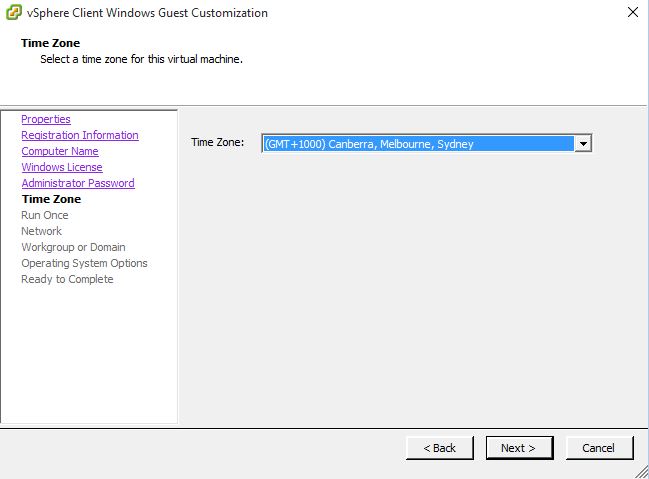
Time Zone Tab
7. Choose the Time Zone relevant to your environment then click Next.
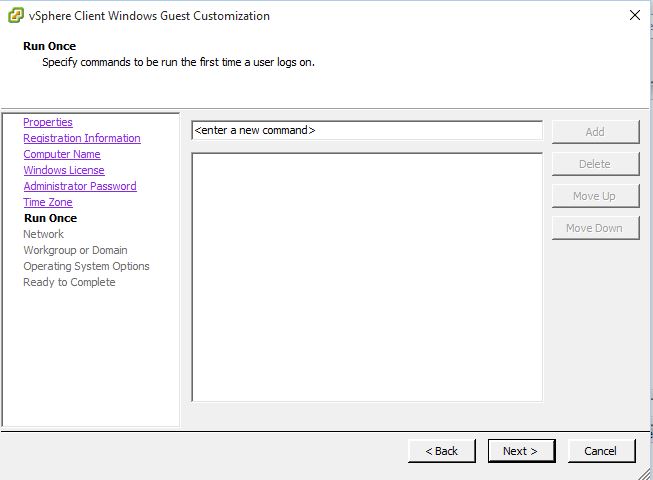
Run Once Tab
8. If you wish for any commands to run (ie scripts to customise your server further) you can enter them here. I havent any for this Customisation so have left this as black. Click Next.
Network Tab
9. For the Network portion of the wizard, you can choose custom settings if required (i.e DNS server and IP address settings). Im using the typical settings (i.e. DHCP). Click Next when you have chosen the settings you require.

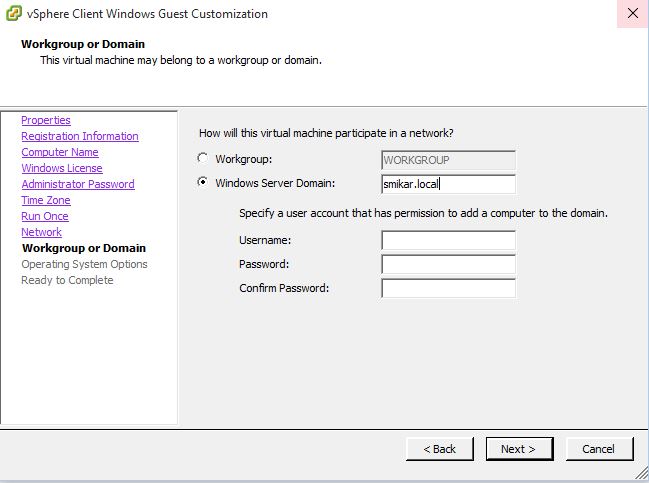
Workgroup or Domain Options Tab
10. Now the important part. If you want the VM to deploy and then to automatically join your Windows domain you will need to add the Domain Name, Administrator Account and Password. Click Next when ready.
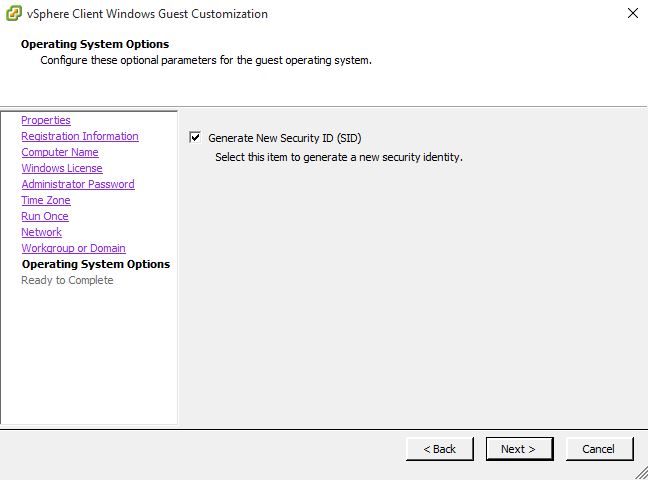
Operating System Options Tab
11. Allow the VMWare customisation script to Generate New Security ID (SID) then click Next.
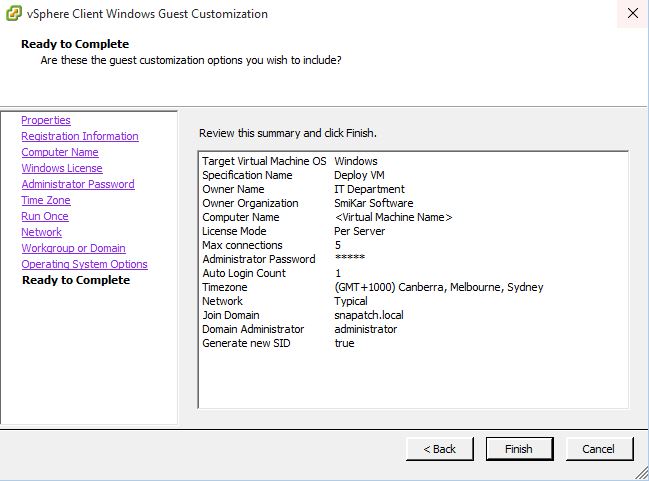
Ready to Complete Tab
12. Finally, check the settings are correct then click Finish to proceed.
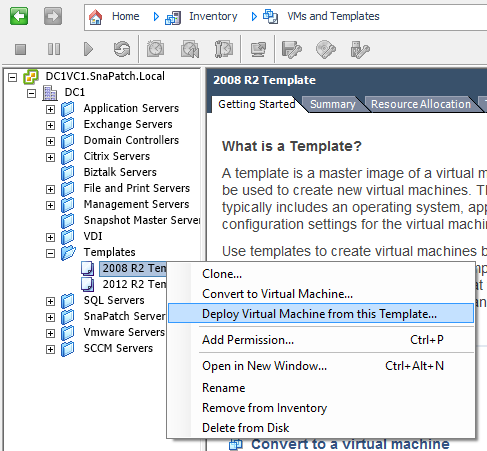
Deploy Virtual Machine from this Template.
13. Now hopefully everything went well and you are ready to start using the VMWare Customisation Script you created and deploy your first VM with these settings. Choose the template you wish to apply this customisation to, Right Click and choose Deploy Virtual Machine from this Template.
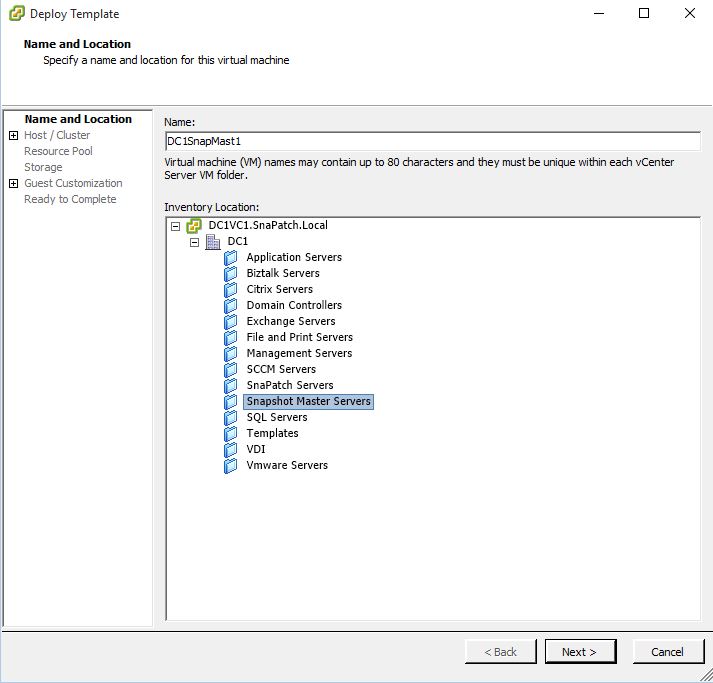
Name and Location Tab
14.Give the VM a name and then the Inventory Location the machine will reside in and then click Next.
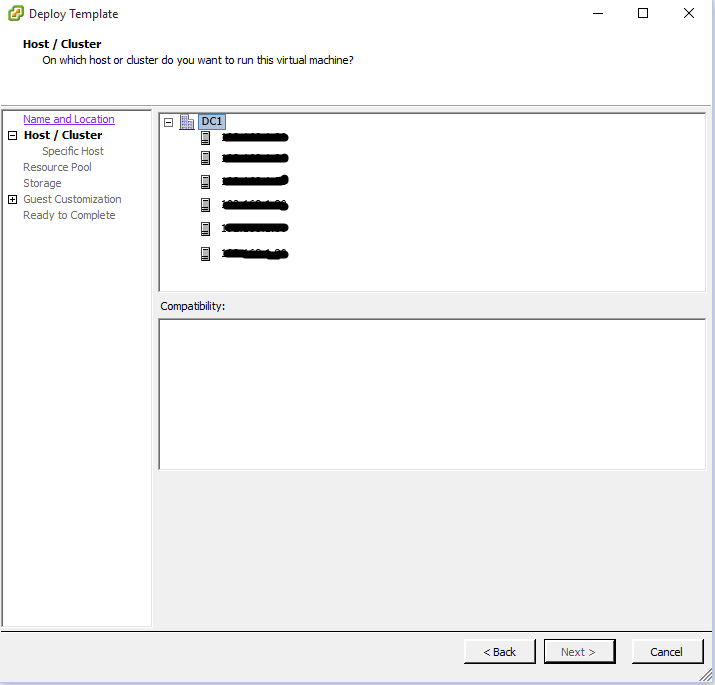
Host and Cluster Tab
15. Choose a Host or Cluster for the VM to run on then click Next.
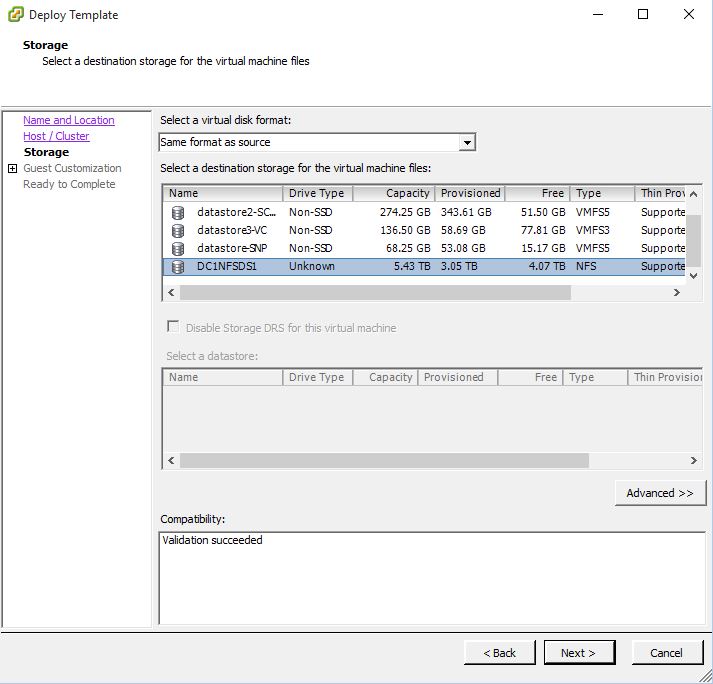
Storage Tab
16. Next you choose the storage location that the VM will use to store its files (VMDK). Select the storage destination then click Next.
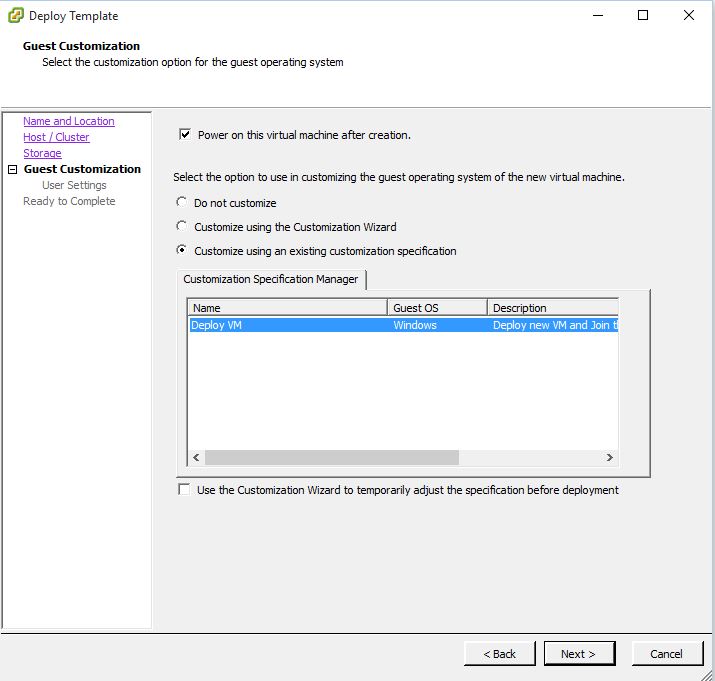
Guest Customisation Tab
17. This is another important part of the VM deployment process. You can choose not to customise but since this blog post is about using the customisation we created earlier, choose Customise using an existing customisation specification. Select the VMWare customisation you created then click Next.
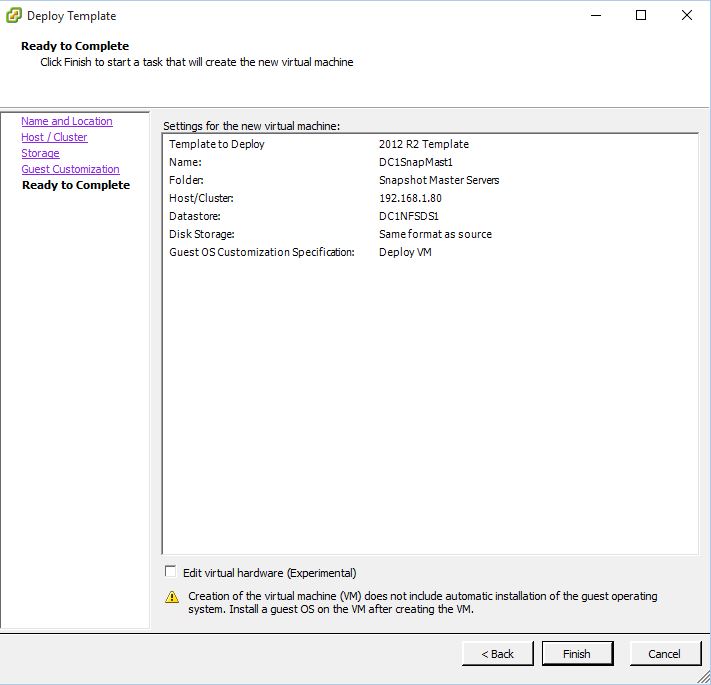
Ready to Complete Tab
18. Check the settings that are specified in this screen are what you have selected and when confirmed click Next. You can also edit the Virtual Machines hardware if you wish to do so (i.e. set CPU, Ram, Disk Space etc)
Finished 🙂
19. You should now be able to see that your new Virtual Machine is deploying using the VMWare Customisation Script you created. It will now automatically join the Windows Domain and be ready to use once the installation has completed.
![]()